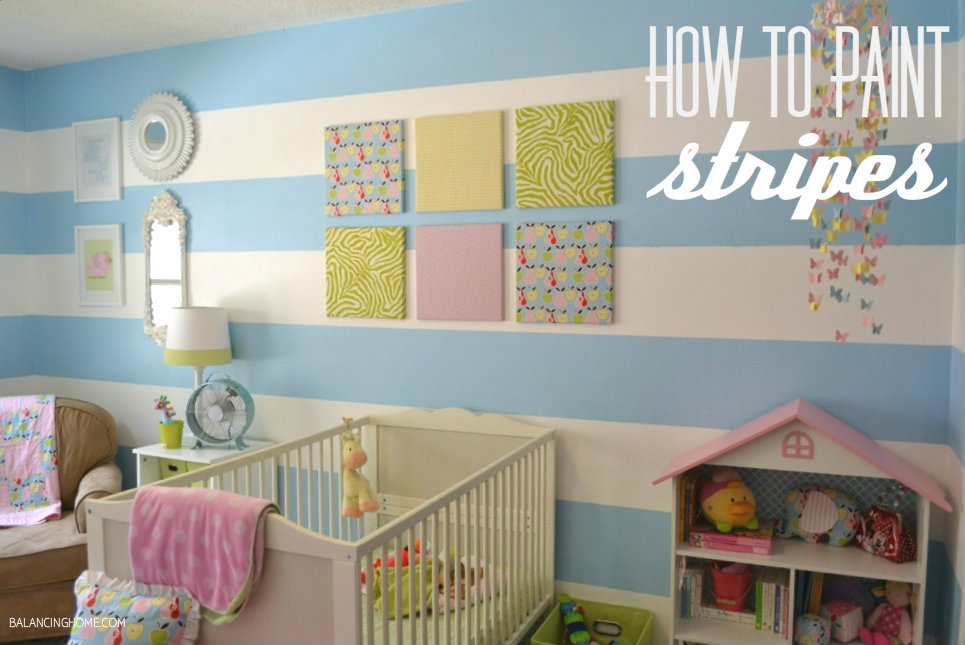
How to Paint Stripes
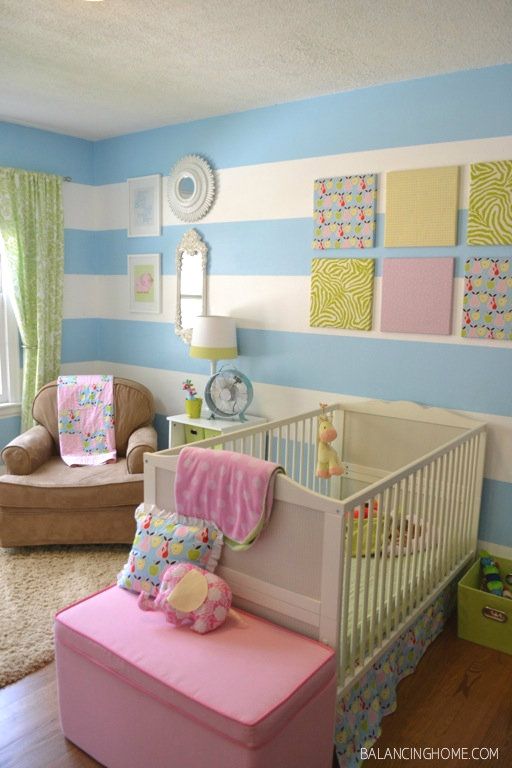
I am Megan from Balancing Home and I am so happy to be contributing here at Honeybear Lane. I recently redid my daughters room and one of the questions that keeps coming up is, “How did you paint those stripes?”. Today I am here to show you how we rocked these stripes out. They are big impact for a small price and just a tiny bit of elbow grease.
Once you get rocking, this goes pretty fast. It seems daunting at first, but I promise you will be able to do it. So lets learn how to paint some stripes.
Supplies:
- 2 different paint colors (Duh! We are painting stripes)
- a roller
- a brush for cutting in
- painters tape (We used Scotch Blue tape)
- a ruler
- a pencil
- a chalk line
- a partner in crime
How To:
- Start with your base coat. This should be the lighter of the two colors. In our case that meant painting all of the walls white.
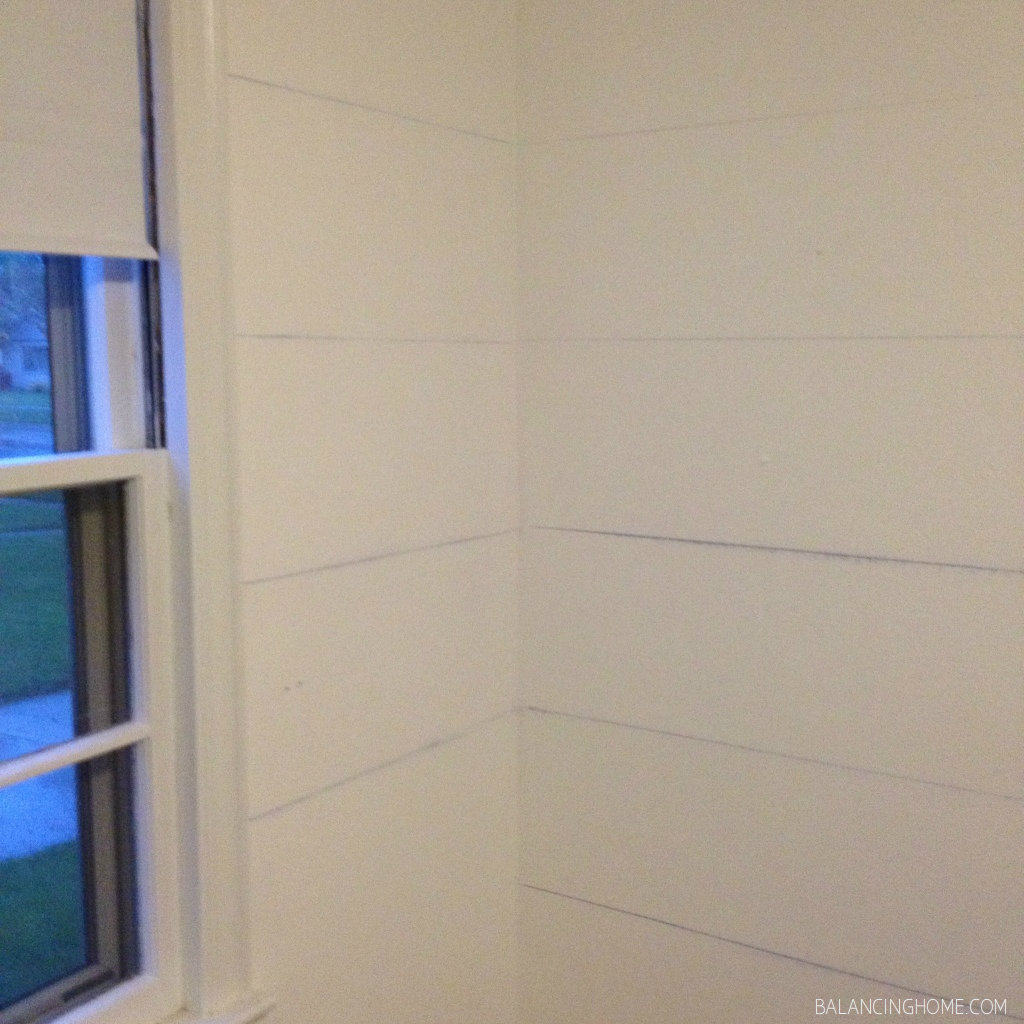
- Decide the width of your stripes. Our stripes are all 12 inches.
- Measure your stripes. You need two points to make a straight line. We just took a ruler and measured 12 inches down and made a tick mark with the pencil.
- You take one side of the chalk line and your partner takes the other side. You put your line on your tick marks, pull it nice and tight and snap it.
- Repeat the measure, mark, and chalk line step until all of your lines are made.
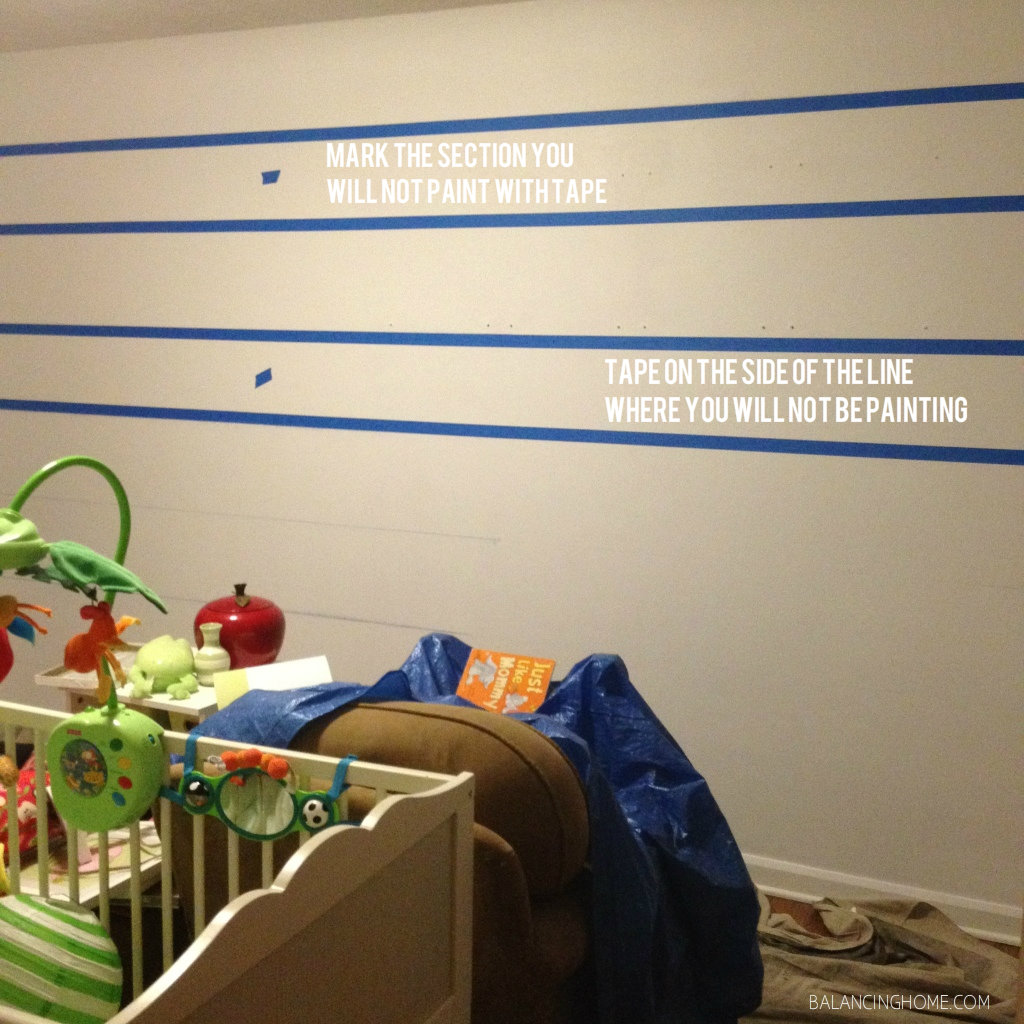
- Mark the places you do not want to paint with a piece of tape.
- Tape your lines off. Be sure to tape on the side of the line where you will not be painting.
- Smooth over the tape with a credit card. Make sure it is on there tight!
- Paint away.
- Peel off the tape while it is somewhat wet. If you let it dry fully, you might pull off some of the painted part too.
- If you get some bleeding you can always go back in with an artist brush and your base color and touch it up.
- Voila! Walls with personality.
If you want to see more of my daughters room makeover be sure to stop by the blog and check it out.
Looks great! I love the colors you chose, and the chalk line is a great idea.
Beautiful!
One caution: I did something like this in my bedroom as a teenager. Make sure you wait until the paint is completely dry before you put the tape on it. We only waited a day or two and the glue on the tape kinda melted into our first layer of paint. We had to repaint the whole accent wall and start over.
We have a good friend who is a painter who recommended that you wait a few weeks – apparently the paint isn’t actually dry dry when if feels dry! Imagine that!
Anyways – try it – its beautiful and easy!
SUuuuuper cute room!