Ruffled Halloween Table Runner
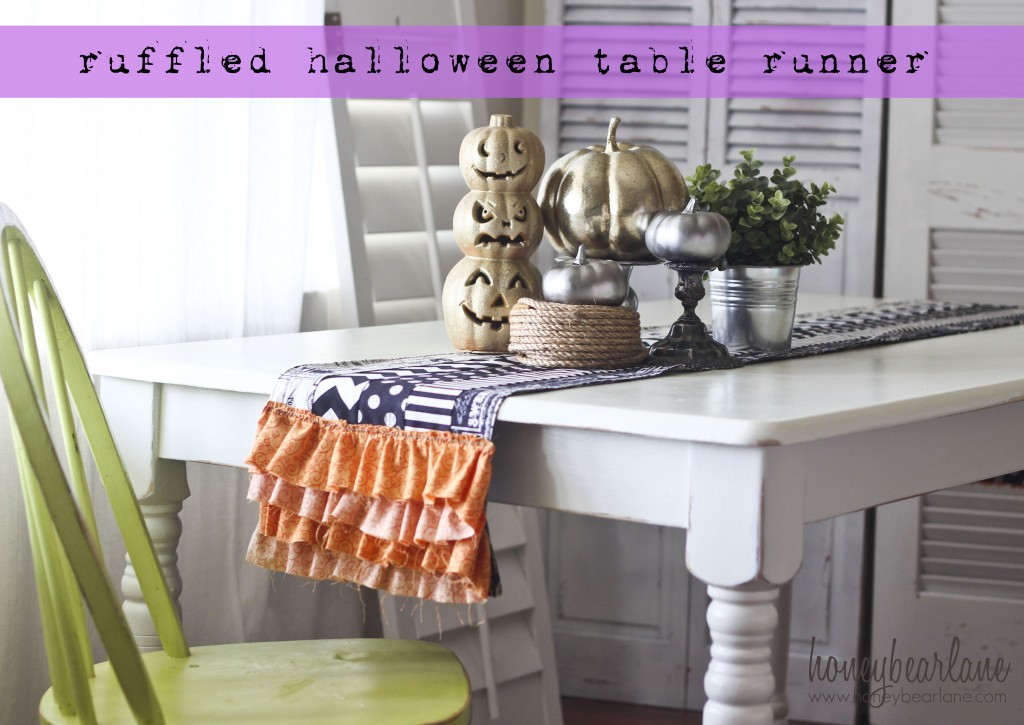
It’s getting close to Halloween, so I decided to whip up this cute little Halloween table runner!
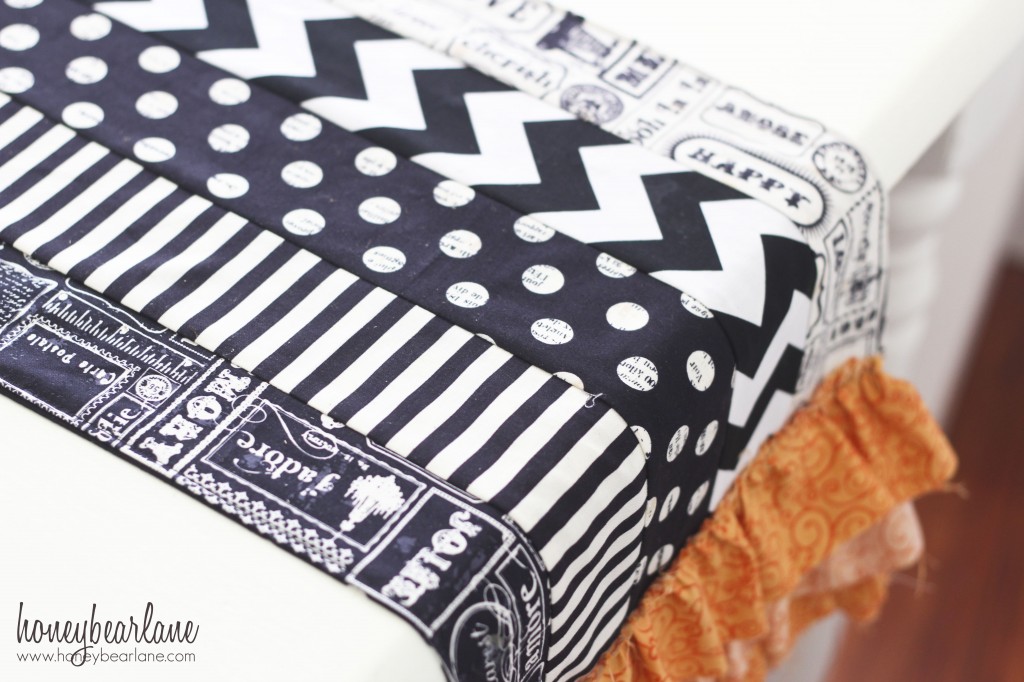
So last summer I got some super cute black and white fabric from Cindy at Riley Blake. I was gonna make a quilt out of it but when it came down to it, it just didn’t seem right. But when I wanted to make a table runner for Halloween, this was PERFECT!
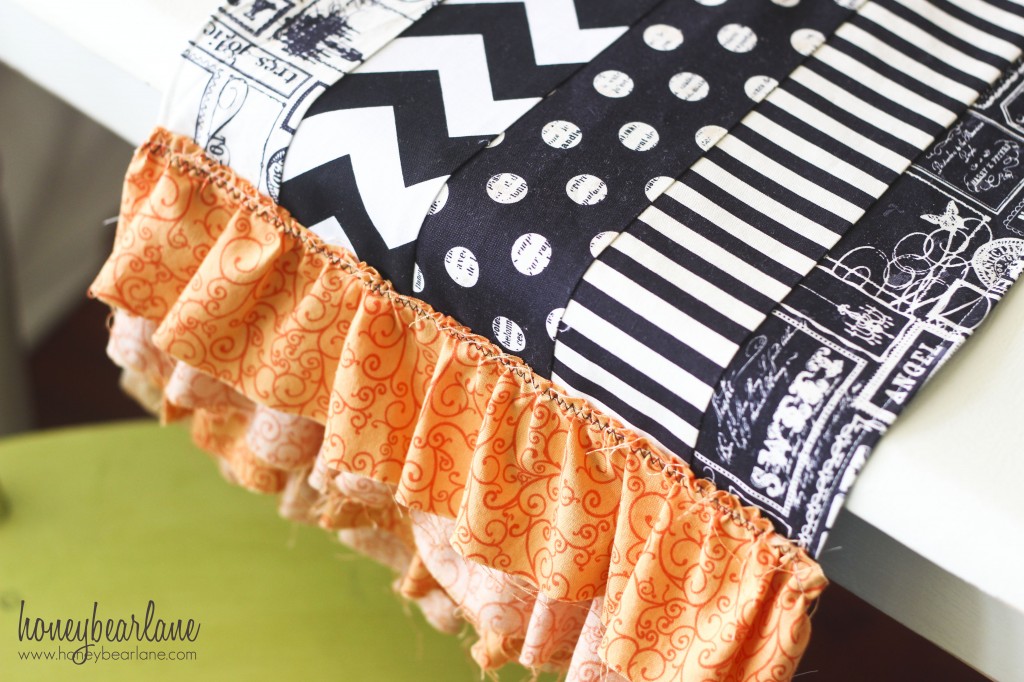
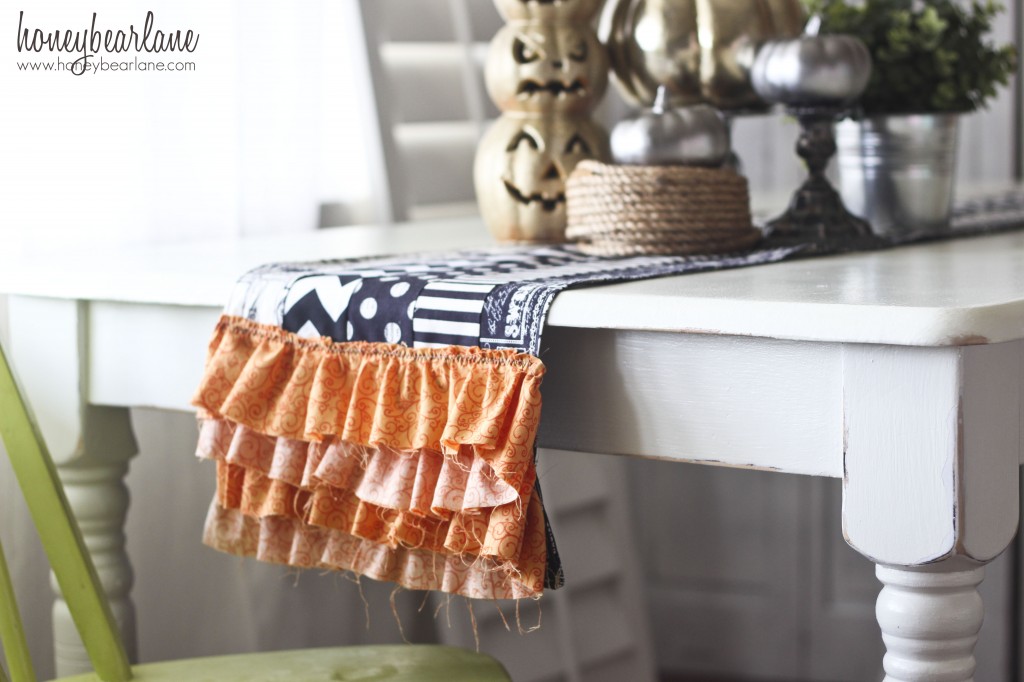
I was tempted to leave it in black and white but I decided to add a little orange ruffle on the end. I left it raw on the edge for a bit of shabbiness which adds to the Halloween-ey feel. And I threw in a strip of Riley Blake’s black and white chevron. It’s funny because I am sick of chevron but yet not…I have to admit, I still love it.
Do you wanna make your own Halloween table runner? It’s really easy and only takes about an hour.
Supplies:
- 2 strips each of 5 different fabrics, 3-4 inches wide (do wider if you have a wider table.) Cut them the width of the fabric.
- 2 pieces of 1 fabric about 15 inches wide for the backing (cut WOF)
- Ruffle: 4 pieces of contrasting fabric, 3″ wide, cut WOF
First you need five strips of fabric 3-4 inches wide, depending on how wide your table is. This tutorial is pretty easily adjustable for the size of your table. For the length, cut the strips the width of the fabric. I cut another five the width of the fabric and sewed them together at the end. But depending on how long you want your runner to be you’ll want to cut the next five fabric strips shorter. You want the final length to be the length of the table plus about 6 inches on each side for the overhang.
Decide which order you want them to be in. Then put two strips, right sides together and sew down the edge, 1/4″ seam allowance. Do the same thing with the rest of the strips. Iron the seams all down to one side.
For the backing, cut two strips of fabric the width of your sewn runner top and the length of the width of the fabric. Sew them together at the ends. Then put the right sides of your top and bottom together and sew all around the perimeter except for one of the ends, where you turn it right side out. Iron it flat. Turn the open side edge under about a 1/2″ and sew shut. Then top stitch around the entire edge, about 1/2″ seam allowance.
For the ruffle, cut 4 strips 3″ wide by the width of fabric in a contrasting color. Sew two end to end so you have two long strips of fabric. Then ruffle it by increasing your tension all the way up and lengthening the stitch as far as it can go.
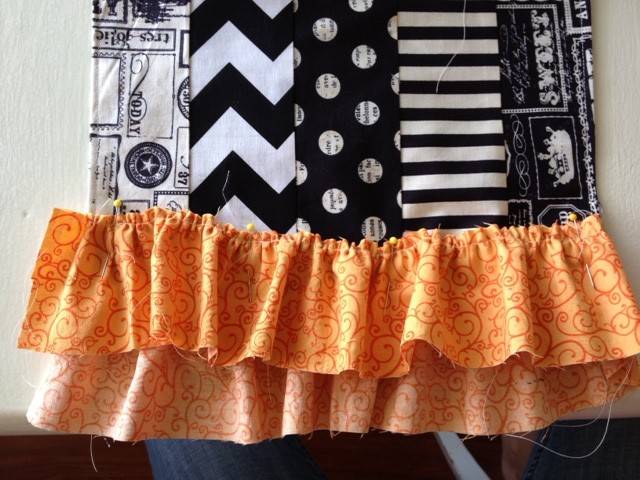
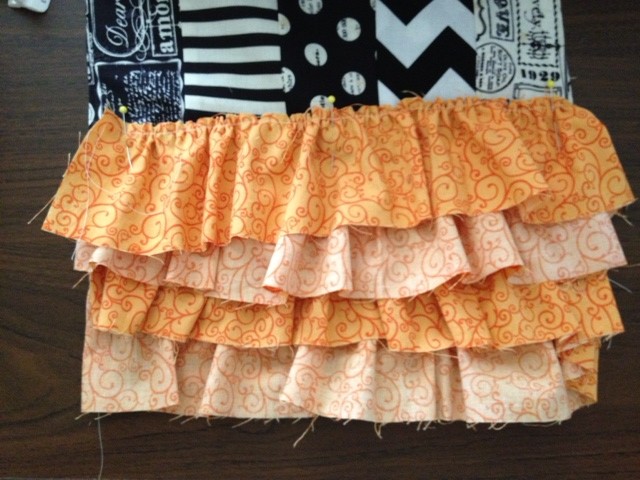
To attach it to the runner, start by pinning your ruffle, lining the bottom of the ruffle with the edge of the runner with the WRONG side showing. I left a little tail to tuck under when I sew it. Pin to the other edge, then scrunch your ruffle up and start pinning it about an inch above the first pinned ruffle, this time with the RIGHT side showing. If you prefer you can do these ruffles all separately but I like shortcuts and it looked kinda cool.
Keep pinning and going up adding more rows until you have four rows. Then sew over it, slowly removing the pins as you sew and being careful not to sew anything I don’t want to. I sewed a black zigzag stitch for a fun look. Repeat it on the other end.
Iron it all again and you are done!
I love how this cute Halloween table runner just adds a little bit of fun and festive flair to my table for the season. Decorate it with a cute center piece or even just some pumpkins!



Pretty cool!
Super cute, Heidi!! I love all of the black and white fabric you used. And the orange ruffle is the perfect complement!
I love black & white anything! This is totally adorable, especially adding the orange ruffles. This idea could be used for all sorts of occasions/seasons ~ thanks so much for sharing!
xo
Pat
I love black & white anything! This is totally adorable, especially adding the orange ruffles. This idea could be used for all sorts of occasions/seasons ~ thanks so much for sharing!
xo
Pat
Um, this is so cute! I love your Halloween projects. I am in the middle of a table runner for my sister and may just have to add ruffles to the ends. Thanks for the inspiration!
Aw yay!!! Halloween decor is at the top of my favorites!!!! Love this! Love the ruffles and the fabric you chose!
Heidi, this is freakin’ awesome……I PINNED it so I can hopefully get to making one around Halloween time!! 🙂 Great tutorial and btw, I’m LOVIN” your new site design. Did you switch from Blogger or have you always been on WordPress?
Thanks Brooke! I switched to WP in May 2011 and have loved it ever since!
This is really cute -gorgeous, actually!! Thanks for sharing!!!
I love it! I think someone like me–who lacks sewing skills-could make that! I’m going to try this weekend. I’m going to attempt to make a Christmas one, too. I host an annual Cookie Exchange and that would be a really good prize.