DIY Storage Shelves
Things have been crazy around here, especially since I have decided to declutter my house all at the same time, so everything is just OUT all over the place and in the midst of it I have about five other projects due, Easter and my son’s birthday, and soccer season starting. I really hope I don’t just drown in all the craziness.
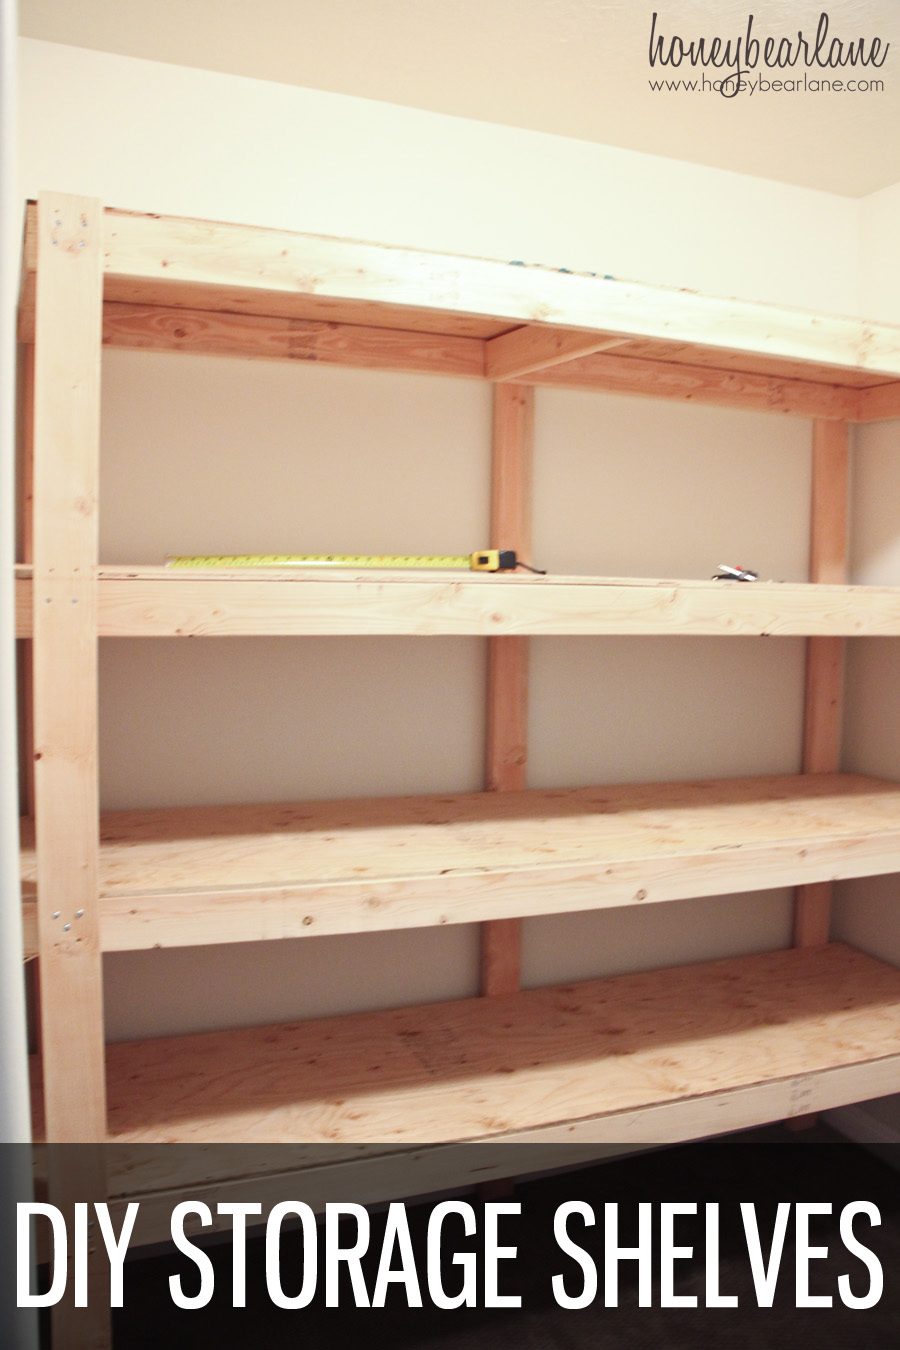
But one thing that is making me happy is my newly organized storage room. At least there’s that. Ironically the messiest room is now the cleanest and the clean-ish house is is shambles. I built some custom heavy duty diy storage shelves inspired by this post.
I am going to show you how to make one of these heavy duty storage shelves. It’s not really that hard, especially if you have the right tools. My particular unit is only 7 feet wide to fit my space. But these instructions are for 8 foot wide shelves so you can maximize your materials (and do less cutting.)
*This post contains affiliate links
What You’ll Need:
- 2 4×8′ plywood at least 1/2″ thick –$40
- 16 2x4x8 –$45
- Box of 2 1/2″ pocket hole screws -$6
- Box of 2 1/2″ wood screws -$3
- Nail gun with 1 1/4″ nails or 1 1/4″ screws
- Kreg Jig
- 4-6 C clamps
Total Cost (not including tools): $94
Cut List:
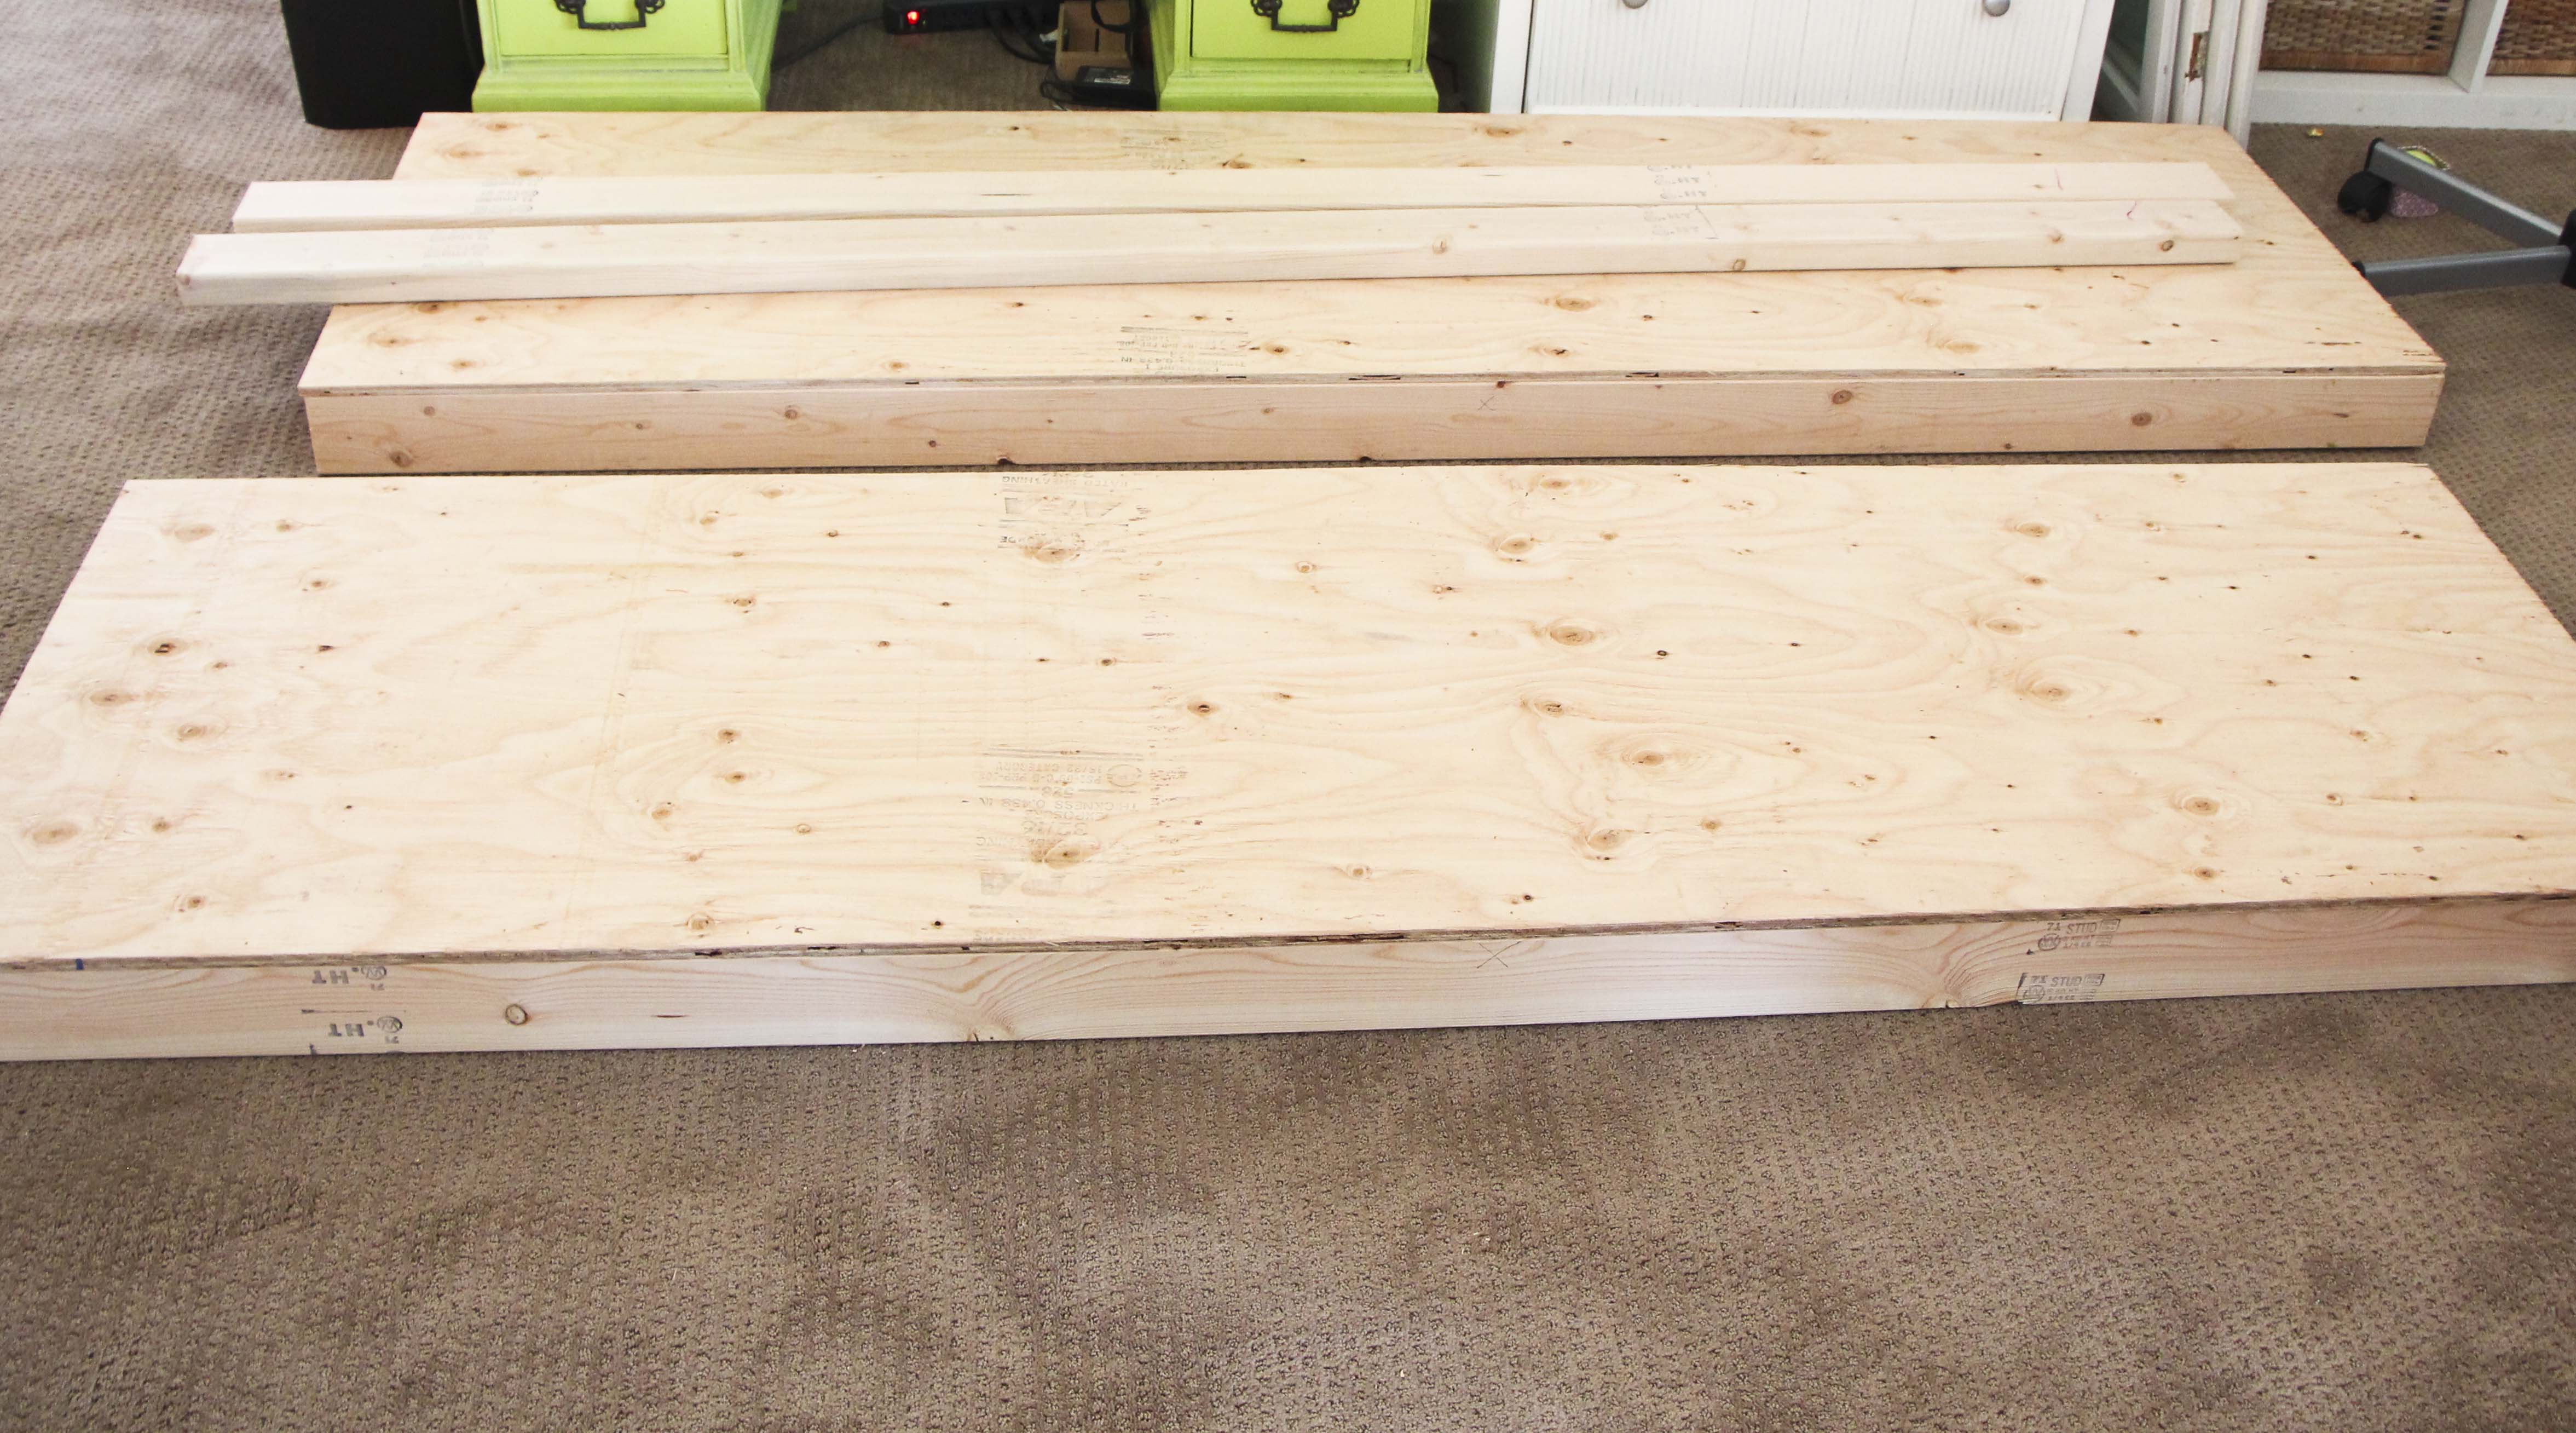
- Cut the two sheets of plywood in half lengthwise so you have four pieces of 2×8′ board. Ask them to do this at Home Depot because it’s much easier to transport this way.
- 12 2×4 cut to 21 inches
- 6 2×4 cut to 80 inches (These are for 16″ spaces between shelves. I suggest measuring your largest bins and adjusting accordingly. You may need larger or smaller gaps.)
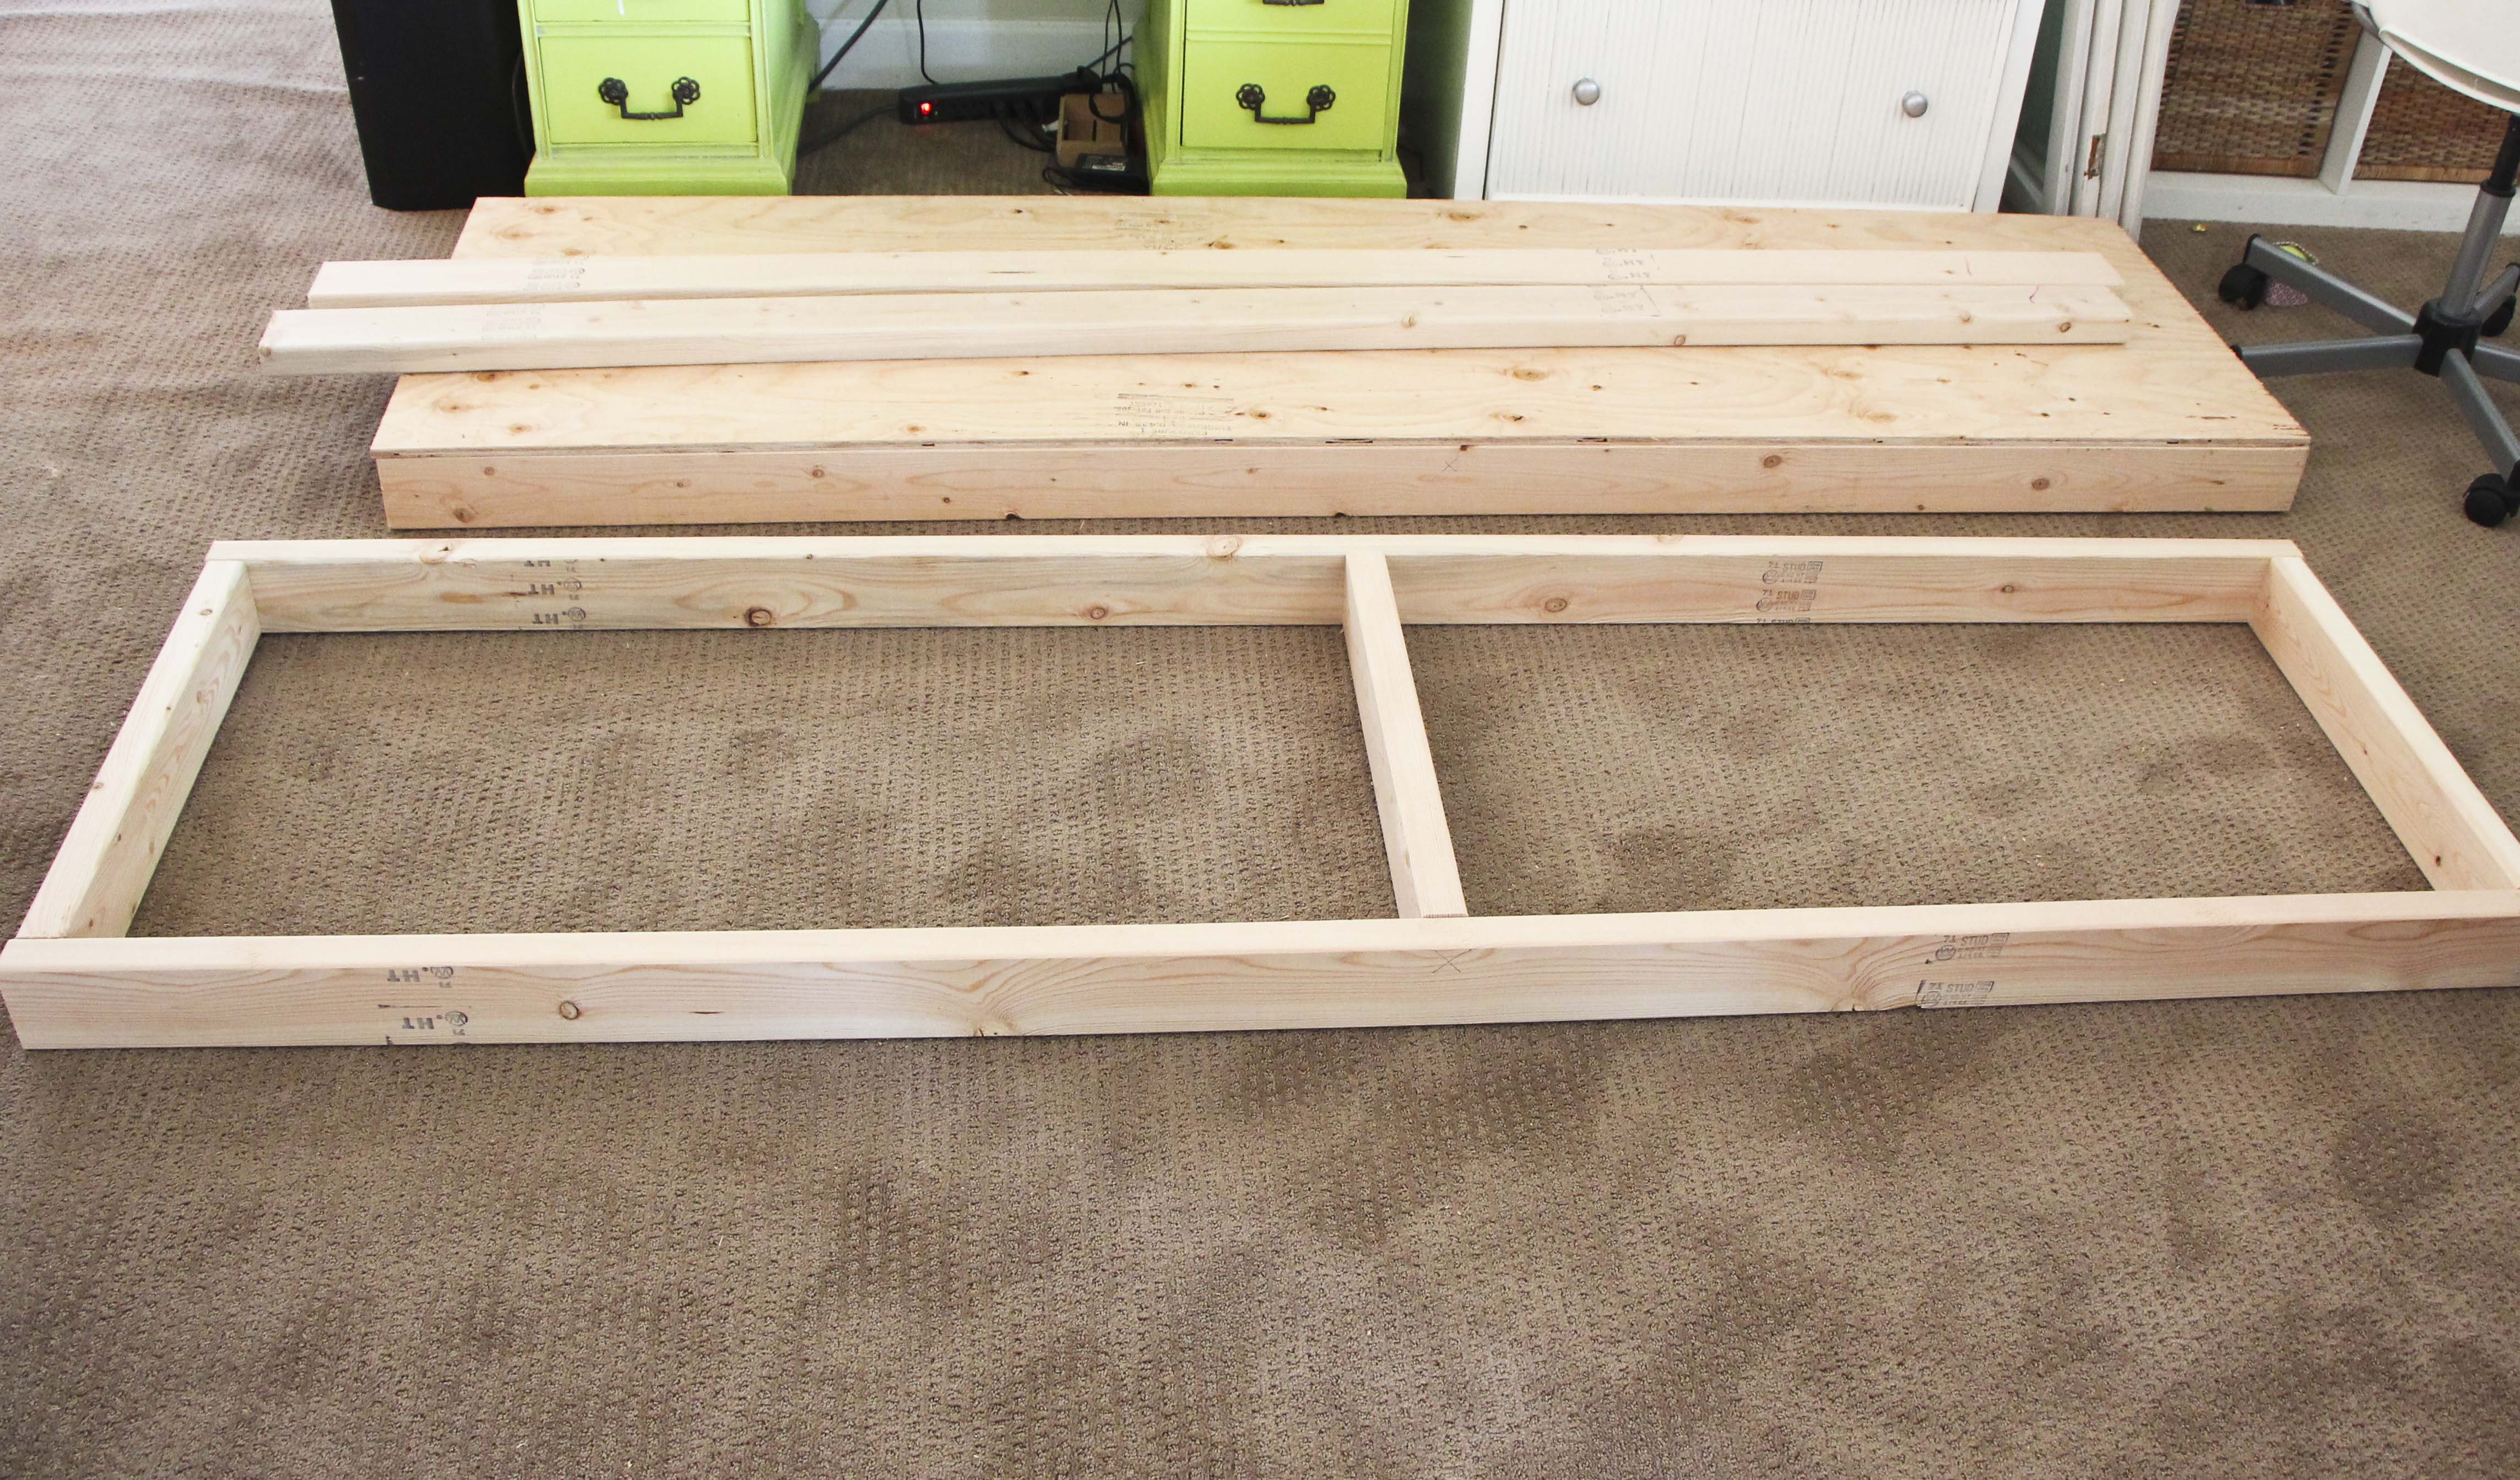
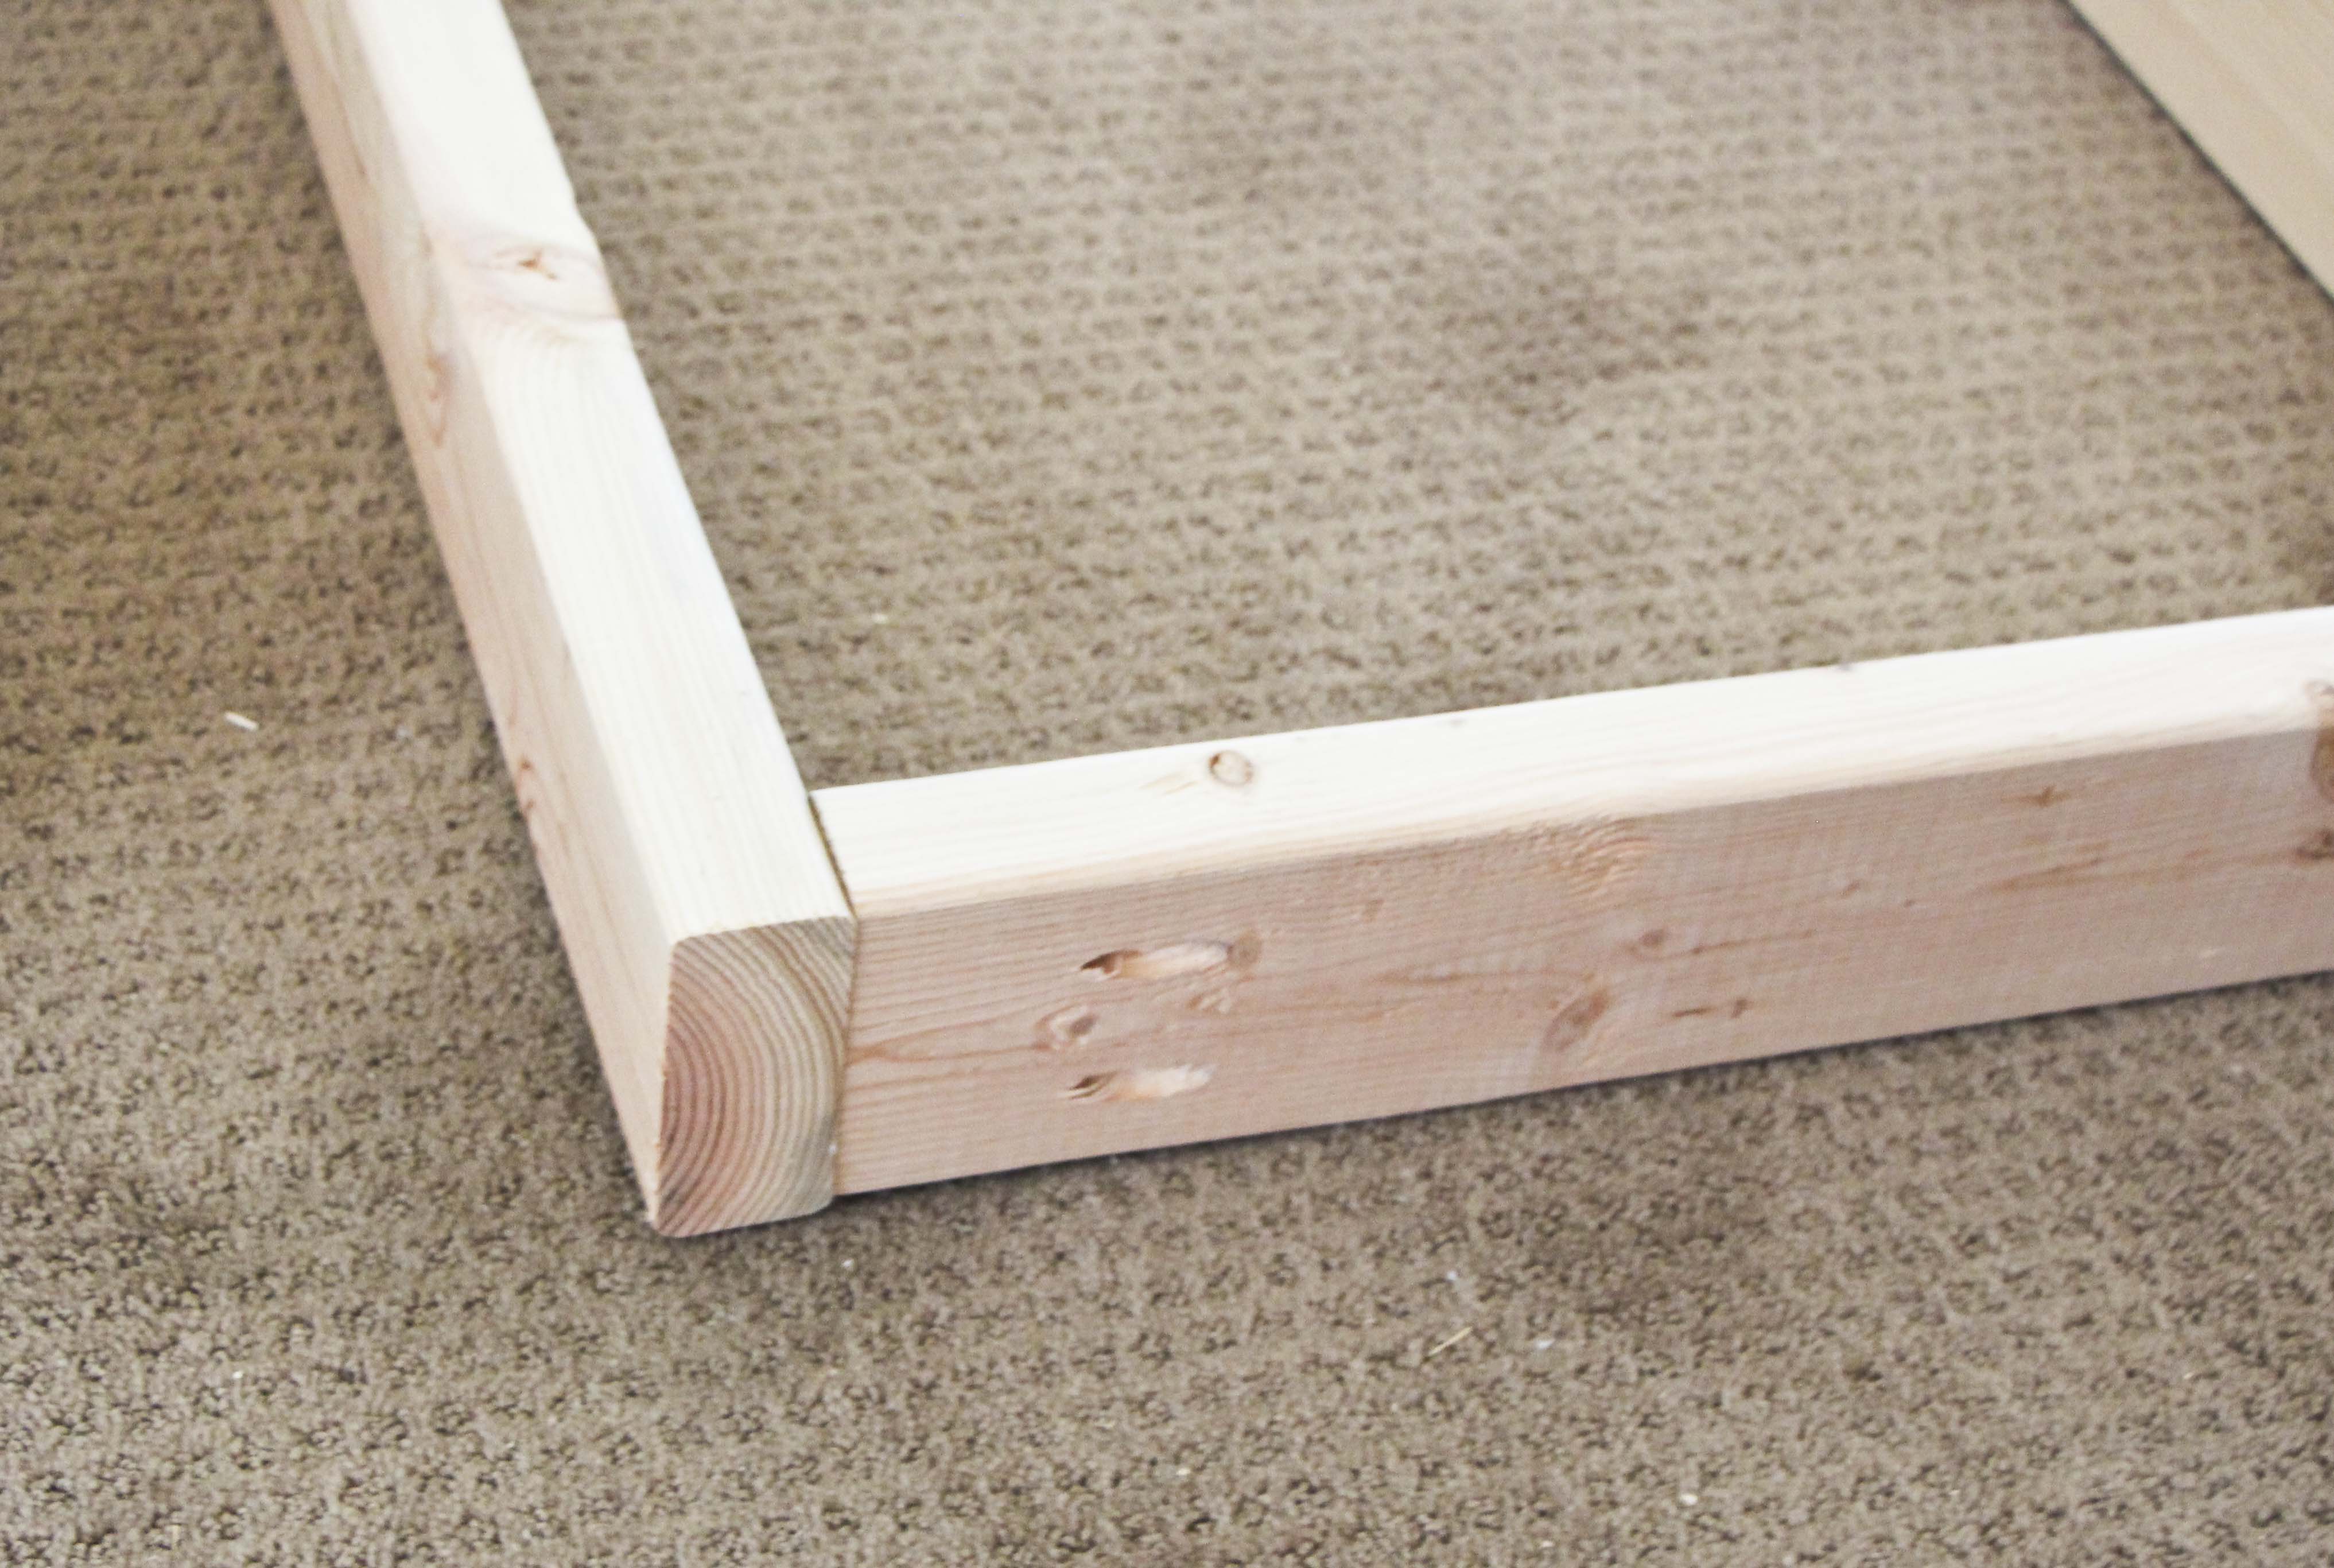
The first thing you need to do is build the shelves. This comes together very quickly. Put two pocket holes in each 21″ piece on both ends. Then drill one 21″ piece into one of the 8′ pieces at one end, in the middle, and the other end. I sometimes find it tricky to make joints on the end of the wood piece because it seems more slippery or something. So you can clamp it down with a right angle clamp or a kreg right angle clamp but I don’t have one (yet) so I will drive the screw in, back it out, then drive it back in. Also, you do not HAVE to use a Kreg Jig but I prefer the strength of the pocket hole joints to a butt joint.
Once you have the E shape, add the other 2x4x8 and make the full apron. Then using a nailer (like my Ryobi Brad Nailer) you can put the plywood right on top and secure in place with nails. If you don’t have a nailer, you can screw the plywood to the 2x4s in several places.
To assemble, I did it all standing up because it seemed like it would be easier to get it all level (also it was my only option being in such a tight space.) You might need a buddy to do it this way but you can also hold your shelves up in place by putting your bins under them plus about a 5″ book or something. You will want all your shelves to have a 16″ gap in between. Clamp the 2×4 vertical beams to the ends of the shelves aligned on the long side.

Once your shelf is level and clamped nice and tight (you also want to the do the fit test–see if your bins fit in the space!), start drilling pilot holes where your beam and shelf apron meet, do at least three holes. Then drive some nice long 2 1/2″ screws in your holes. You will probably have to move your clamp to do the last hole but the other screws you did should hold it in place.
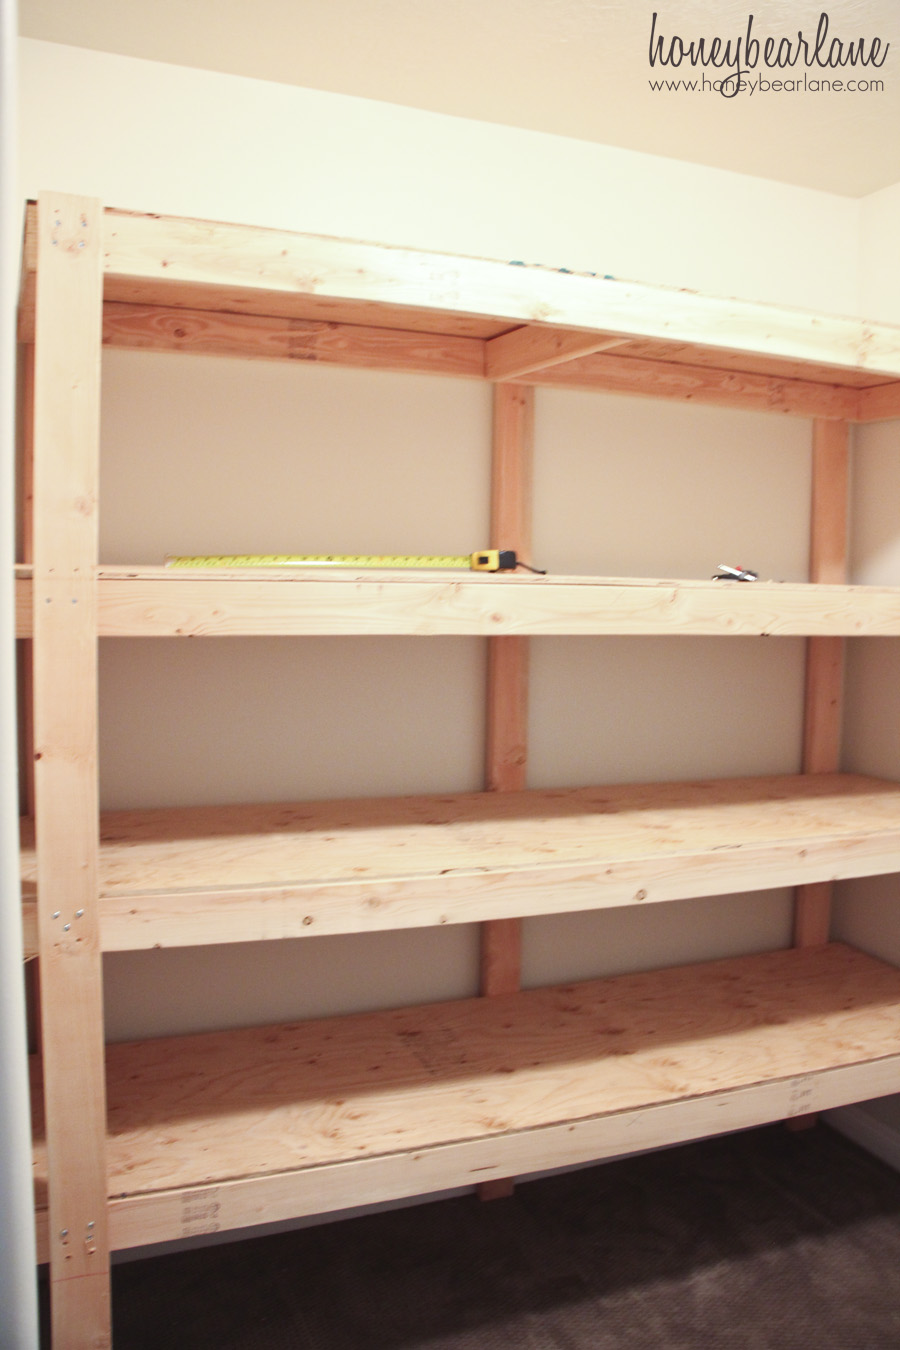
Repeat this process with the other three shelves, making sure the gap in between shelves is 16″. The top shelf should be flush with the 2×4 support beams. You could possible assemble this unit while it’s laying on the ground, but I feel like it would be difficult to make sure each shelf is level and even and you’d end up doing a lot of readjustments after you’ve screwed in the shelves, which is a pain. However in the inspiration post they did assemble it on the ground so I’d like to try that in the future. Read her post to see their method.
For the record, we did not use the clamps until the very end because we’re brilliant like that. So learn from my mistakes and use clamps for this project! They are not that expensive and you will use them in tons of other projects.
Other than that, I learned a lot from building these DIY storage shelves and I think all future storage shelving units will be a lot easier. And I’m SOO glad we have it!
These look fantastic! Do you have any idea how much the supplies cost? I am wondering if it is a cheaper route than buying a premade shelving unit.
Great question! I just changed the post to include the cost. It’s about $94 for an 8 ft wide unit.
Your amount of wood needed isn’t correct. It’s very confusing ?
So glad you found my post useful! 😀 I am the one who wrote the post you liked to a couple times! Just wanted to let you know you are welcome to add one of my pictures to your post if you’d like! 😀 Thanks so much for giving me credit! 🙂
Your post is great! Thanks for the inspiration!
How deep do drill the pocket holes? How far back from the edge is the hole?
How deep did you drill the pocket holes? How far back did you put the jig?
I set the Kreg Jig to be the right adjustment for a 2″ thick piece of wood. I’m not sure exactly what that is but if you have a Kreg Jig you will probably know what I mean. 🙂
Very nice. I’m building a very similar set of basement shelving with pocket hole joints. Just wanted to point out that the jig should be set for 1.5 inch thickness for a 2×4 since the lumber is closer to 1.5×3.5.
Yes–very true. I probably forgot to mention that. However I need to mention now that I have built these type of shelves two more times since the original and didn’t bother with pocket holes. They do look nicer, but since these are extremely function-over-form style, who cares? It is much easier to purchase self-driving screws and just screw them in with an impact driver.
How tall is the shelf?
It’s about 8 feet tall. I live in a 9 ft basement. If you have lower ceilings you will need to cut the size down a smidge.
FYI your cut list is wrong. 80inches does not equal the 8 foot length of the plywood. The cuts should be 96 inches… The 2x4x96… Thanks
Nm I realized the boards were cut wrong… Ugh never trust someone else to do your cutting!
You are my kind of woman! Tackling shelves is inspired and what an awesome job you have done. Seems like I spend hours organizing my sewing room, primarily because I keep thinking of new ways to do things while I’m sewing. Anyway, thank you for the amazing tutorials and for the inspiration to make storage shelves The Basket Weave looks like a challenge, but I love challenges so thank you so much for sharing your amazing talents.
Thanks so much! I love learning new skills to add to my repertoire. And I love encouraging others to do the same!
How tall is the gap at the bottom of the shelving? You don’t make any mention of it in the post…
I don’t know the exact height but we just based it off the size of the largest bins we have. I recommend placing your largest bins in a row, then laying a couple 2x4s across, then laying the shelf on top of that, then you can get a good height.
Thanks for sharing how to make my own shelves for storage. My wife was complaining to me just the other week about not having enough room to store things. If I put up these shelves in our storage room, it could maximize our space. I feel the same way you do when it comes to organized storage rooms.
I have got to try these. I have so much yarn I cant keep track of it. I also do alot of canning, so this would be great for those as well. But you dont mention anything about bracing the middle for weight barring items in middle. I also didnt see anything how to attach to the uprights. Thank you so much for helping.
Nike Air Vapormax Flyknit http://www.nikeairvapormaxflyknit2.us/
Nike VaporMax Flyknit,Nike Air Vapormax Flyknit,Nike Air Vapormax Flyknit 2 http://www.nikevapormaxflyknit.us/
Nike VaporMax Plus,Nike Air VaporMax Plus,VaporMax Plus,Nike Air Vapormax Flyknit,Nike Air Vapormax Flyknit 2 http://www.nike-vapormaxplus.us/
Nike Air Max 2019,Air Max 2019 http://www.max2019.us/
Nike Air Max 2019,Air Max 2019,Nike Air Max http://www.air-max2019.us/
Nike Air Max 2019,Air Max 2019,Nike Air Max http://www.nike-airmax2019.us/
Nike Air Zoom Pegasus 35,Nike Pegasus 35,Nike Air Zoom Pegasus http://www.nikeairzoompegasus35.us/
Nike Pegasus 35,Nike Air Zoom Pegasus 35,Nike Air Zoom Pegasus,Nike Pegasus http://www.nikepegasus-35.us/
Nike Zoom,Nike Air Zoom http://www.nike-zoom.us/
Nike Air Max 270,Air Max 270,Nike Max 270 http://www.nikemax270.us/
Nike Shox,Nike Shox Outlet,Cheap Nike Shox Outlet http://www.nikeshoxoutlet.us/
Adidas Outlet http://www.outlet-adidas.us/
adidas originals http://www.originalsadidas.us/
adidas ultra boost,ultra boost http://www.adidasultra-boost.us/
Adidas Shoes http://www.shoesadidas.us/
Pandora Rings,Pandora Ring,Pandora Rings Official Site http://www.pandorarings-jewelry.us/
Pandora Official Site,Pandora Jewelry Official Site,Pandora Rings Official Site http://www.pandora-officialsite.us/
Pandora.com,Pandora,Pandora Official Site,Pandora Jewelry Official Site http://www.pandora-com.us/
Pandora jewelry Outlet,pandora charms,,pandora bracelets,pandora rings,pandora outlet http://www.pandora-jewelryoutlet.us/
pandora outlet,pandora jewelry outlet,pandora charms outlet,pandora jewelry http://www.pandoraoutlet-jewelry.us/
Cheap NFL Jerseys,NFL Jerseys Cheap,Cheap Sports Jerseys http://www.cheapsportsnfljerseys.us/
Cheap NFL Jerseys,NFL Jerseys Outlet,Cheap Jerseys http://www.cheapoutletnfljerseys.us/
Cheap NFL Jerseys,NFL Jerseys Cheap,Cheap Sports JerseysNFL Jerseys,Cheap NFL Jerseys,NFL Jerseys Wholesale,Cheap Jerseys http://www.nfljerseyscheapwholesale.us/
Cheap NFL Jerseys,NFL Jerseys Cheap,Cheap Sports Jerseys http://www.cheapjerseyselitenfl.us/
NFL Jerseys,NFL Jerseys 2019,Cheap NFL Jerseys,NFL Jerseys Wholesale http://www.nfljerseys2019.us/
Pittsburgh Steelers Jerseys,Steelers Jerseys,Steelers Jerseys Cheap http://www.pittsburghsteelers-jerseys.us/
Dallas Cowboys Jerseys,Cowboys Jerseys,Cowboys Jerseys Cheap http://www.dallascowboysjerseyscheap.us/
NFL Jerseys,NFL Jerseys 2019,Cheap NFL Jerseys, Cheap Authentic Nfl Jerseys http://www.nflauthenticjerseys.us/
NFL Jerseys Wholesale,NFL Jerseys 2019,Cheap NFL Jerseys, Cheap Nfl Jerseys Wholesale http://www.wholesalenfljerseysshop.us/
NFL Jerseys Wholesale,Cheap Nfl Jerseys Wholesale,,Cheap NFL Jerseys,NFL Jerseys 2019 http://www.authenticnflcheapjerseys.us/
Pandora Sale, Pandora Jewelry, Pandora UK http://www.pandorasale.org.uk/
Pandora Charms,Pandora UK,Pandora Charms Sale Clearance http://www.pandoracharmssaleuk.me.uk/
Pandora Bracelets,Pandora Bracelet,Pandora Jewelry http://www.pandorabraceletsjewellry.me.uk/
Pandora UK, Pandora Sale, Pandora Jewelry UK http://www.pandorauk-sale.org.uk/