DIY Play Food Crates
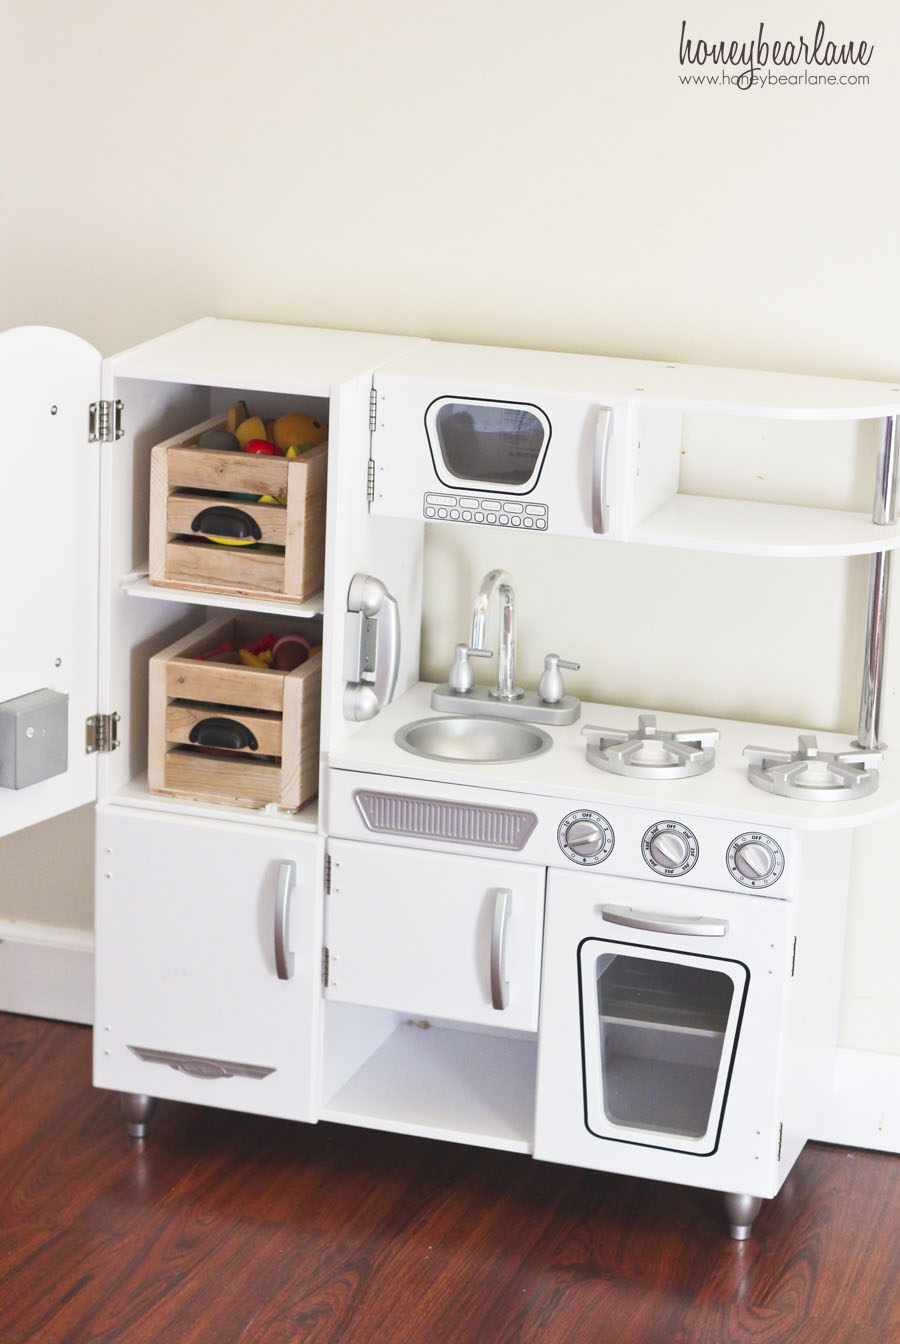
Last year we gave my daughter a play kitchen. You know, the KidCraft Vintage Kitchen–it seems to be the hot play kitchen to buy these days. I love it because it’s so cute while not being plastic and bulky. It feels high quality and looks like real kitchens. And the white one is gender-neutral and well, I have a thing for white kitchens. Not gonna lie though, it was a beast to put together.
Anyway, we also gave her some play food, some of the cheapo plastic ones and some of the nicer Melissa and Doug ones. But despite the kitchen having plenty of storage, it doesn’t come with bins to put the food in. So the second you open the doors, all the food will spill out.
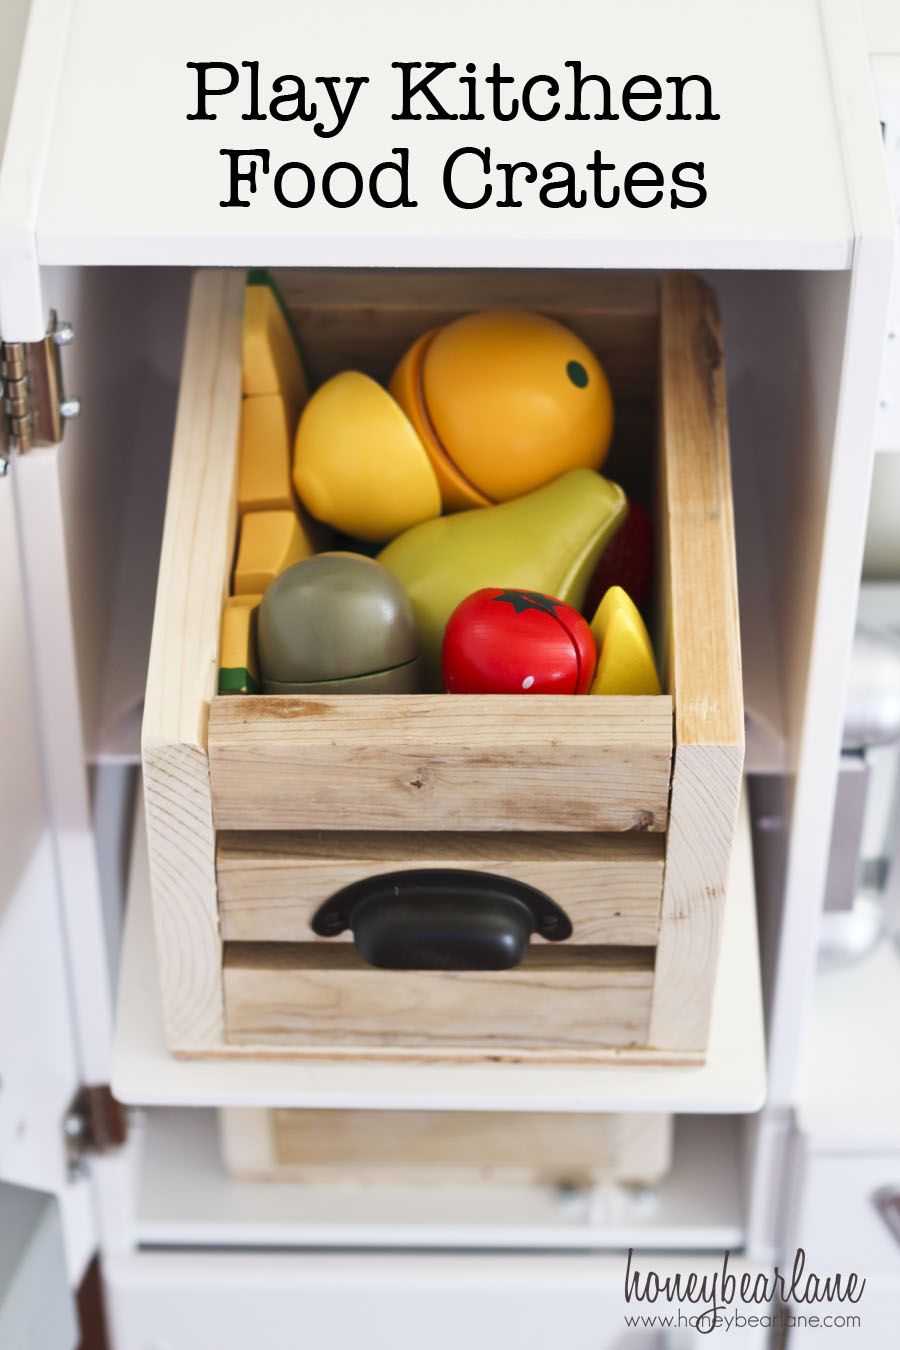
I wanted to find some crates that fit this little fridge, but I just couldn’t. Nothing was the right size without being too expensive. Finally, one day I was sick of the mess so I decided to whip up some wood crates of my own design– some DIY play food crates, if you will. And I love the way they turned out! They fit the vintage feel of the kitchen and best of all, I finally have something to hold the food!
Make it Yourself
Supplies (makes 1 crate)
- two 1x2s
- one 1×6
- scrap plywood
- 1 1/4″ screws or nail gun
- wood glue
- clamps
- hardware pull
Cut list
6 1x2s at 5.25″ long
2 1×6 at 5.5″ long
plywood cut to 6 5/8ths x 8 3/8ths
Step one:
Assemble your box frame by placing four 1x2s between the two 1x6s. Place wood glue on the ends and clamp together. Check for square, then screw or nail them in place. Slide in the other two 1x2s in the middle with some glue on the ends and nail/screw into place.
Step two:
Flip the box over and place your plywood on the bottom. Glue and nail/screw into place. With all the glue, wipe off the excess.
Step three:
Mark the spot for your hardware pull and pre-drill holes. Screw your hardware into place.
Finishing touches:
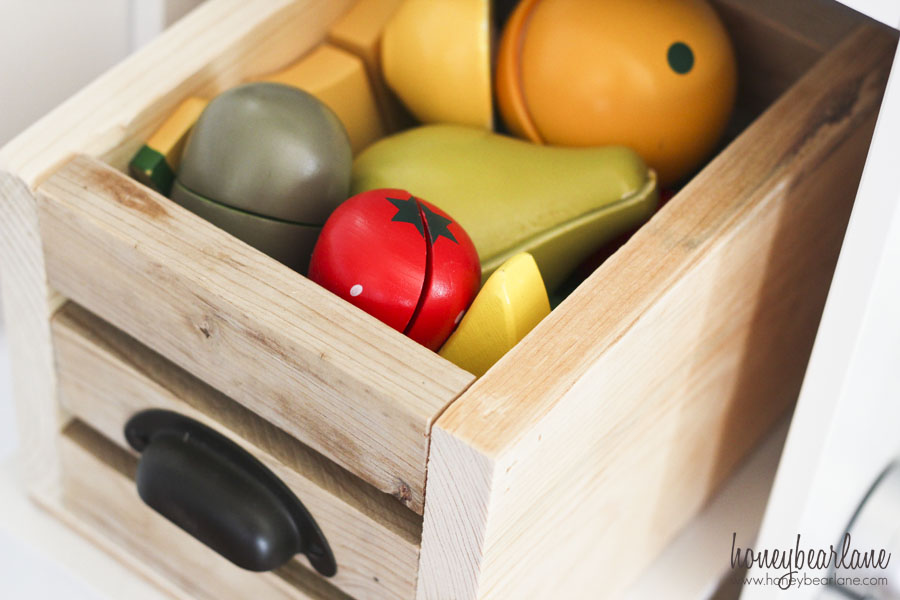
Sand the edges and any rough spots so you have a nice splinter-free box. Stain or paint your box (my wood was already somewhat aged and weathered so I left it as is.) and seal with a non-toxic wax. Let it cure for several days to a week before putting the toys in it.
These would make a great Christmas gift for your kids, whether or not you have a play kitchen. You could fill the crates with play food and leave it under the Christmas tree. This is also a good beginner project for woodworking and a great use for scrap wood!
Many could think that observing its incredibly lovely sand shores and enjoying
the peaceful and serene surroundings is only going to remain a wish.