Kids Craft: Personalized Candles
Hello Honeybear Lane! It is so good to be back! This is Amy, from Amy’s Craft Bucket. Being a part of Heidi’s amazing blog and creative world has been so fun!
Are you ready to do another fun craft with your kids? How about this:
A Personalized Candle!
Doing Crafts with my kids has been a great way to beat the boredom of long days and extreme temperatures. We actually hit 119 degrees this summer. Yuck! Anyway, using your kids artwork is such a fun way to personalize a candle. Think of all the holiday possibilities! Best of all they are pretty simple to make.

You will need:
A Candle (or two)
tissue paper ( I used one that was plain white and one that had a floral design)
crayons
wax paper
hair dryer or embossing tool
scissors
Getting Started:
Step 1: Measure out your tissue paper. Roll it around your candle and make sure you see ends meet before cutting. Do the same for your wax paper.


You should now have two pieces of paper. One tissue, one wax.

If you are using the plain tissue paper, then now is the time to let your little artist get to work.

Which brings me to step 2: Color the tissue paper using crayons. ( Do you like my daughter’s hair? It was styled by the swimming pool earlier in the day)

Once your picture is completed, you can begin step 3.

Step 3: Wrap the tissue paper around the candle first. Then wrap the wax paper around it. Make sure both are taught. The idea is that the wax on the wax paper will seal the tissue paper to the candle.

Step 4: Use your blow dryer to seal the wax onto the candle. Be careful not to burn your fingers, please. I had to press my blow dryer directly on top of the candle. I am sure that heat will vary, so if your paper starts to yellow back off a little and keep your appliance moving. Embossing tools work a little better. But work with what you have. (oh, yeah, this little curly head of mine had the same hair stylist as her sister in the previous picture.
** Note in the pictures above the wax paper was not wrapped around the candle. This was our first attempt. We discovered that it is indeed better to wrap the wax paper all the way around the candle.

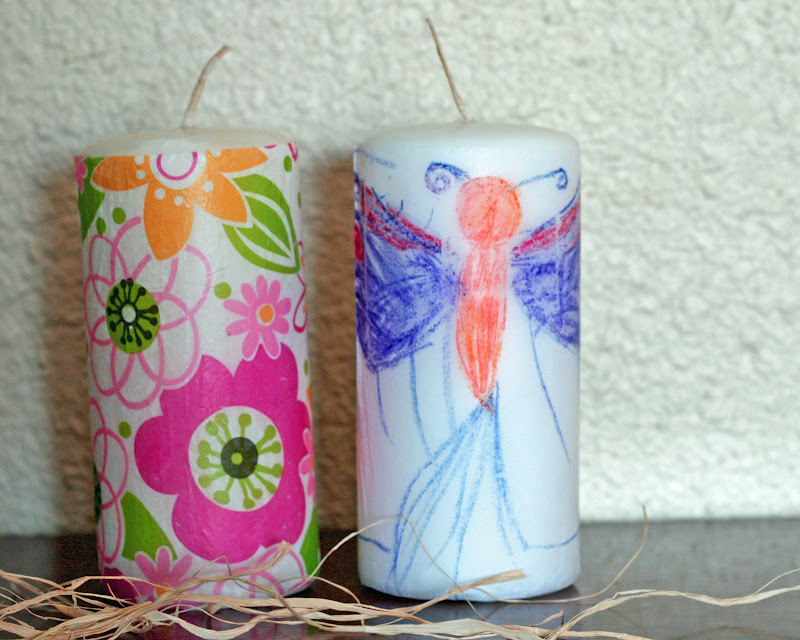
This is what your finished product will look like. As you can see the butterfly suffered a bit. Some of the crayon color melted off on the wax paper. The reason why, we heated that spot too long. Keep your hot air circulating. We were able to fix the artwork. We just color on it again.

So it looks like this now.:)

And the other looks like this:

The funny thing is, both of my girls loved this project. They liked how each of their candles turned out, but Cambria thought Kiera’s looked better and Kiera thought Cambria’s looked better. And they both said that to me when the other sister wasn’t around! I guess it is true, the grass is always greener on the other side. They were very excited however, to clear a place of honor on their shelves to display their new craft.

I really hope that you have enjoyed this little craft idea. For more crafts to do with your kids (and for yourself as well) please visit me at Amy’s Craft Bucket. I would love to have you!
Thanks, Heidi!
Until the next time Honey Bear Lane!
Happy Crafting!
XOXO,
Amy
Thanks Heidi! It is so fun to be on your blog. I hope this is something that people like!
Hi I love this project! I did this for Christmas gifts last year. But I scanned a family pic into my pc and printed it on tissue paper. (I cut the tissue down and taped it to a sheet of paper) The grandparents and God parents LOVED it! I also did a few with the “family name” for exchange in Chinese Christmas. An idea for child’s art…have them color on the tissue paper with crayola markers. Just be sure they don’t color so much they rip the tissue. And I would also suggest letting the ink dry well before trying to adhere to candle.
Question- does the wax paper then get removed? Is it only to separate the heat from teh paper?
Why isn’t it working for me? Any ideas?
This is the perfect way to get the candle to match what ever the decor is of the room… And very easy to do with the kids… We are doing my daughters some peace sign candles for her room and I know they will turn out great…
It didn’t work for Me right either…. how long did you have the dryer on each side?
Very fun idea! What happens to the tissue and wax paper as the candle burns down, though?