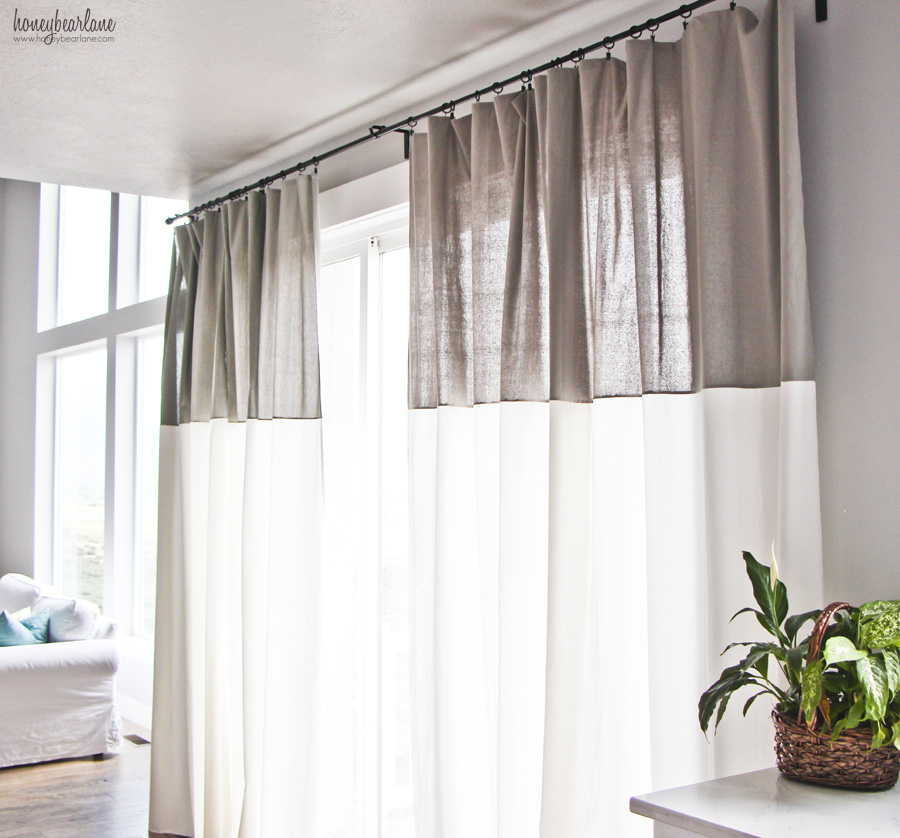
DIY Two Toned Curtains
Our new house has lots of big, bright windows. We also have a large patio door. And while this is great for lots of natural light, since we back south, we get some pretty intense sunshine in our house. I actually don’t mind it at all since sunshine makes me happy, but it was blinding to eat breakfast, especially when it snowed and the sun was reflecting even more light off the snow.
I hung a curtain rod and my old IKEA curtains in front of the patio door, but since our main floor is 9 foot ceilings, the longest IKEA curtains were still about 6 inches off the ground and looked silly. I thought about making new curtains, but I couldn’t decide on a fabric and I didn’t want to spend a lot of money on yards and yards of fabric since I needed a lot.

I decided to add a little band of fabric at the bottom to lengthen the curtains and essentially make two-toned curtains. I wanted it to be portionally pleasing to the eye so I wanted the contrasting fabric to be at least 1/4″ of the curtain rather than just the little 6 inches I was missing.
I purchased some gray clearance curtains from World Market for a great deal and cheaper than I could even buy fabric—plus it was already hemmed!
This ended up being super tricky because I had to make sure I cut off the same amount of fabric from the white panels and measured the gray panels the same so when they were all hung they would match up in the seamline and were the right length once hung. (I hate it when curtains puddle on the ground, I prefer it when they just brush the ground.) It was mostly hard because the amount of fabric I was working with.
I finally finished sewing and hung the curtains and one of the seams was not level and looked bad. I was so frustrated and wanted to give up. I decided to flip them over and hang the gray part from the top with curtain clips. Then I could just trim the white curtain to be level. It was kind of sad to just cut off the grommets, but I’m over that style anyway and they are so much better this way. I just hung the curtains and took my scissors and just trimmed the white curtain part to be the exact length I wanted–where it barely hits the floor. Then I took them off and sewed an overcast seam so they won’t fray and voila! Done!
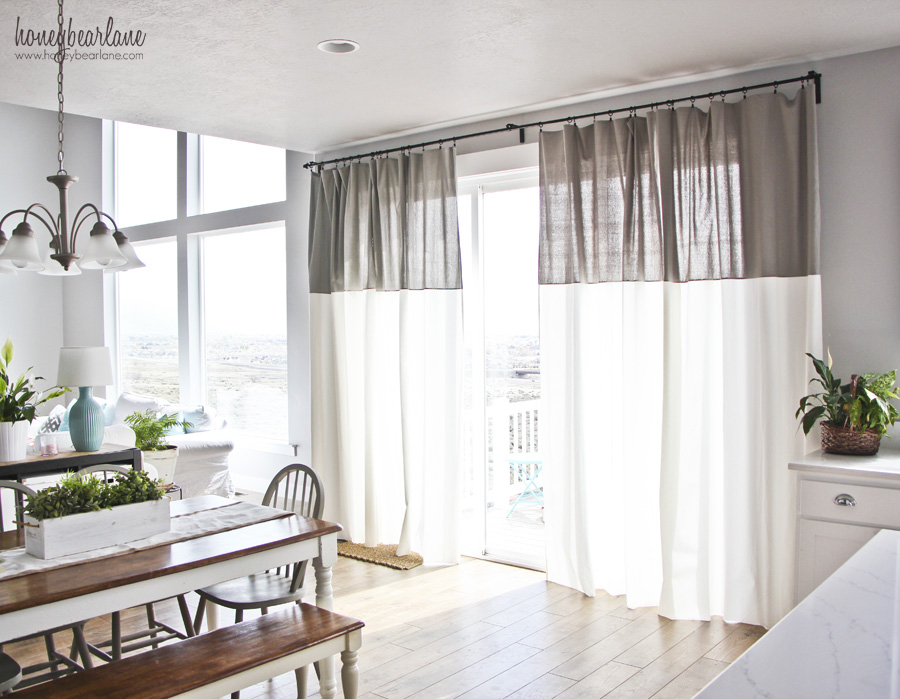
Starting this project from scratch using just plain fabric would be easier than the way I did it. You could just sew the two pieces together, hem and hang them and then trim to size, especially if the contrasting fabric hung from the top and you were just trimming the neutral fabric. But I eventually got there and I’m glad I stuck it out because I love my custom curtains! It’s hard to take a picture of these because of the amount of light coming in from behind but they really do look nice in my house.
They look fabulous!
Thank you! This was a labor of love haha!
I love how they turned out! Isn’t it funny how the best results usually come from “winging it”? The great thing about the darker color on the top, is that it cuts down on the bright light too! It reminds me of the tinting on the windshield of a car. Really like the colors too.
Good call-that’s true! They have worked wonderfully for us.
What a fantastic looking “mistake”! Very unique & eye catching along with being practical and cost effective!