Fireplace Mantel Makeover Part 2
Once all those pieces were stable and securely in place, it was time for the crown moulding. What. a. pain. We (and here I enlisted my husband’s help) first tried to just cut it free hand without any jigs or guides. Wah-wah-waaaahhh. Didn’t work. Was a nightmare. Ruined the pieces. We got some of the pieces pretty close but I wanted perfection. I also remember reading about the Kreg Crown Pro, which is a jig that helps you cut your crown moulding perfectly every time.
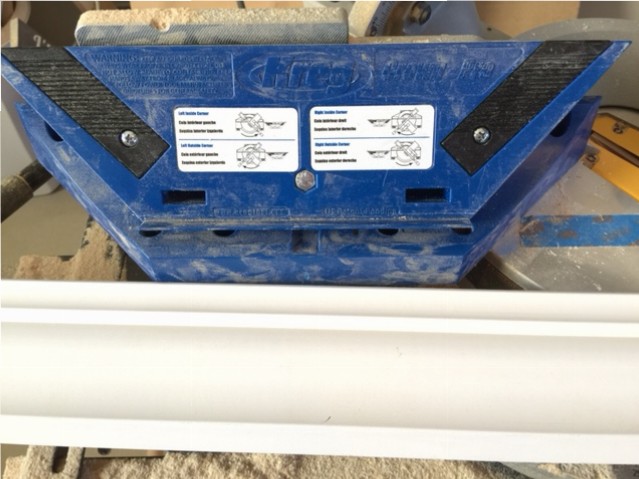
I went back to the store and bought the Crown Pro and more crown moulding and then started working on it. The Crown Pro is like a little shelf that your crown moulding sits on while you cut it. It also comes with a super handy angle finder. First you find the ‘spring angle’ which is the angle the crown moulding sits at when it’s on the wall (or in my case mantel) and most crown moulding comes in three standard spring angles, 38, 45, and 52. Mine was 38. Then underneath the Crown Pro you set the spring angle. This is where I made a stupid mistake and was looking at the numbers backwards. I had it set at 42 and not 38. Once I figured that out it took only a few minutes to cut all my moulding correctly.
You must place the crown moulding upside down (decorative side on top) when you cut it. It has a handy guide to show you which direction to set your miter and which side to cut on. You have inside corners and outside corners. Mine were outside corners so I kept that in mind while cutting. You also have to hold or clamp the moulding tightly while you cut it to make sure it’s not slipping out of place.
Make generous cuts at first, giving yourself room for error and then shave off little pieces here and there until it’s perfect. I did the sides of the mantel first, using a clamp to hold up my long middle piece (my husband was at work at this point and I didn’t want to wait for him.) I got the sides aligned correctly and then bit by bit cut the middle piece until it was perfect. Also I kicked myself many times for not just buying a trim saw blade because yes, I’m still using the bulky construction grade blade it came with.
Once the crown moulding is in place you can use a little sandpaper to sand any slight gaps and then fill it with a tiny bit of caulk or filler. Once it’s painted you won’t even be able to tell!
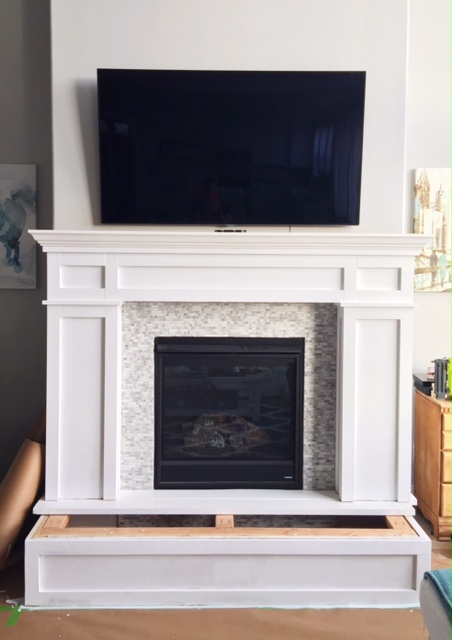
That is how far I have come on the mantel. I primed the entire thing and now it’s a little more presentable while we wait for the quartz. Once the quartz is installed I will add the final base pieces to cover any gaps between the quartz and the mantel and then take off the entire mantel and spray it with paint. Once it’s installed and nailed in place I can add the final top piece and the whole thing will be done!
Check out the other parts of this makeover!
Wow! That looks so great! Thanks very much for sharing as this is exactly what I’ll be doing next month! Timing! 🙂 I love the crown moulding! I cut scotia (cove) for the first time recently, and it nearly did my head in trying to match the cuts up correctly. Eventually discovered I had to place everything on the saw backwards and upside down! (I’ve kept samples with instructions written on them for next time! Nearly drove me nuts!).
Thanks again, Heidi. Well done!
Cheers, Liz (Australia).
Thanks! Good luck with yours!