House Tour
I’ve been meaning to post this house tour for like two years. It is not quite complete since some rooms haven’t even been touched yet but I have to say, I LOVE that about my house. I will never be done decorating and that’s endless possibilities (and blog fodder) for me!
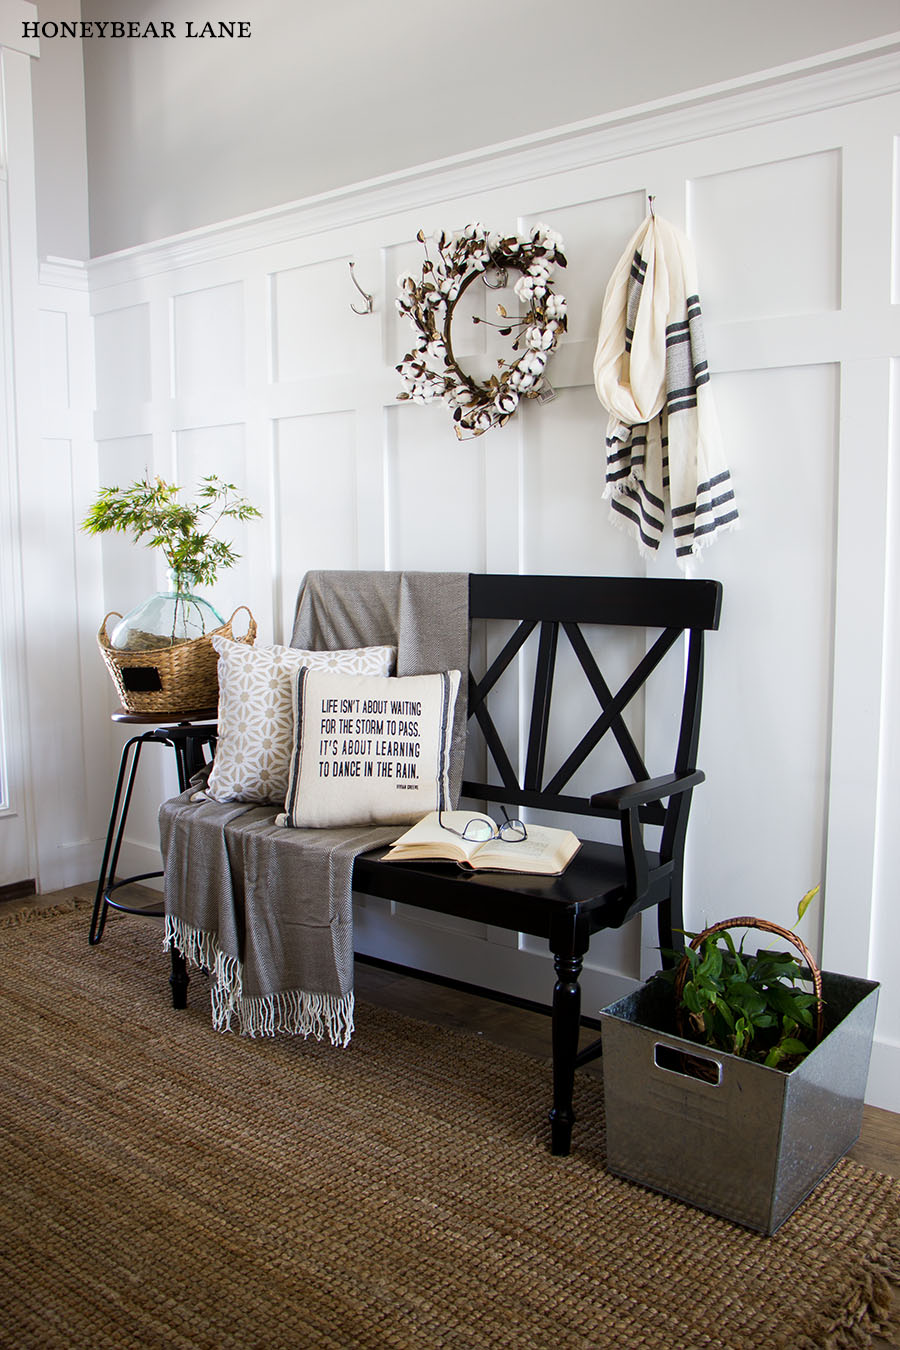
ENTRY
Before
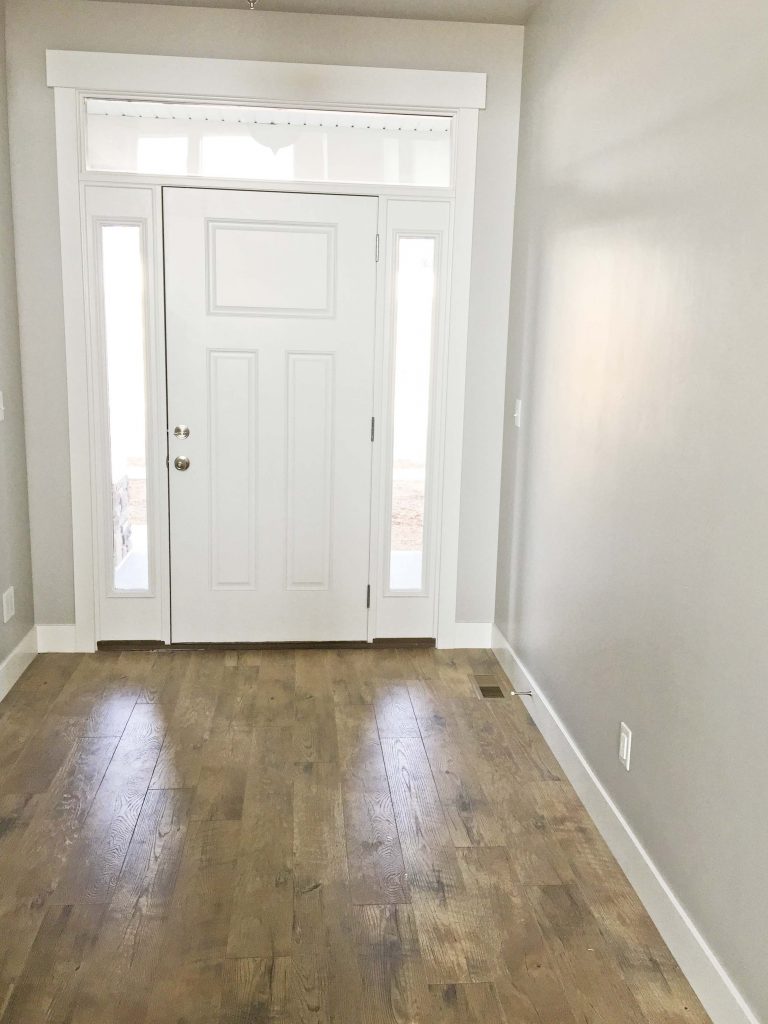
After: I added board and batten to the wall (as well as trimming a doorway which you can’t see), painted the french doors Benjamin Moore Kendall-Charcoal gray, added a rug and some decor. We might get around to doing something else someday, like maybe replacing the entire front door, adding little shutters to the sidelights and stuff like that.
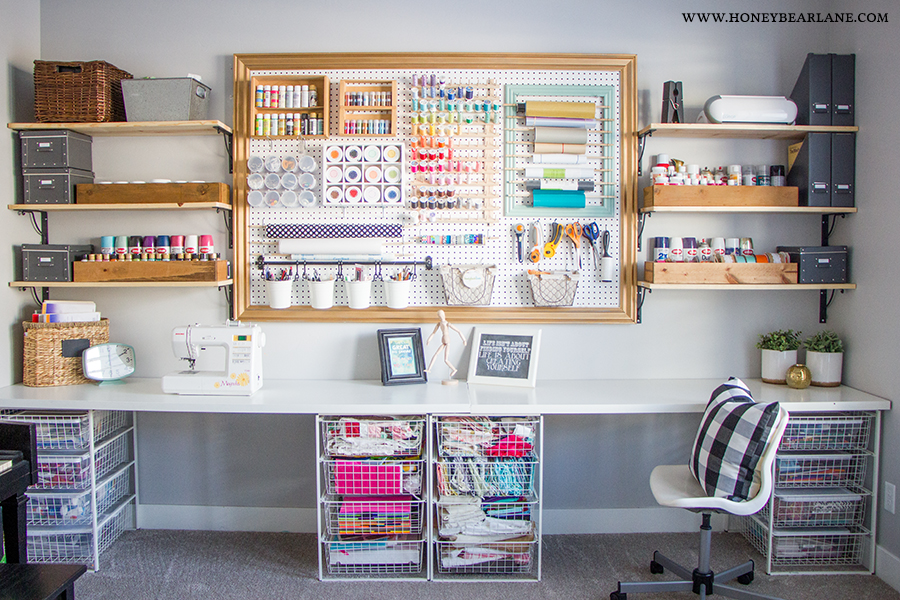
FRONT ROOM/CRAFT ROOM
Before: It’s actually not that bad but it was rarely this clean and organized. It became that room that just accumulated more and more stuff.
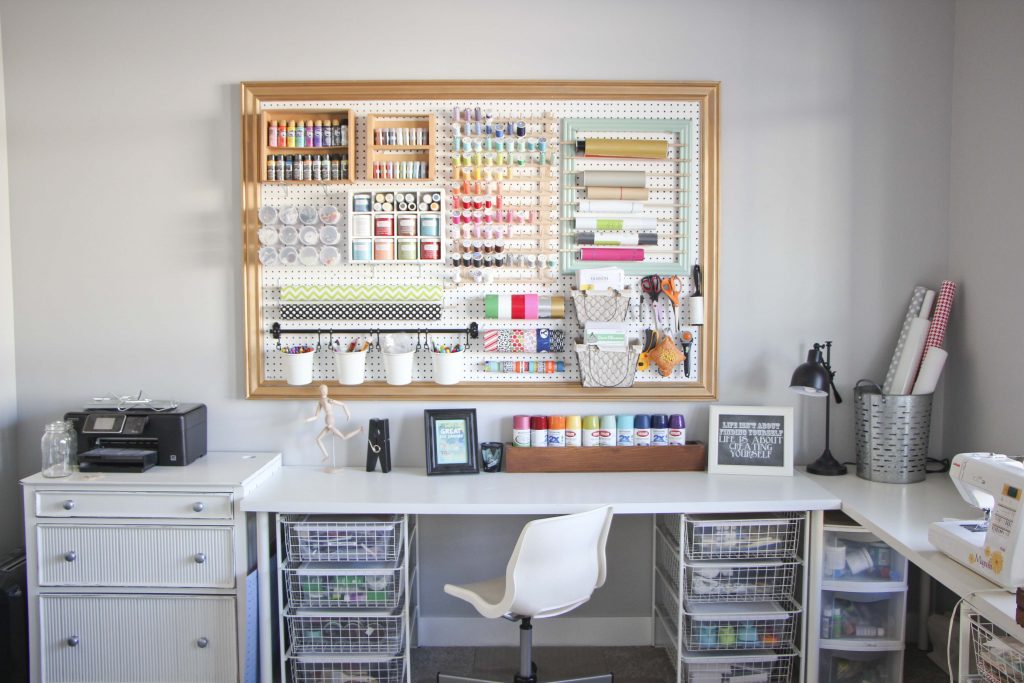
After: We hung shelves on either side of the giant pegboard and I moved the tables to one wall. I had to cut off one end of one of the tables to get it to fit against the wall perfectly. There’s really nothing else in the room right now except our old recliner. I plan on doing this whole room totally differently in the future, turning it more into an office/piano room and moving the craft stuff upstairs to the loft.
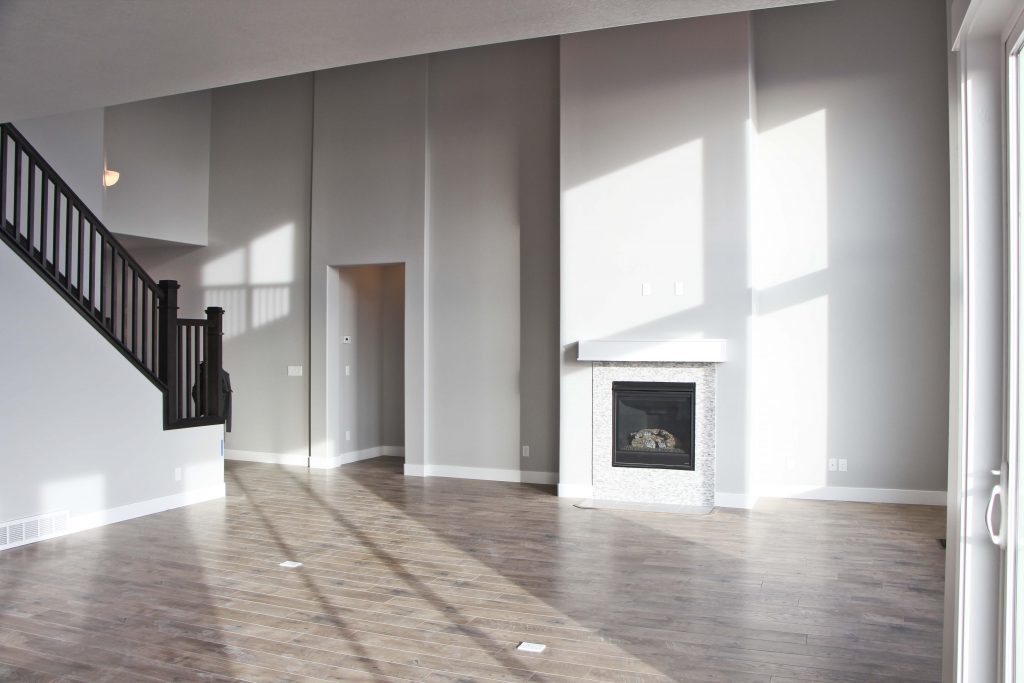
FAMILY ROOM
Before: This is the bare bones before, before we even moved in. You can see none of the wainscoting is done, the door is not framed, the balusters not painted white, the boring mantel.
After
I love how much I have done to this space. I built the built-ins and mantel myself and added tons of wainscoting. This is my favorite space to decorate so it gets updated a lot!
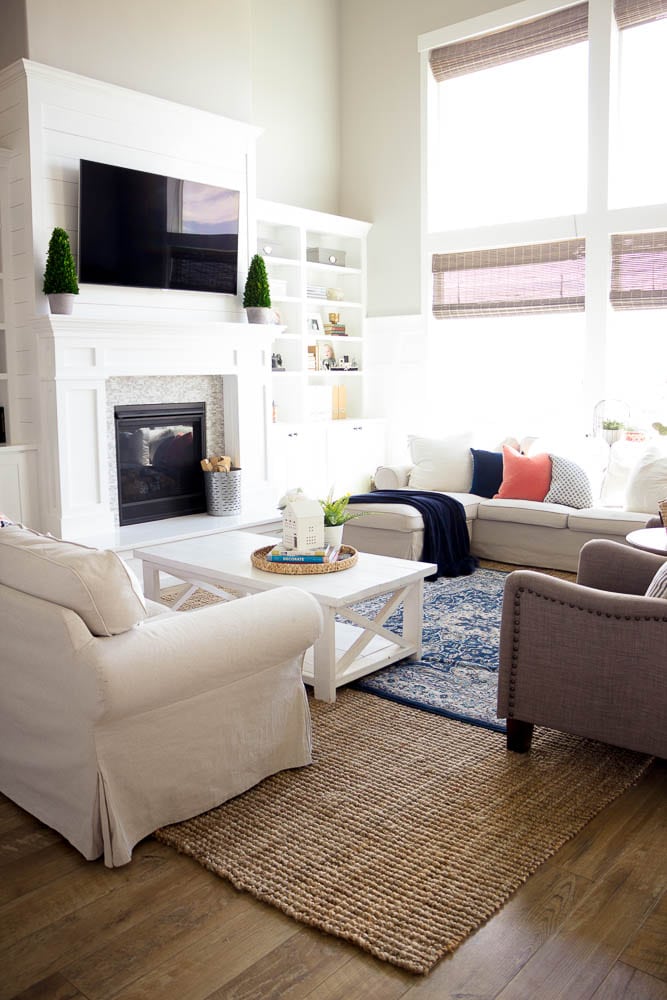
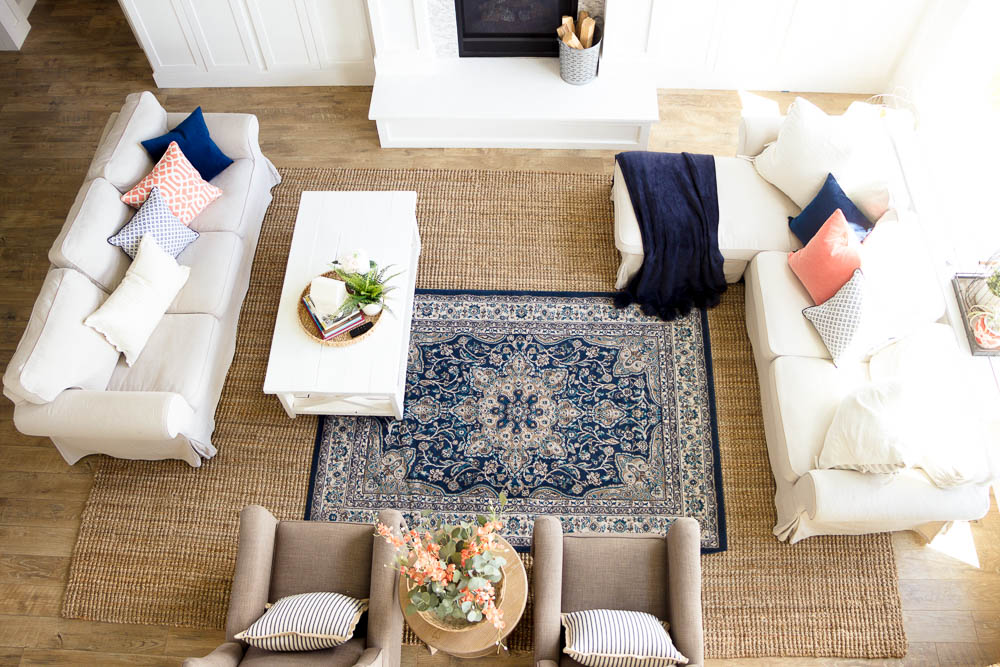
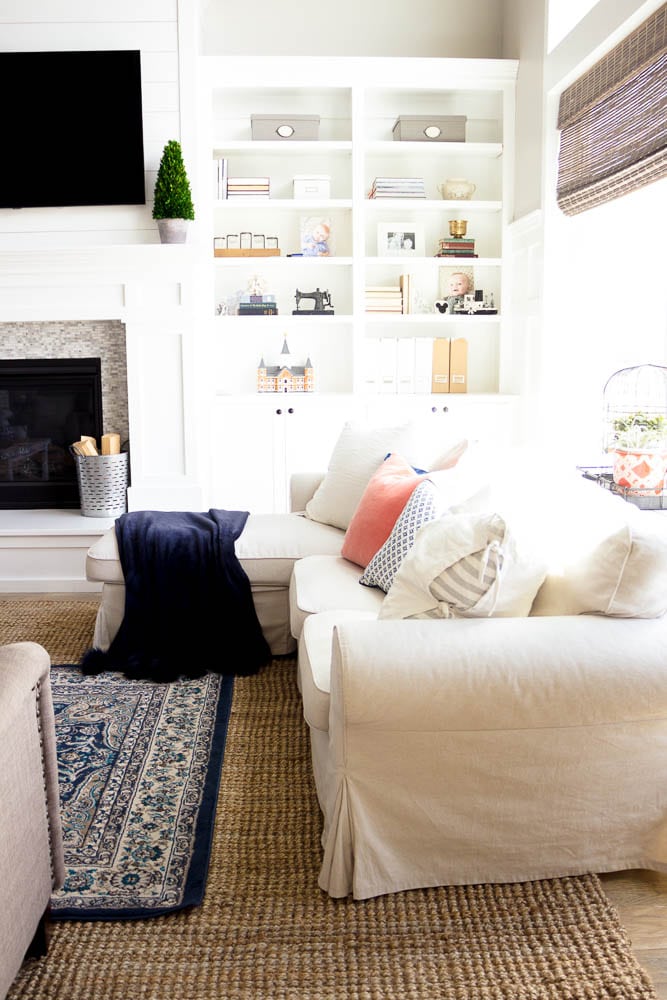
The couches are from IKEA, the jute rug is from Overstock and the blue rug is from Wayfair, the recliner/wing chairs are from BHG at Walmart. The sofa table behind the couch is an old one I built. The small round table is from Home Goods, and the sofa table against the wall is from World Market. I built the coffee table.
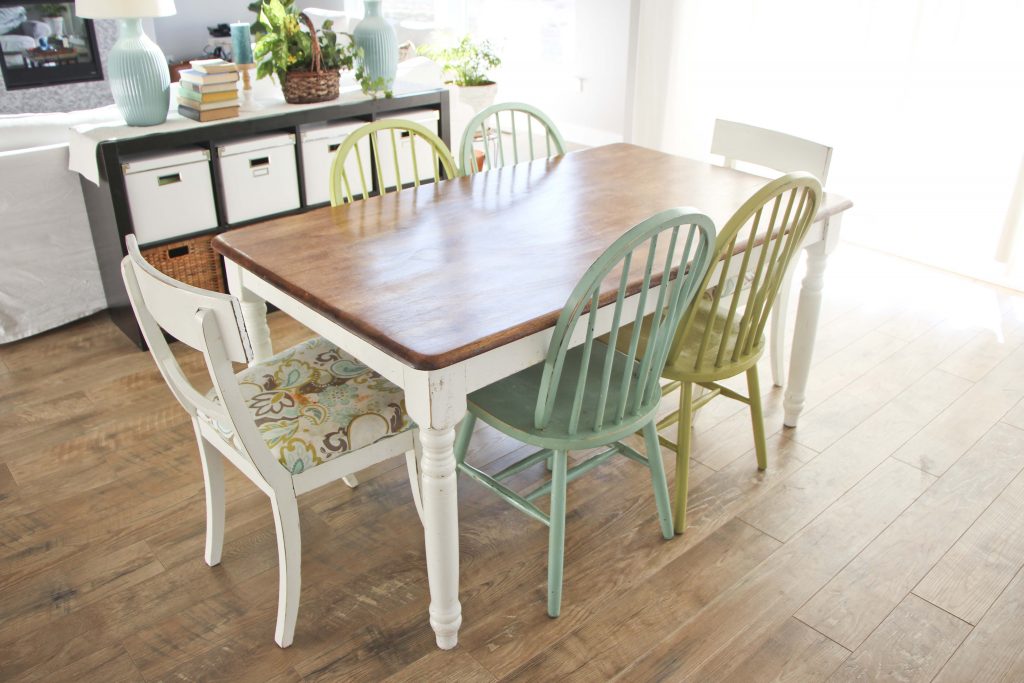
DINING ROOM
Before: Our old old dining set which I’d redone at least three times. You can see the stains on that upholstered chair on the end. Both of those chairs have been refinished/reupholstered and moved to different rooms and I actually painted all the Windsor chairs gray and then black.
After: I built a new table and bench, sewed curtains for the giant sliding glass door, and we replaced the lighting fixture. I also planked the wall where the clock is, hung some shelves, and plan on building a small console to hold china and such. You can see my Windsor chairs here, painted gray, but below they have been painted black.
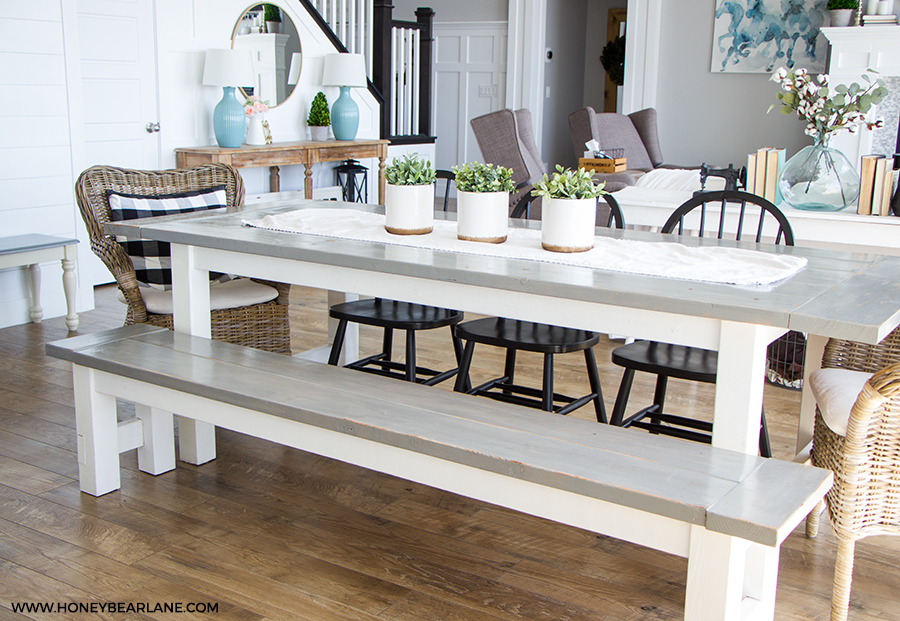
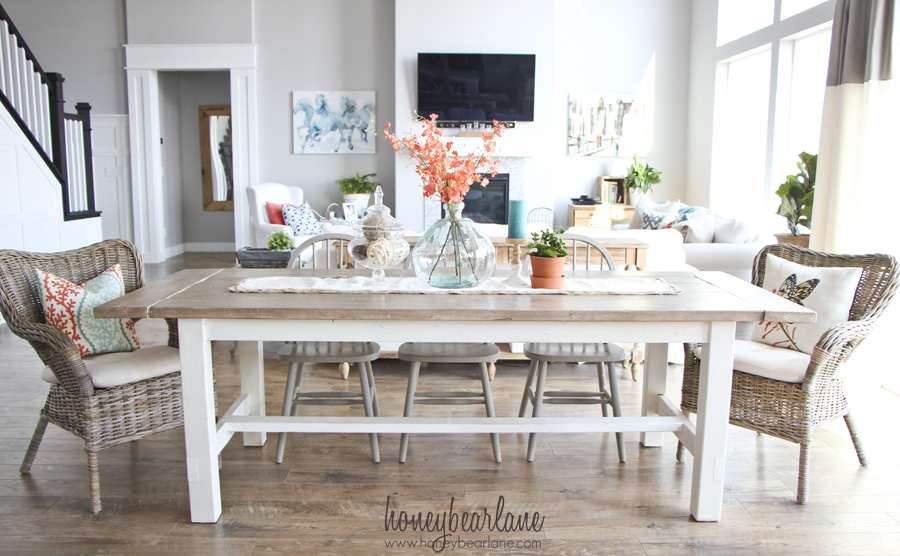 Except that the first finish wasn’t sealed well enough so I refinished it again and here’s what it looks like now (along with several other changes!)
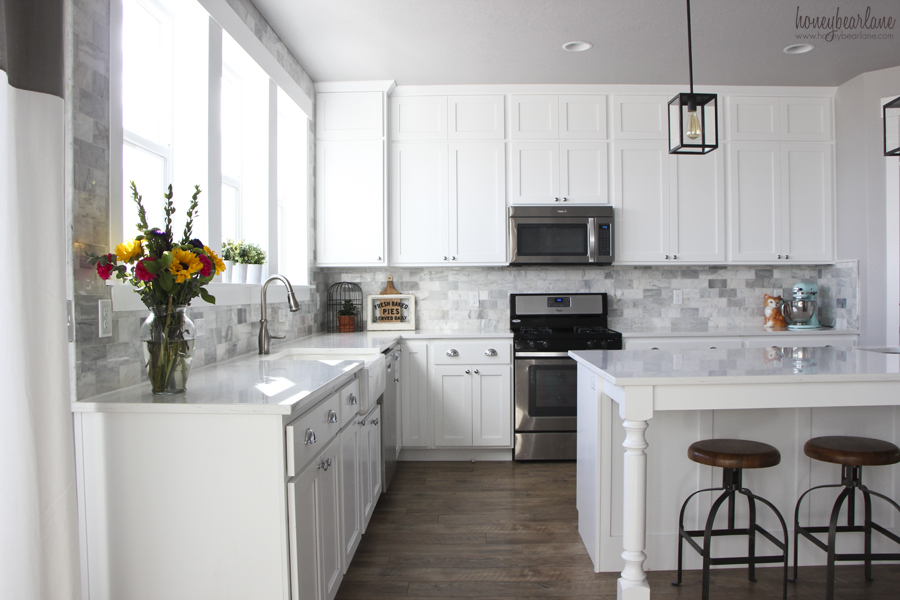
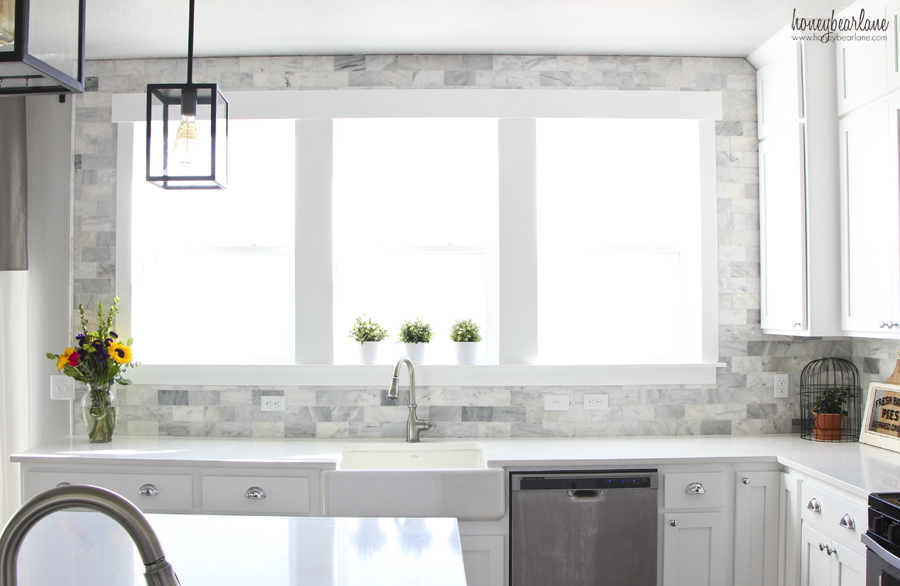
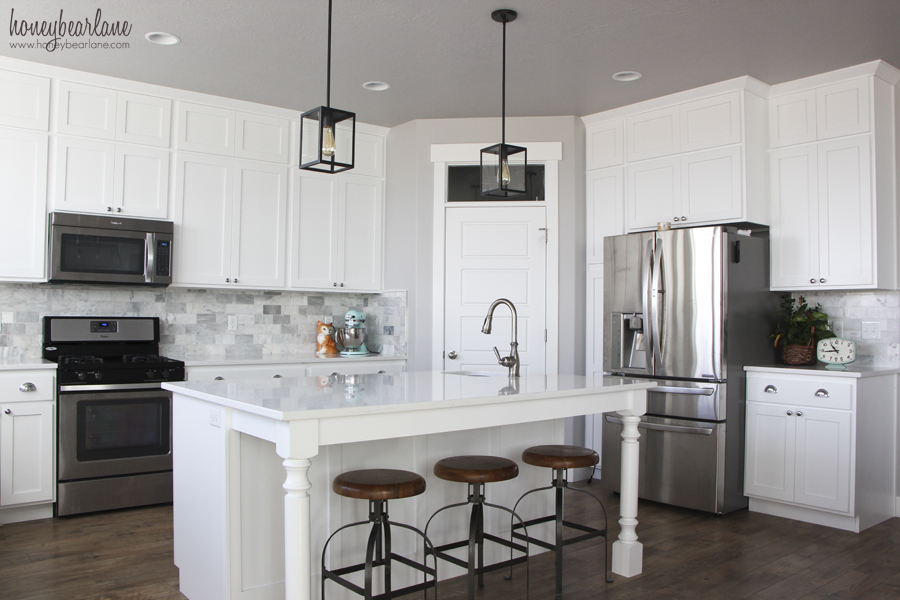
KITCHEN
Before: Again, bare bones, before we even moved in.
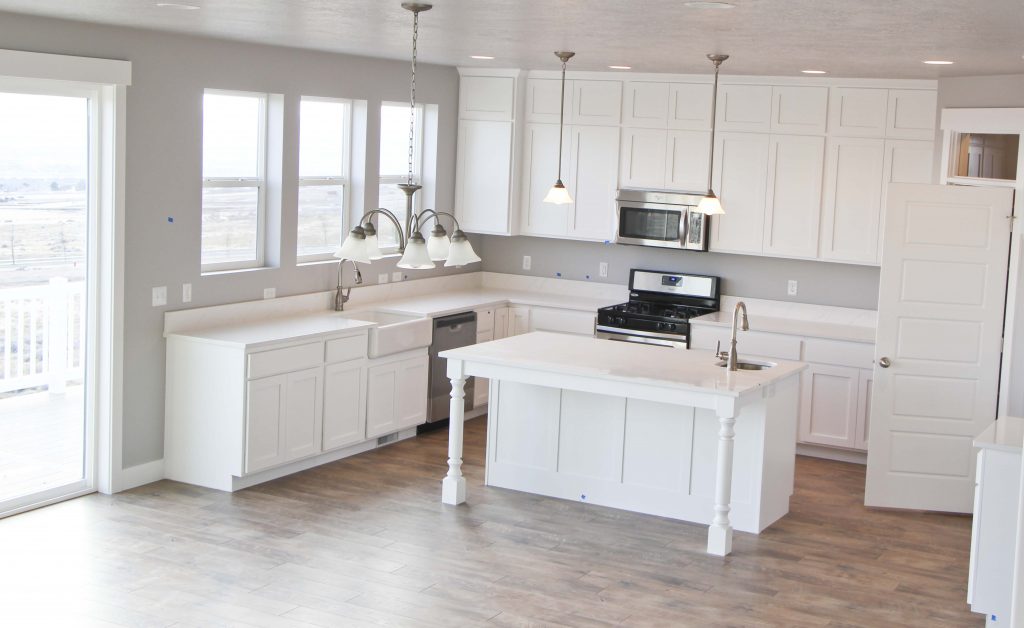
After
We trimmed the window, replaced the lighting, and added a marble tile backsplash. We still plan to replace the upper upper cabinet doors with glass doors, change the cabinet above the microwave to a hood, & move the microwave. And replace the range with a better one.
MUDROOM
Before: Just a blank corner. Not hard to imagine because there was nothing there.
After: I completely built this mudroom bench which has been so nice to have. But it’s still small. Someday, once we become billionaires, we will completely revamp this entire space and make it bigger and more functional. That is one of our biggest regrets in building this house…not rearranging this space to make more sense!

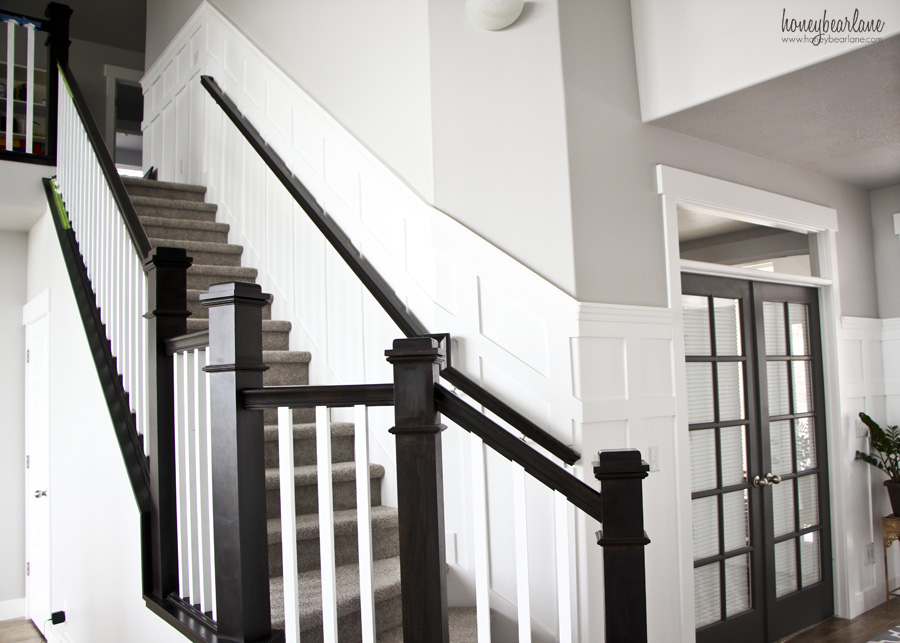
STAIRS
Before: Blank and boring.
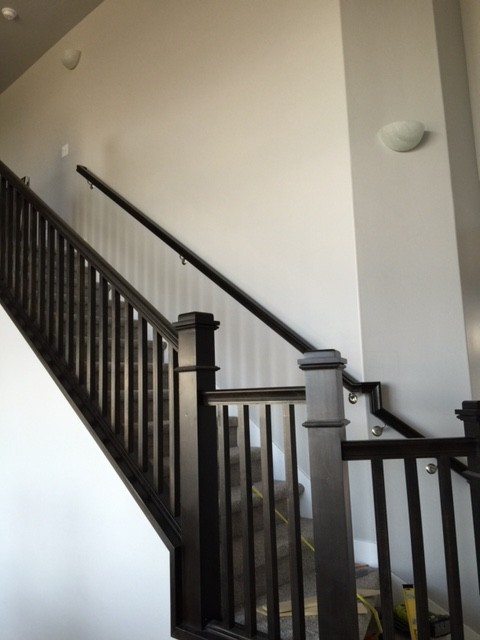
After: It seems weird to me that I made doing the stairs such a priority. It was actually one of my first projects in my house. But I’m super glad it’s done and I never want to do that again because it was hard. I put board and batten all the way up the stairs and we painted the balusters white. Both really hard and tedious projects. We plan on someday ripping out the carpet and replacing it with hardwood treads.
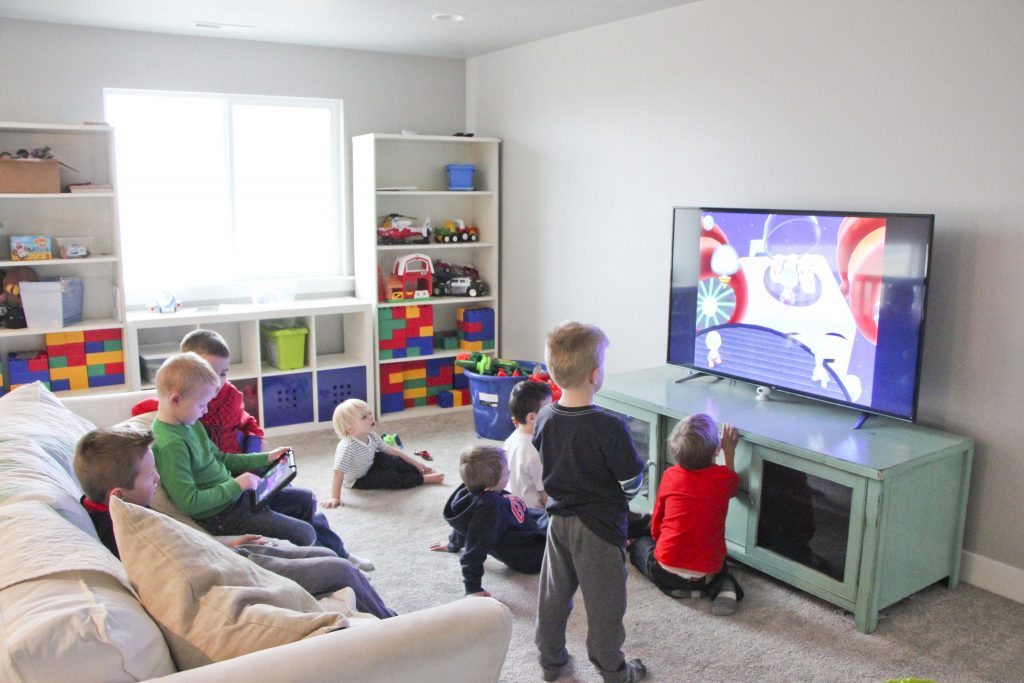
LOFT
Before: This picture was taken at a Disney party I threw last year but it perfectly captures how much this room sucked. Those bookcases wedged around the window, not fitting it well, how awkward the toys were stored, and the big boring TV wall.
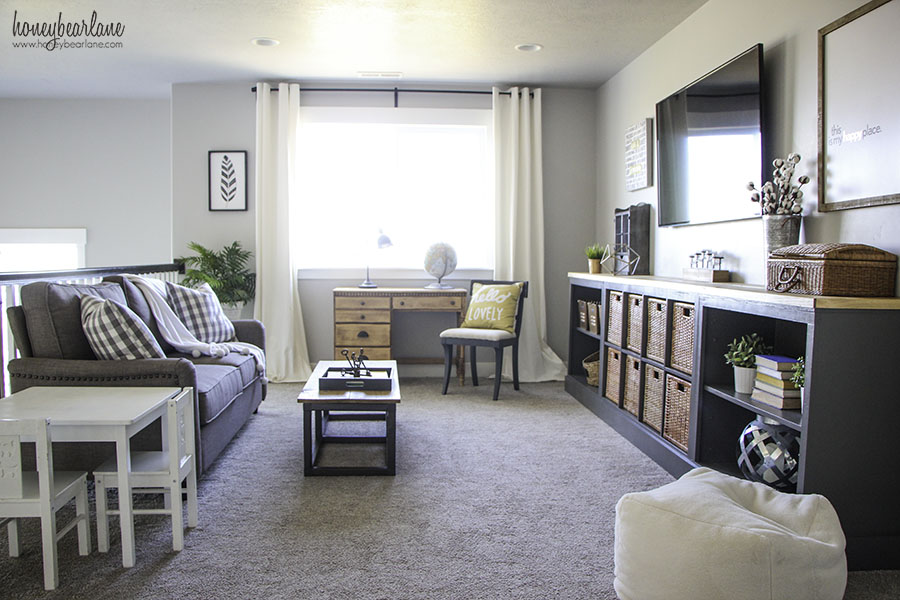
After: We decided to move the TV and couch to the unfinished basement. I actually cut one of those bookcases in half to use as cabinet carcasses and added a face frame and doors to them. I painted all of it, including the IKEA Expedit with a shellac primer so I could paint the entire unit in the Benjamin Moore Kendall Charcoal gray. I raised the unit with a 2×4 frame and screwed them together, finishing off with some baseboard trim. Now it’s a nice little toy storage unit which houses toys and video game stuff. This room is mainly for toys and gaming and hopefully some homework on that back desk. The plans are to someday rip out the carpet and put down matching laminate, build the entire perimeter with cabinets for all my craft storage and make it a craft room/homework room space.
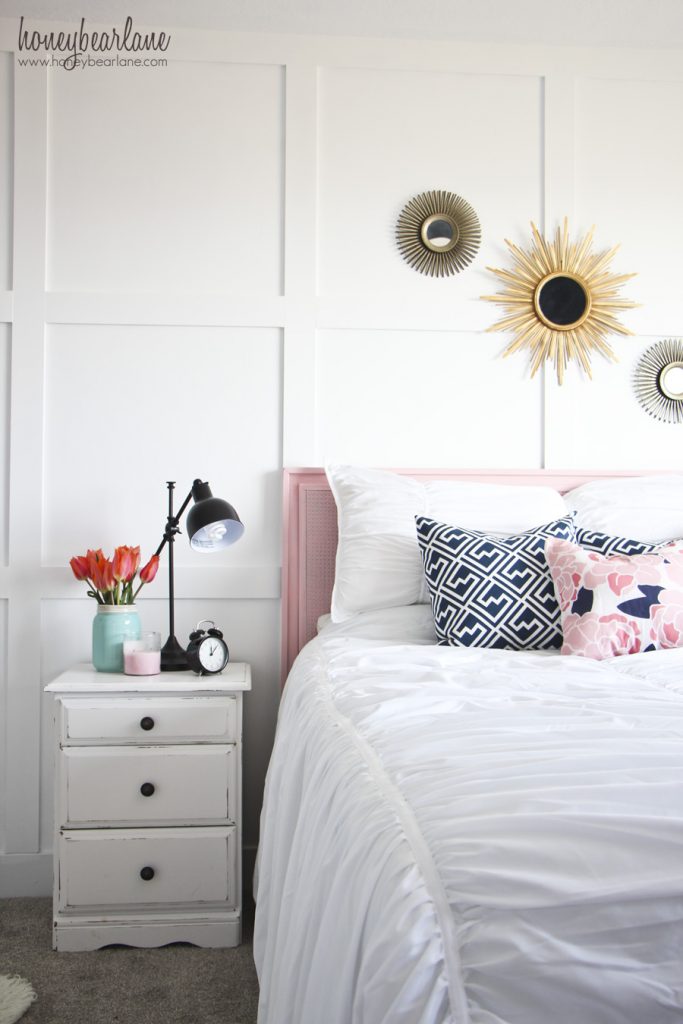
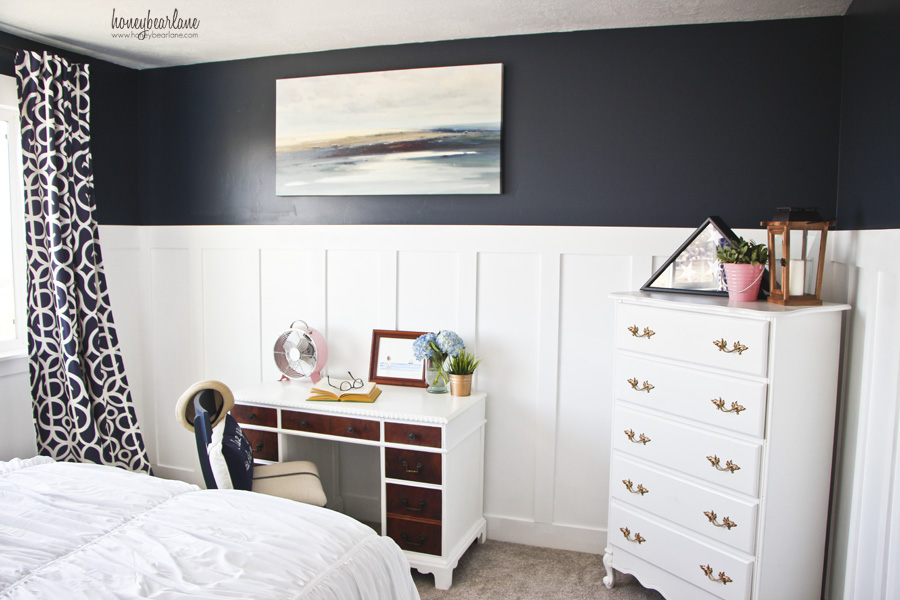
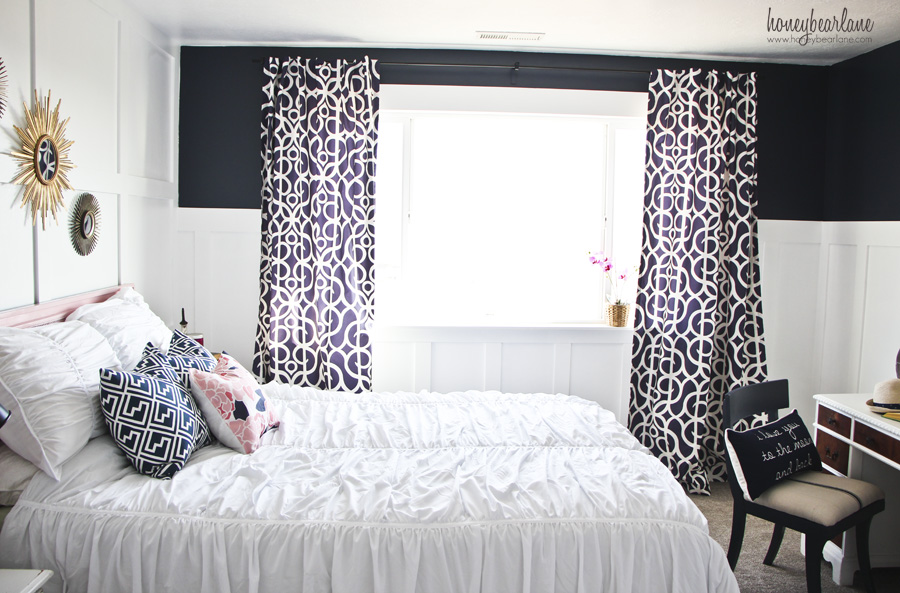
GUEST ROOM
Before
After: I added tons of board and batten and a grid wall and painted the upper part Benjamin Moore Hale Navy. I installed curtains and bedding and other furniture which I’d redone as well as spray-painting the headboard of the bed. This room is now serving dually as a nursery so I’m taking out the pink accents and making it more masculine (since my baby is a boy.)
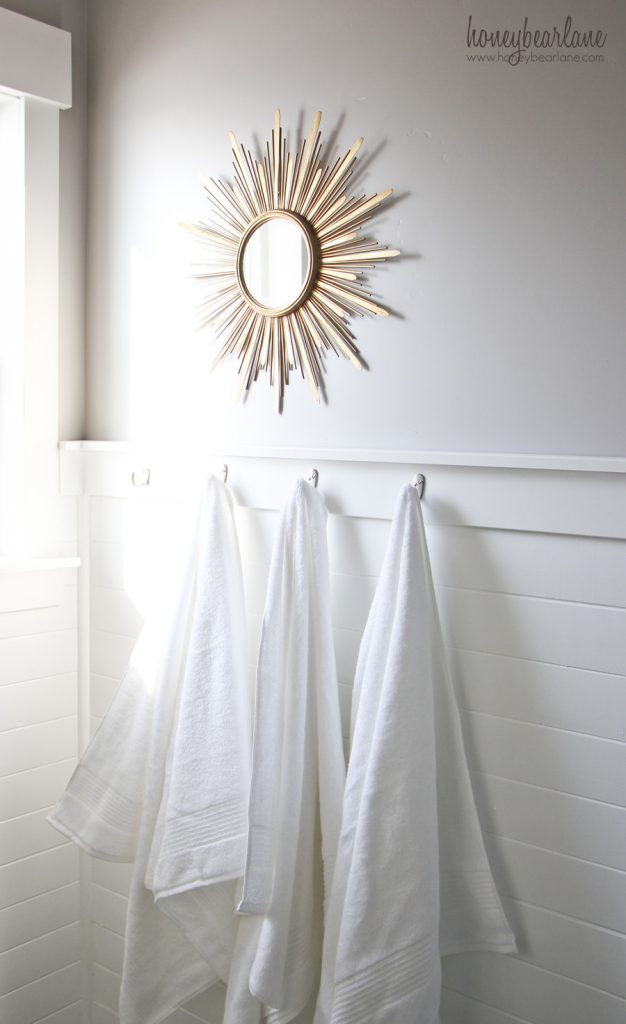
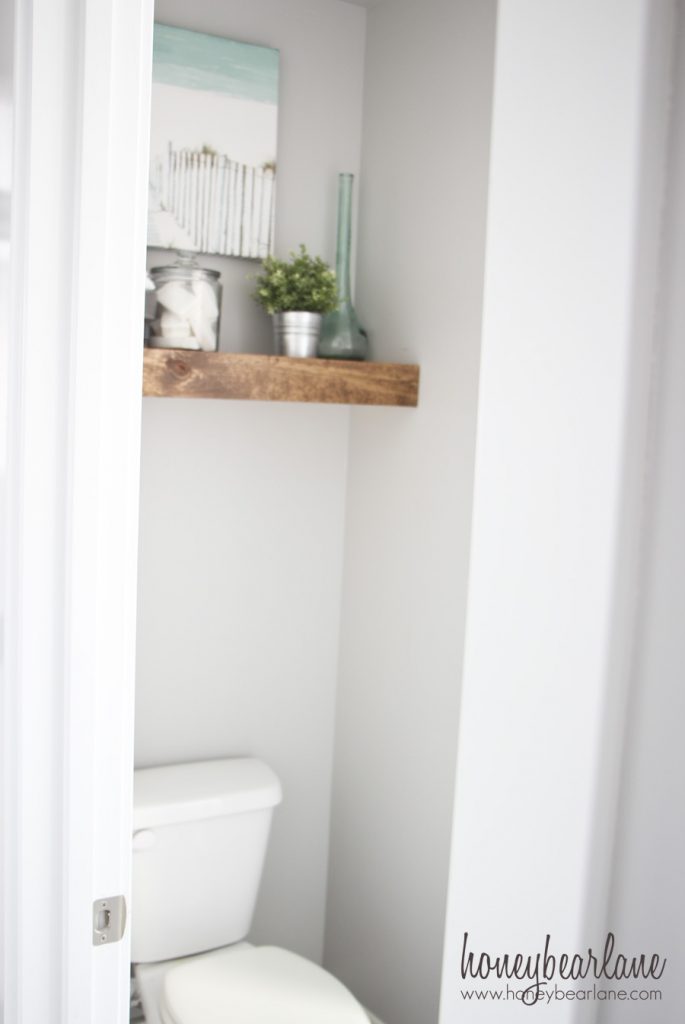
KIDS BATHROOM
Before:

After: I planked these walls and added some floating shelves. I also framed out the mirrors. I’m planning on planking the rest of the walls and someday we will replace the laminate counters with quartz and change out the light fixtures.
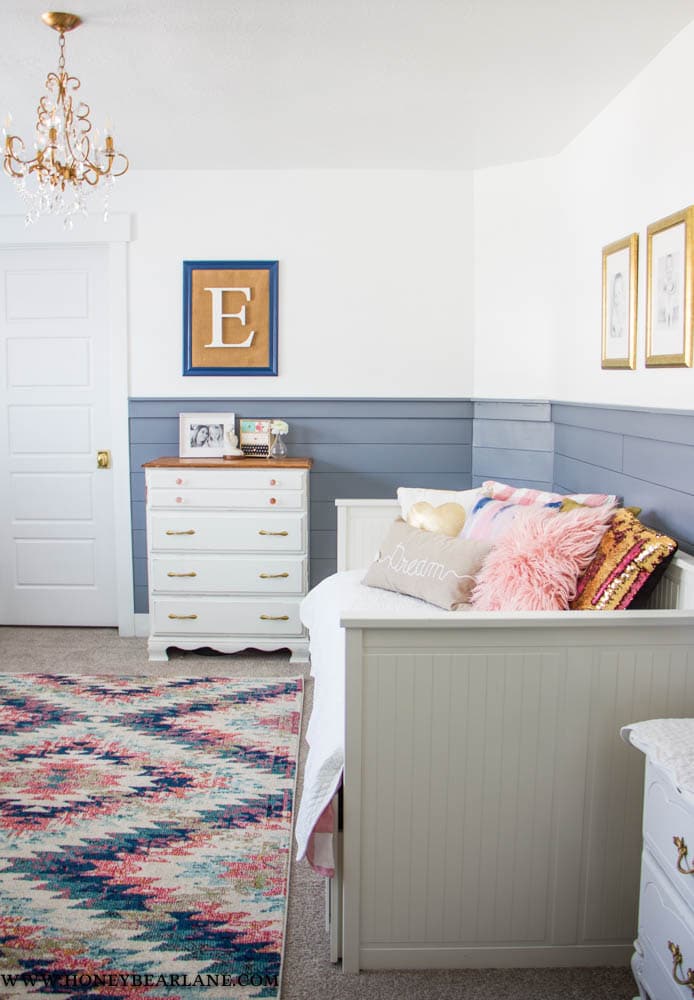
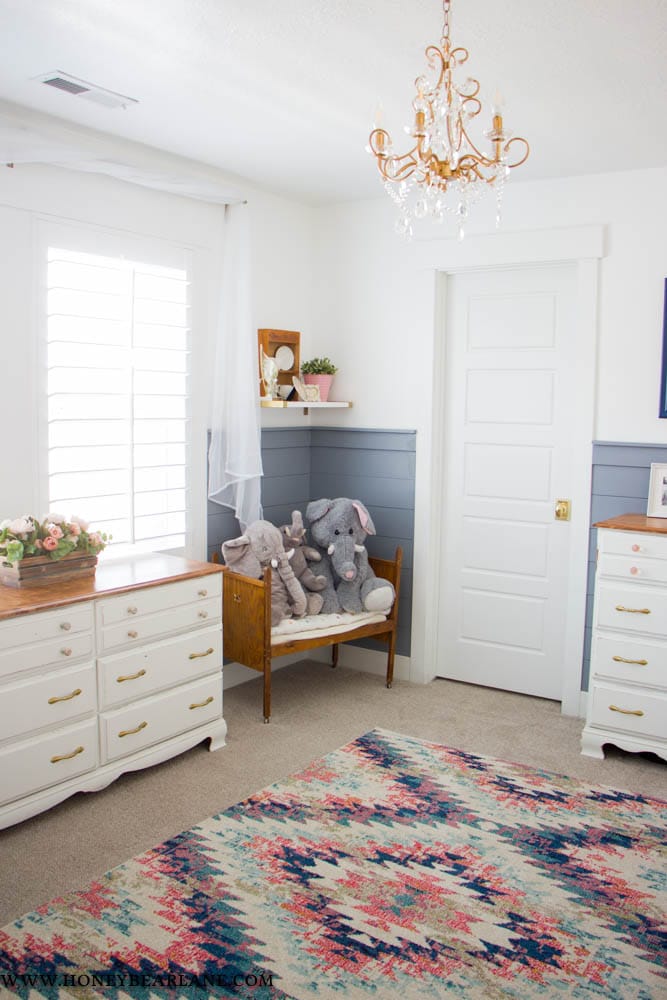
ELLIE’S ROOM
Before:

After: I added polka dots to this wall and tricked out an IKEA bed to make it a custom daybed. I hung curtains as well. Except that this is also out of date because I have since switched my boys into this room and Ellie into another room and neither of the rooms are decorated yet.
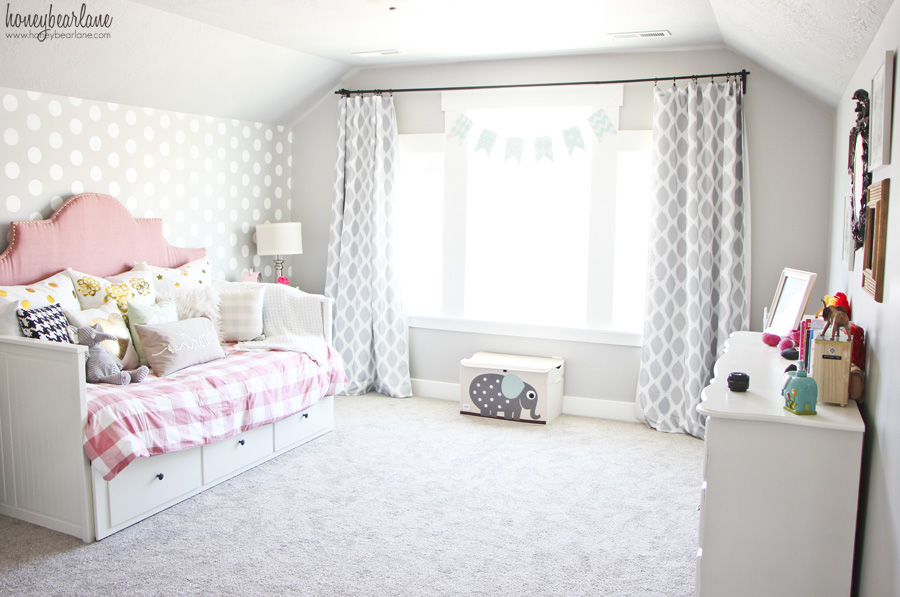
About a year after this was done, I decided to switch my boys room and Ellie’s room. This was better logistically because they were sick of bunkbeds and Ellie’s room was bigger. I did my boy’s room and then I decorated Ellie’s room again in a totally different style.
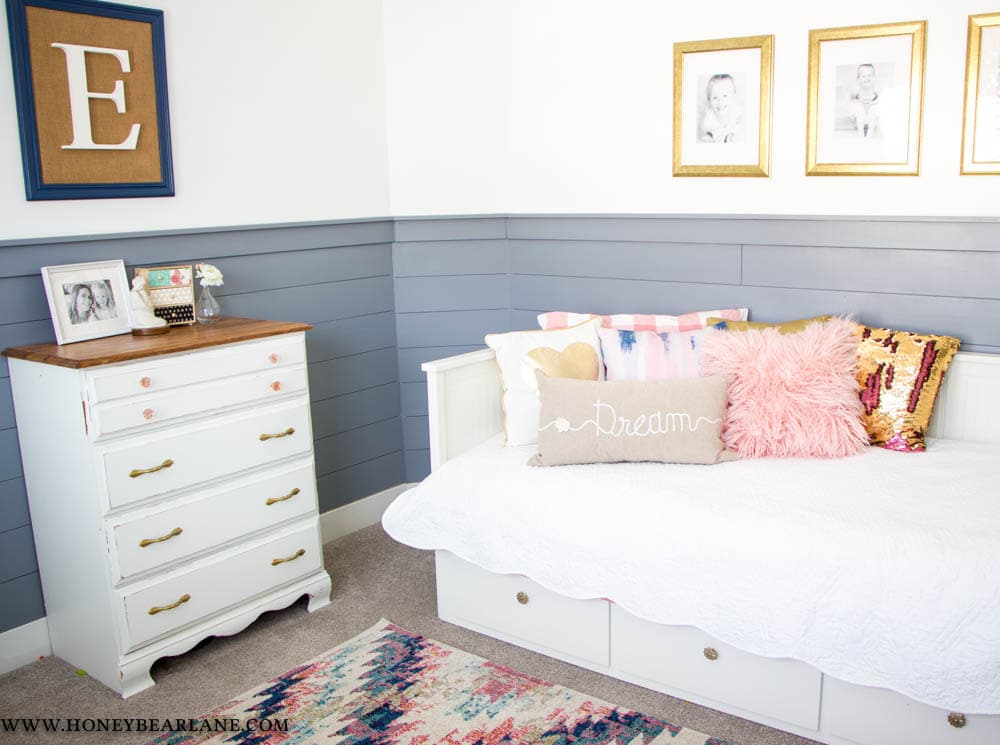
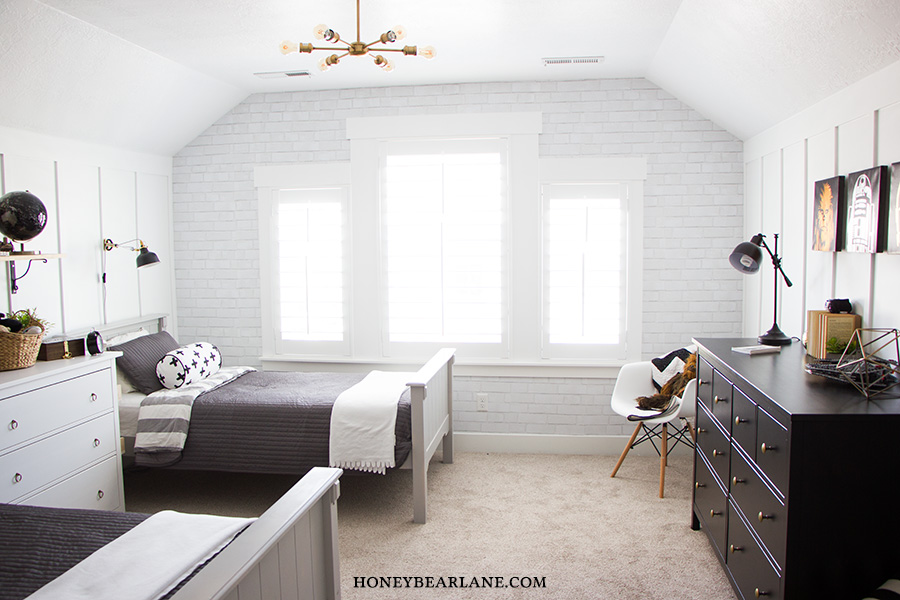
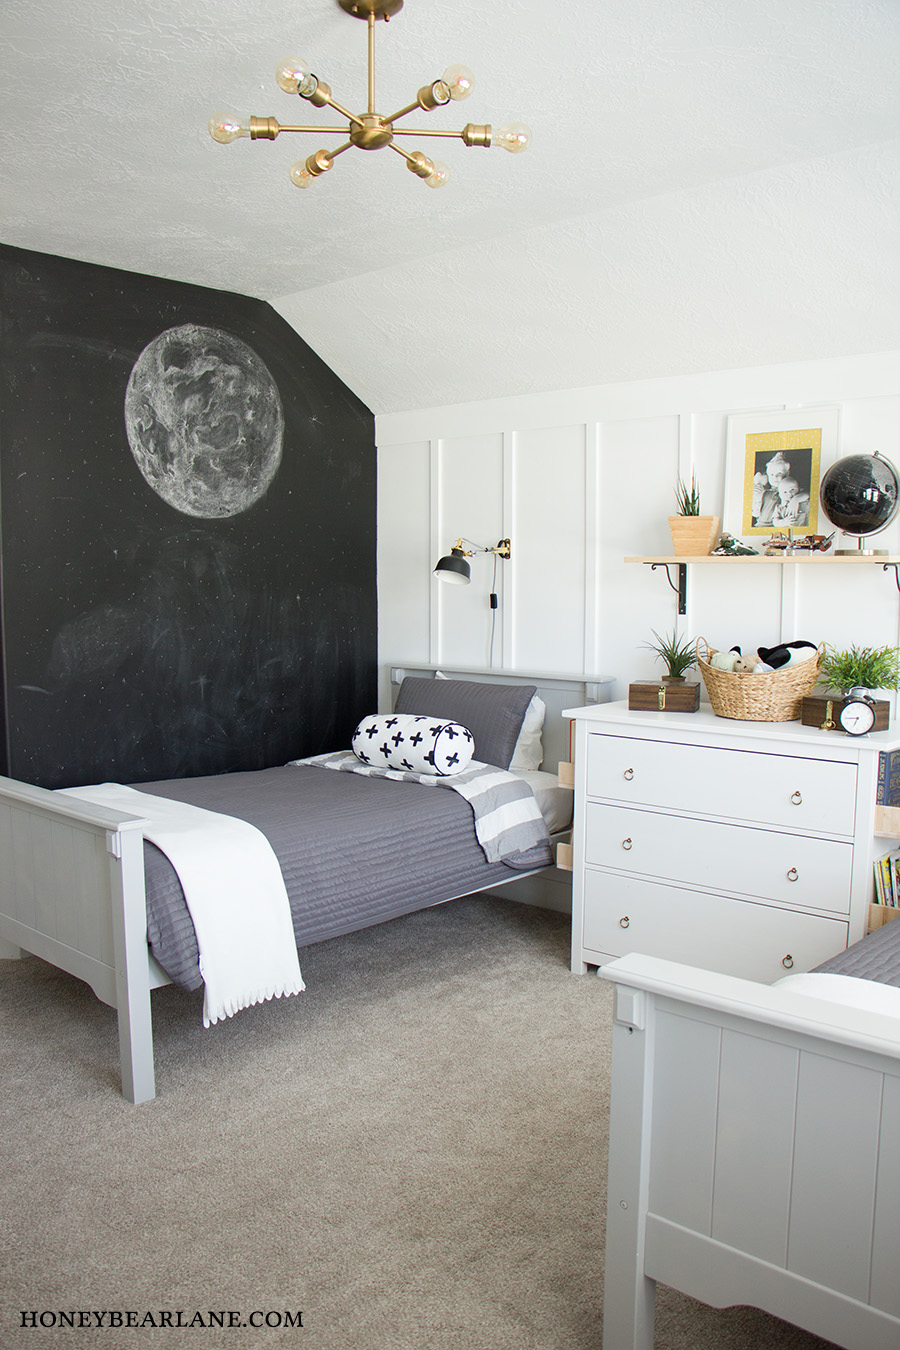
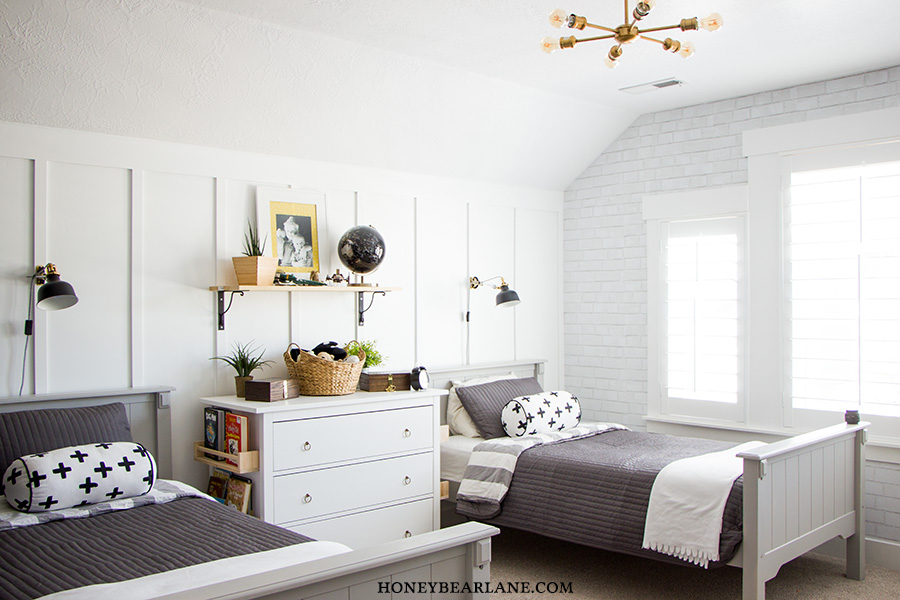
BOY’S ROOM
I did my boy’s room in a farmhouse industrial style with a space theme. This was a fun room to decorate–if only they would keep it looking this nice all the time!

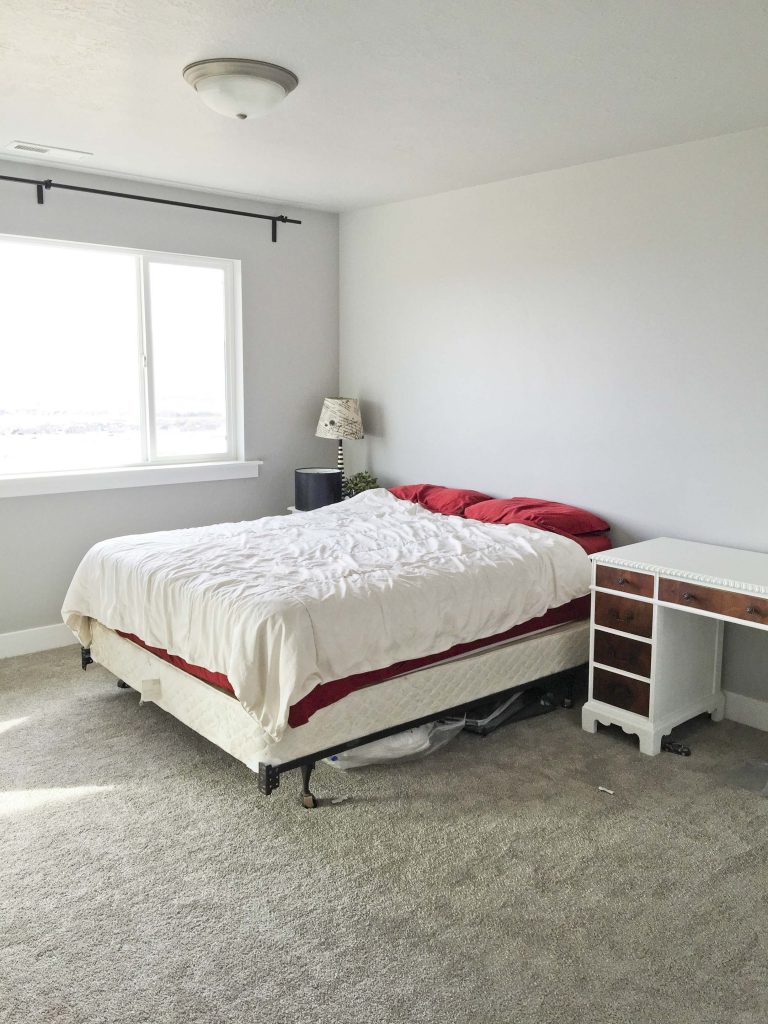
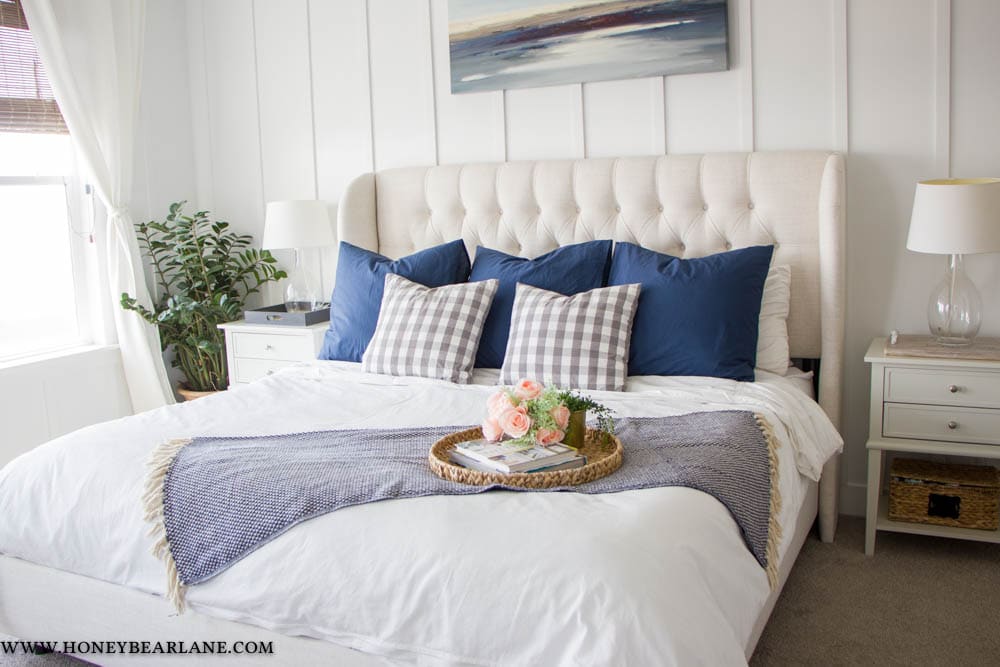
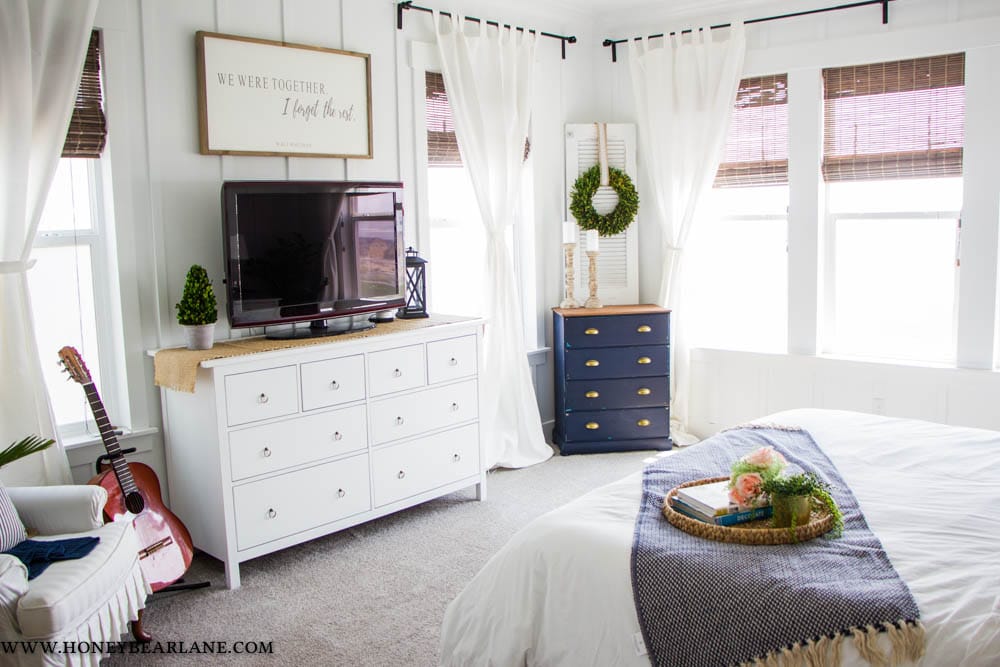
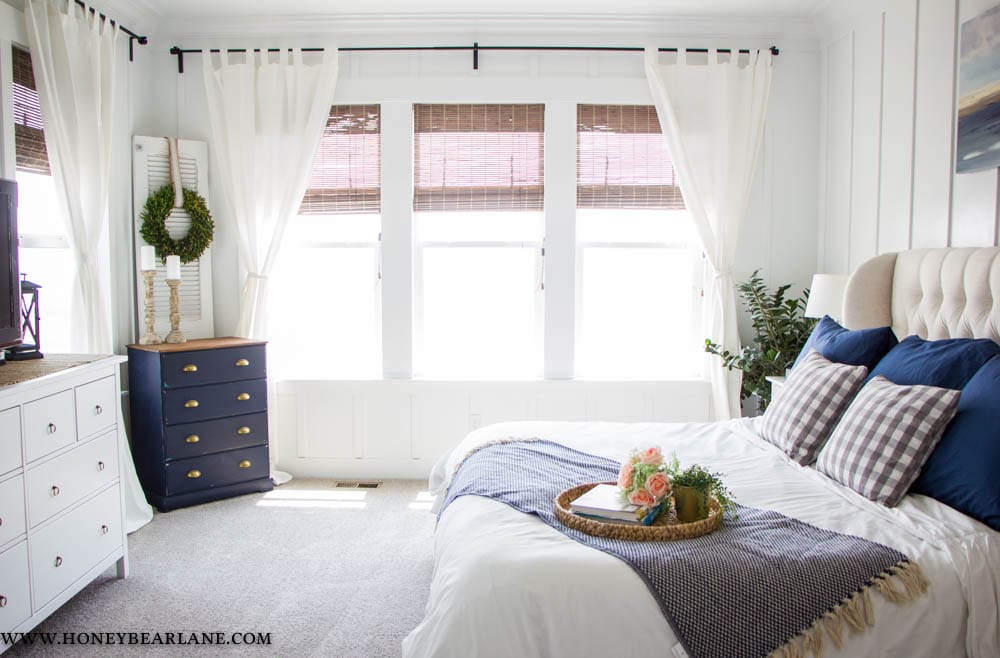
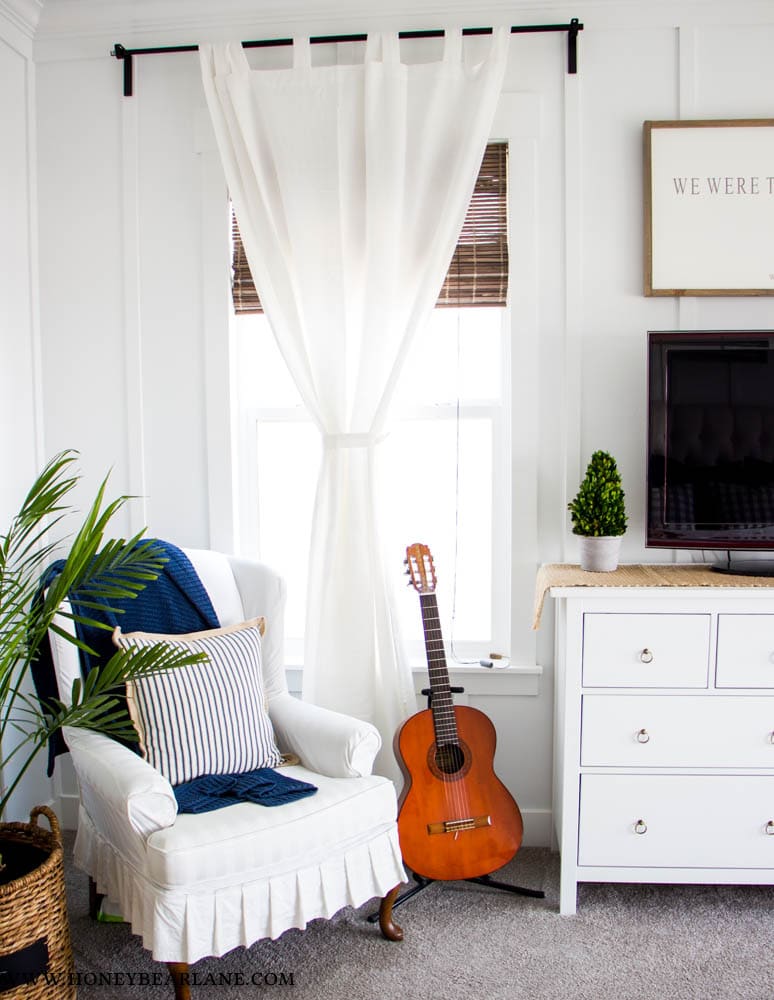
MASTER BEDROOM
Before:

After: I did board and batten on all 4 walls and crown moulding. We switched the bed to be on the other wall because we upgraded to a King size bed and it didn’t get between the windows. I hung curtains which still need to be hemmed! I love the beach vibe in this room, it feels very summery and relaxing. I still have some other things to add, like doing the tray ceiling and replacing the closet hall door with a barn door. Eventually we will also do something about the TV eye sore.
Master Bathroom
Before: I can’t seem to find a good before picture for this room.
After: This is another low priority room but it’s another room where I keep changing my mind about what I want to do. I’m seeing subway tile and round mirrors.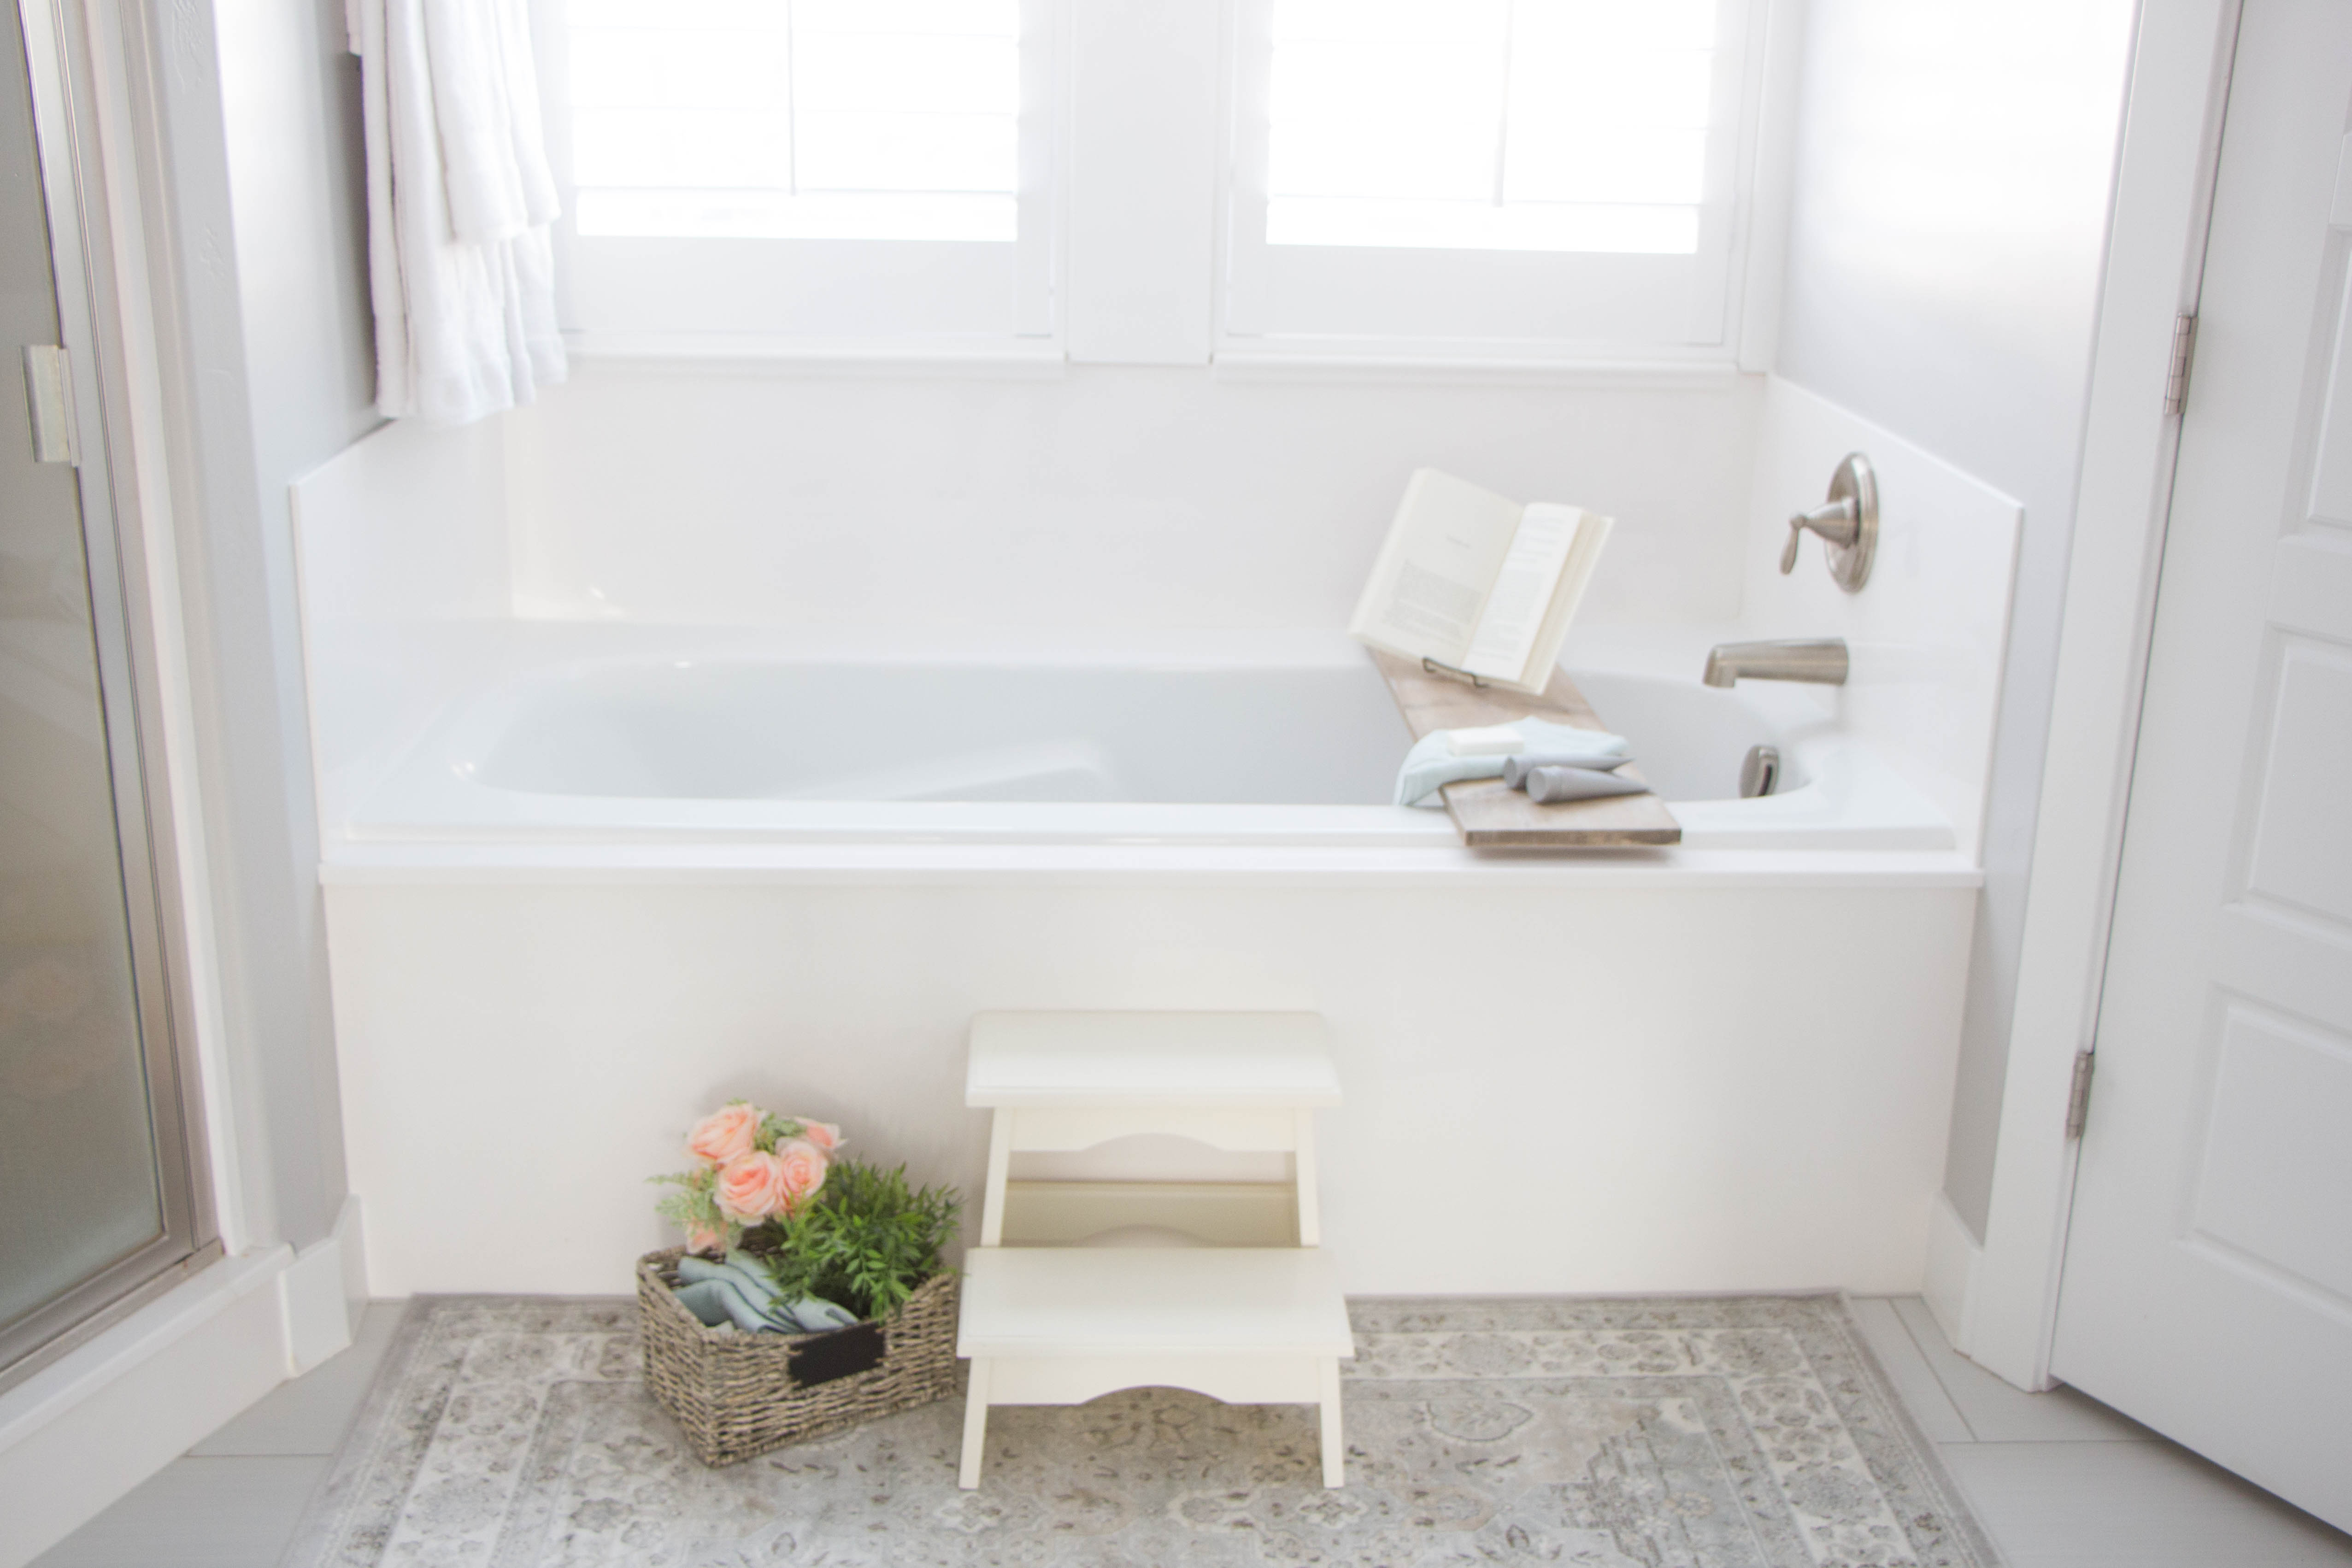
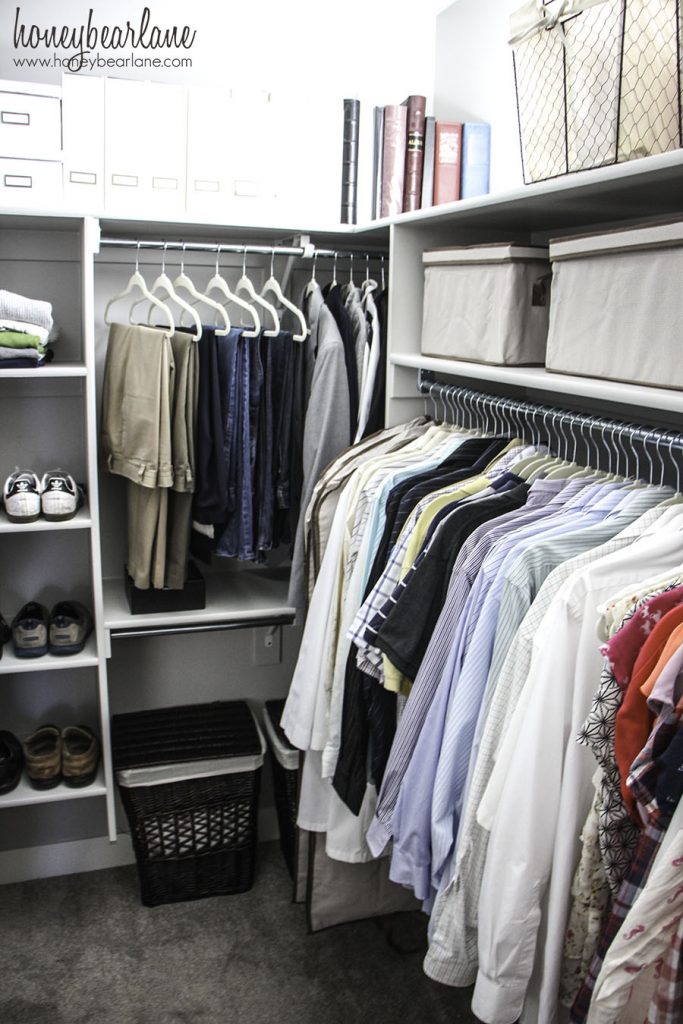
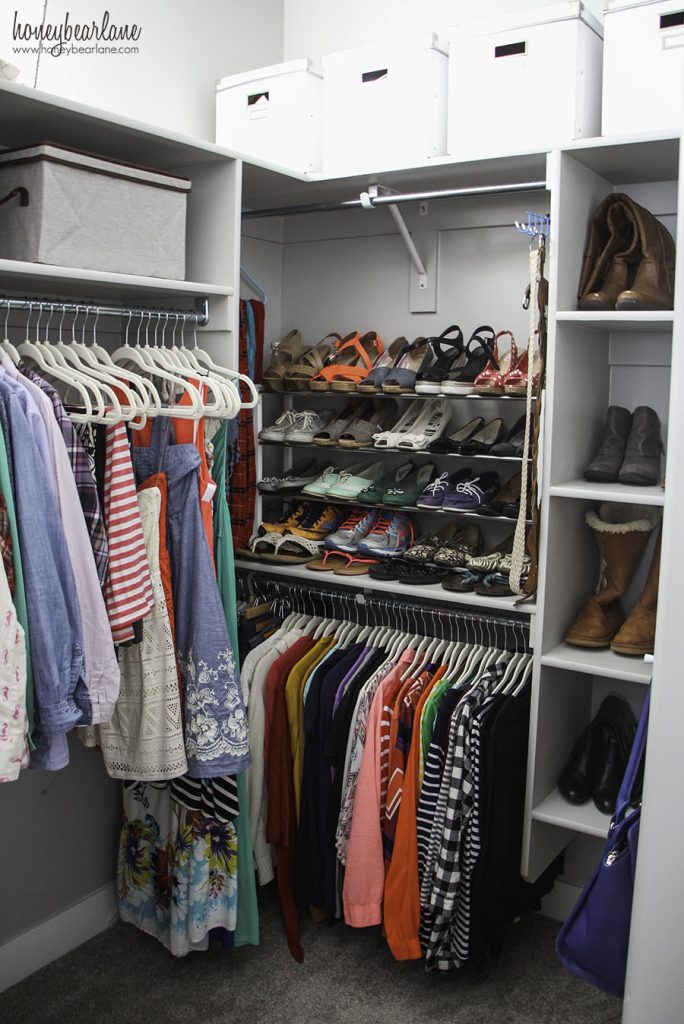
Master Closet: This is really low on the priority list but I want to trim out the doorway and paint this room white and add some more custom organization options (drawers and whatnot). In the meantime we moved all of the extra stuff that was in there and organized it really well.
The basement is unfinished right now but my plan is to finish it next year. We also have a major laundry room remodel planned because we’ve always hated the layout of the laundry room so walls will be removed.
When you build a house there are just a bajillion things to do, especially when you have more high-end tastes like me. But it’s been a fun journey so far!
Heidi, you have done such a wonderful job making your house into a lovely home. I am so impressed by all of it!
Great job!
Thank you SO much!
Wow …I love the before and after pictures. All of the moldings you added really do look amazing!
Great job Heidi ! My question is what did you do to the top of the dining table (2nd pic) ? Thanks!
Hi Diana! I created a new painted weathered wood look which I also posted about recently.
I’m changing my wall color from yucky brown to gray. What color sdid you use for your walls and trim?
My gray is called Passive Gray by Sherwin Williams and the white is just ultra white.
I just found your site, and happy I did, because I am loving what I see. Beautiful home. By the way, can you please tell me how you get your hubby to keep his closet so neat and clean?
He doesn’t! This picture was taken right after I cleaned and organized it…it’s a daily battle haha!
Amazing Job Heidi!!! You did turn the house into a warm and lovely home! I also enjoy the before and after pictures!
Decorating, and refurbishing are a passion of mine, so thanks for posting your home makeover!
Thank you so much!
Hi Heidi,
I really like the changes you made in your home – beautiful! I like the paint color in your family room. What brand/color is it?
Thanks in advance.
Thank you! The gray paint color is Passive Gray by Sherwin Williams.
After three months of searching and deliberating I am placing an order for these floors all because of your blog. Thank you for sharing all these beautiful photos.
Yay! So excited for you! Thank you!
Your home looks amazing! Can I ask where you bought your new headboard?
Thank you so much! I bought it at One King’s Lane. It’s a full bed but I think they sell the headboard separately.
Can you tell me about the flooring in your entryway?
Read this post: https://www.honeybearlane.com/2015/10/why-i-chose-laminate-flooring.html
I’m blown away by everything you have done to your house. You definitely have an eye for decorating also. It is classy and beautiful. I would like to make the built-ins (with husband’s help). Is it smart to save time and just by the pre-made cabinets from Lowe’s for the base of the built-ins?
That is something I considered for a very long time before I built my cabinets. I was intimidated by building cabinets so using pre built ones seemed easy. In the end I just didn’t like the construction of the Lowe’s cabinets, they were held together with staples and I wanted to know that my cabinets were sturdy. I was really glad I did build my own because it was such a valuable lesson in building which I have used over and over and took my skills to the next level. Just something to consider!
Love the floors? What kind are they? Have they held up well?? Thanks!!
I wrote a whole post about my flooring here: https://www.honeybearlane.com/2015/10/why-i-chose-laminate-flooring.html
I love your style and your home! Beautiful job! Do you happen to know what kind of flooring you have? I love it!
Thanks! It’s Mannington Historic Oak Laminate in Ash.
What are the door and window trim dimensions?
Heidi, I love your decorative touches to your home. It looks lovely.
Can you please tell me where you purchased the frames with slide-out baskets that are shown in the craft room, under the table?
Thanks.
I love the look and feel you have throughout your house! Can I ask where you got your dining room wicker chairs? Did you purchase those online or just locally? What color are they?
They are from IKEA! They are a weathered brown/gray. I love them and they are VERY comfortable.
I LOVE your backsplash!!! What is the name/manufacturer of it? Thanks 🙂
I’m not sure but we bought the tiles from Lowes.
What did you use for your craft room table tops and wire baskets underneath? I am trying to decide how to turn a small guest room into my craft room(embroidery and Cricut machines)?
Got them both at IKEA
WOW. Just wow. I found your site originally on Pinterest after I saw your office built-ins. I am just in complete awe that you have transformed your home so dramatically with your own hands. Coming from someone who doesn’t know how to build ANYTHING, I am so impressed that you have done this all by yourself with all those kiddos. It is stunning and the craftsmanship is impeccable.
Thank you so much!!
hi, i’ve just discovered your site and really love your design.
do you give notice emails if you have new ideas on your site?
regards,
r
Yes, you can sign up for my email list!