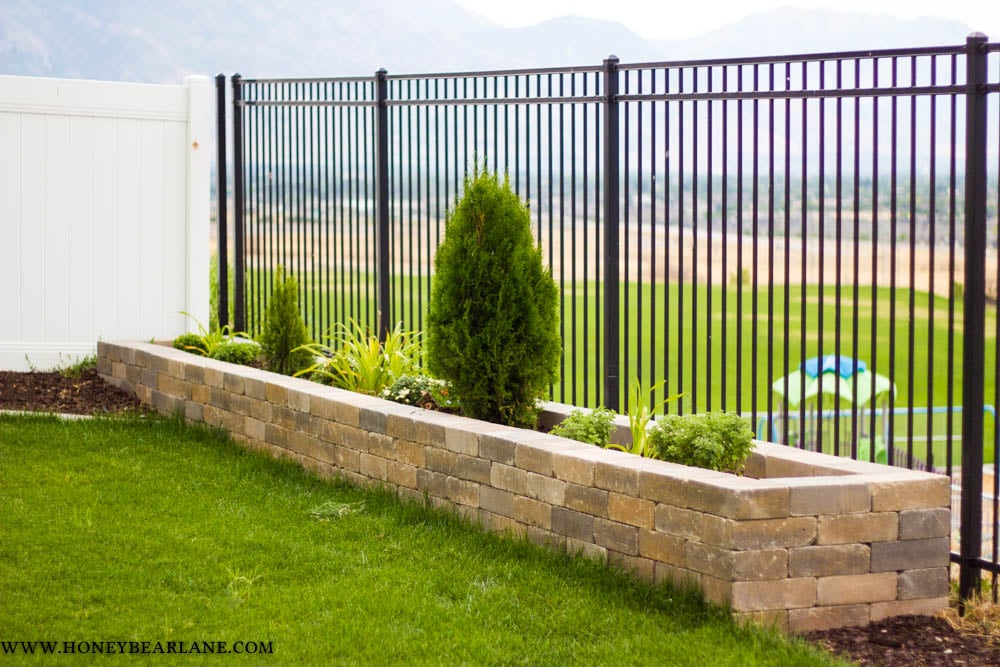
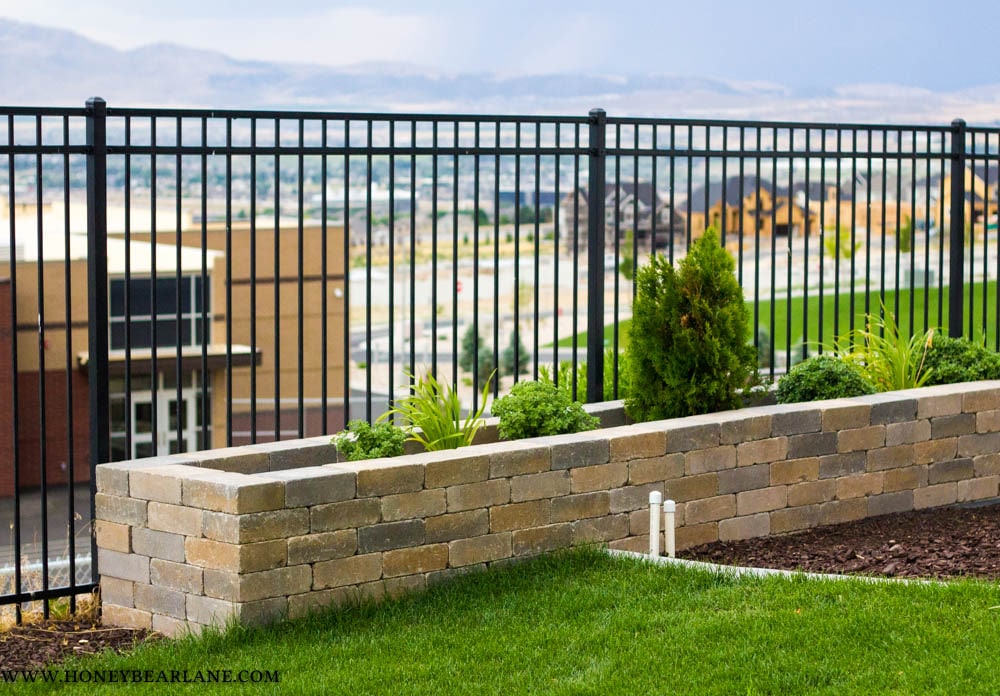
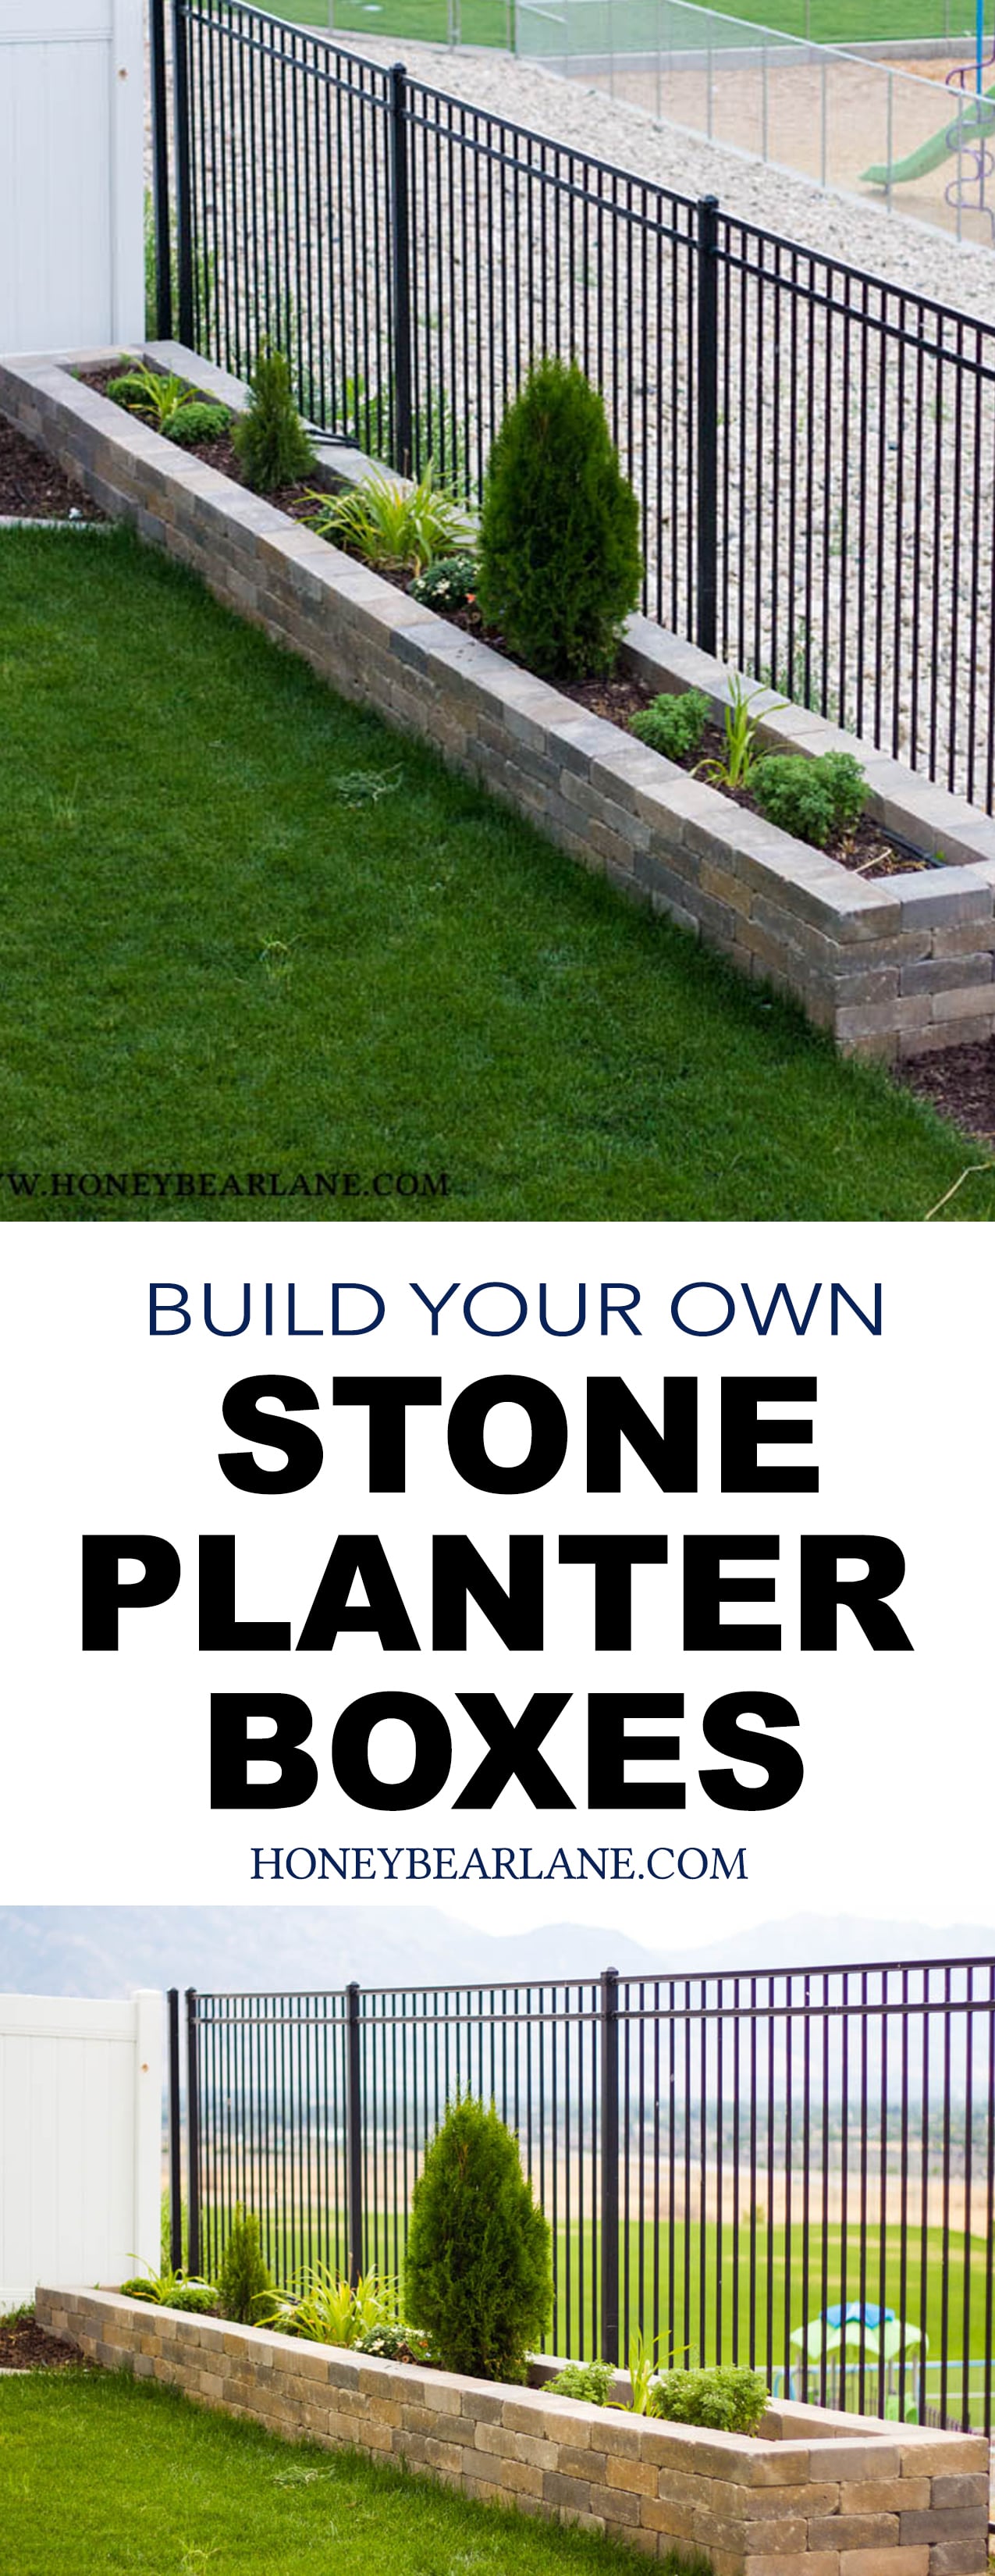
DIY Stone Planter Boxes
Last fall we finally finished our back yard. It took us a long time because wanted to built some DIY stone planter boxes. This was a big project that took us a long, long time. We actually bought the stone a couple years ago and the bricks sat like castle ruins in our backyard for about nine months. It made a great home for hornets. I’ve been waiting forever to finally share the photos of a pretty back yard!
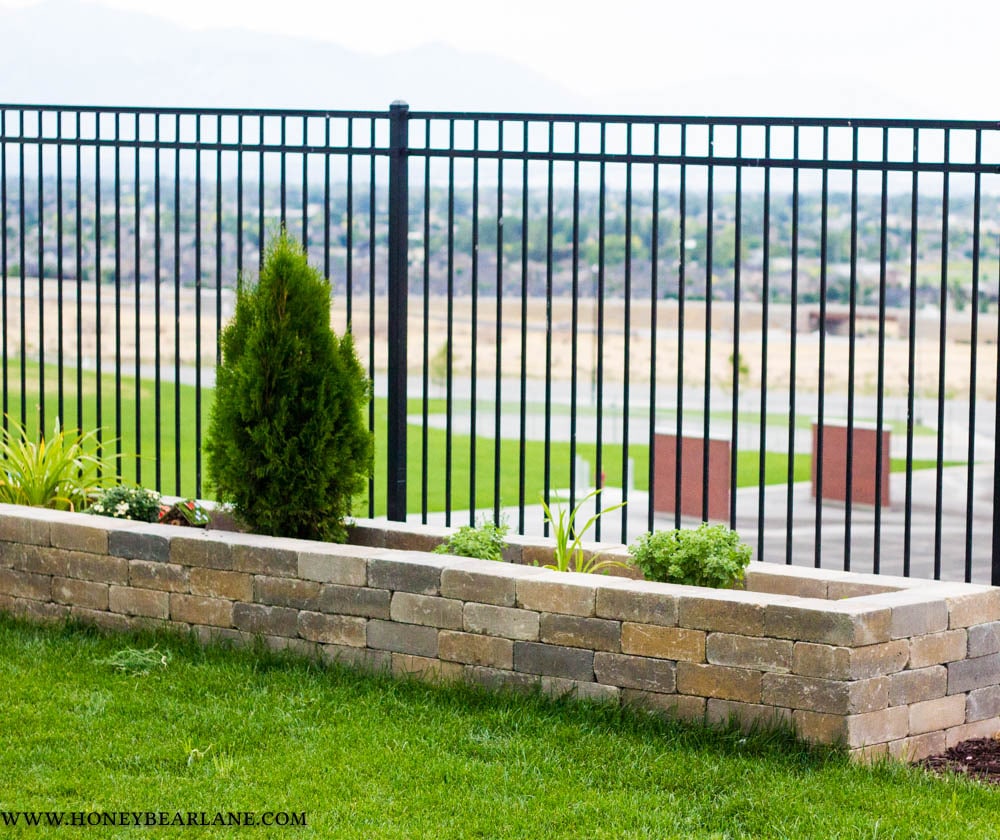
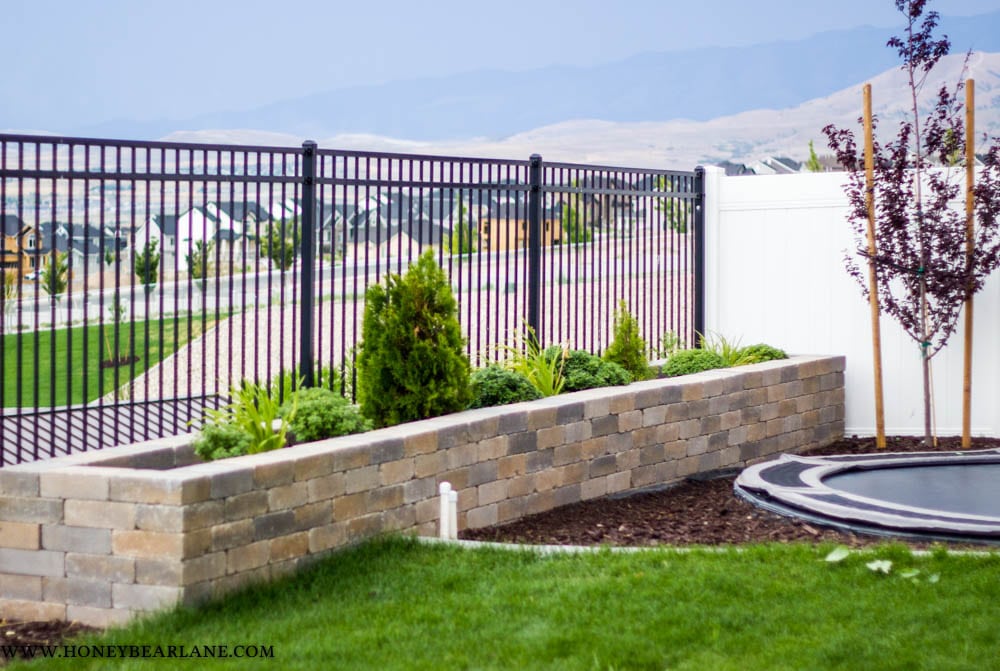
I’m super happy with how they turned out though. It made all our hard work worth it. We haven’t completely filled them in with plants yet. Planting a beautiful garden can take years, kind of like decorating. You add in plants here and there and watch how they grow and fill out. Some work and some don’t. And you want plants that flower during different times of the year so you have beauty all year round.
We went back and forth for a long time between building the planters out of stone or out of weather-resistant wood. Wood would be cheaper, but not hold up over a long time, especially with some of the raging weather we get in the winter. Stone seemed to be so expensive though. But luckily, we found this stone place about an hour away and we drove out and looked in the clearance yard. There was a ton of stone that was kind of ugly and labeled as $1 each. I learned that they could tumble the stone for us and by doing this it made it look a lot prettier. They tumbled about half our stone for an extra $1 per stone. My husband did some serious math in calculating how many to buy and how many to get tumbled. Then we paid for it to be delivered. They set it on the driveway, so then my husband lugged them all to the backyard in a wheelbarrow–which was quite the workout! There they sat for nine months.
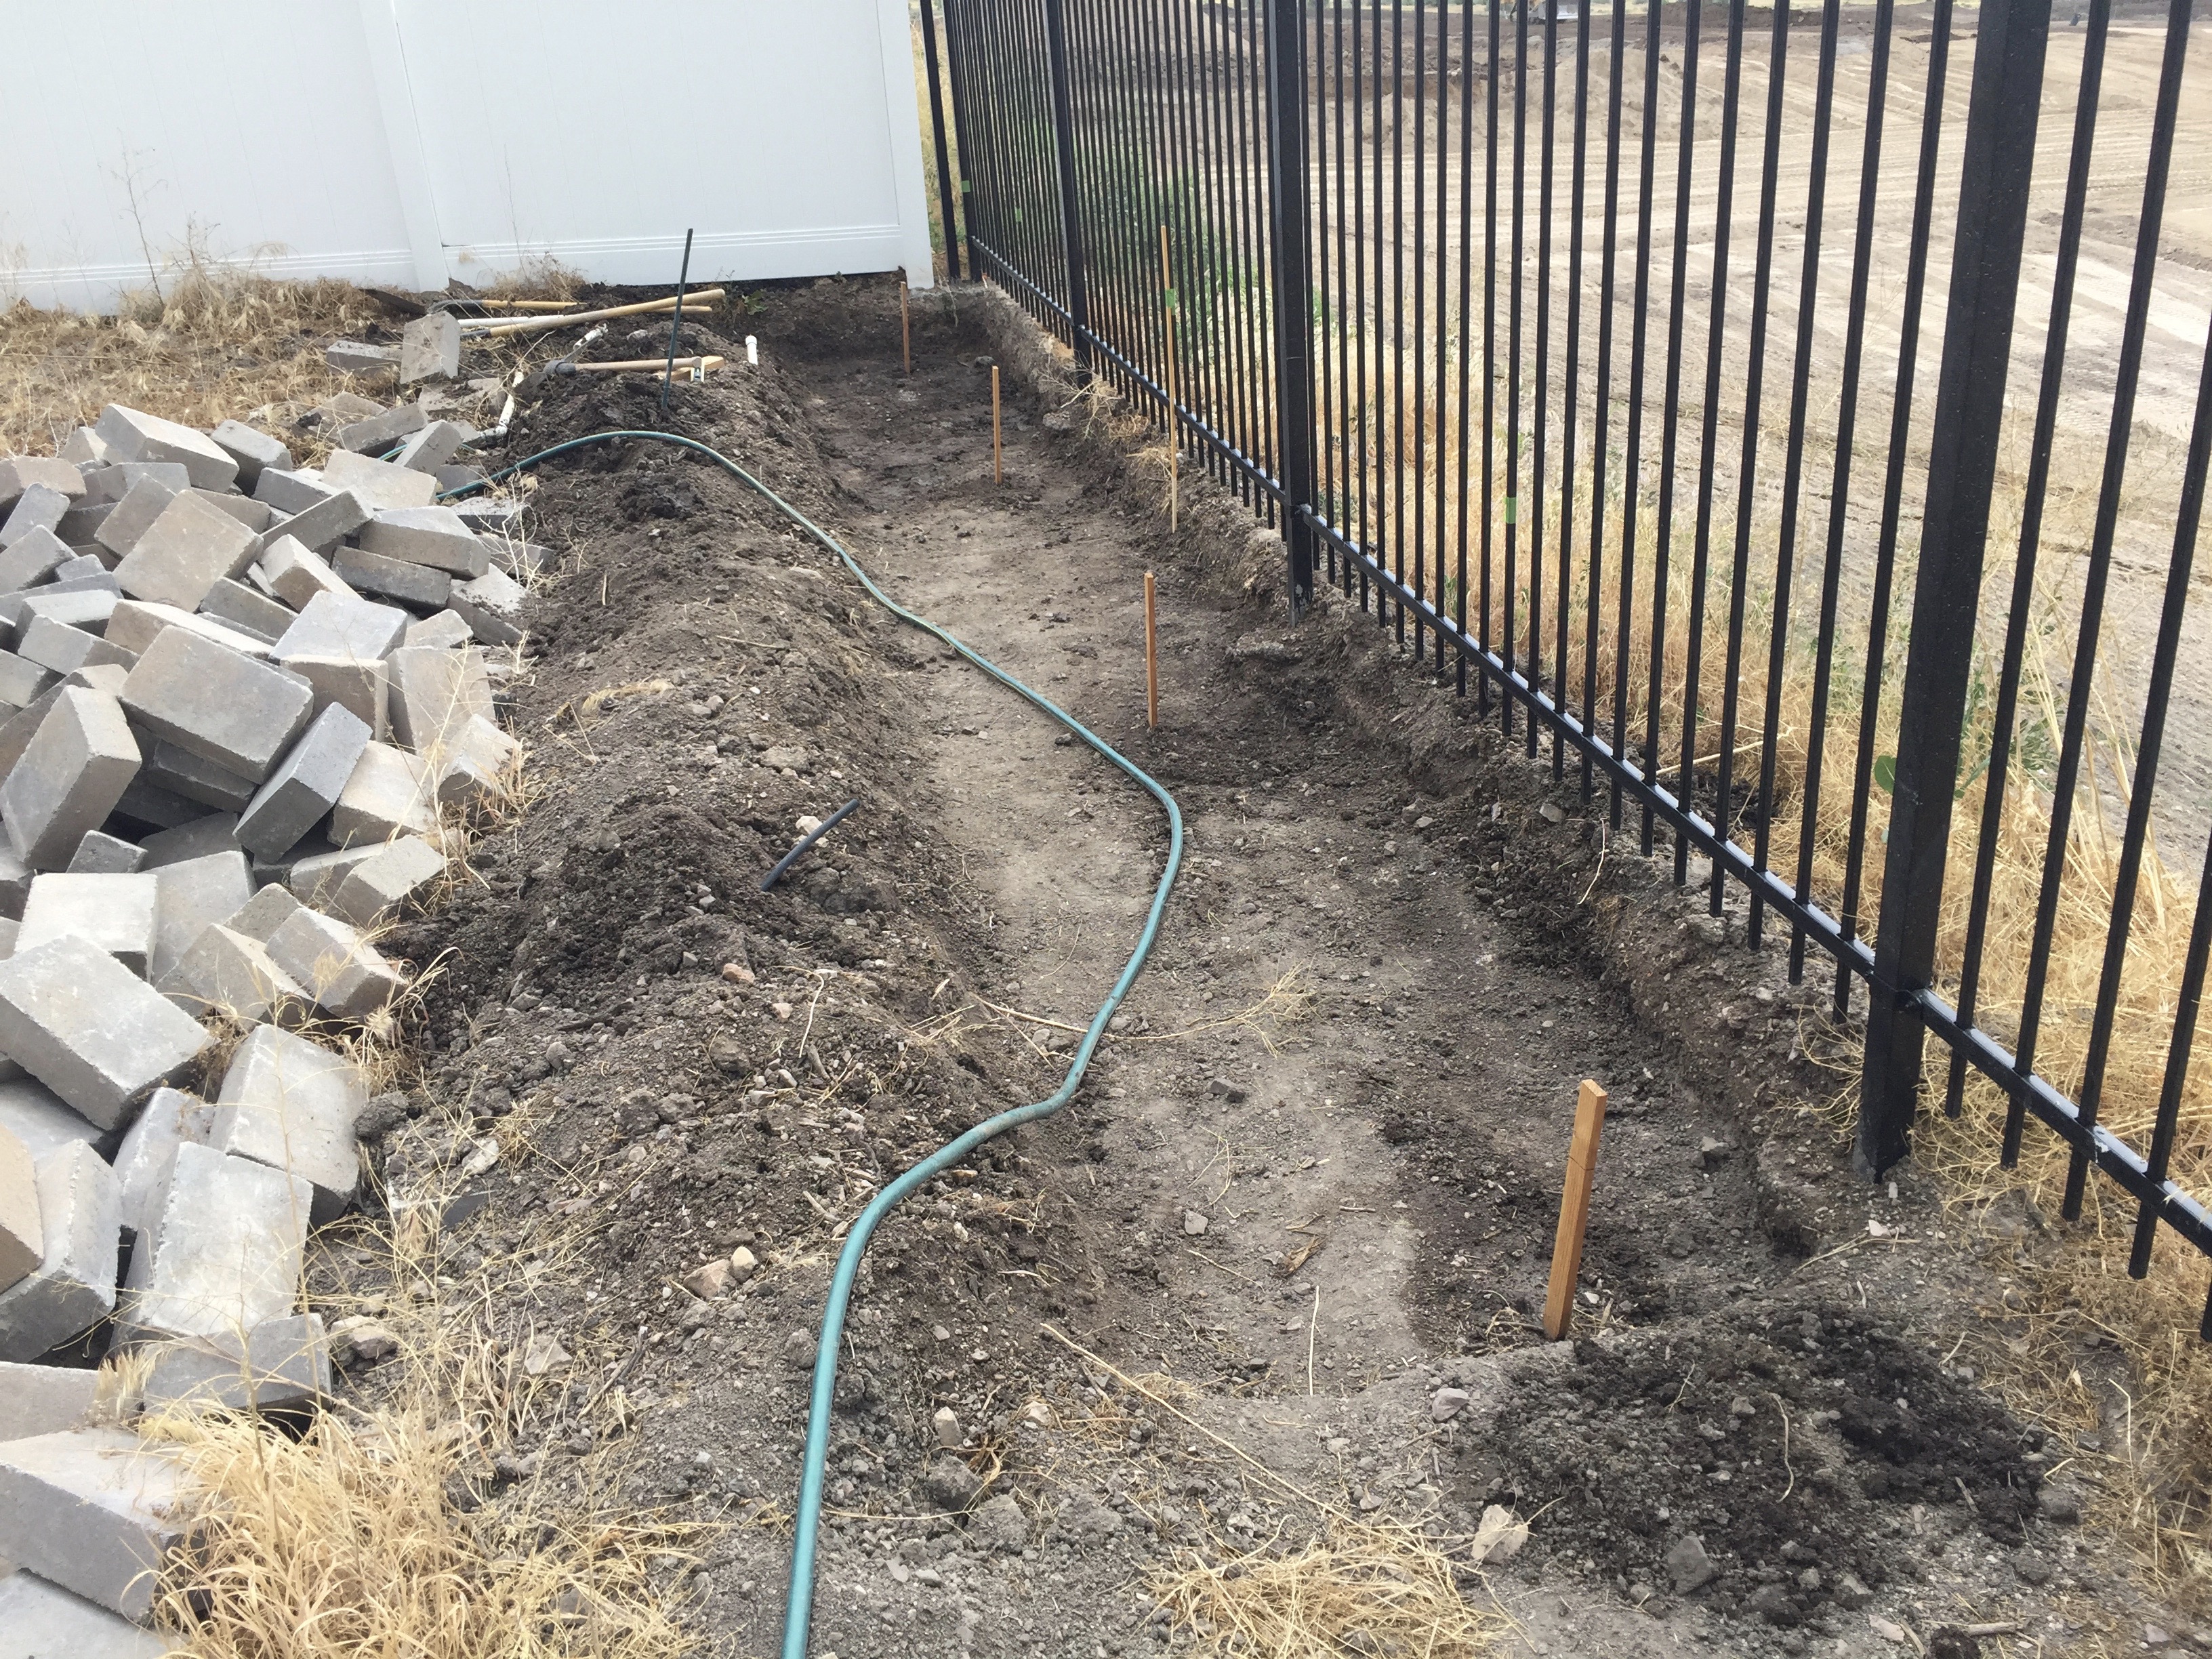
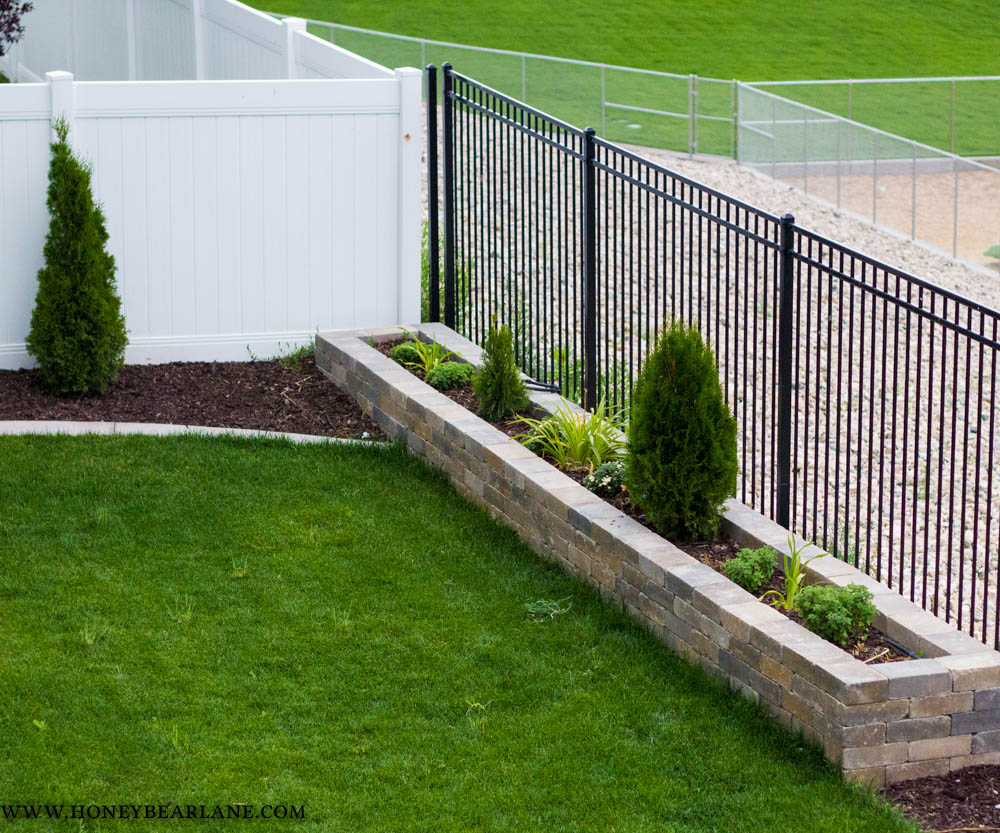
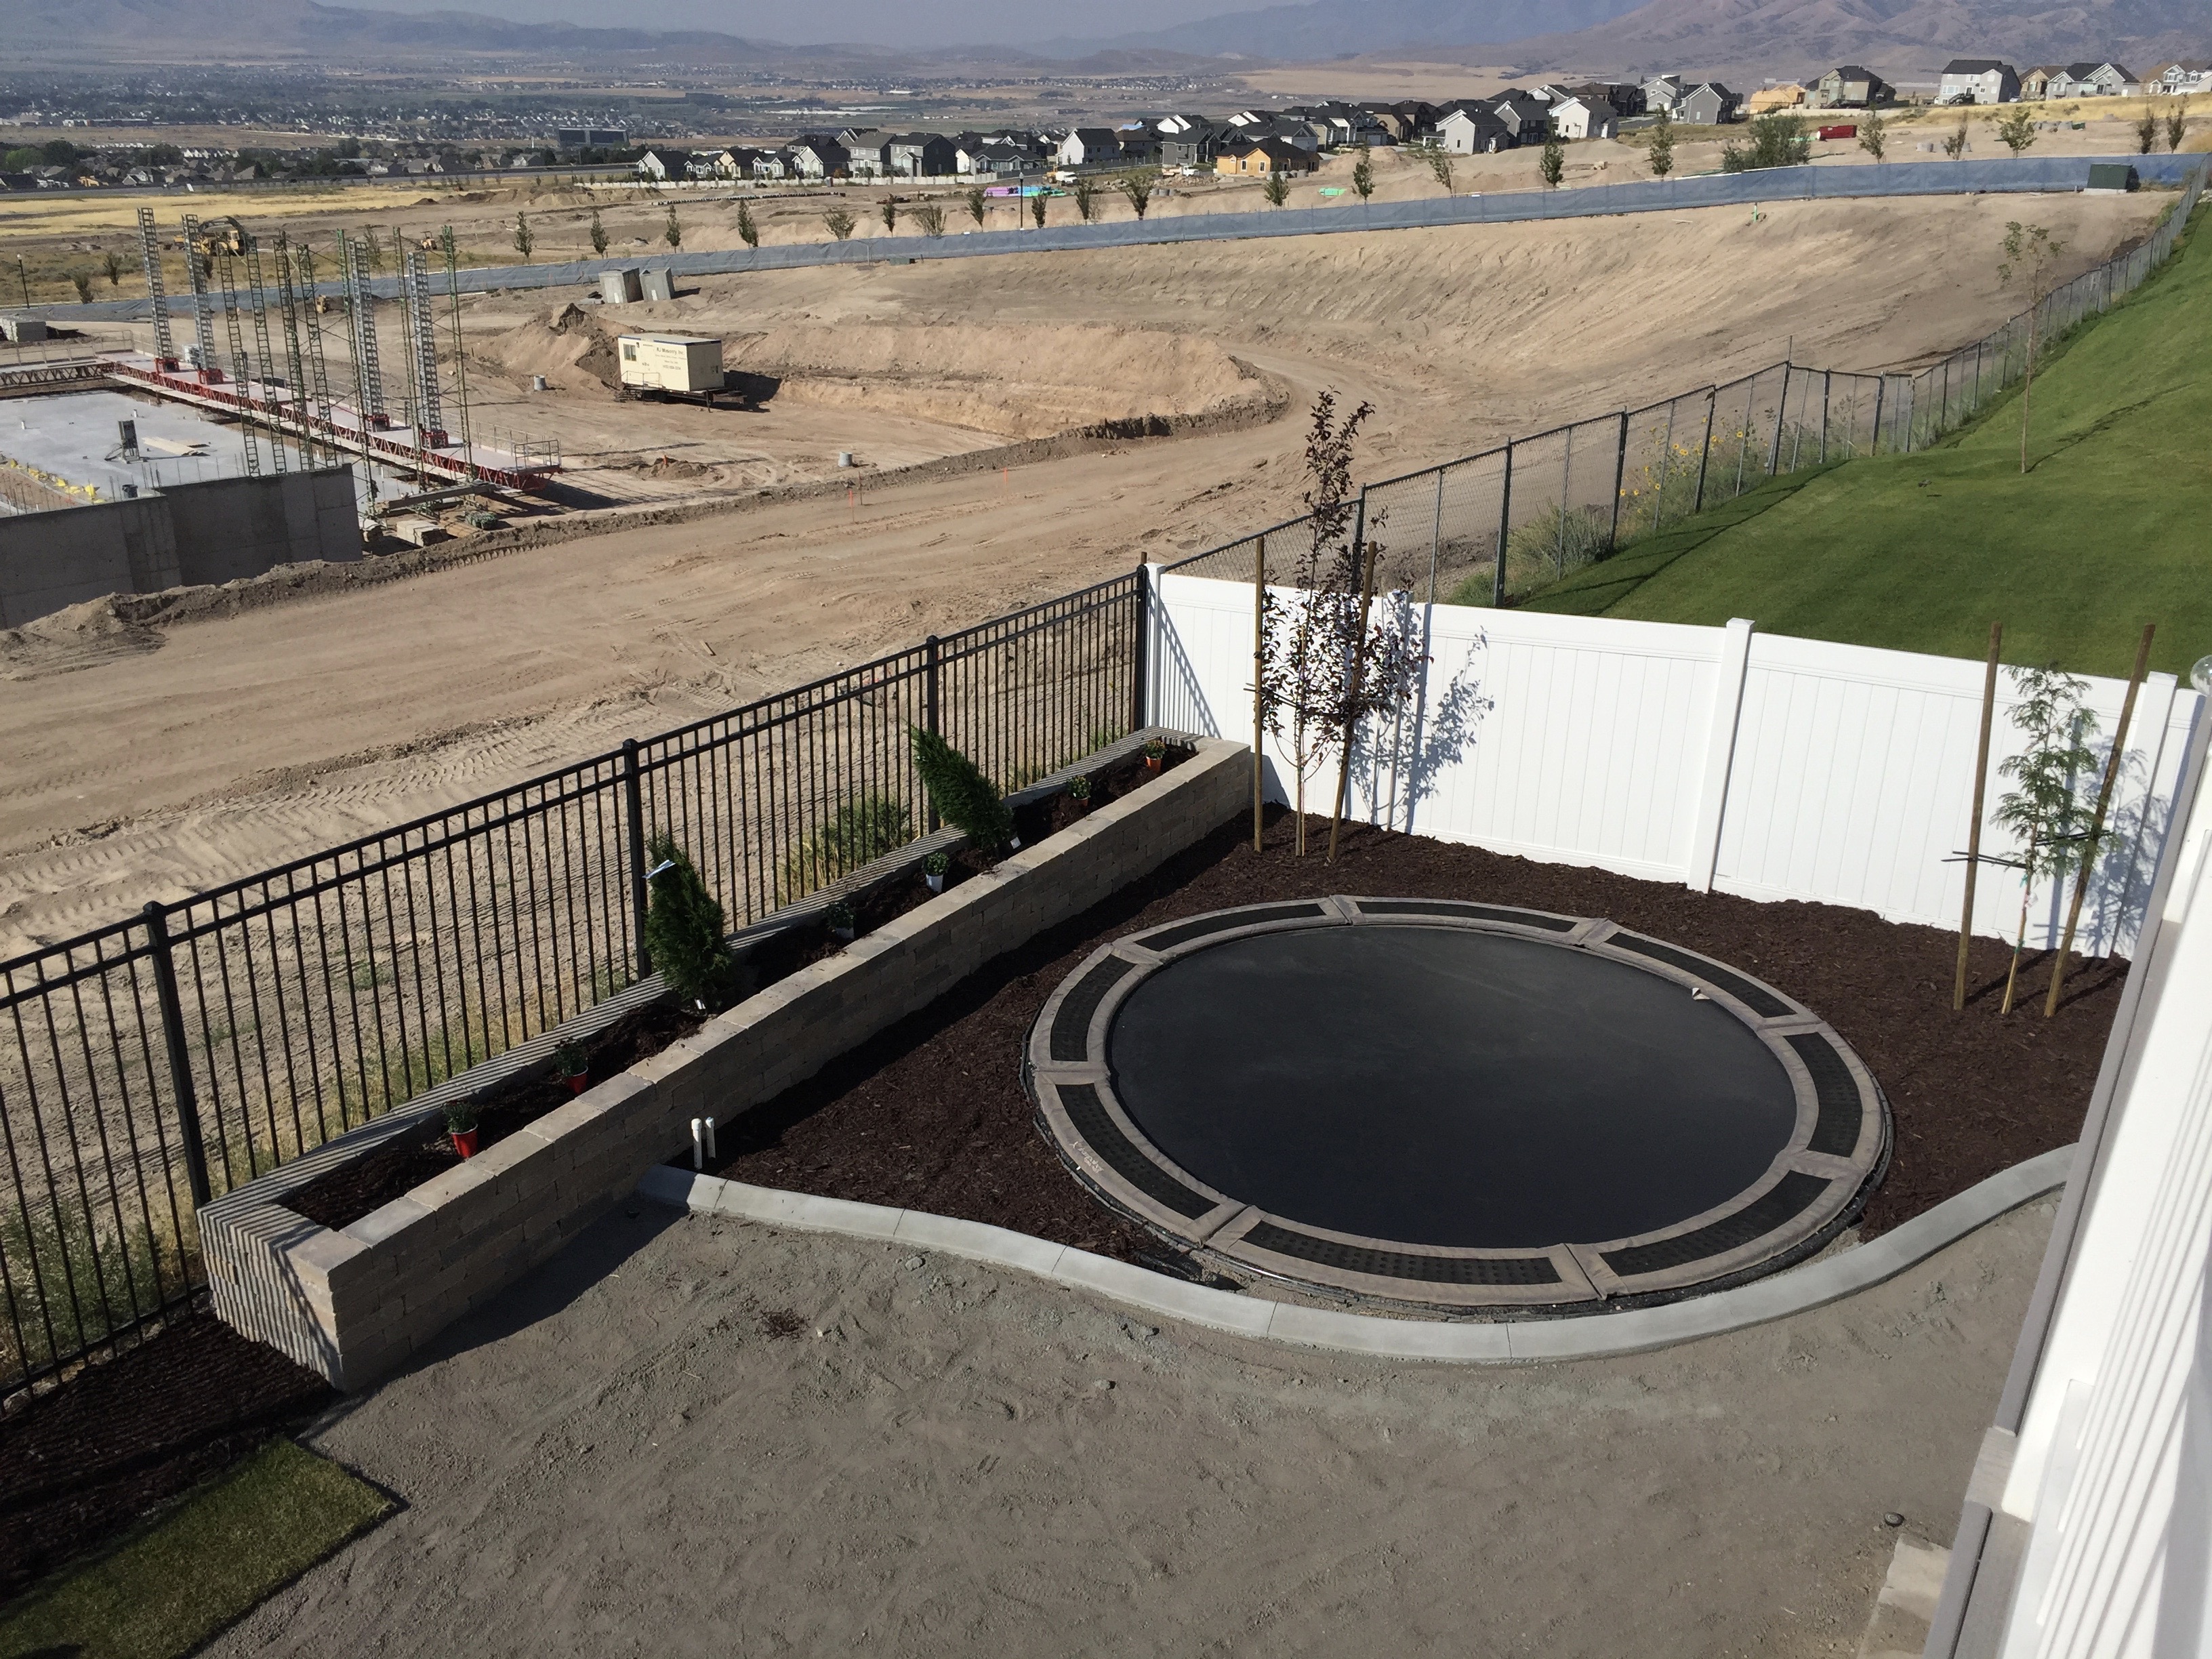
Since our yard was covered in these stones, we knew we couldn’t get the yard done until the planters were done. First we had to dig out a little bit of dirt in each space to get a solid foundation. My yard also slopes a little from left to right and my husband wanted the planters to all be level so that took some more serious math to figure out how to do that. Basically the planter on the left of the yard is only 6 bricks high, the one in the middle is 7 bricks high, and the one on the right is 8 bricks high. He dug out the ground as level as possible.
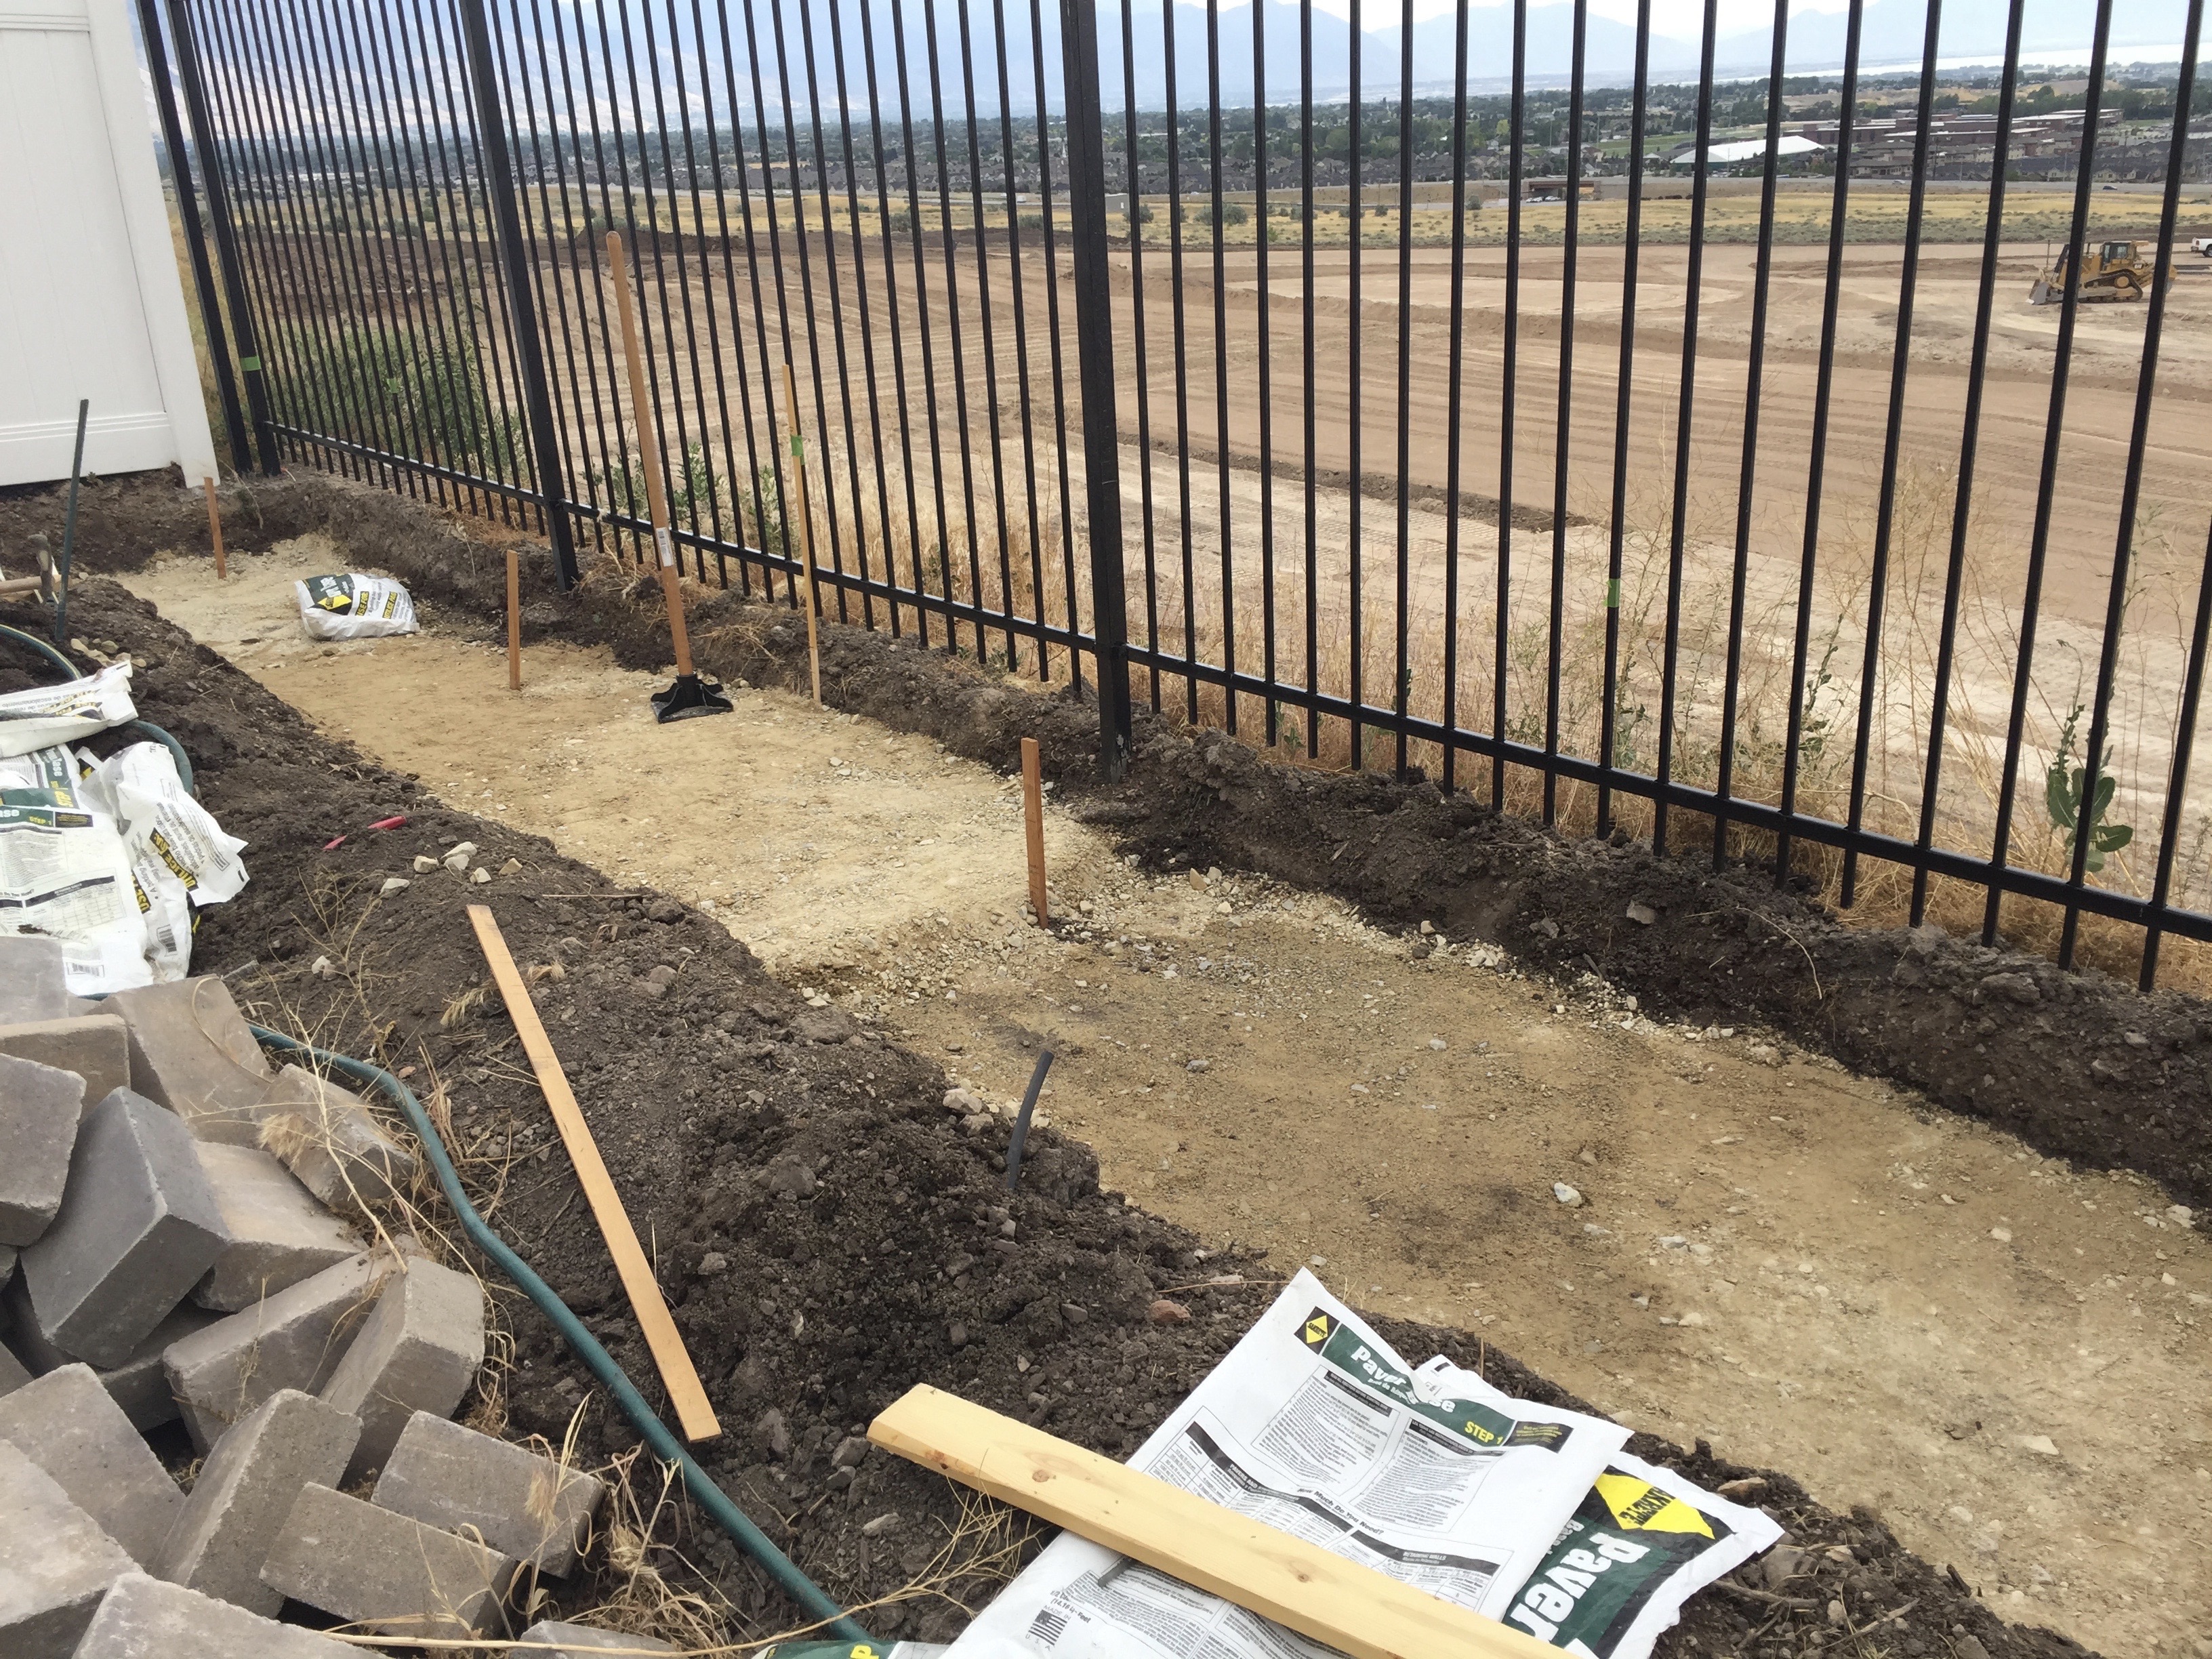
Next he ordered some paver base and paver sand from Home Depot, which they also delivered to us. He layered each spot with a few inches of paver base and the carefully leveled the sand into a super smooth and even base. This is easier said than done, by the way. It took him a long time to do this part and it’s hard on the back and knees.
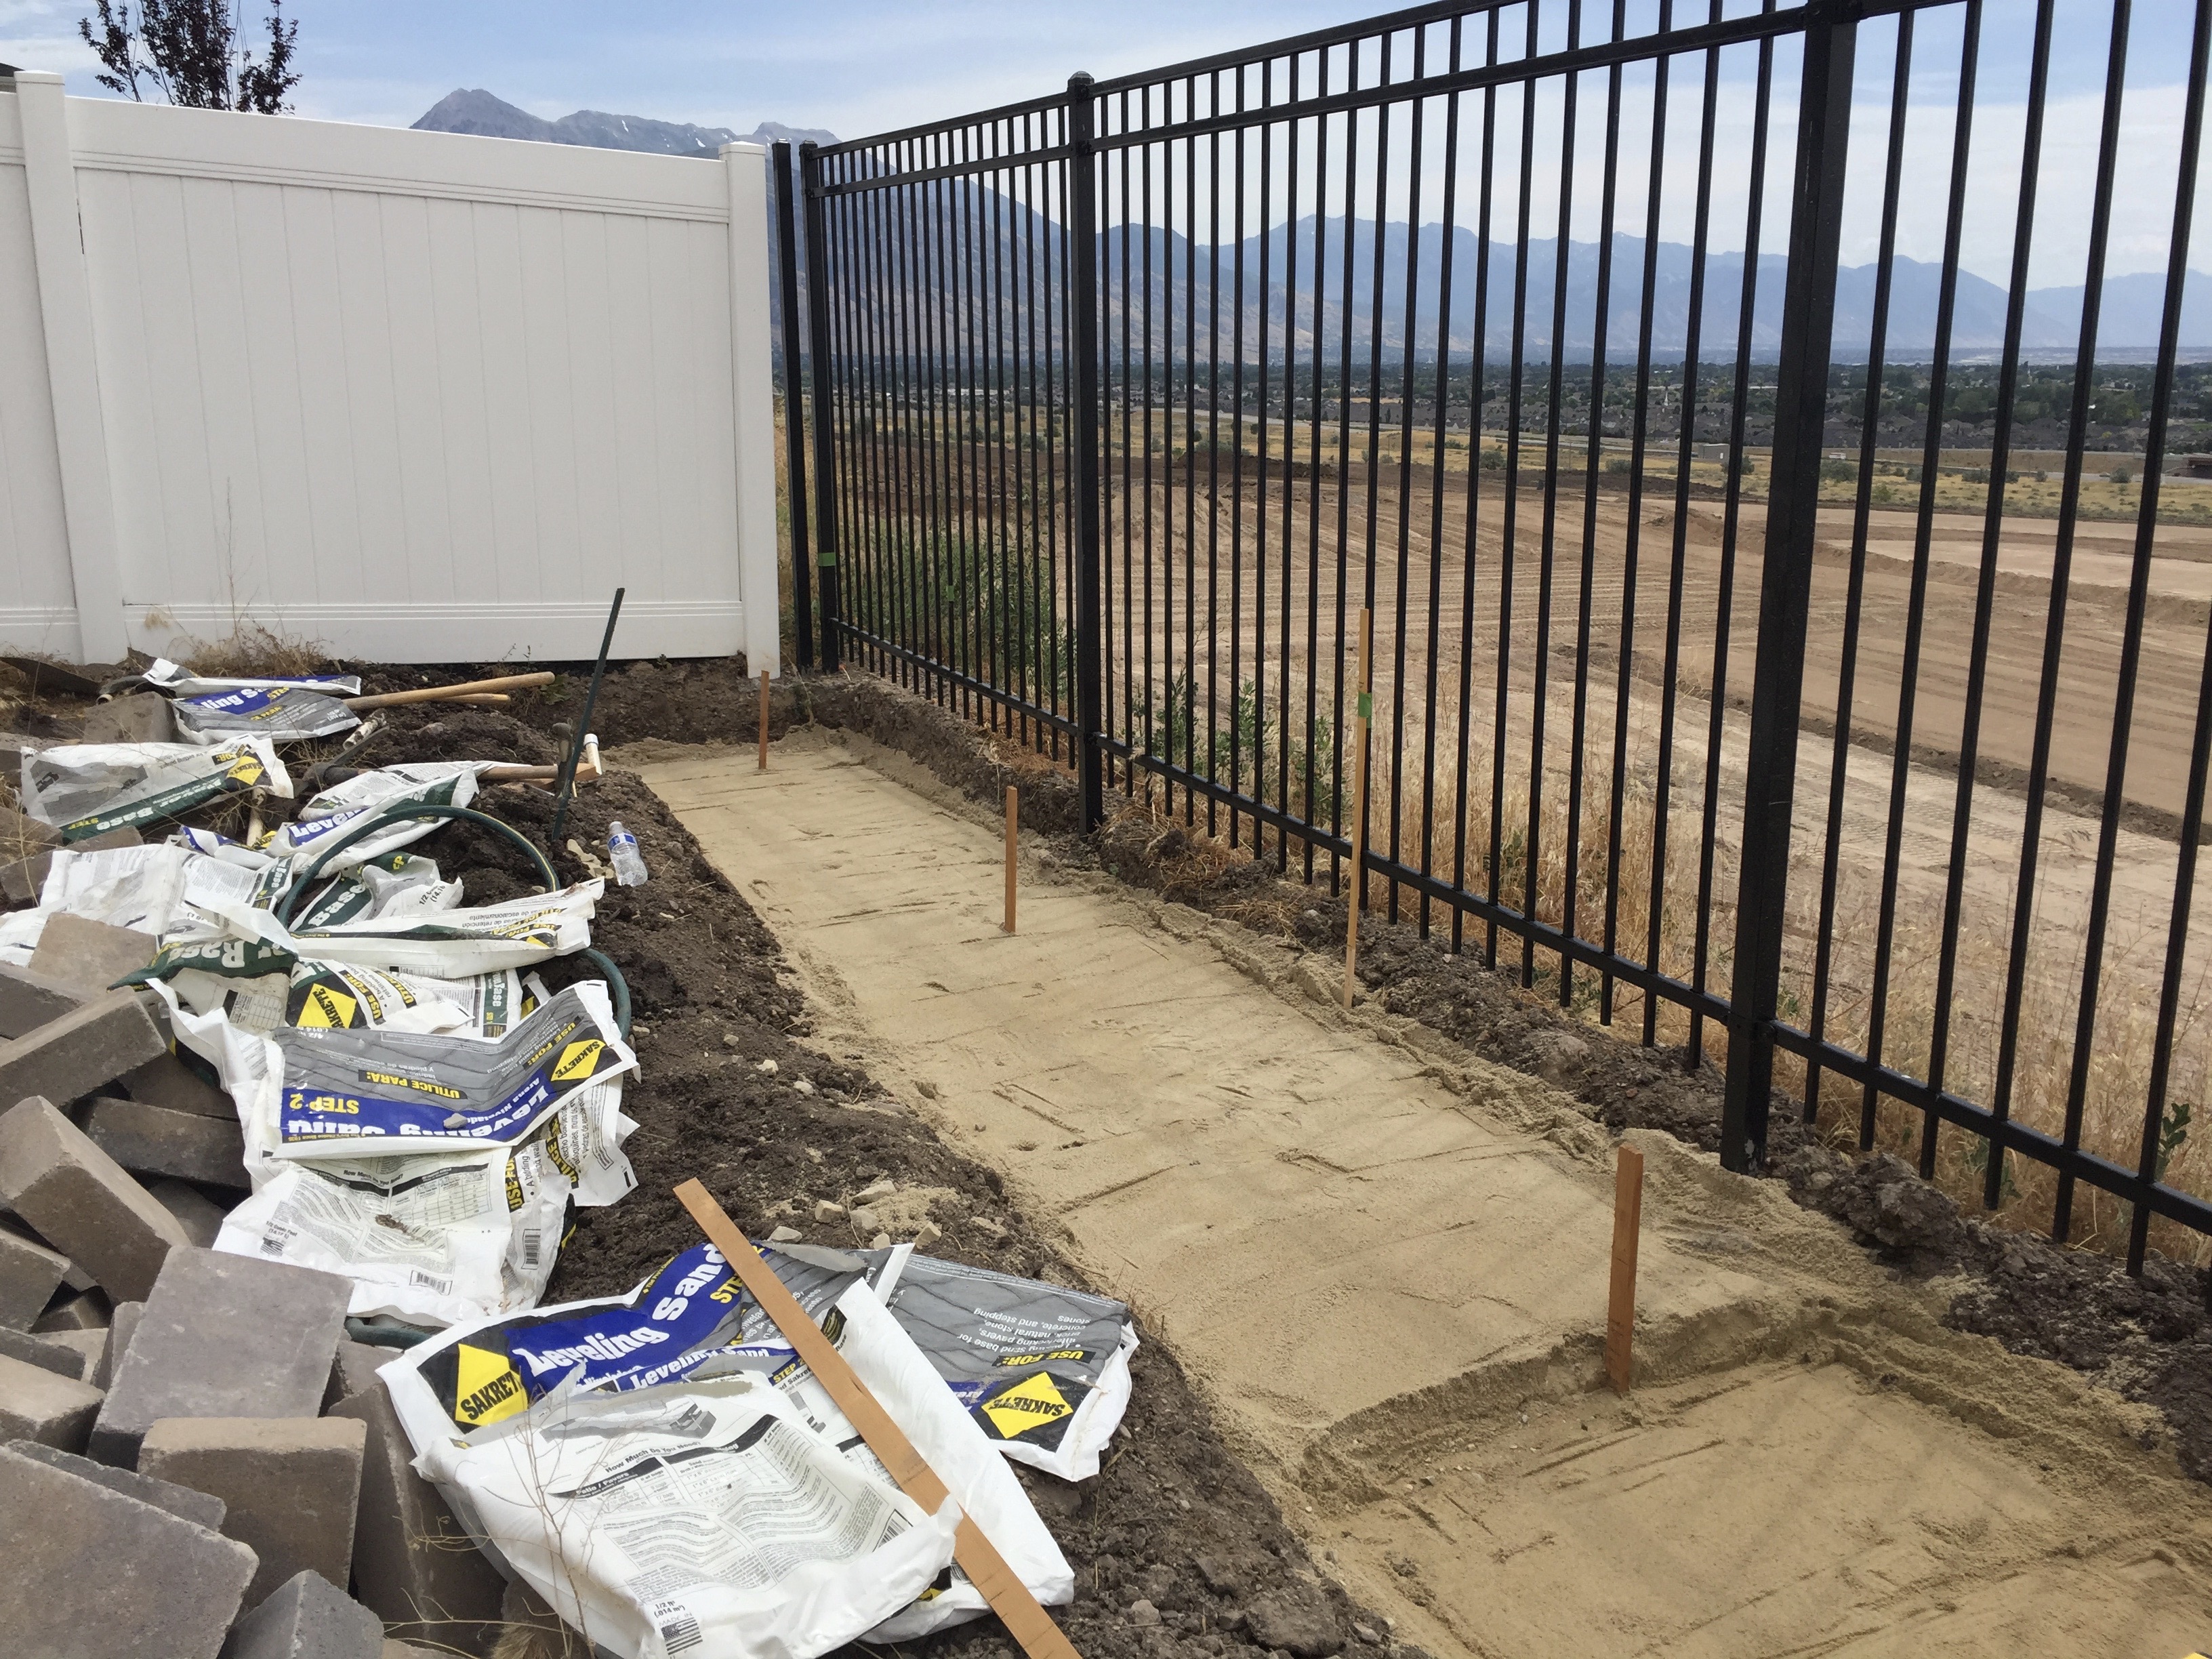
The next step really helped us to make a very level box. Apparently you can use these instead of paver base and sand so maybe look into that before you buy it. We had already bought and poured it before we found these things so we just used them in addition. They are these black styrofoam pads. They are usually used for paver patios but we cut them in half lengthwise with my table saw (you could cut them with a razorblade also but this was faster) and laid them under each brick. After we did this the first course of bricks was a lot more level.

Once the first two courses of bricks are laid, it’s just a matter of stacking bricks. It’s hard back breaking labor, although weirdly I found it enjoyable to go out while my baby had his nap, listen to an audio book and just work. I stacked most of the bricks myself. I also had to battle some hornet nests that were hidden amongst the bricks.
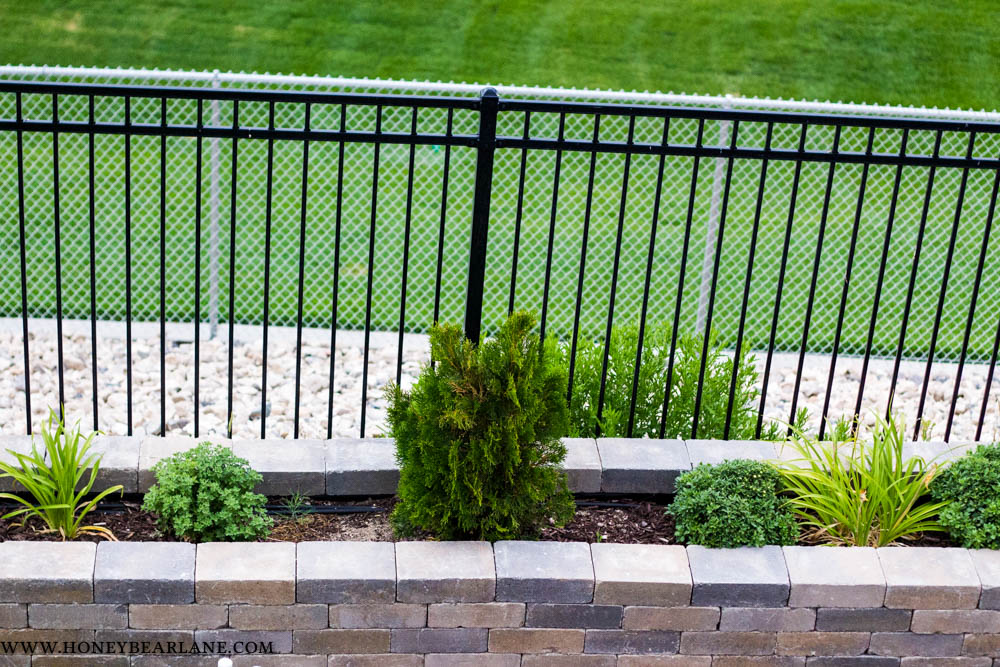
We put a short layer of drainage rocks in the bottom of each planter to help with drainage. This helps with expansion due to the weather and also preventing mold. After the drainage rocks we put down landscape fabric which we secured the top of underneath the last layer of bricks. We also glued the top layer of bricks down with masonry glue.

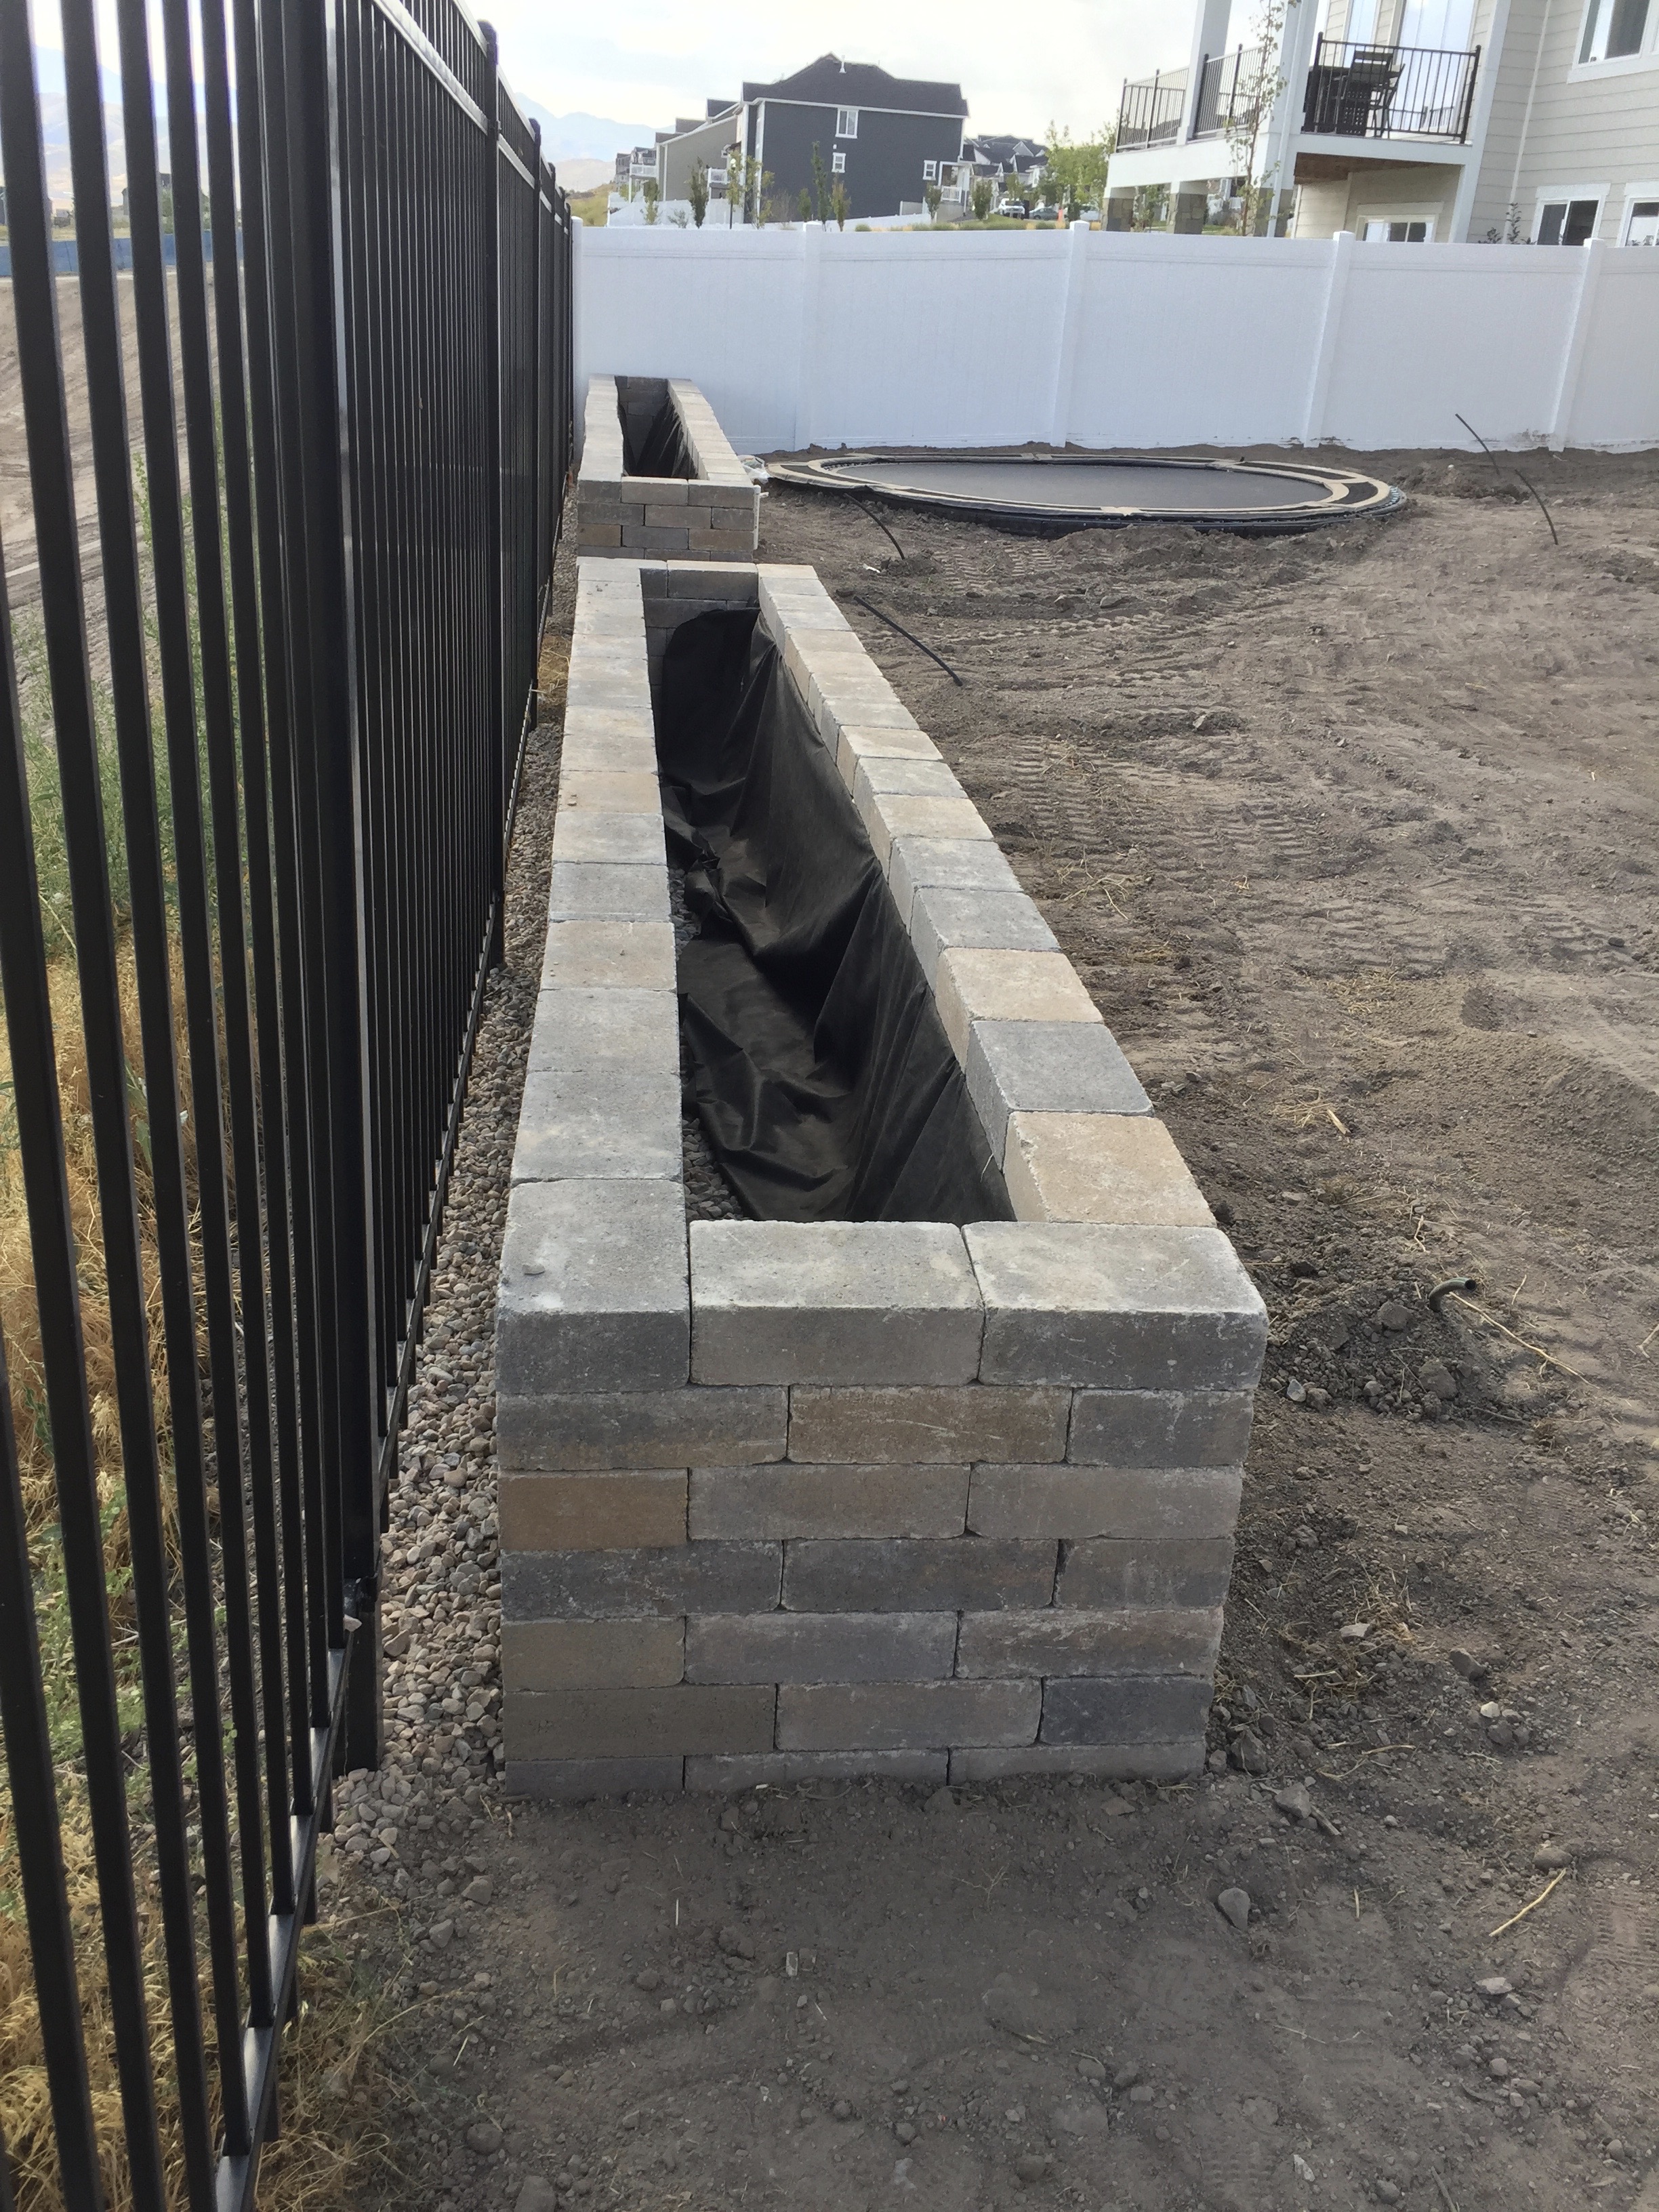
The reason for the landscape fabric is to help keep the dirt from seeping out of the cracks. And you can see that we also put drainage rocks behind the planters to help prevent weeds from growing behind.
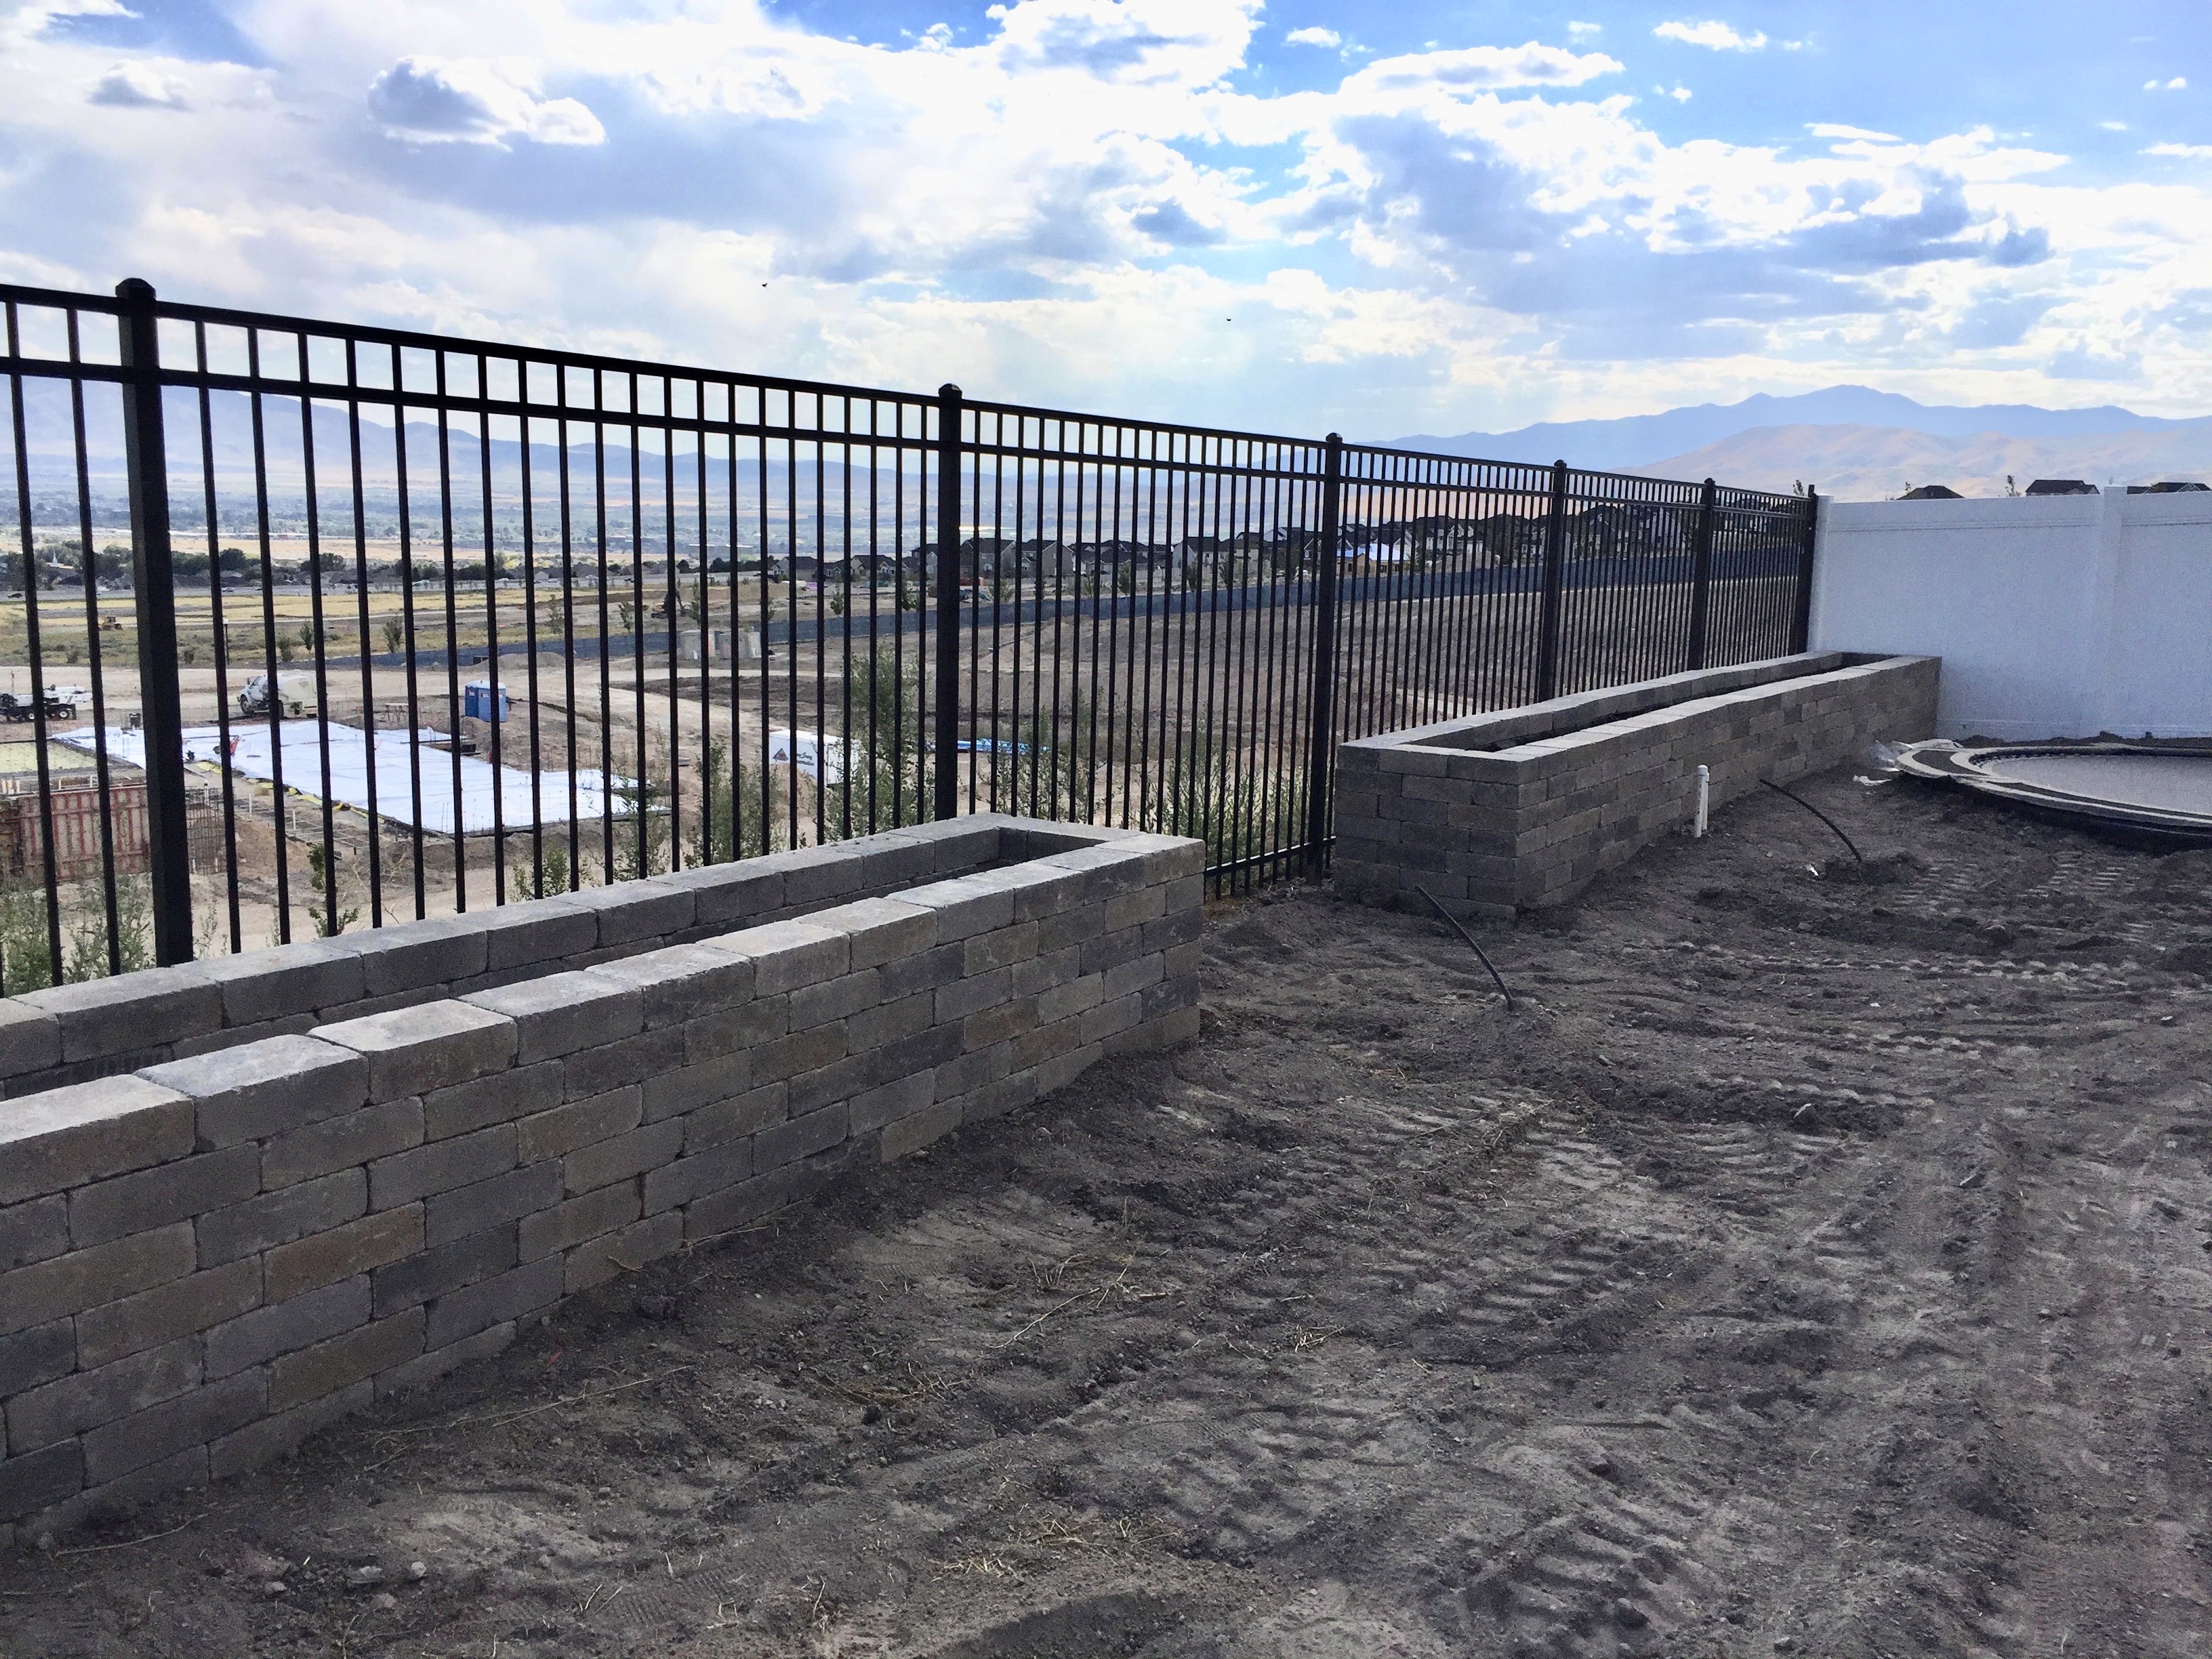
It was so nice seeing our yard again once all the bricks were in their place! We were so exhausted from this project we hired our next-door neighbor to finish the backyard since he was starting a landscape business. My husband had already installed sprinkler pipes and dug the hole for the trampoline. He had rented a mini-excavator two summers back and worked pretty much dawn to dusk every day for a week. We purchased an in-ground trampoline kit from Trampolines Down Under. It comes with a dirt barrier that you put around the trampoline frame and special trampoline pads that allow air to go through and makes you able to jump higher.
We had a curbing guy come add curbing to the backyard. It makes it look a little more professional with the distinct lines of separation. Our neighbor also filled the planters with dirt and we planted a couple things in them.
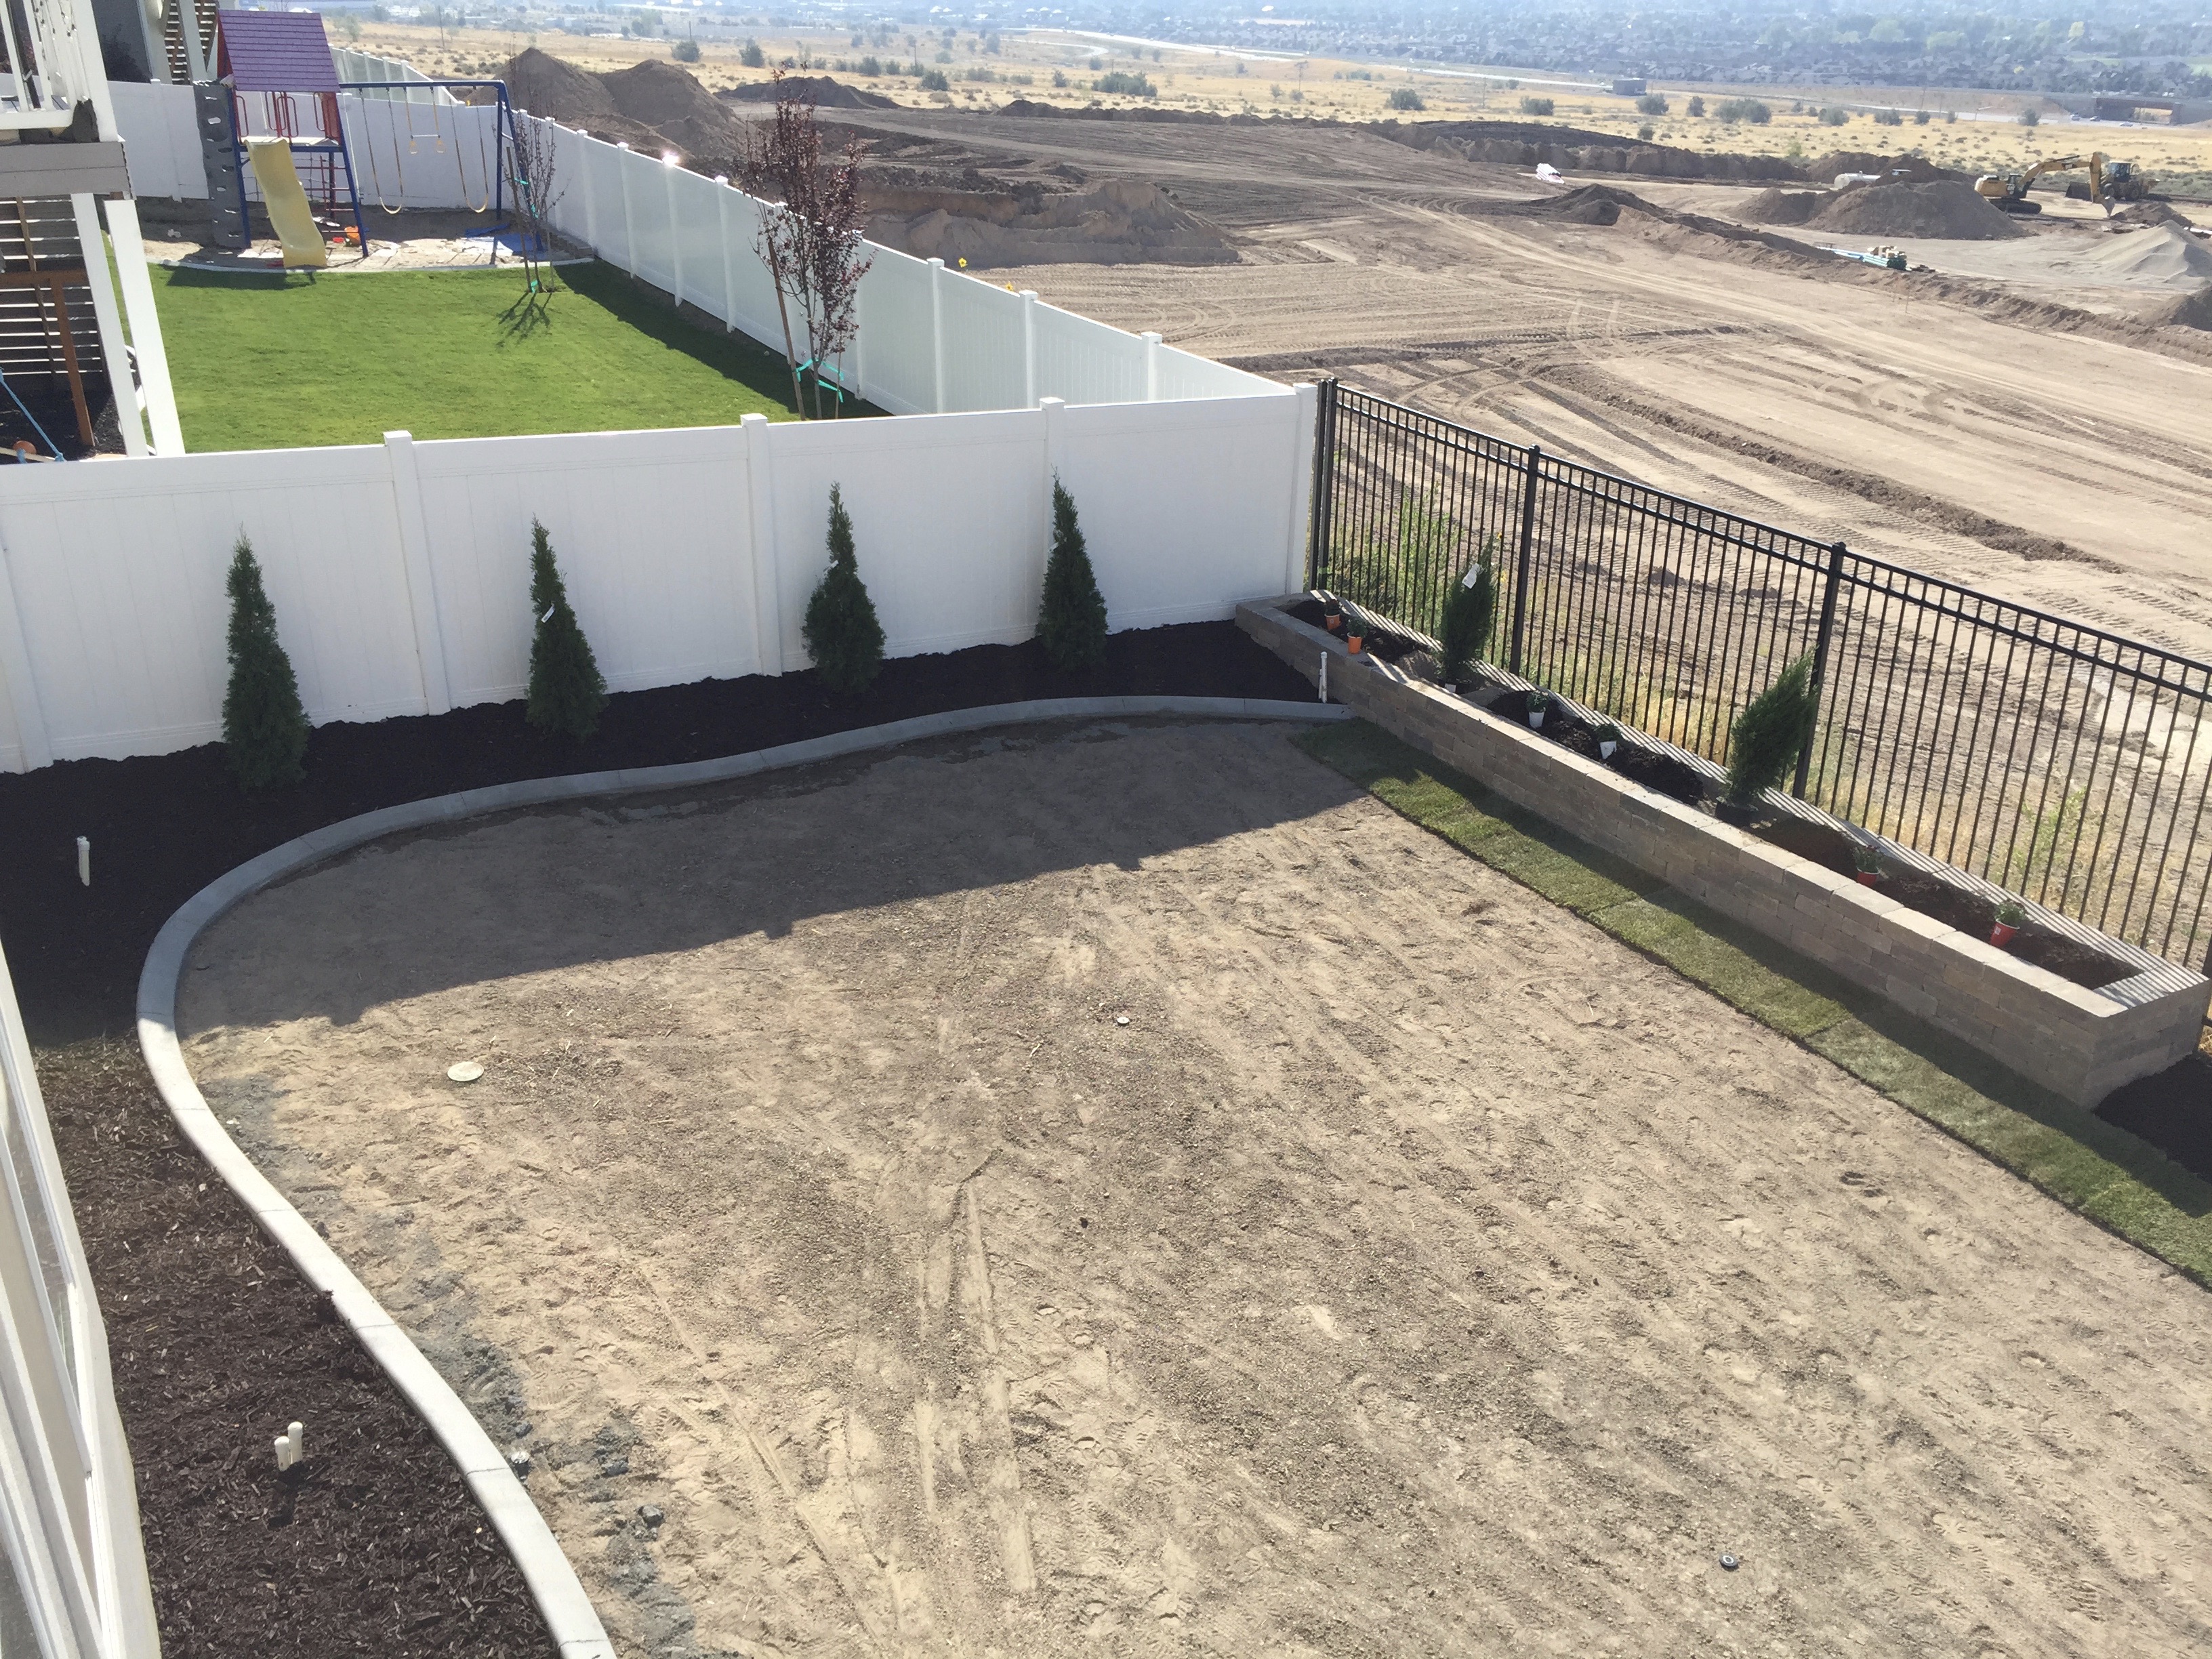
It was so great to see our backyard taking shape! But the piece de resistance of course was having the grass installed. No more dirt!!! Seriously, after staring at a dirt and week backyard for several years, we were ecstatic to have it.
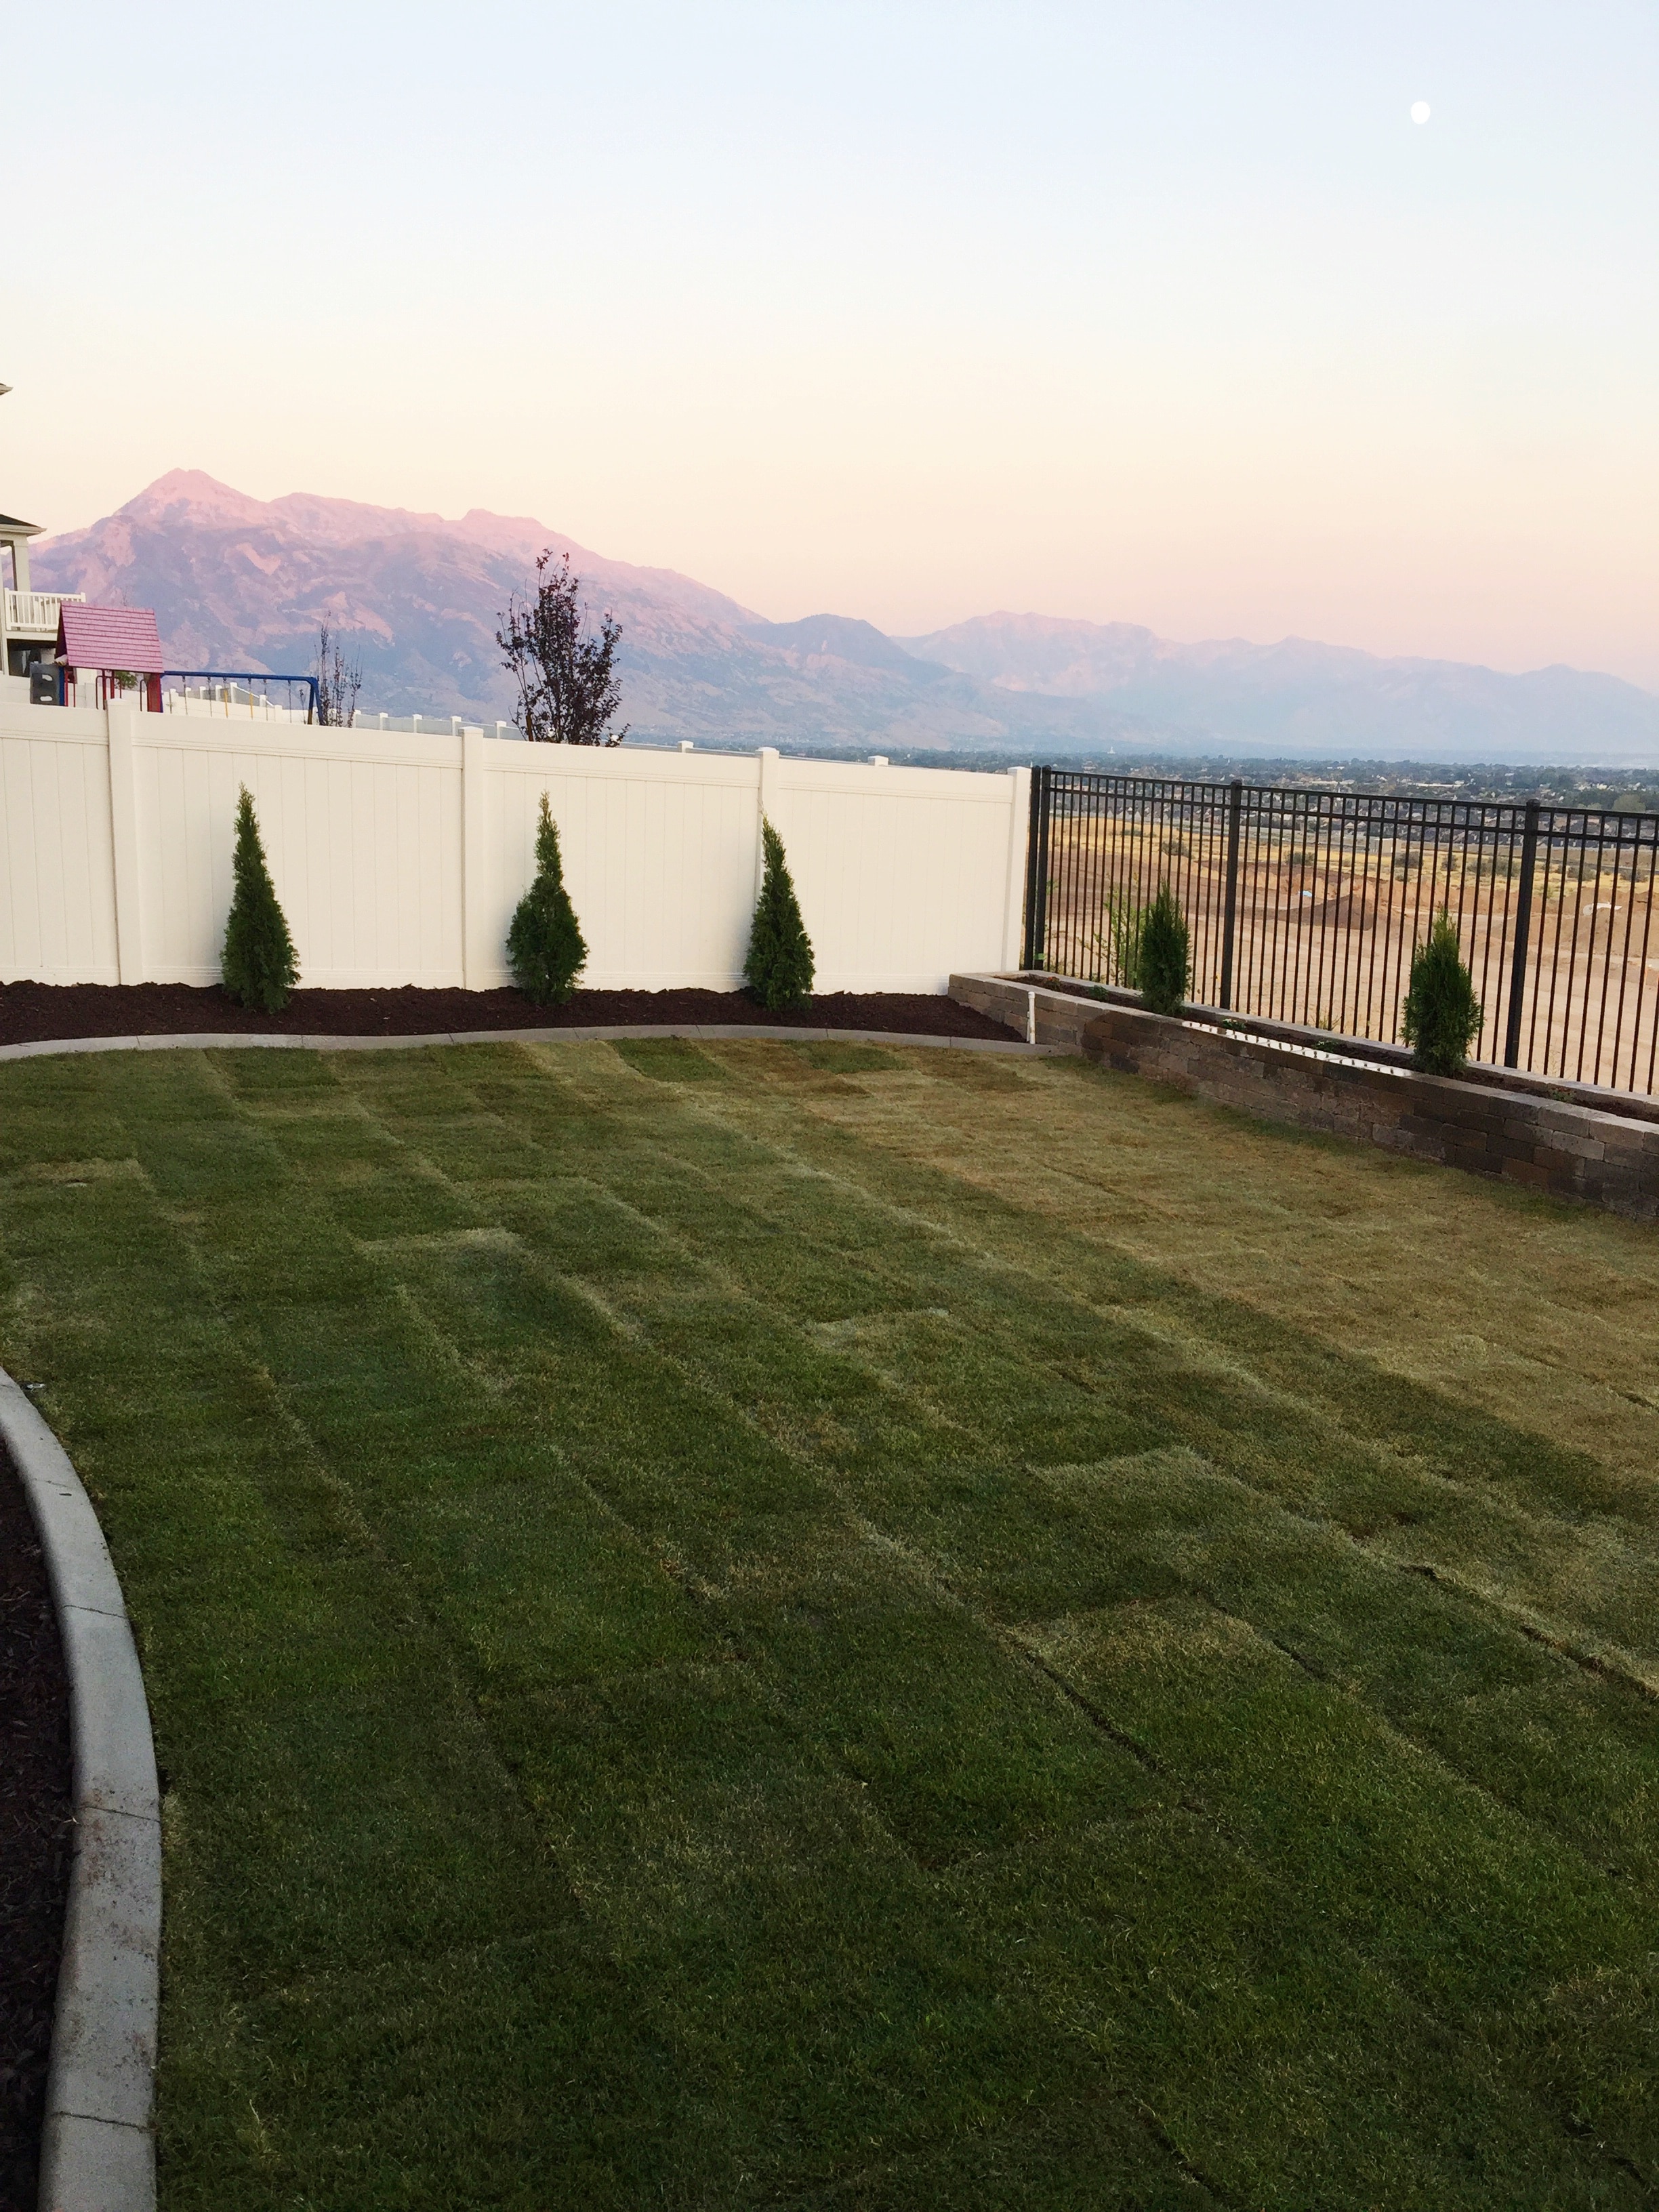
Unfortunately since it was super hot when it was installed, some of it died and it has taken us all summer this year to get it looking good again. Last fall I also planted some tulips, daffodils, day lilies, and some other plants in them so we’d have a little bit of greenery this summer. I’ll plant more again this fall and next year to really fill it out. It still ended up costing us quite a bit to finish the back yard so we’re playing catch up!
This is what it looks like right now. We only mow it like once or twice a month so that the grass can reseed itself and grow in nice and thick. A lot of it died over the winter and it really looked bad. Fortunately grass is super resilient and my husband has treated it like a baby and it’s looking nice and green and lush now!
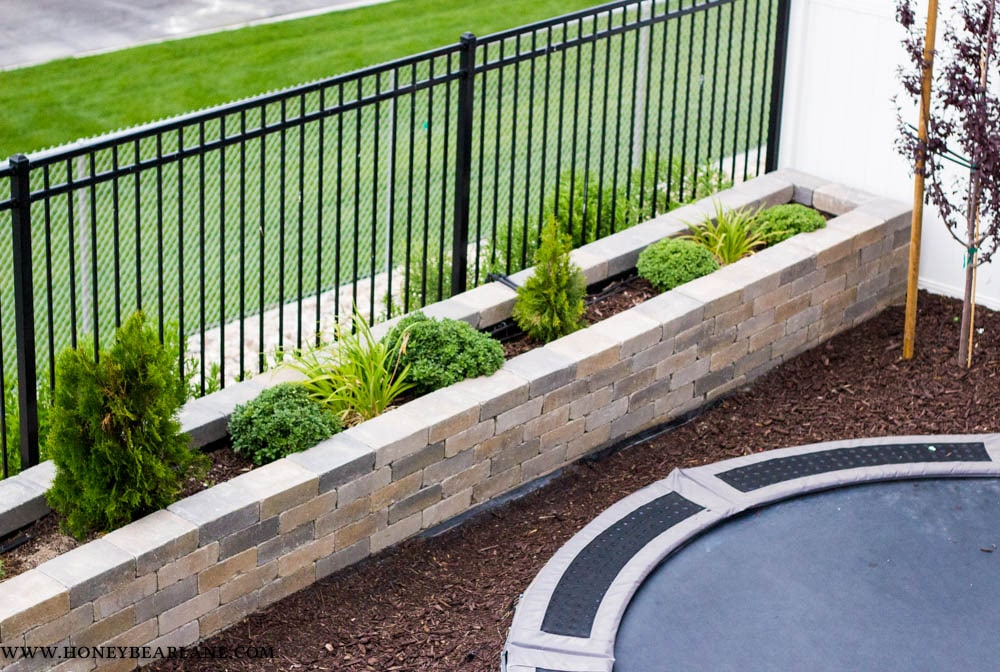
As you can see a couple of my Arbor Vitae trees in the planters died and I replanted them with much smaller ones. Oh well! Eventually it all evens out. I have planted some fall mums and day lilies here and I want to fill them in with more. My day lilies didn’t bloom much so maybe next year.
My husband also installed a drip line in the right and left planters. Next year he’ll do the middle one as well since I haven’t planted anything in the middle. I had some tulips in there but I’m going to do something else for next year.
Overall we love our planters and we think they were worth the effort and cost. We really wanted to do something different in the back yard and over the years as it fills in and the trees mature, I think it will really be worth it!
This is gorgeous!! Is it ok to ask how much one of these flower boxes cost to build? Hoping to build our own soon!
Sorry to say, they are pretty expensive! Stone is not cheap but we got ours for a good deal in a clearance yard. Then we had to pay for all the other supples. Total cost was like $5000 for all three.
wow – beautiful! You’ve inspired me to modernize our 40 year old garden/yard. Trampoline set in is such a great idea. Cheers D
airmaxbw-classic, cunettes,
hopestreasuresconsignment [url=http://www.hopestreasuresconsignment.com/]hopestreasuresconsignment[/url]
2015lbjshoes, bigfishlights,
analytics1718 [url=http://www.analytics1718.com/]analytics1718[/url]
cape-finest, fsbofrog,
cathyardreypropertysales [url=http://www.cathyardreypropertysales.com/]cathyardreypropertysales[/url]
They look great. How are they holding up?
yayobuy, discoverdelawarerivertowns,
ashithai [url=http://www.ashithai.com/]ashithai[/url]
corporatemilestones, thedragontour,
okbuy360 [url=http://www.okbuy360.com/]okbuy360[/url]
freeportraitstudio, fwmenstennis,
freedomrealtyonline [url=http://www.freedomrealtyonline.com/]freedomrealtyonline[/url]
buythesite, daryusbcms,
euroasya [url=http://www.euroasya.com/]euroasya[/url]
Did you use mortar between each layer or just the masonry glue on the top?
We did not use mortar. The stones are pretty heavy so we just used glue on the second to top layer.
Do you think that base mat would have been enough?
Maybe, it says it should be. We probably over did it.
Wonderful planter boxes! I really liked your project and beautiful team work!
This DIY stone planter box idea is both rustic and elegant I love how it blends naturally into outdoor spaces! You’ve explained the steps so clearly that even beginners like me feel confident to try it.
I love how they turned out. The stone planter boxes are so pretty. I am glad you showed the process photos too though because it looks like a lot of work and that is good to know before I get started.