Sharing is caring!
Hi!
My name is Rebecca and I blog over at
Better Life Blog.
{{You might remember me from this week’s giveaway! (Don’t forget, today’s the last day to enter!)}}

I’m so excited to be posting this tutorial over here at Honeybear Lane!
This is my FIRST EVER guest post, so please come visit me and leave me some love!!
I’m hoping this project will challenge you a little in your Sewing 101 class as we tackle a zippered pocket, but also be fun and reinforce some things you’ve already learned!
… Bags are kinda my specialty, and if you visit
my blog or
my shop you’ll see why …
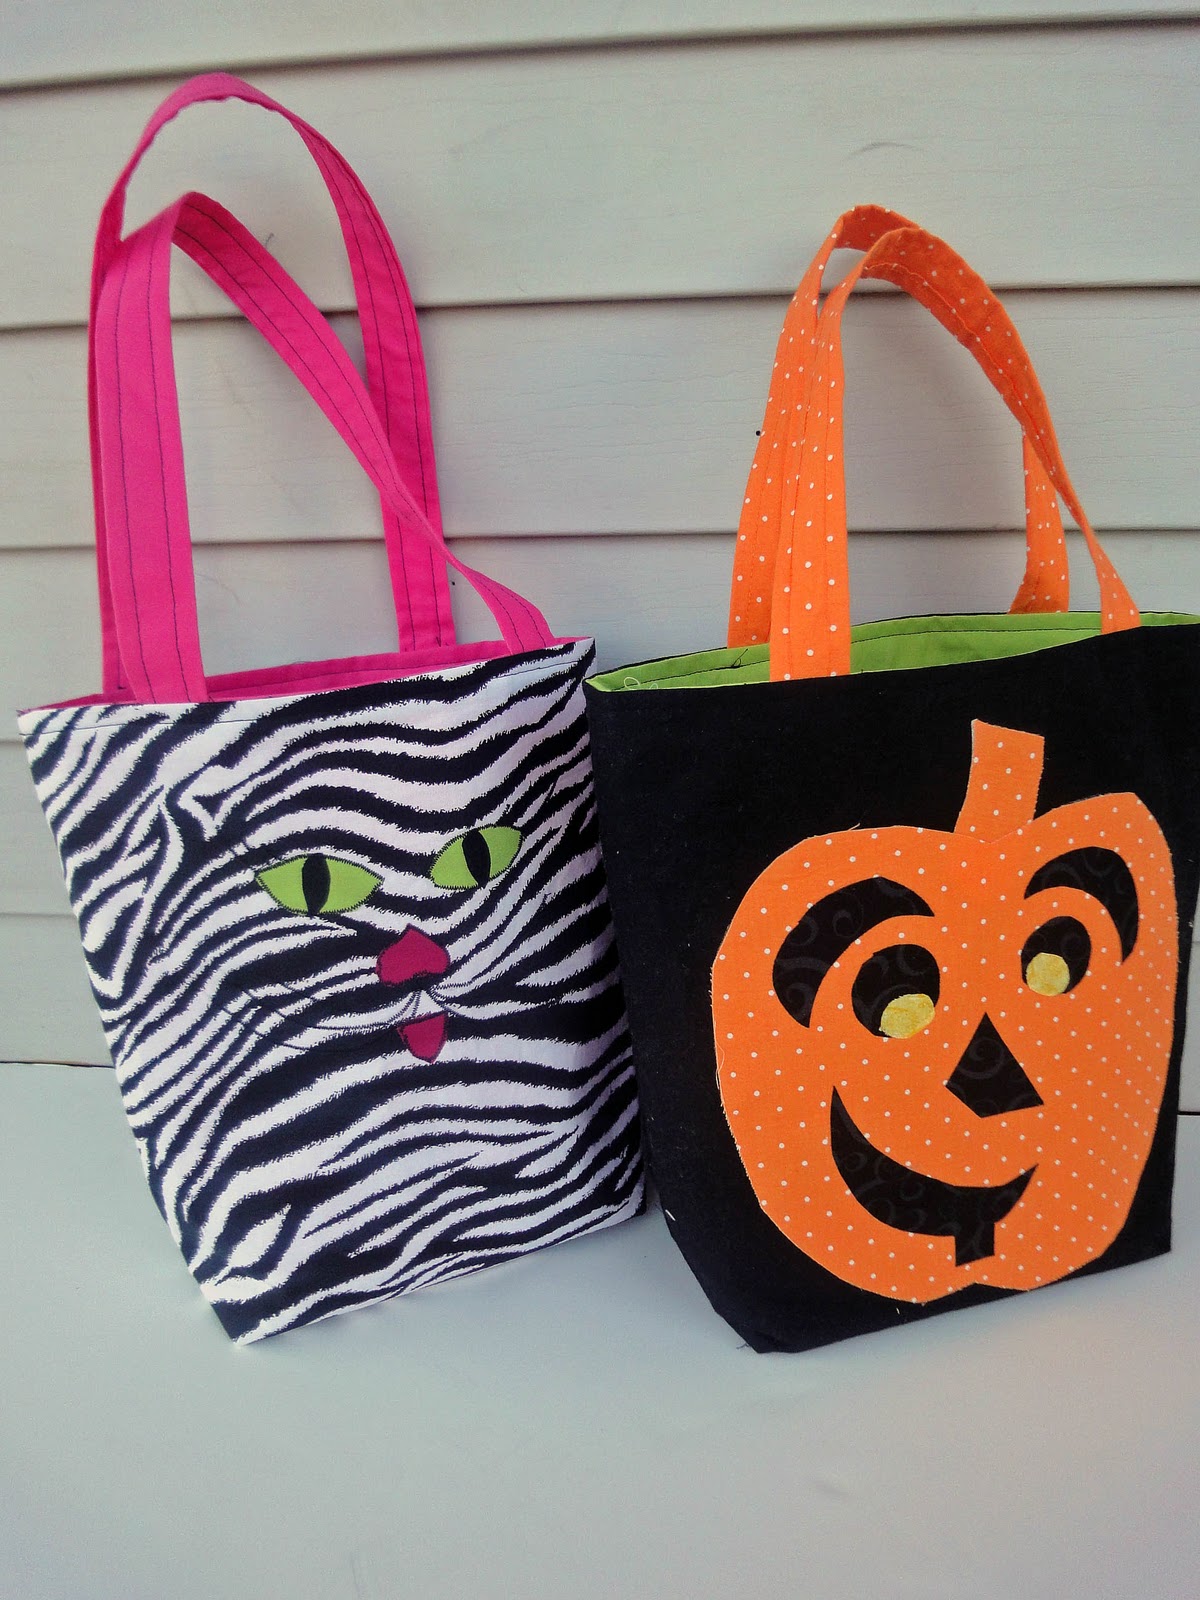
Today we are going to make a simple small tote bag PERFECT for those little Trick-or-Treaters in your life!
Here’s what you’ll need.
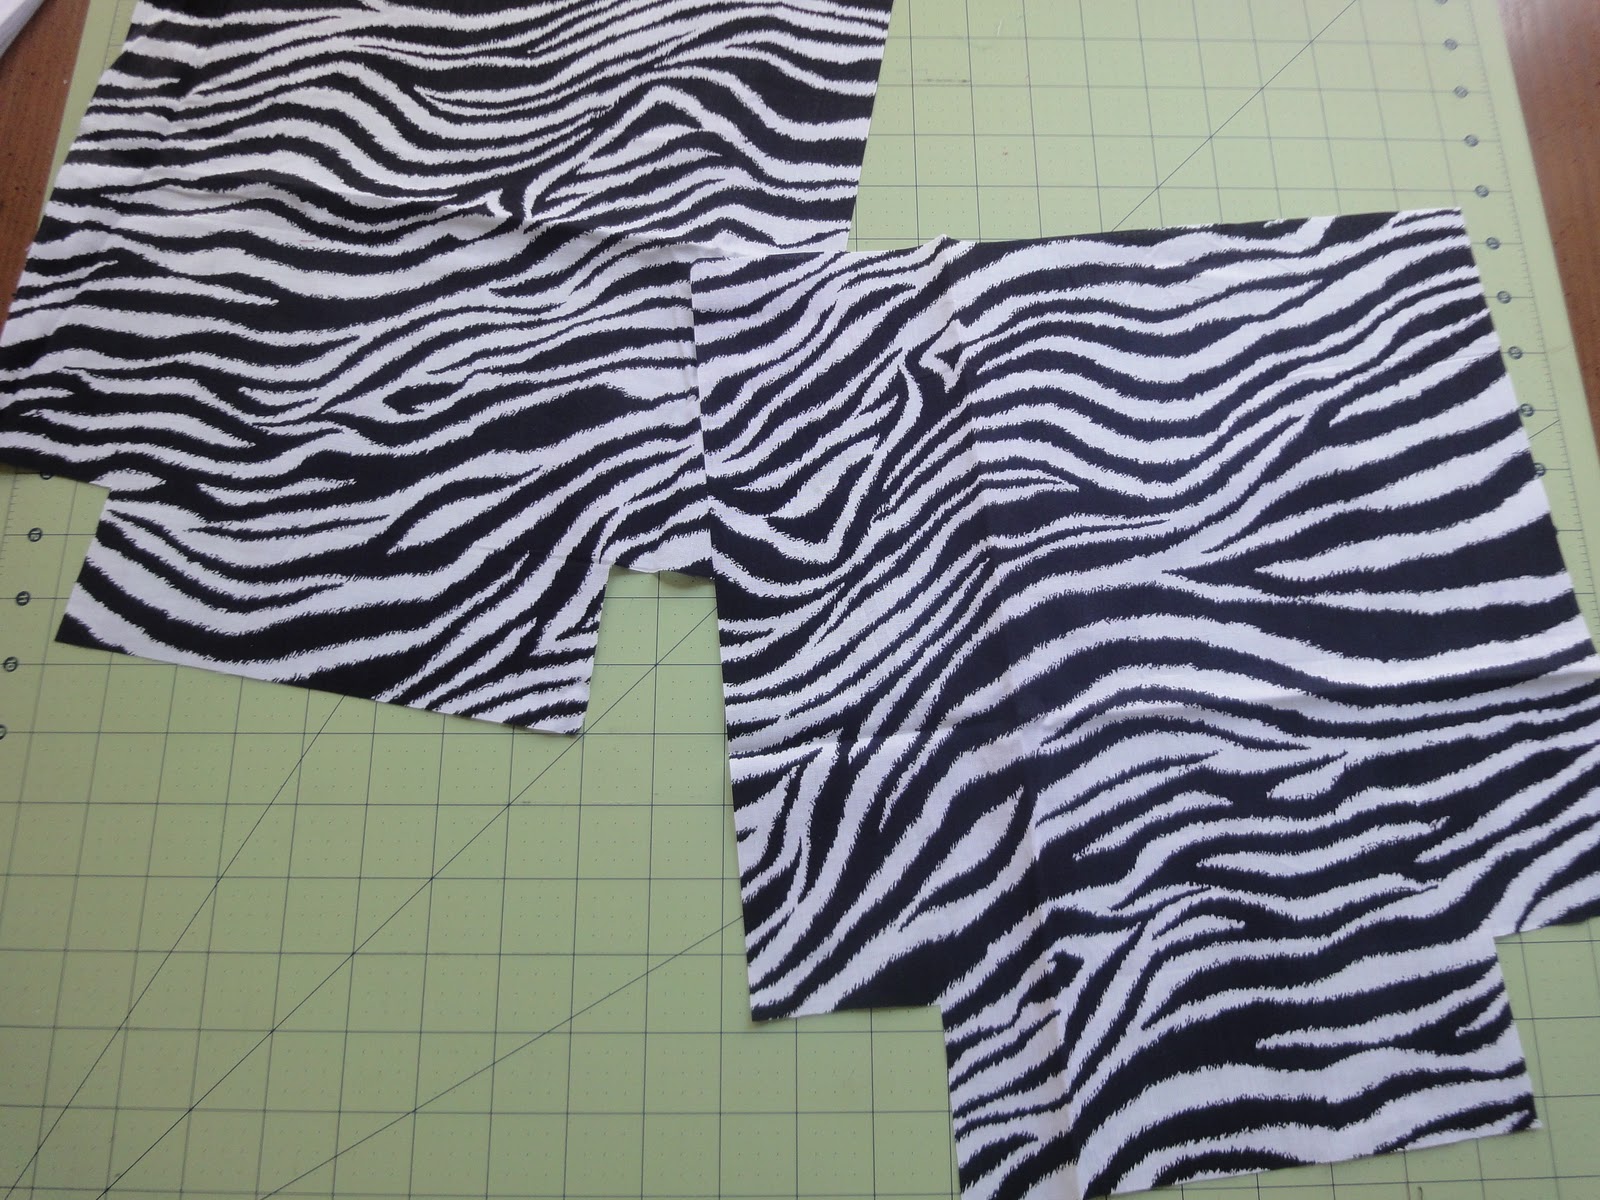
– 2 Outside pieces 14″ x 13″
– 2 Lining pieces 14″ x 13″
– 2 Handle pieces 24″ x 3″
– 2 Pocket pieces 8″ x 8″
– 2 pieces of interfacing 14″ x 13″
– 2 pieces of interfacing 24″ x 1″
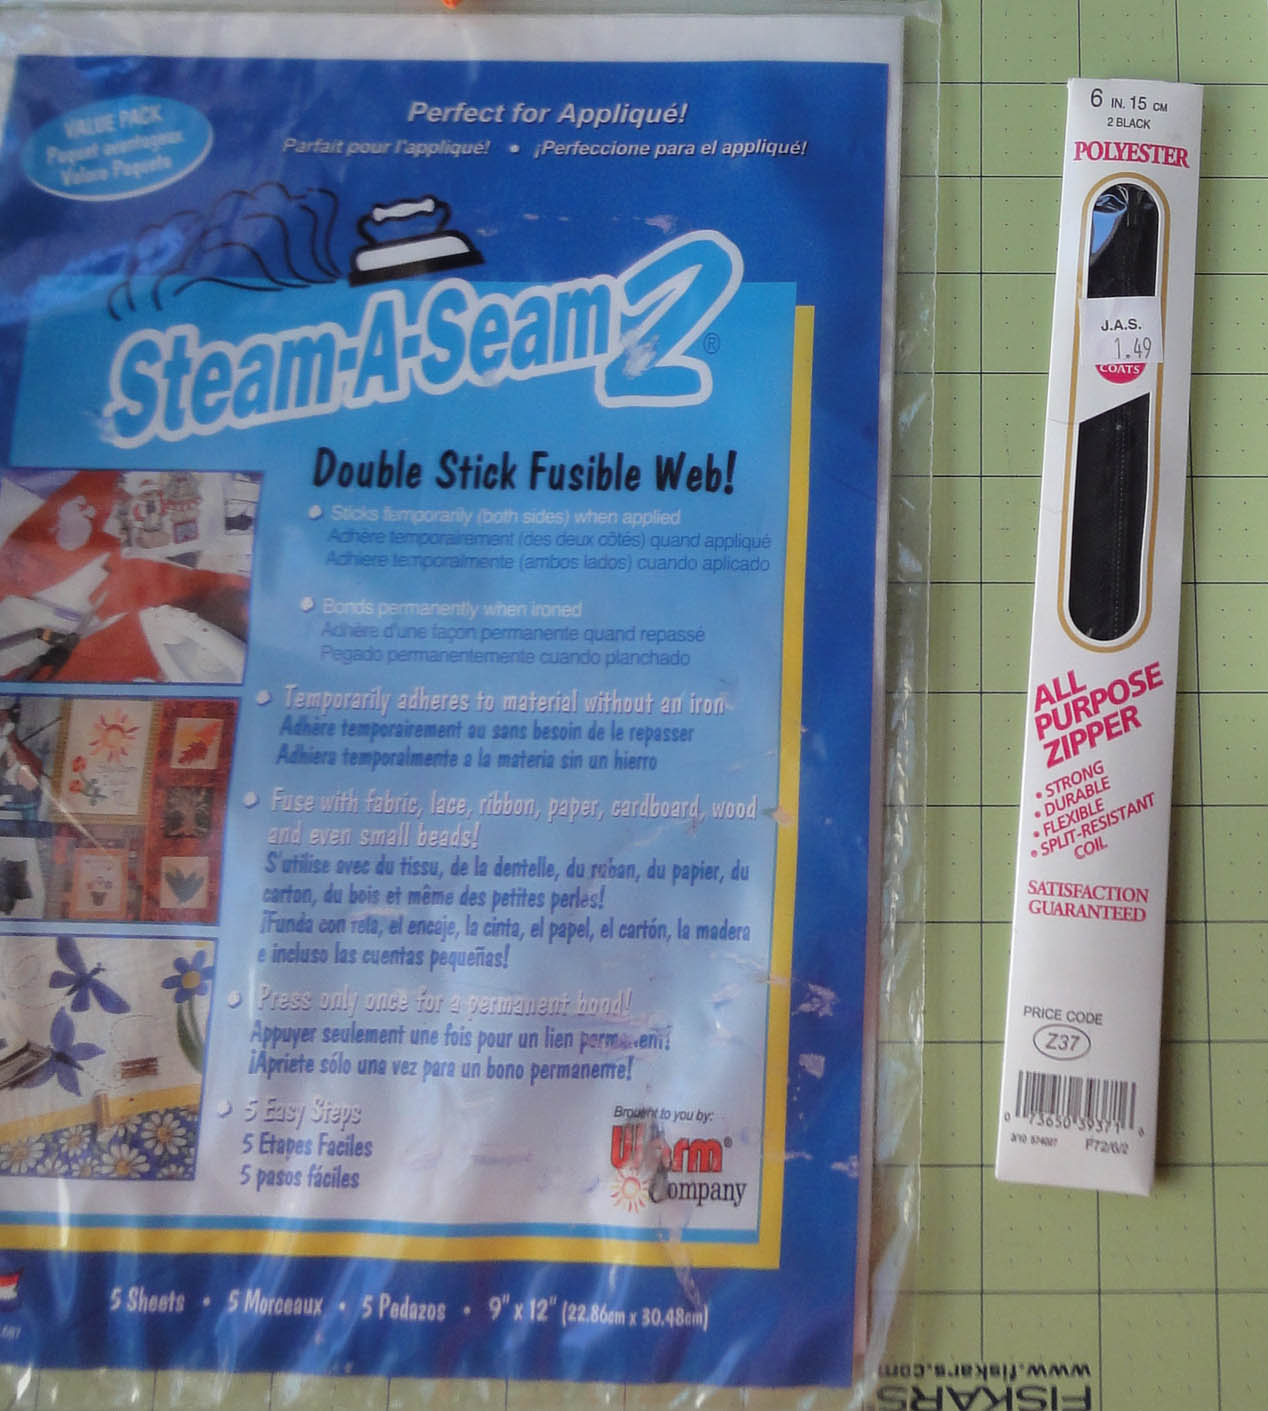
Here is the interfacing that I use for this project:
– 6″ zipper
– Double Stick Fusible Web
Ok! Here we go!
1. Iron on your 14″ x 13″ interfacing to the back of the outside pieces. The interfacing has a shiny side that is meant to fuse to the back of the fabric.
{Hint: if you are new to ironing on interfacing, place the interfacing shiny side up on your ironing board. Then place your fabric right side up on top. Iron on top of your fabric to fuse the two together.}
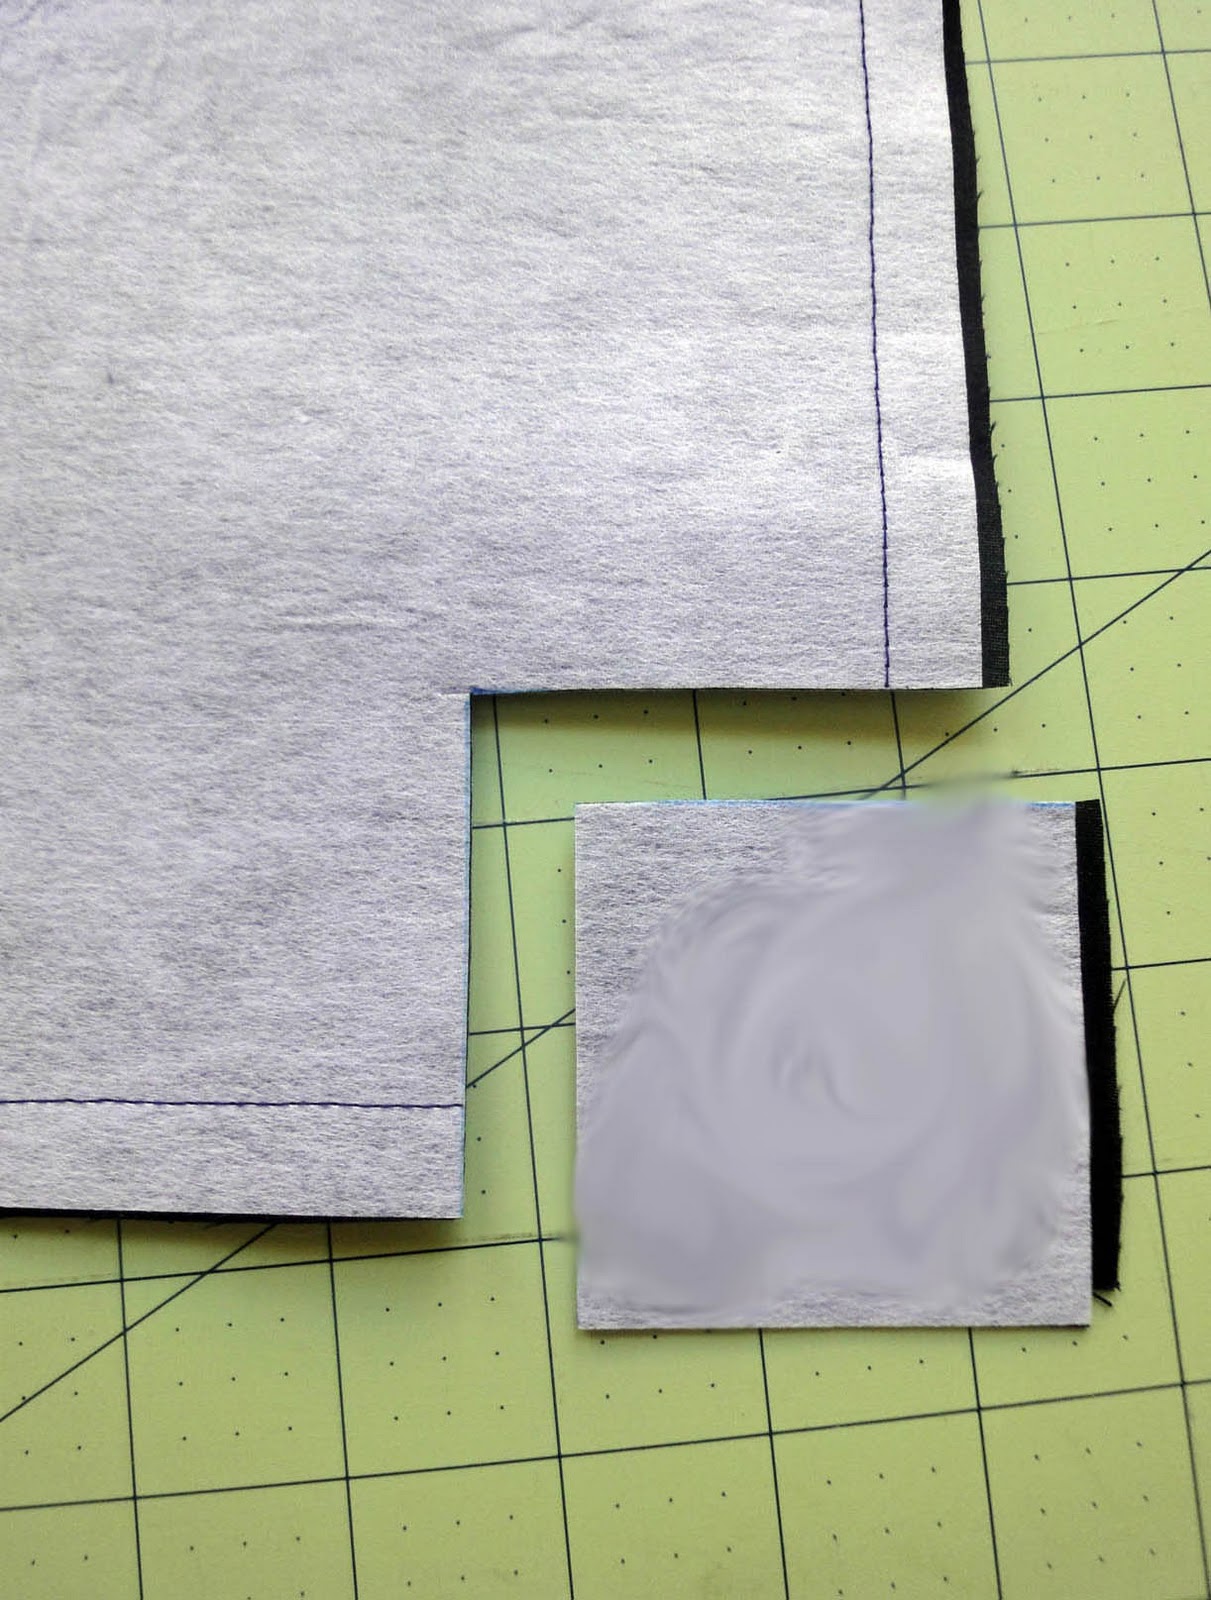
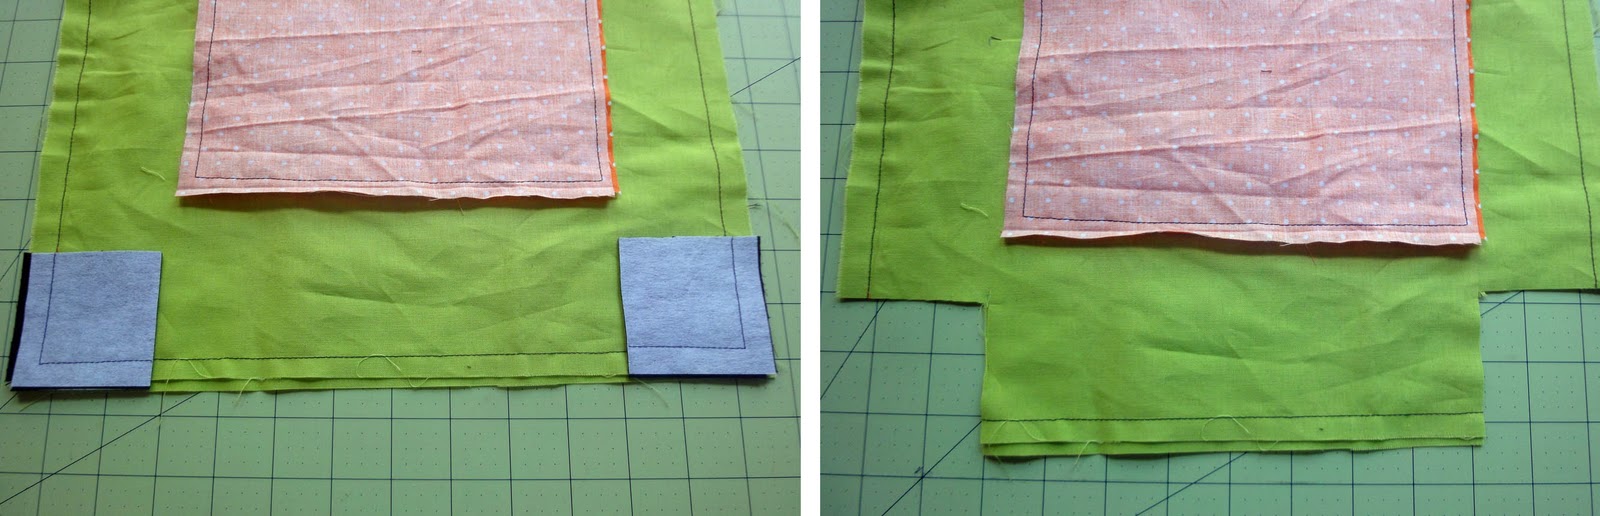
2. Cut 2.5″ squares off the bottom corners of each outside piece. Keep the squares you cut to use as templates later in the tutorial.
3. Decorate your bag!
{Important: Keep your design above the cut corners or it will end up on the bottom of the bag.}
a. Peel the paper backing off one half of the double sided fusible web and iron it onto the fabric you will use for your design. Remember to follow the same steps as ironing on interfacing.
Draw your design onto the paper part.
b. Cut them out, peel the other half of the paper of the fusible web and iron your design onto the bag.
c. You can layer different colors of fabric by repeating the same steps.
Optional Challenge:
Applique around the pieces you fused to the fabric.
Heidi has a great applique tutorial here!
I also added some zig zag stiching for the whiskers and eyelashes – so have fun with this!
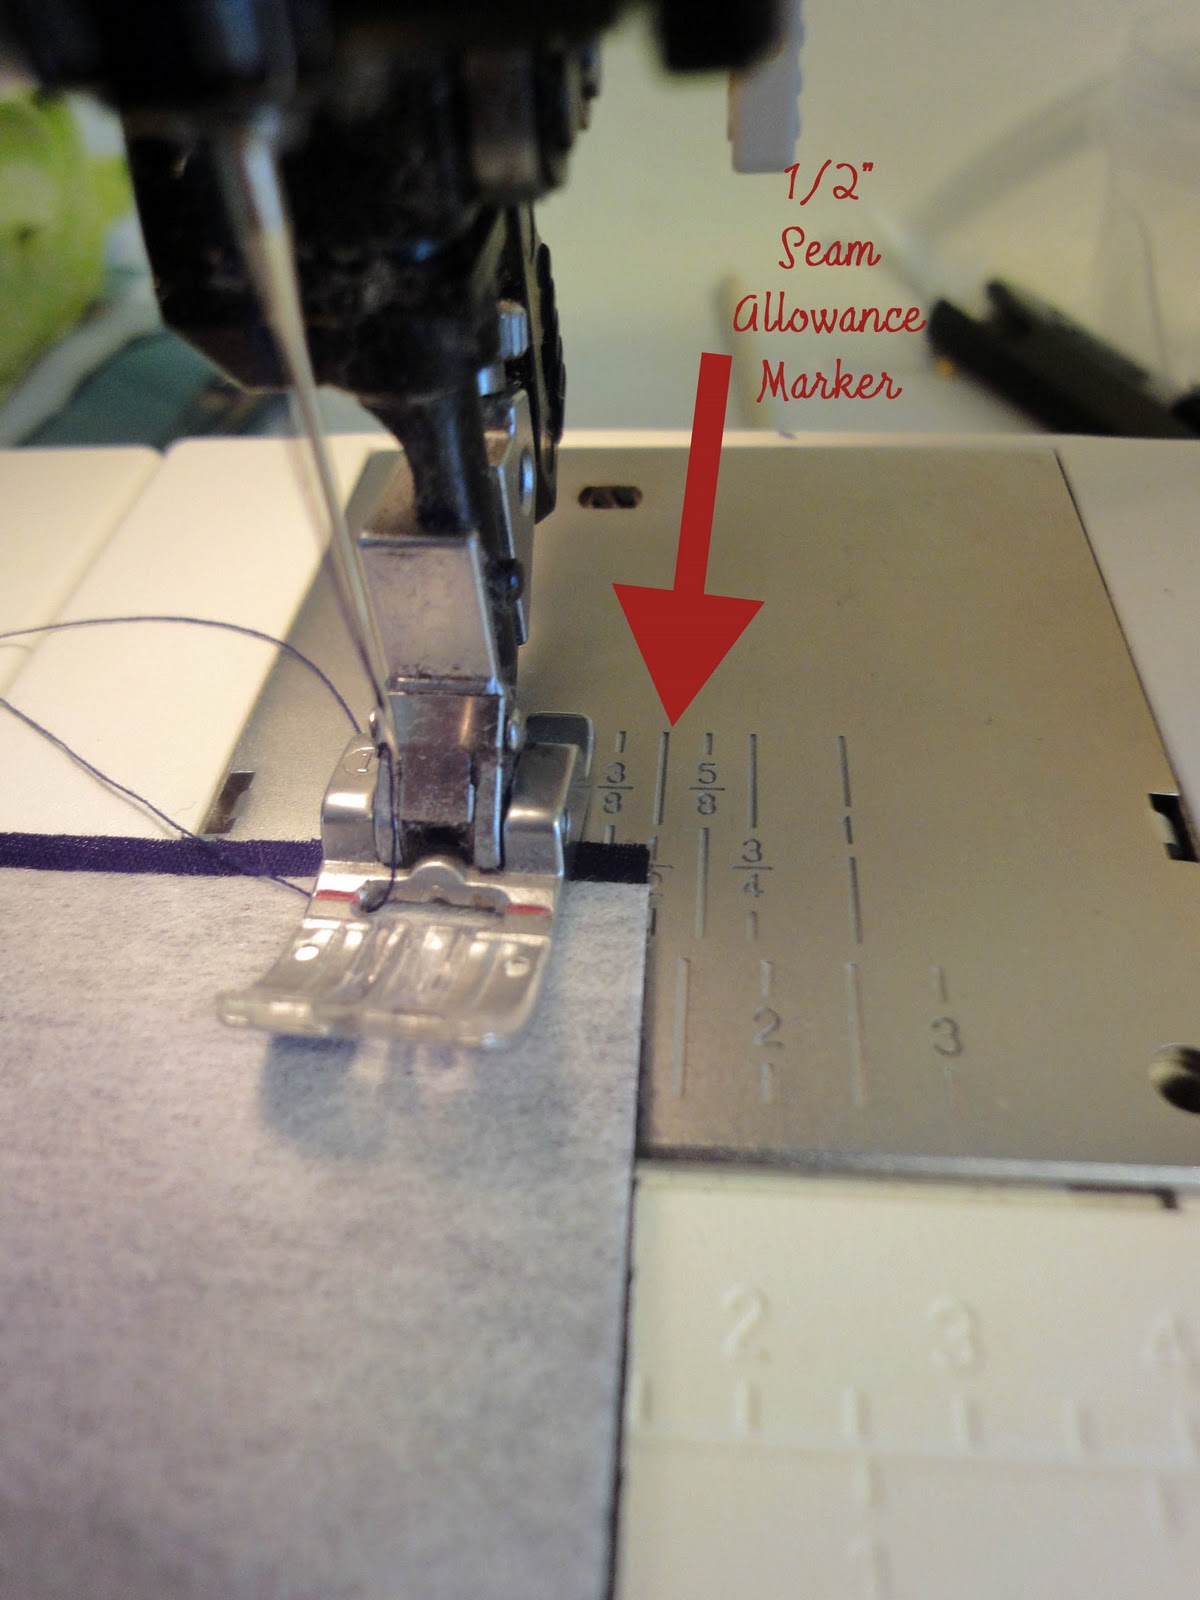
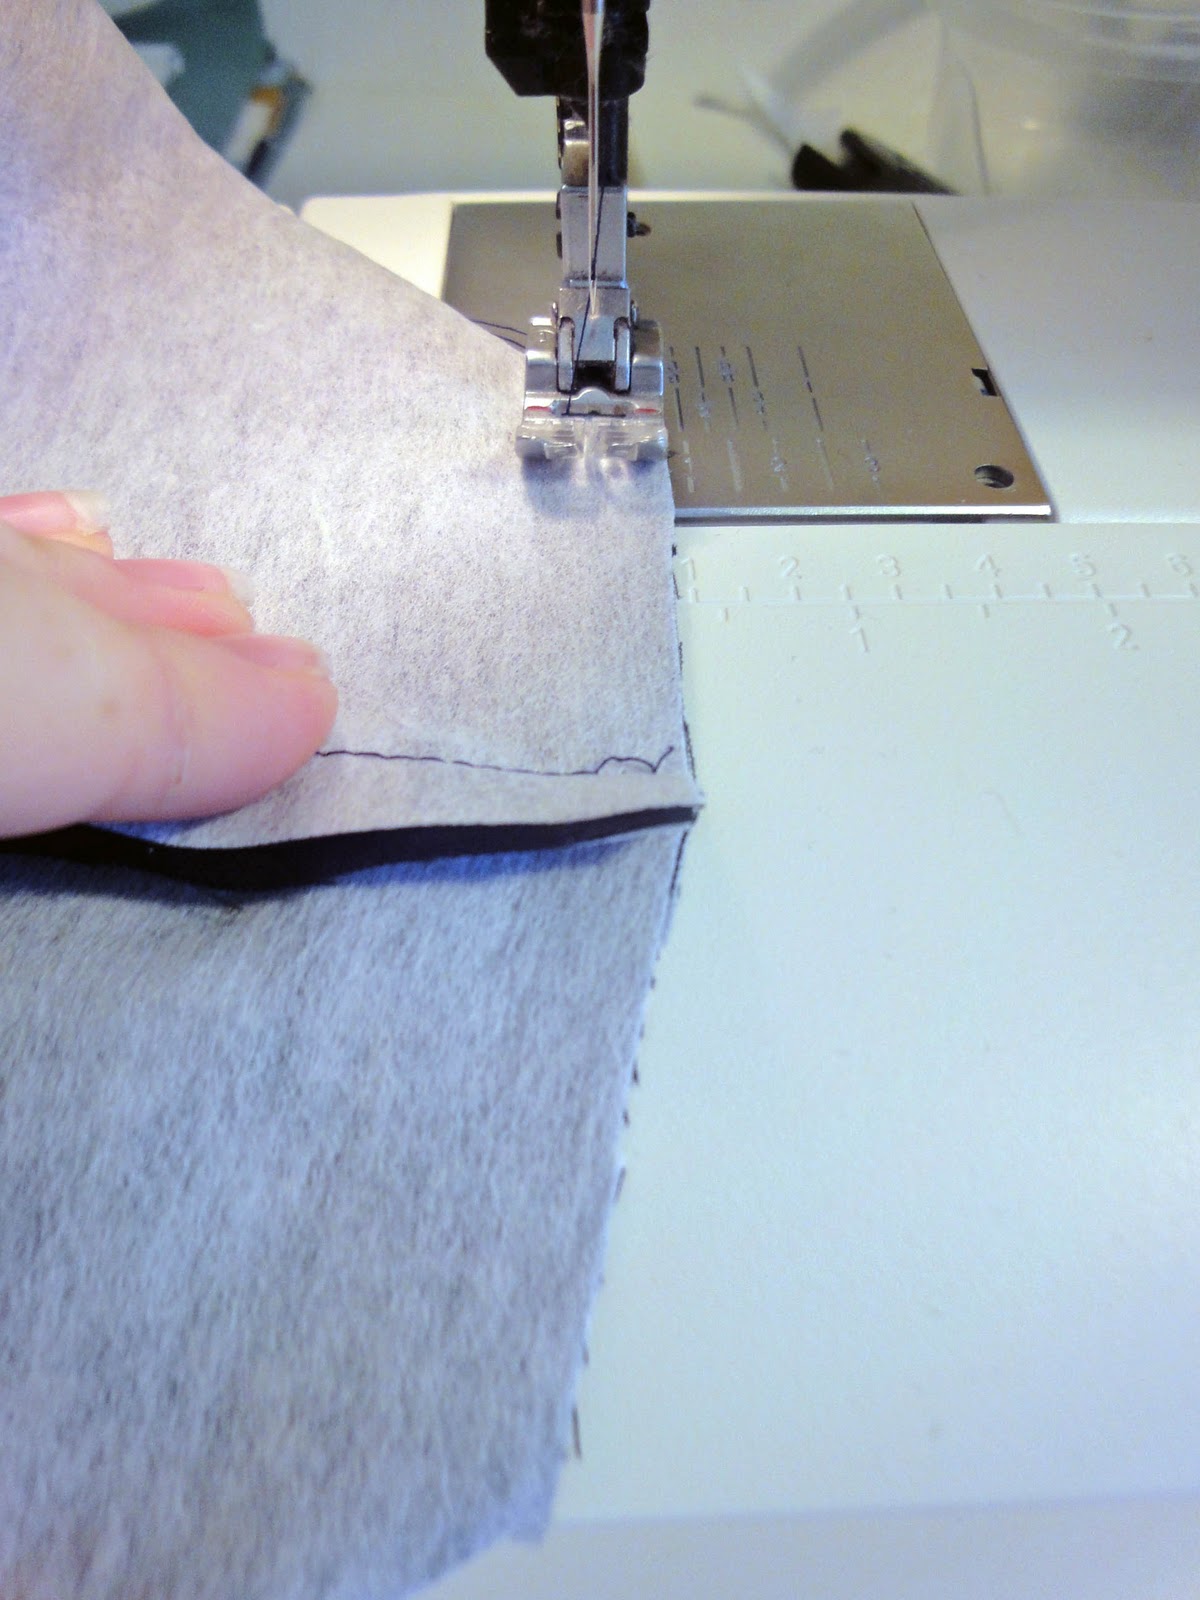
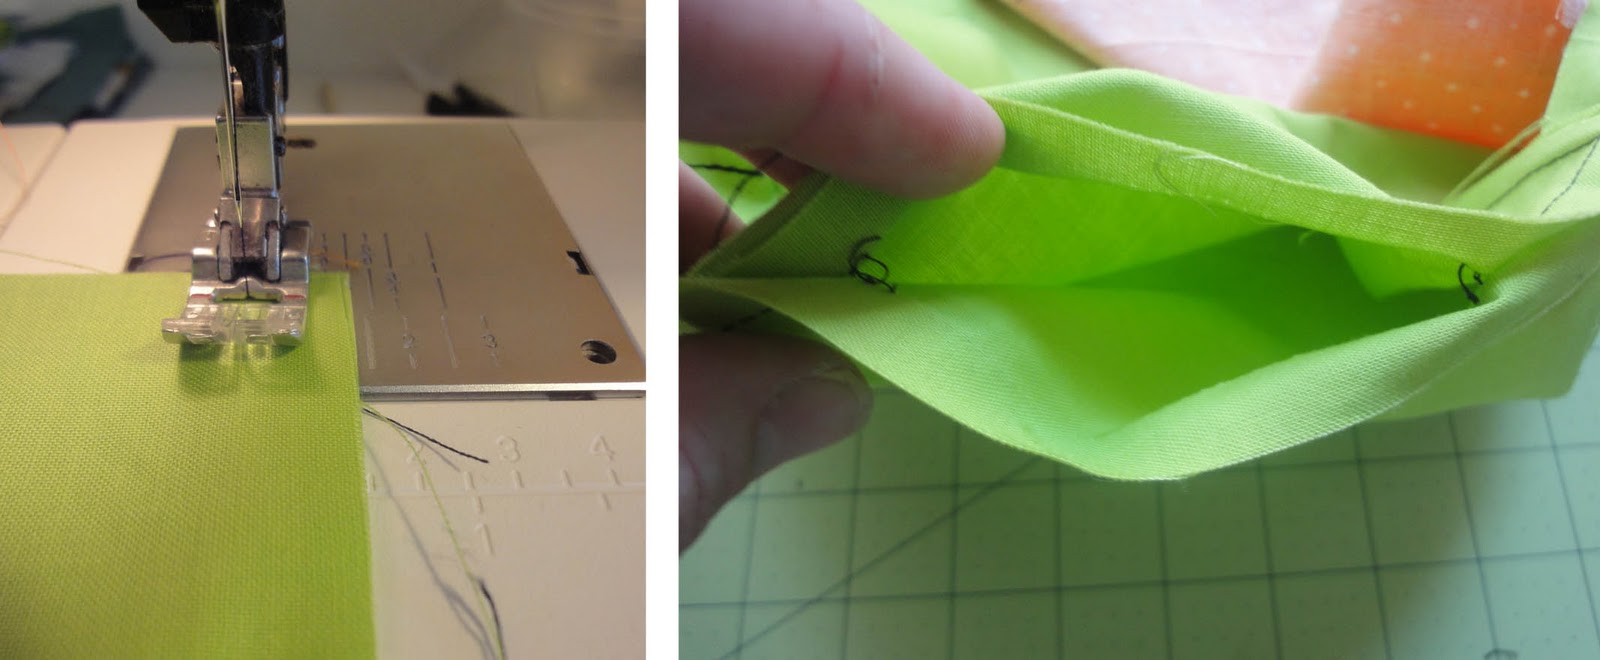
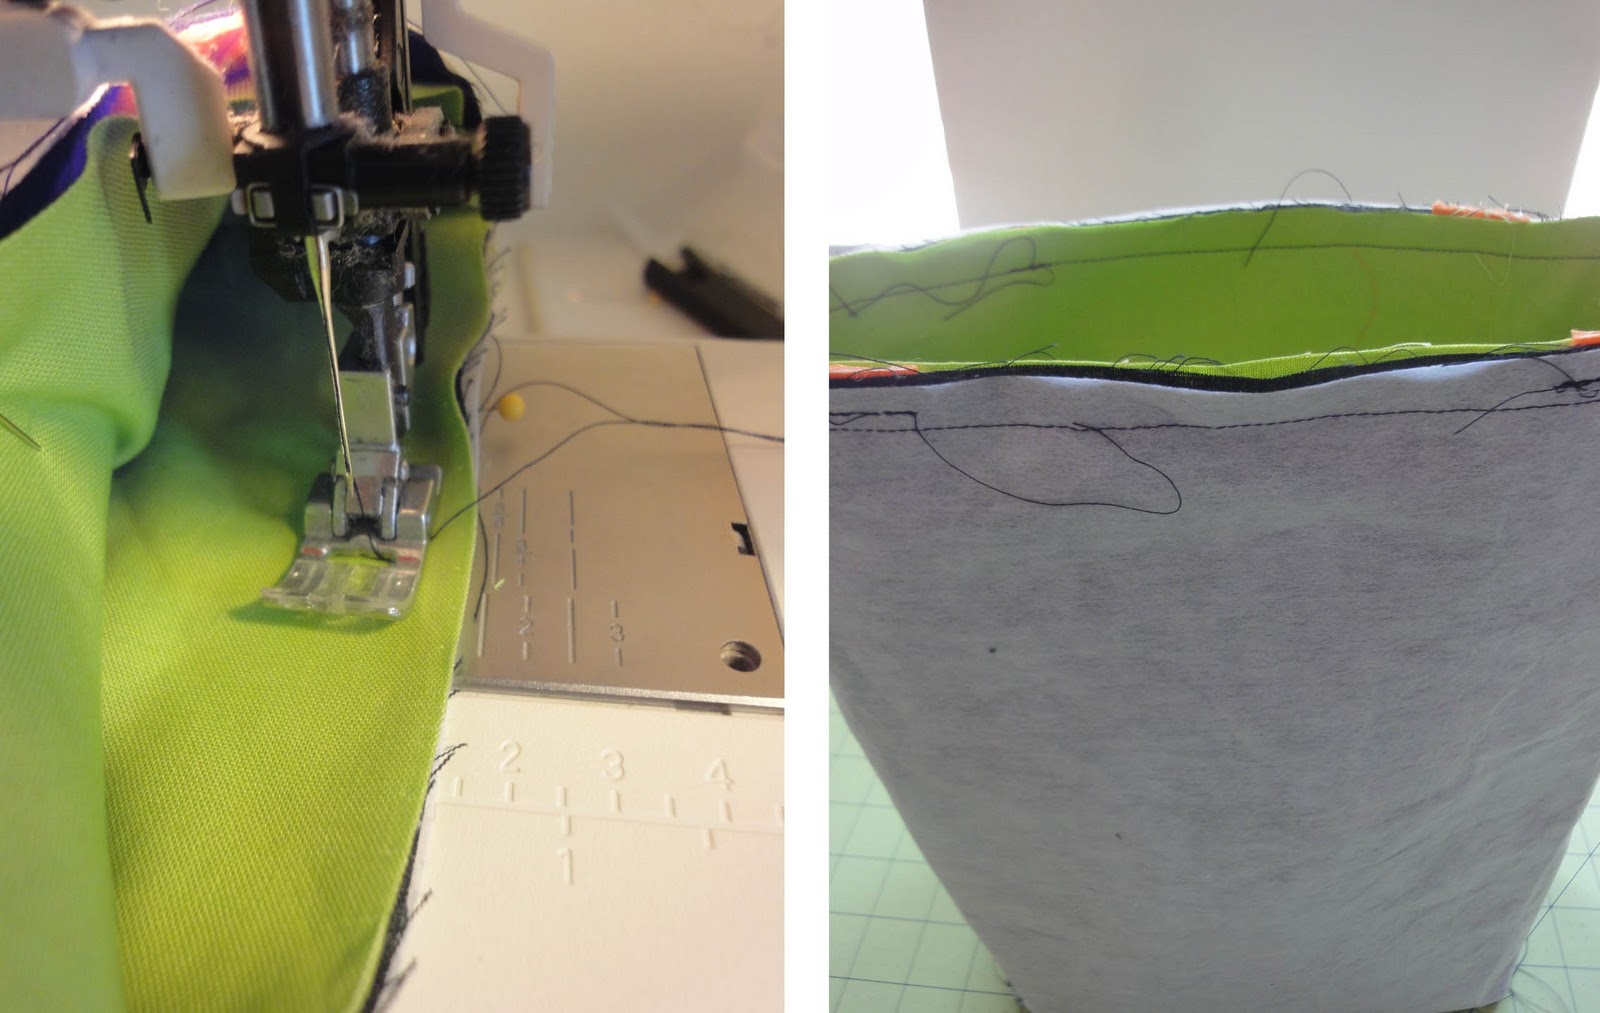
4. With right sides together, pin around the sides and bottom of your bag. Then sew with a 1/2″ seam allowance on each side and the bottom (reversing your stitch a little when you start down a side and when you finish a side to secure the stitch).
Here is where the 1/2″ seam allowance marker is:
This is what your seams should look like:
 |
| Ignore the 2.5″ square cutout in this picture 🙂 |
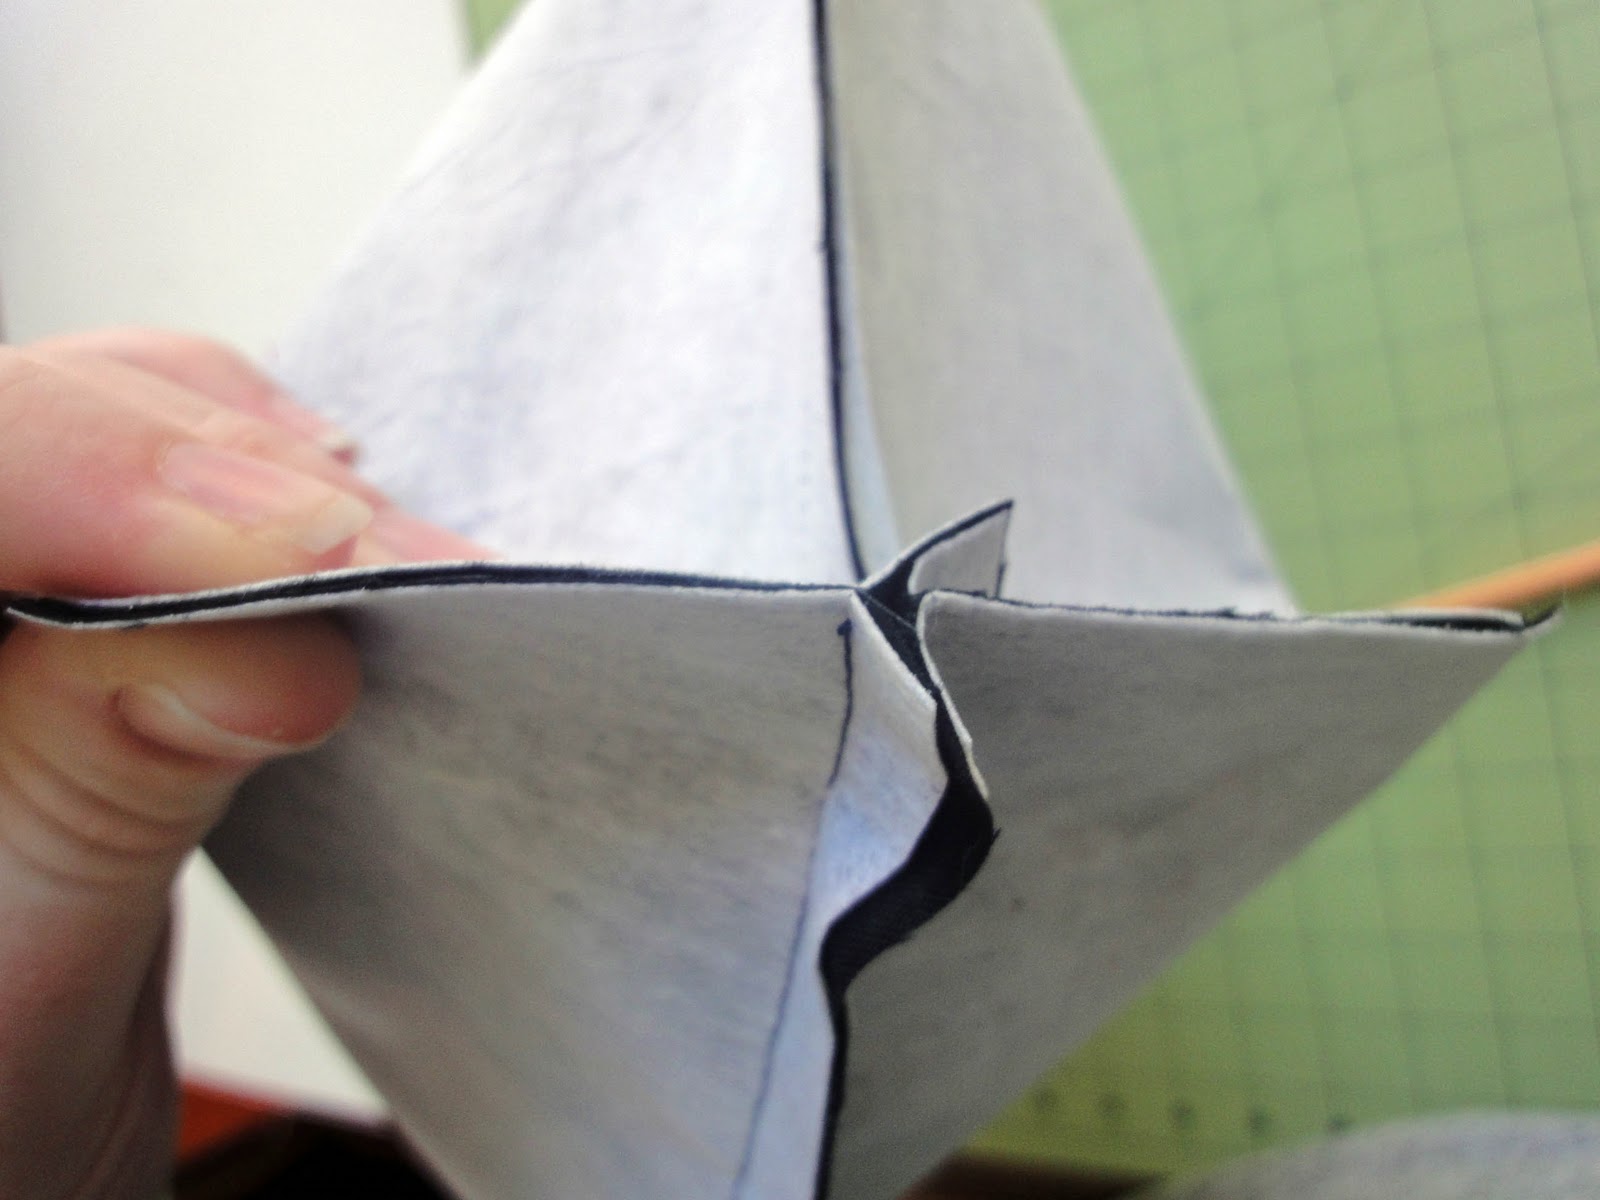
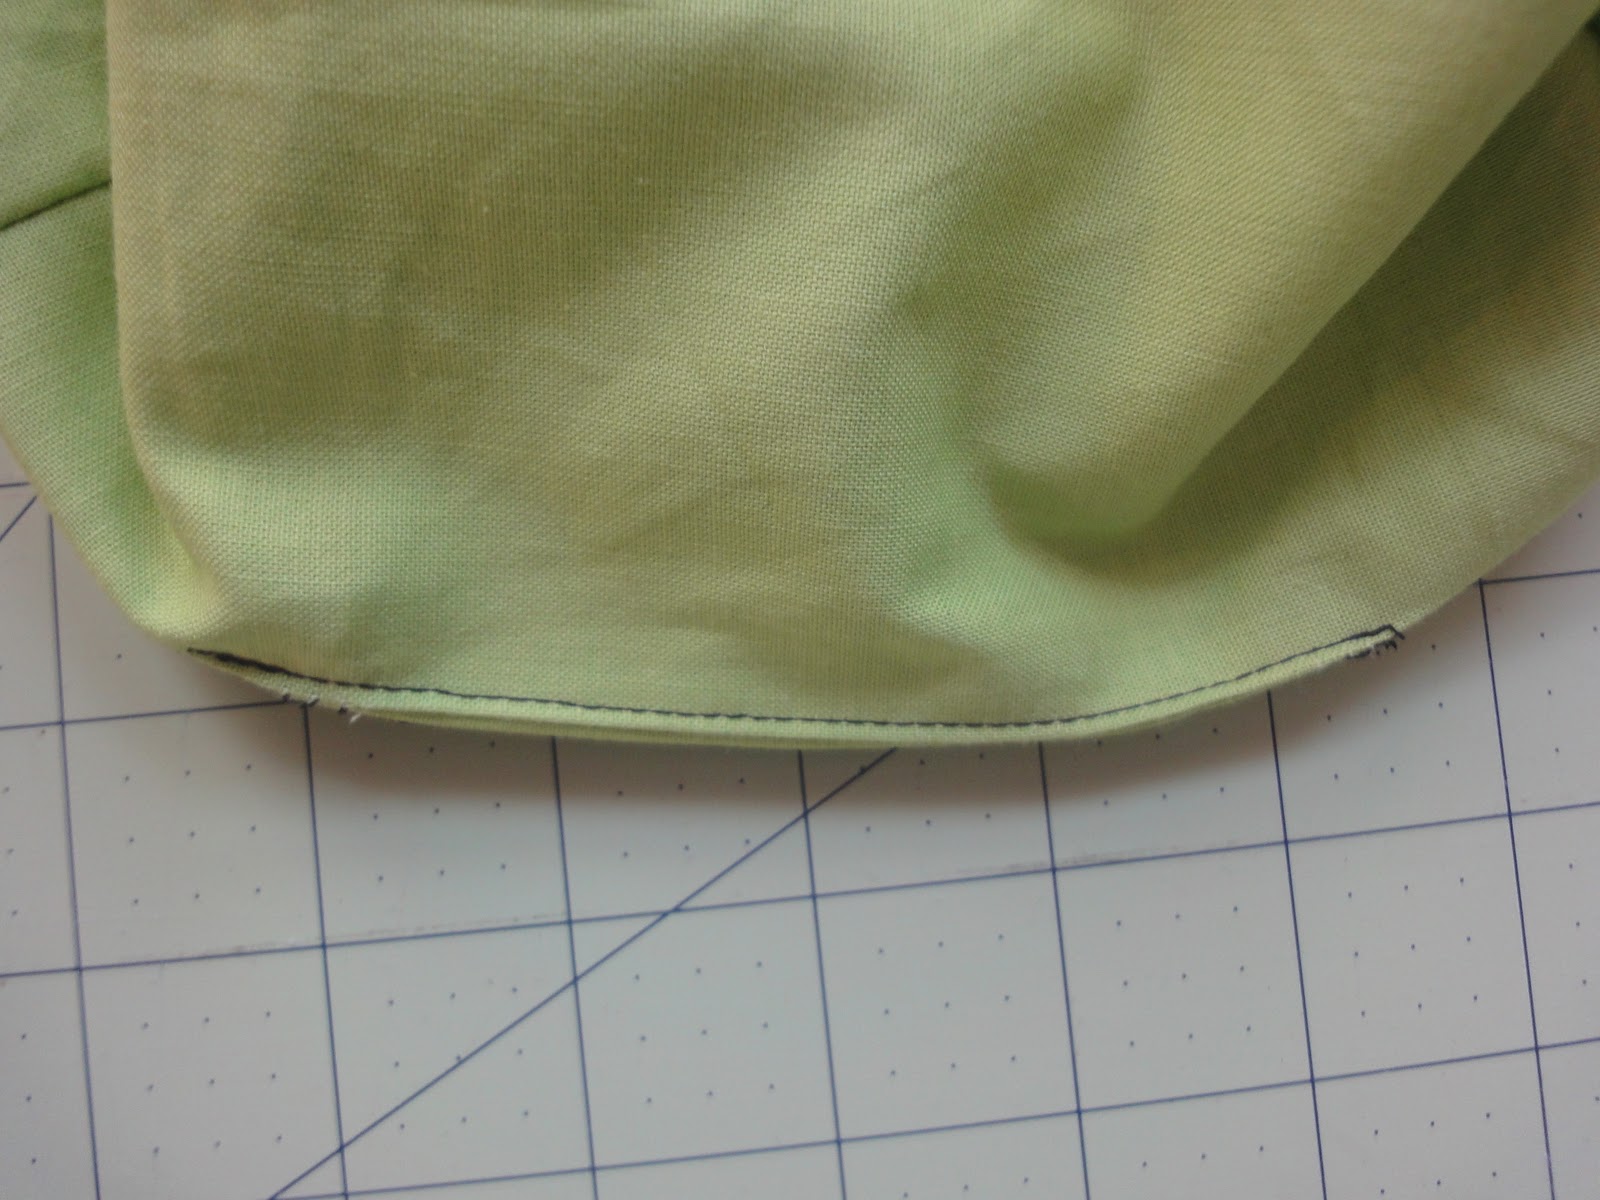
5. Pull apart your bag at each cut off corner and match up the side seam to the bottom seam.
6. Sew it shut with a 1/4″ seam allowance (basically the edge of your presser foot follows the edge of the fabric).
7. Repeat for the other corner and your bag should have a flat bottom!
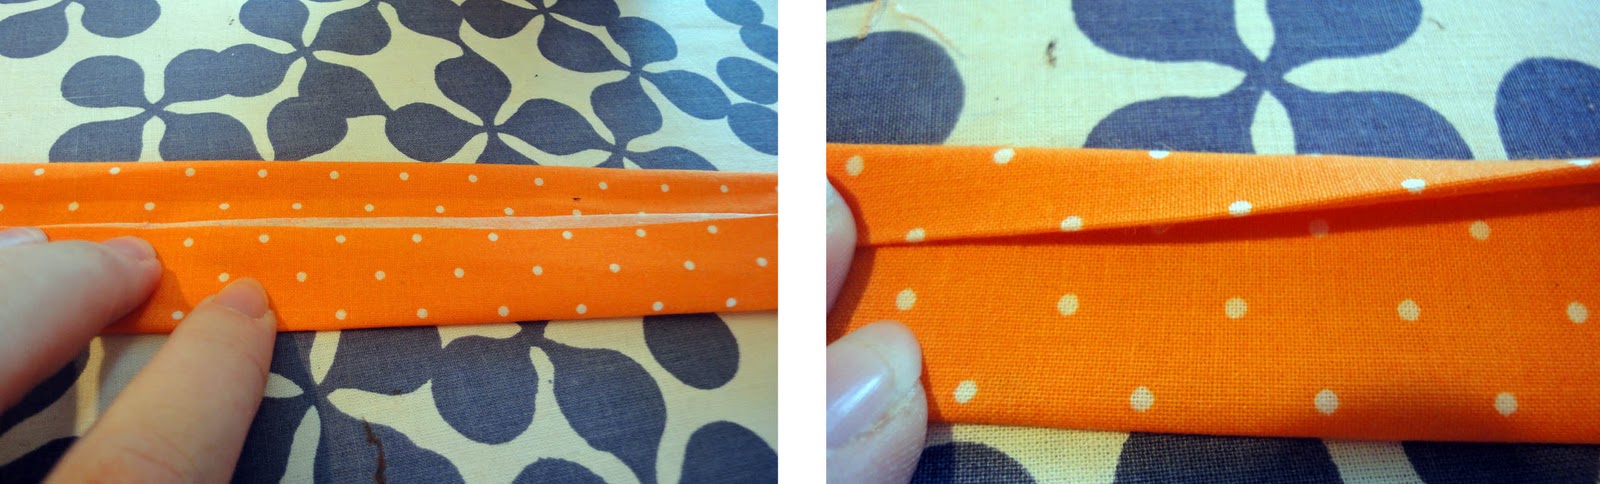
8. Now to make the handles, take the two 24″ x 3″ pieces of fabric you cut, fold one side in 1/4″ and iron.
9. Take your 24″ x 1″ interfacing piece, line it up with the raw edge of the folded side, flip it over and iron.

10. Fold the raw edge up over the interfacing and iron. Then fold the other edge down on top of the raw edge. Iron.
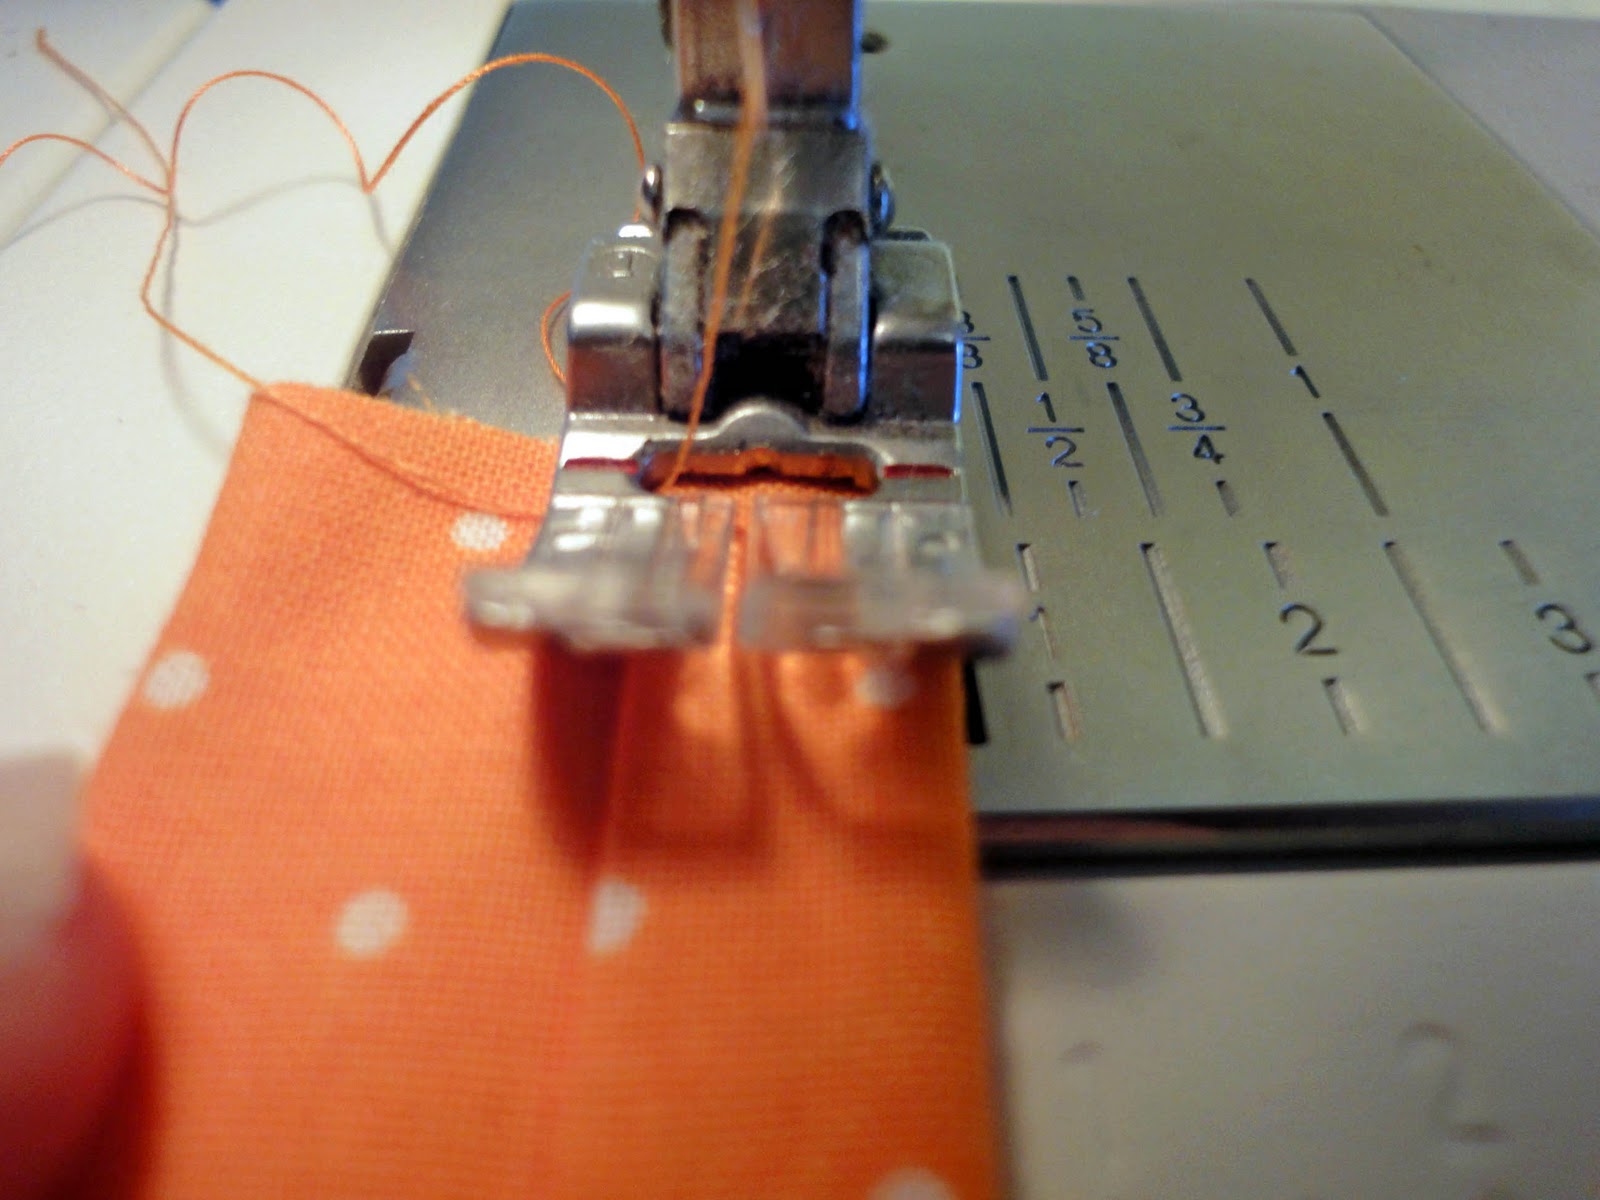
11. Sew down the handle on top of the folded edge with a 1/4″ seam allowance to keep it closed.
12. Sew along the other edge of the handle with a 1/4″ seam allowance to keep things looking even.
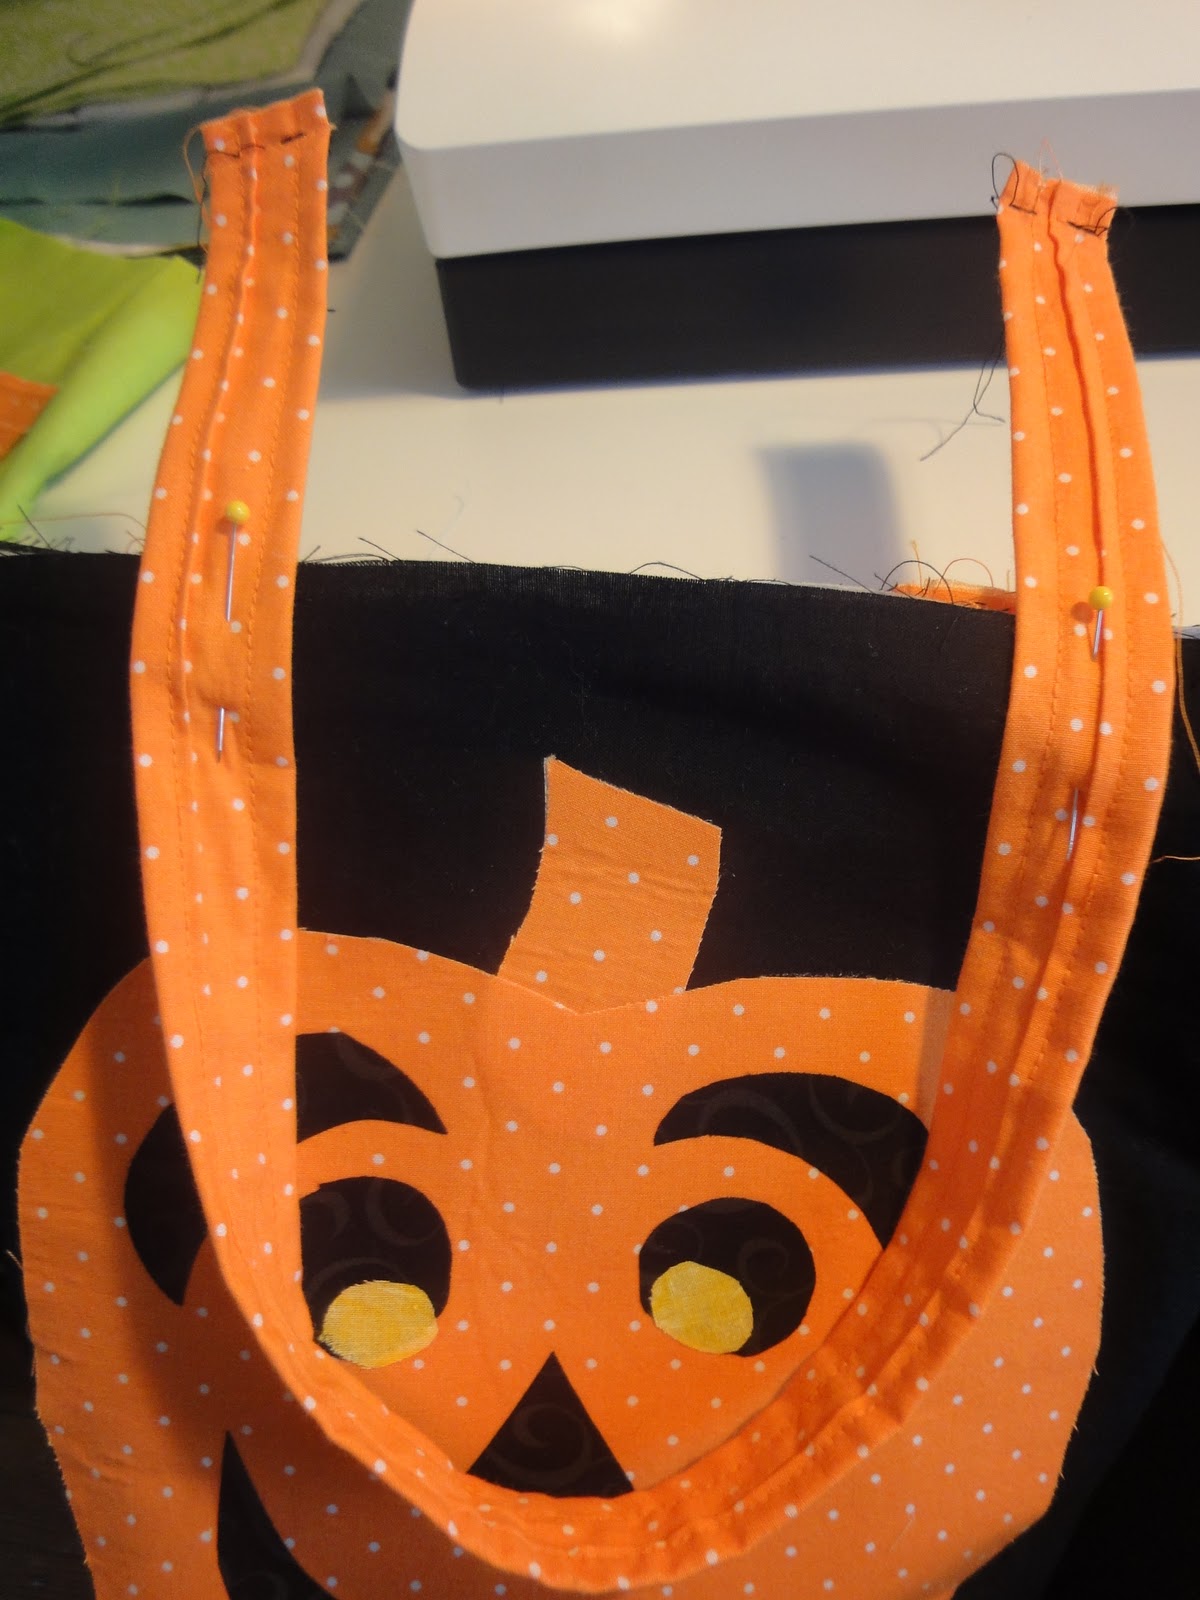
13. You can make the handles any length you want by pinning about 3″ in from the bag side seams and cutting off the excess.
{Shorter handles work better for younger kids and longer handles are more suitable for older kids!}
14. Sew with a 1/4″ seam allowance to secure the handles to the bag.
{Hint: to hide the folded edge of the handle, pin with the folded edge facing you. It will become the inside of the handles when we are finished.}
Now, let’s work on the inside of the bag – starting with the zippered pocket!
{if the zippered pocket is too much of a challenge for you at this point, skip to step #25. But I encourage you to try!}
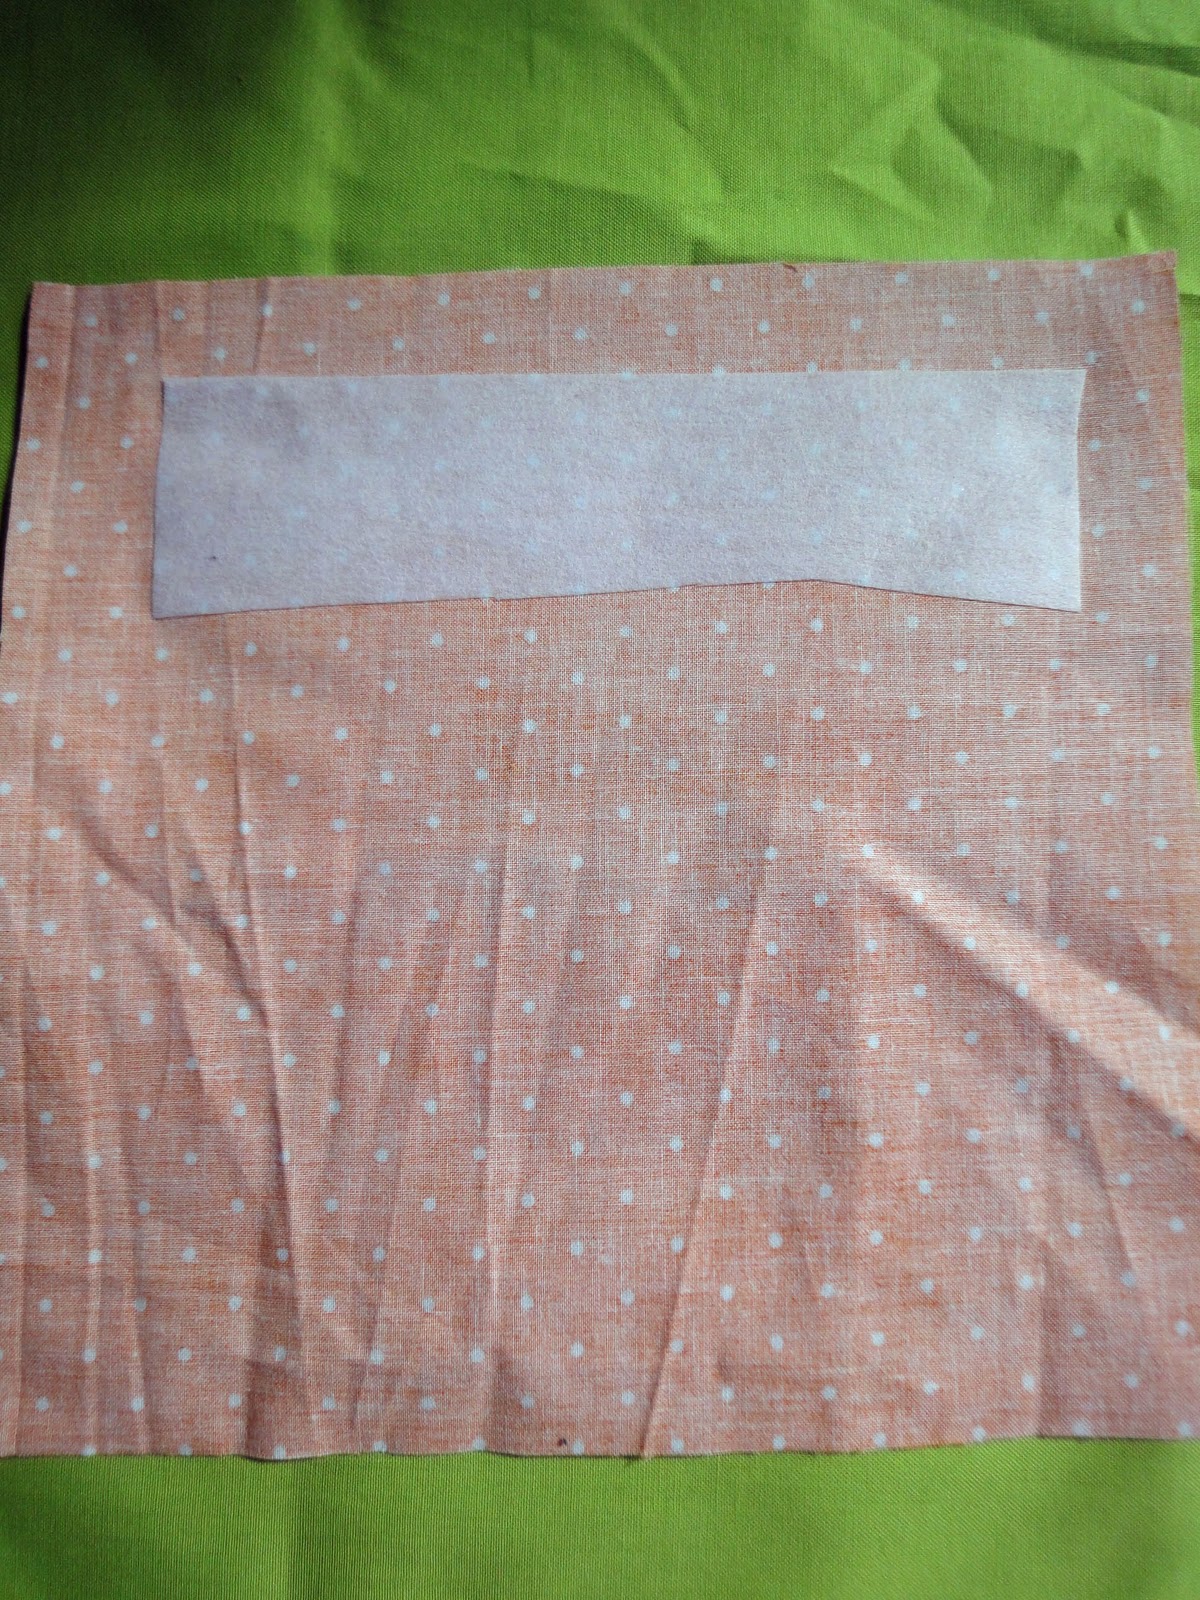
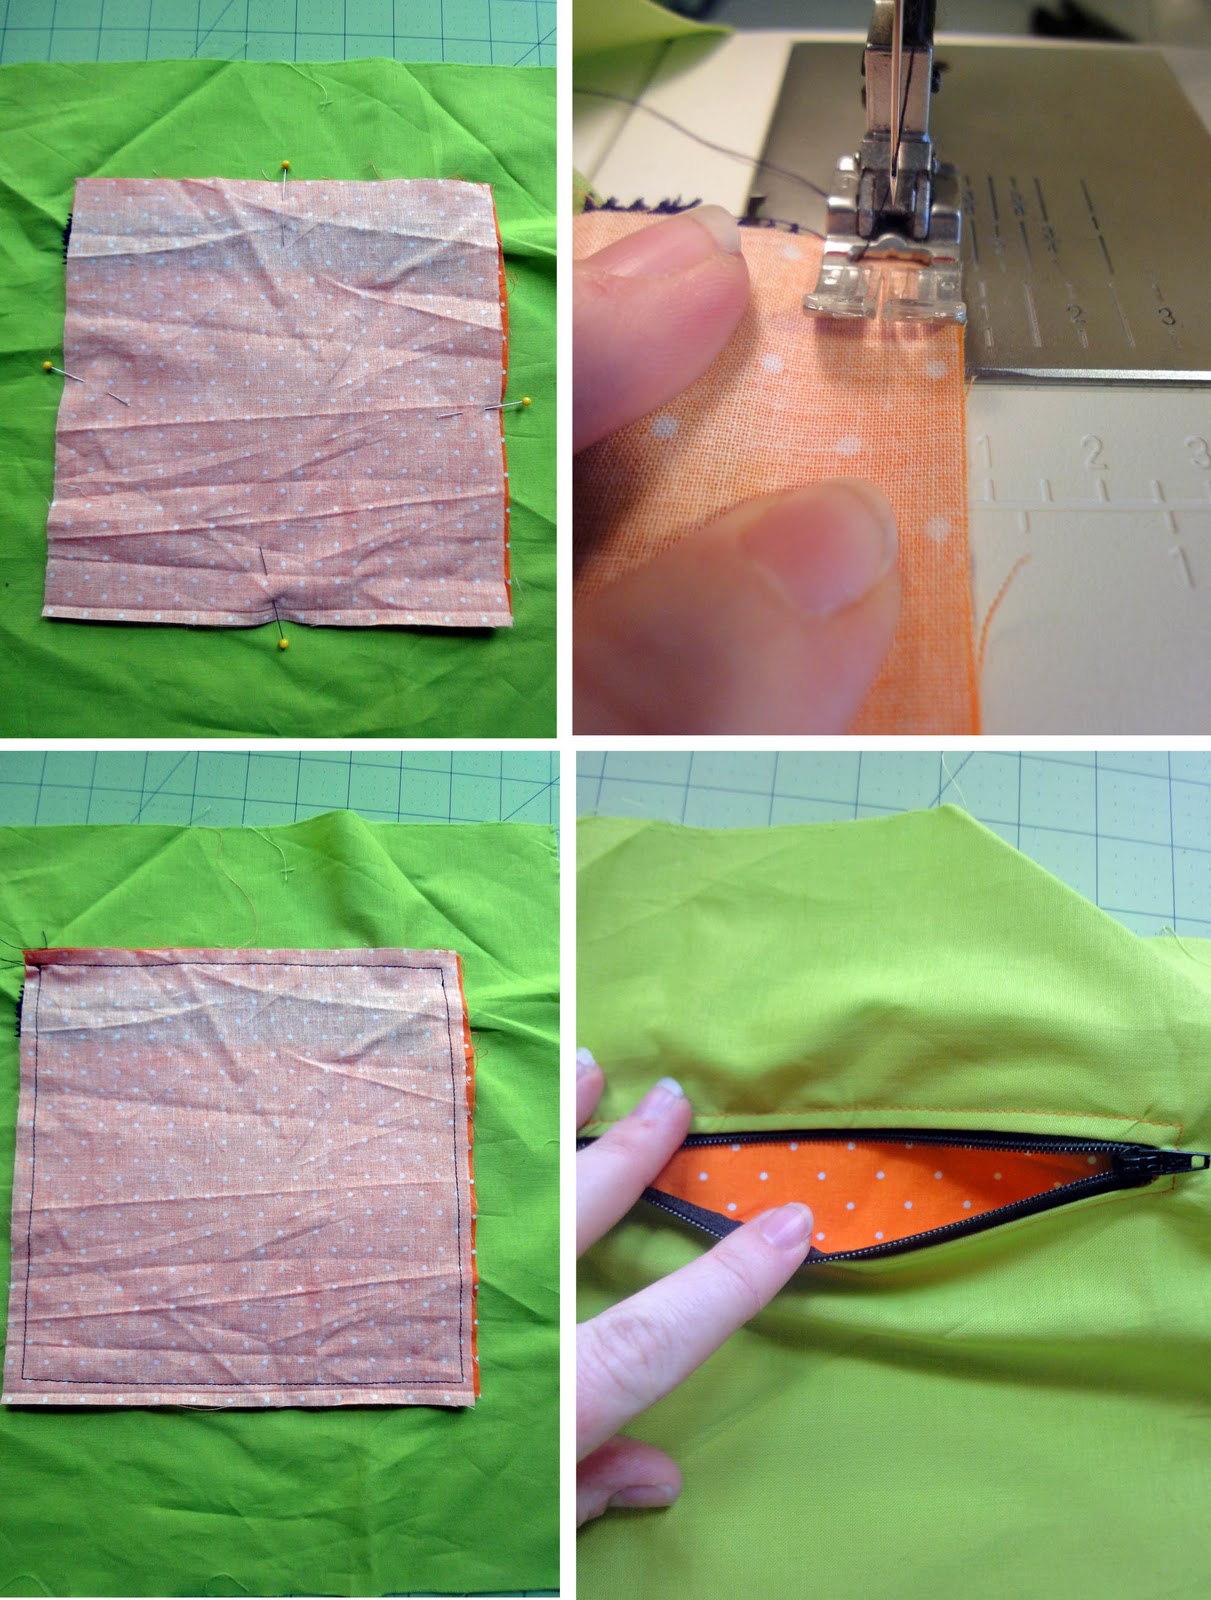
15. Take one of your 14″ x 13″ lining pieces and one of your 8″ x 8″ pocket pieces. Iron on a strip of interfacing to the back of the pocket piece where you want your zipper to be.
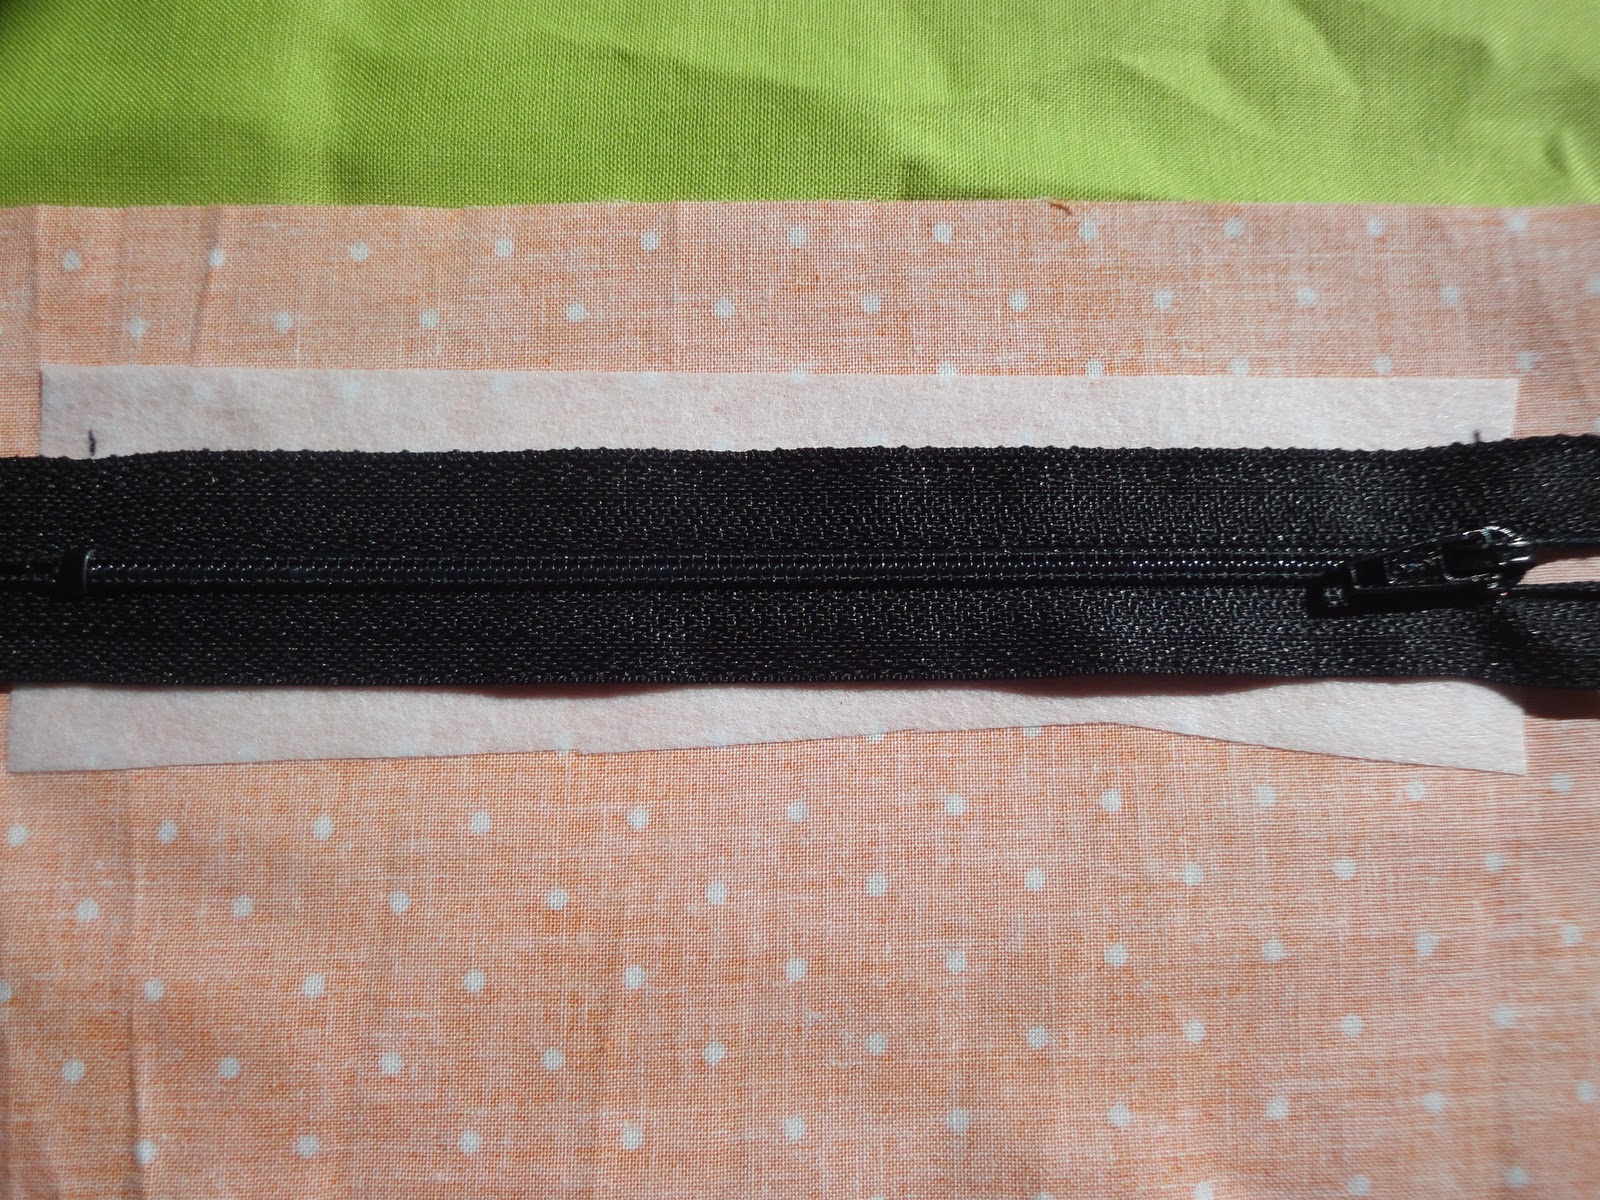
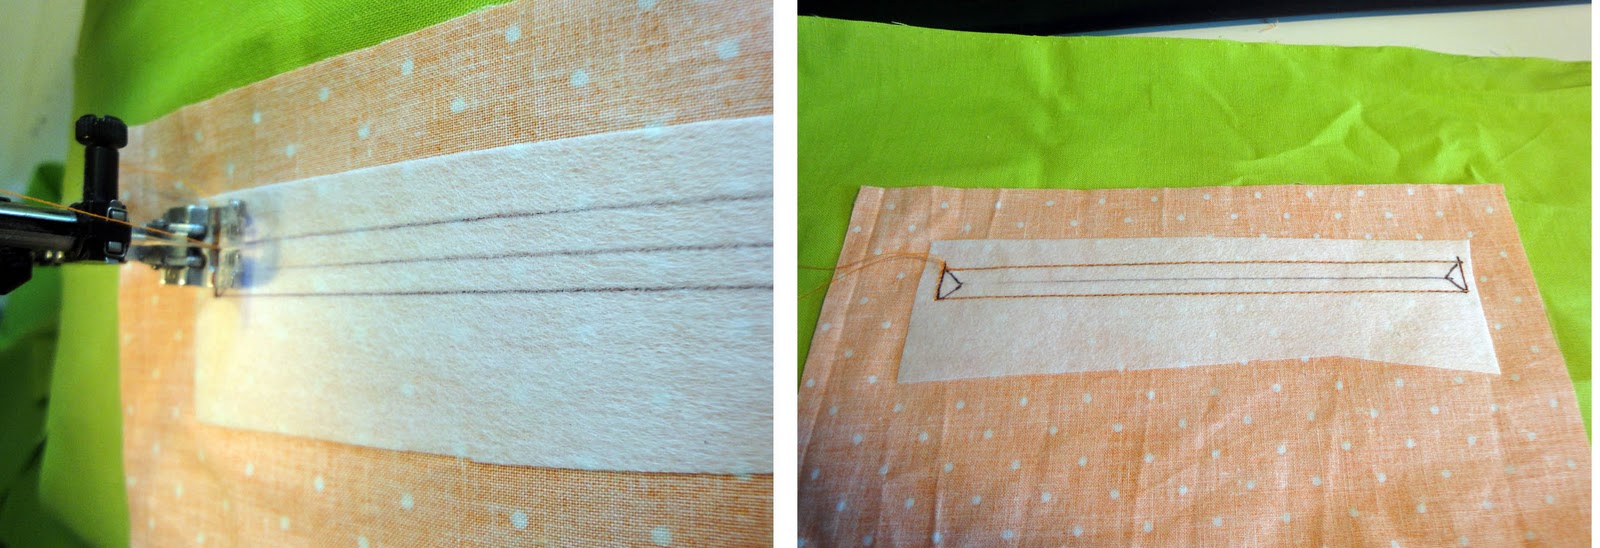
16. Take your 6″ zipper and draw a small line on the outside of the zipper pull and the outside of where the zipper stops.
17. Using a ruler, draw a line connecting those two points.
18. Measure 1 cm down on either side and connect again. You should end up with a long rectangle.
19. Free hand triangles on each side of the rectangle and connect the points.
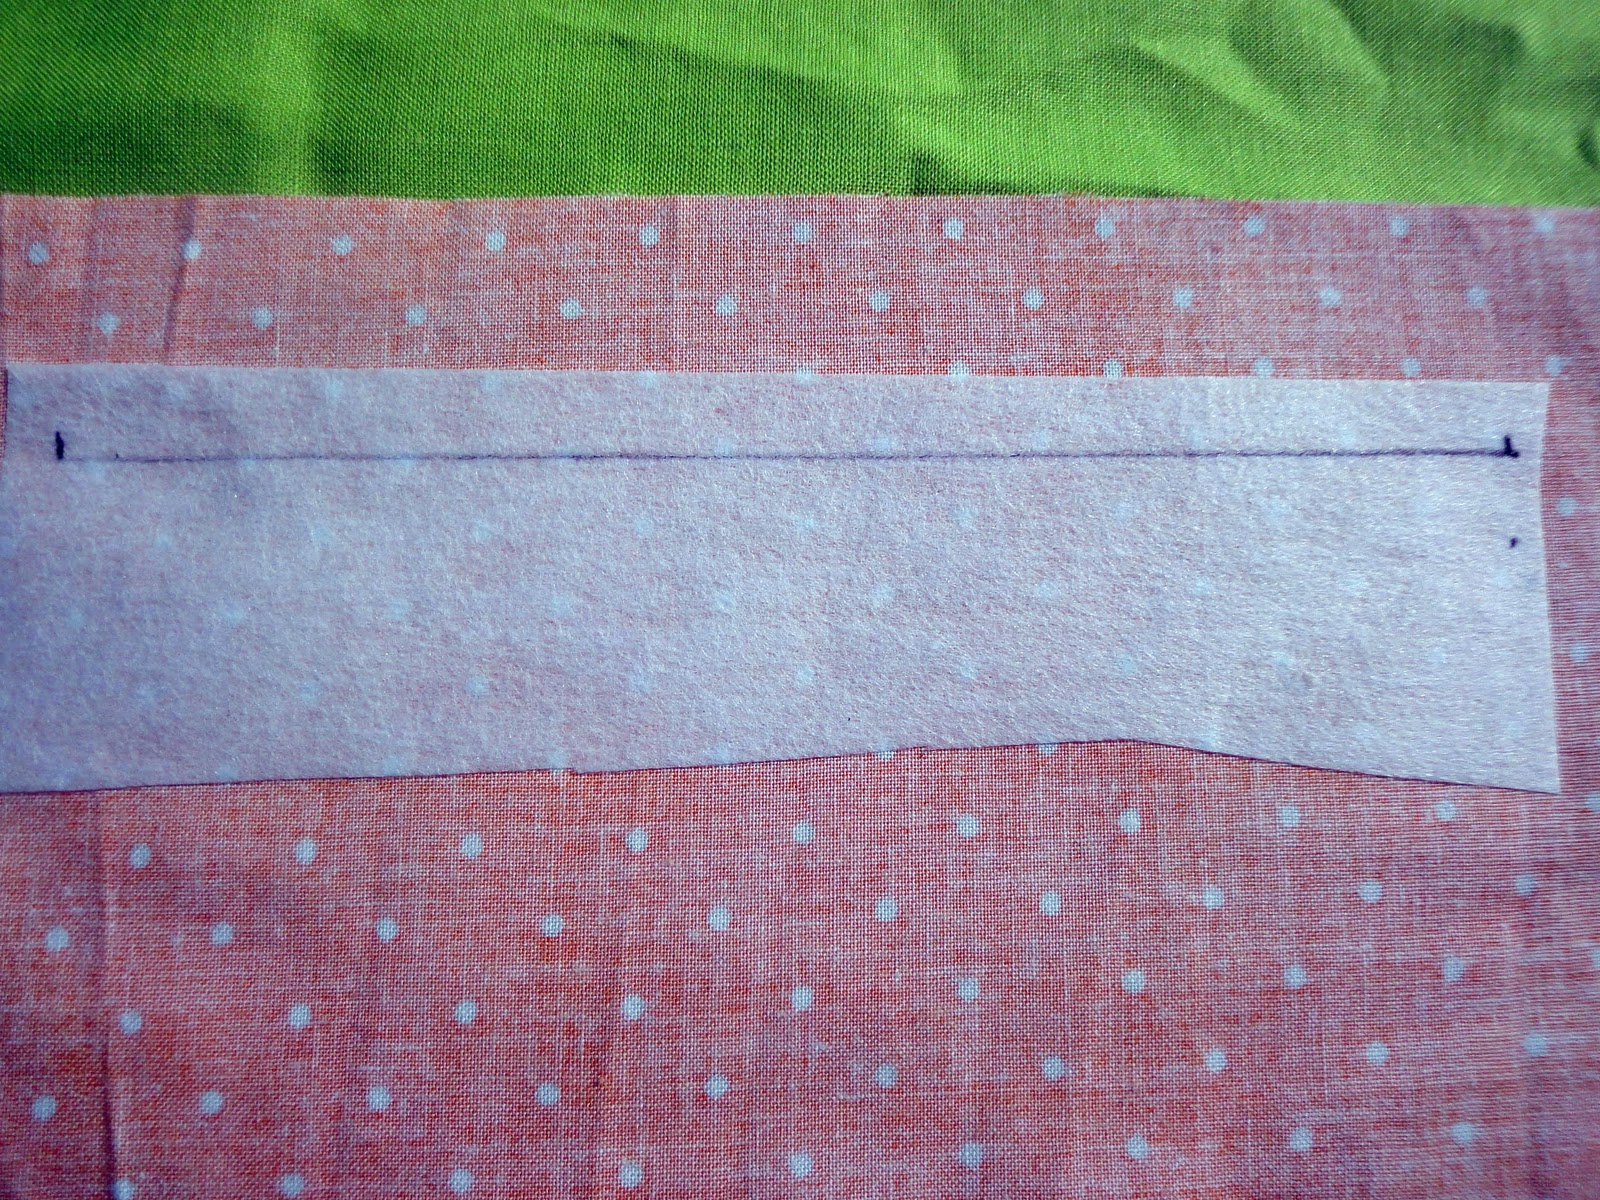
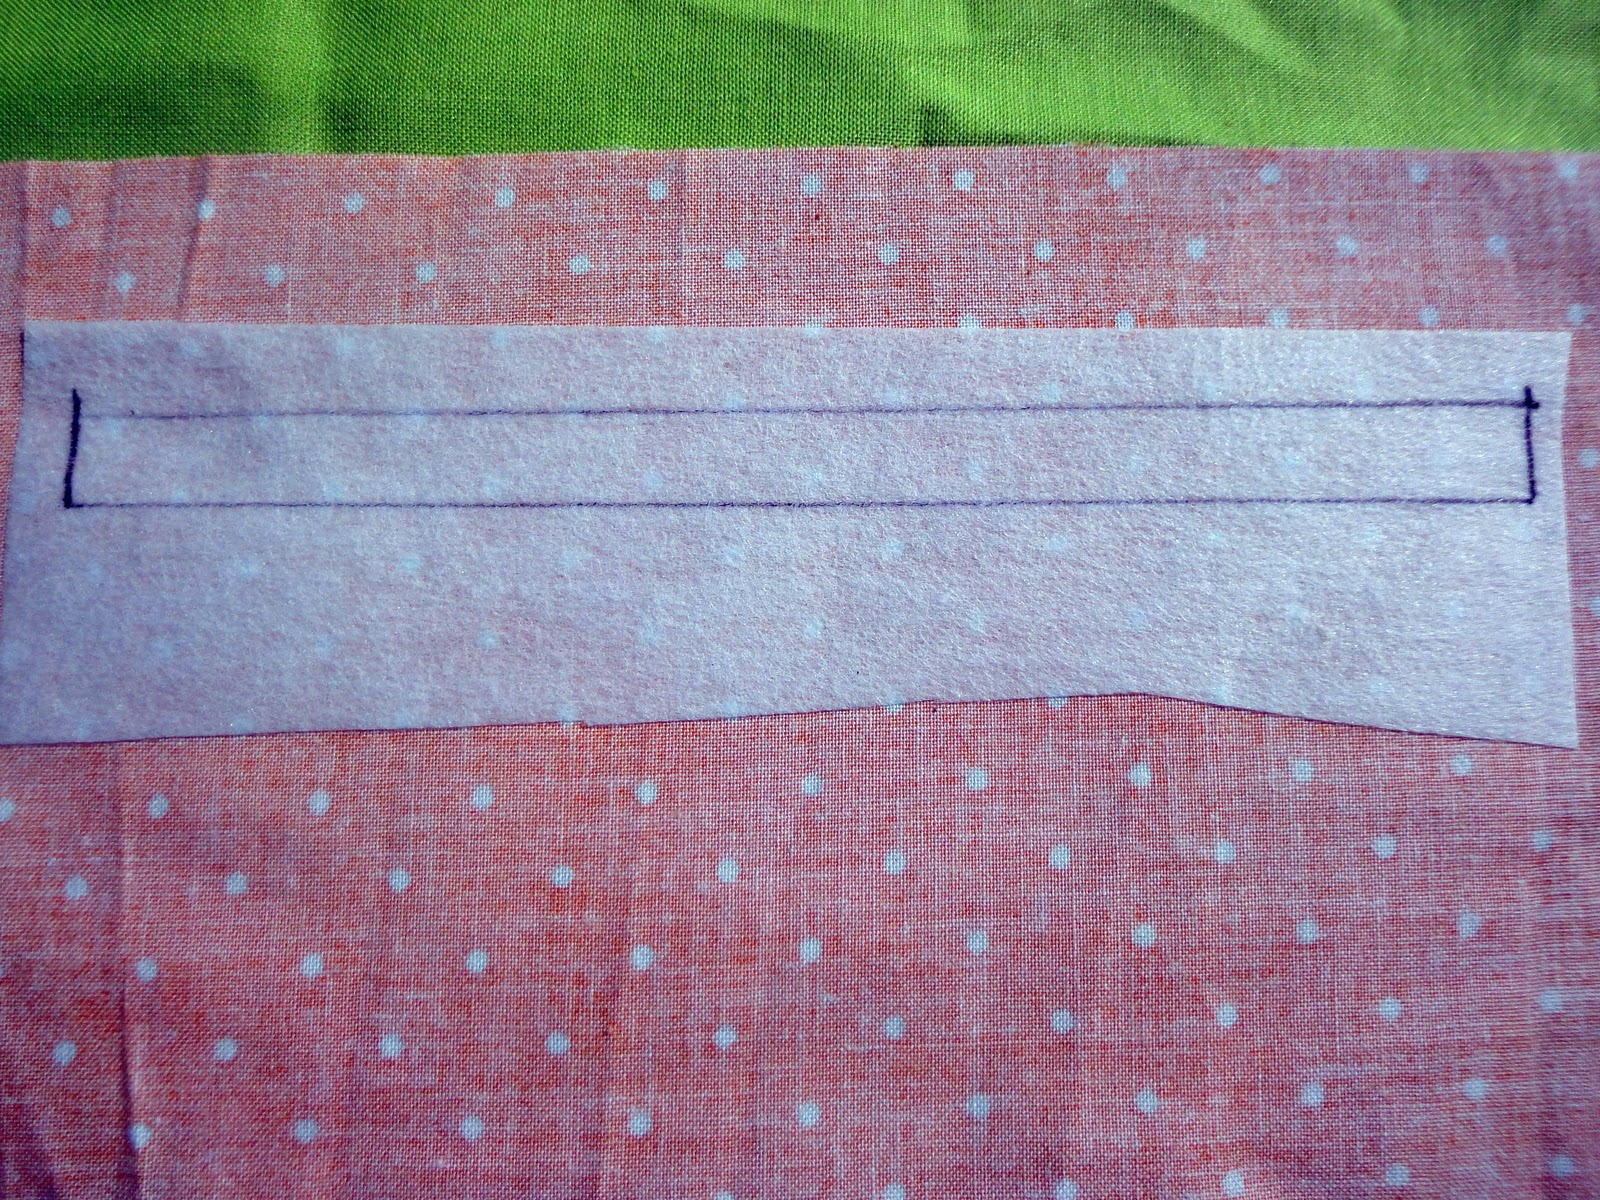
20. Sew a simple straight stitch around the perimeter of the rectangle.
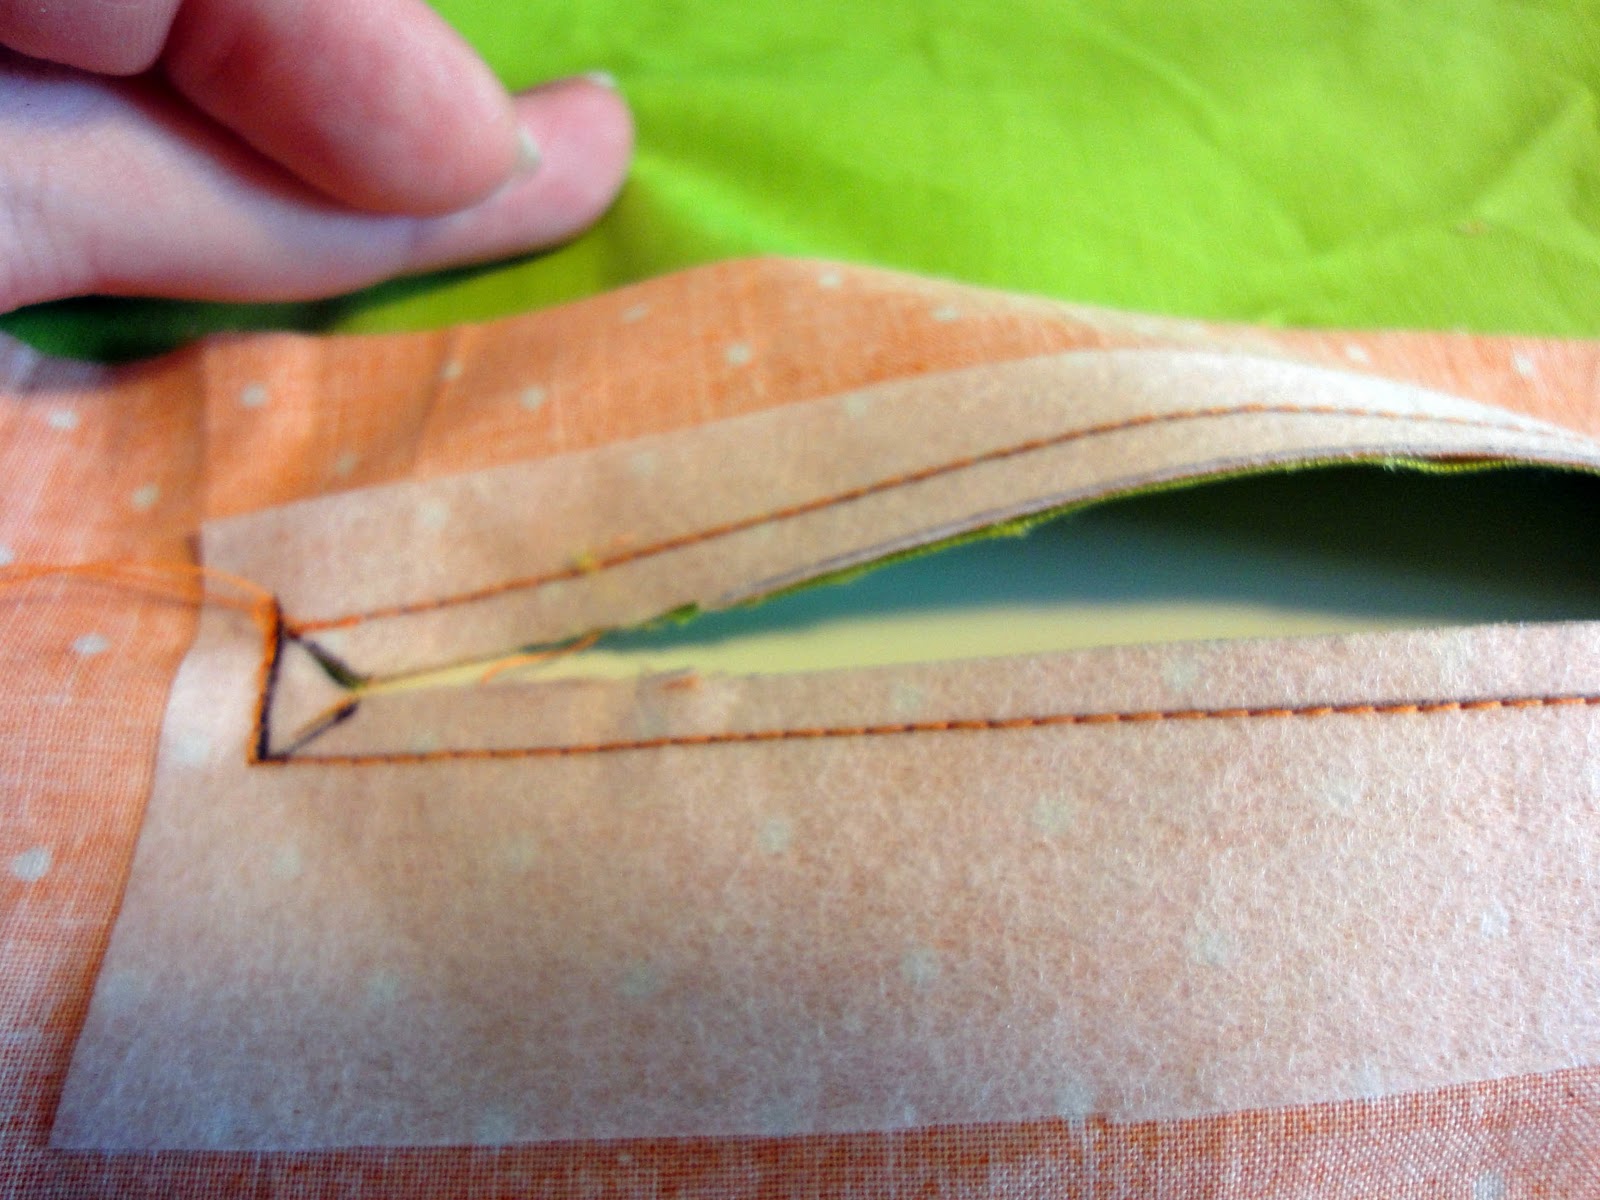
21. Then use your scissors to cut the middle line and the edges of your triangles. Be sure not to cut through any stitching!
22. Turn your pocket piece inside out through the slit your made. Pull and press with your iron to get it as flat as you can. This will take some tugging and pulling. 🙂
 |
| This shows the front and back of the lining piece after you’ve turned your pocket through the hole. |
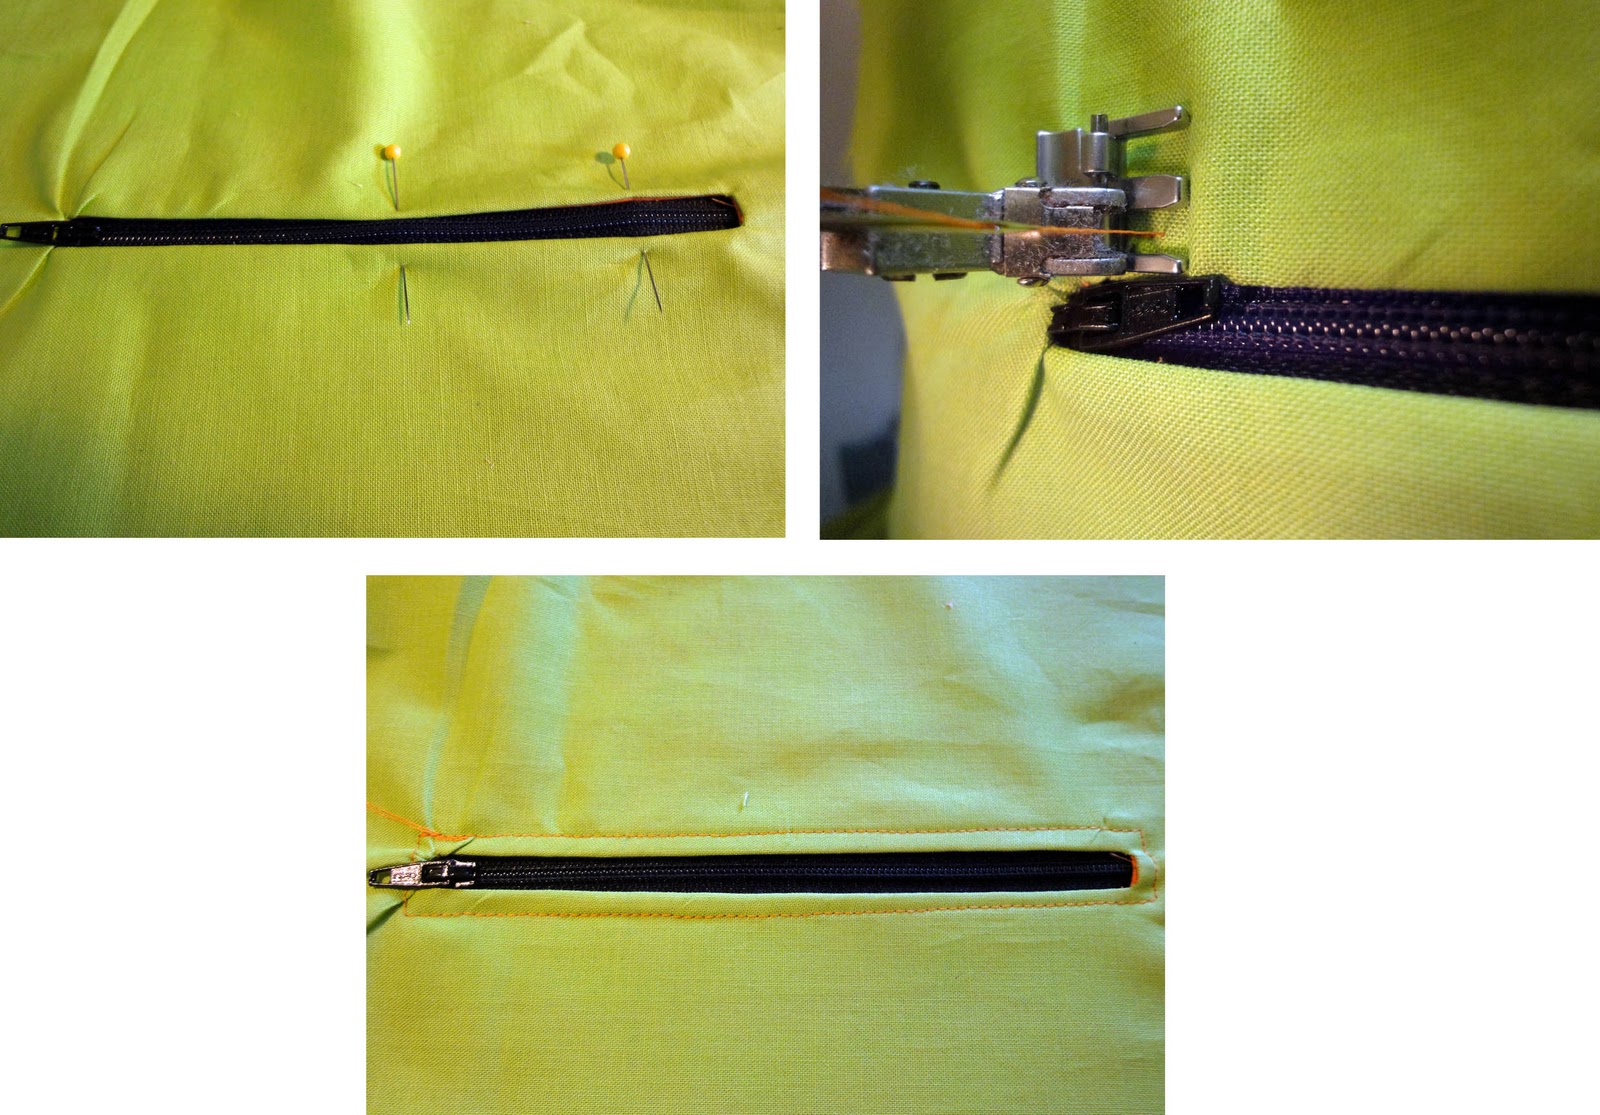
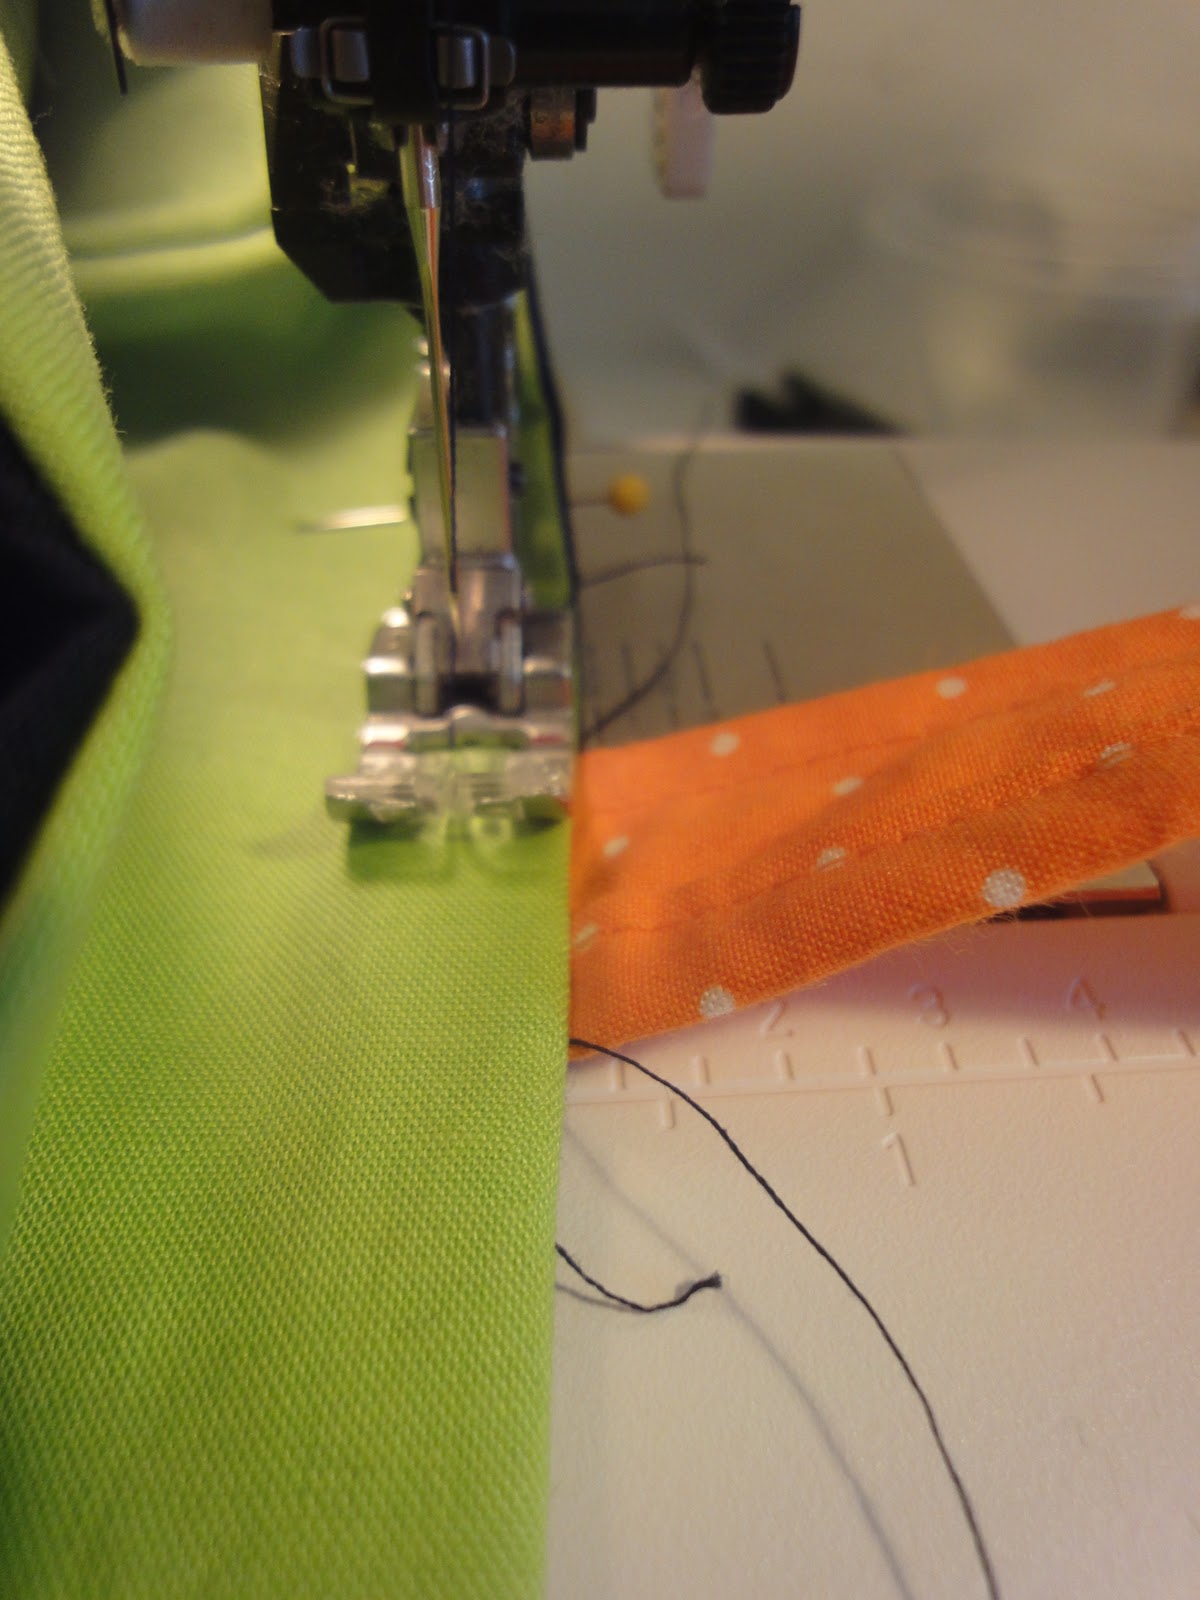
23. Pin your zipper to the back of the lining and use your zipper foot to sew along the edge of the zipper window.
(Most sewing machines come with a zipper foot. A zipper foot allows you to get as close to the edge of the fabric as you can. Read your manual to find which foot is the zipper foot. It should look something like what is pictured below and should snap on and off of the machine easily.)
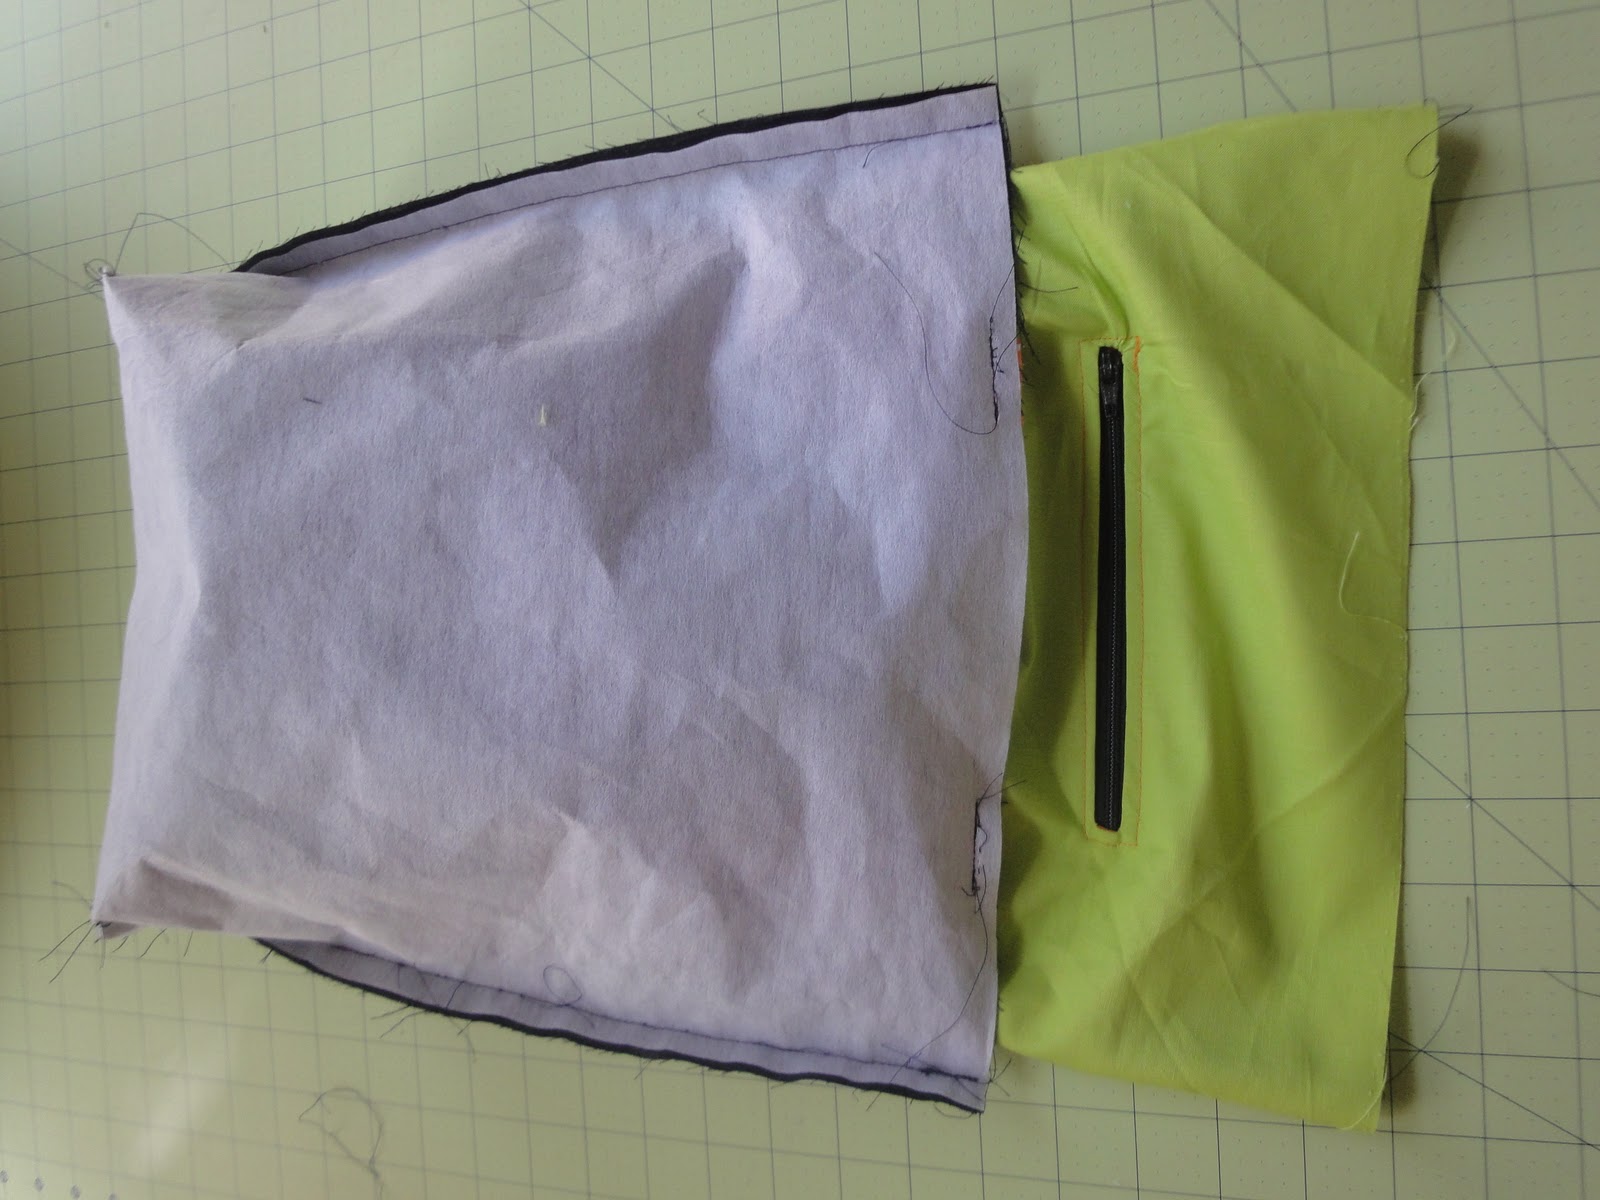
24. Finally, take your second 8″ x 8″ pocket piece and pin it right sides together. Sew around all four edges to close up your pocket. (Be sure to keep the large lining piece out of the way as you sew so you don’t catch it in your seams, too!)
25. Then put the lining together just as you did the outside:
a. Lay right sides together and sew around the sides and the bottom with a 1/2″ seam allowance.
*as seen in step 4*
(LEAVE A SMALL OPENING in the bottom of the lining to turn the bag right side out at the end).

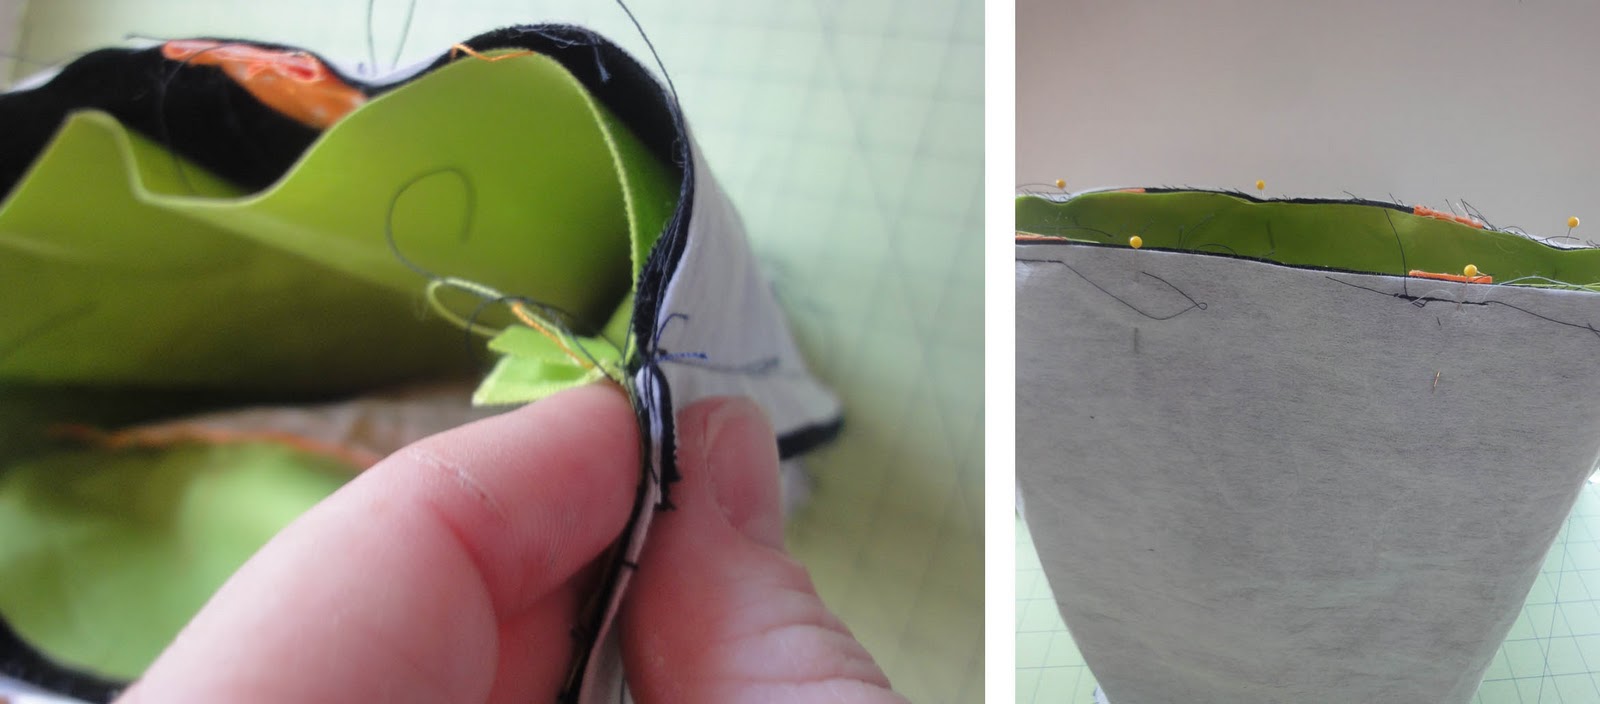
b. Cut a 2.5″ square out of each corner (this is where you can use the square you cut out of the outside piece as a template).
c. Pinch the bag apart and line up the side seam with the bottom seam.
*as seen in step 5*
d. Sew along the edge with a 1/4″ seam allowance to close it up.*as seen in step 6*
26. Turn the outside inside out and the lining right side out (confused? Look at the picture). Then stuff the lining inside the outside. (Right sides should be touching and the bag handles should be inside the bag).
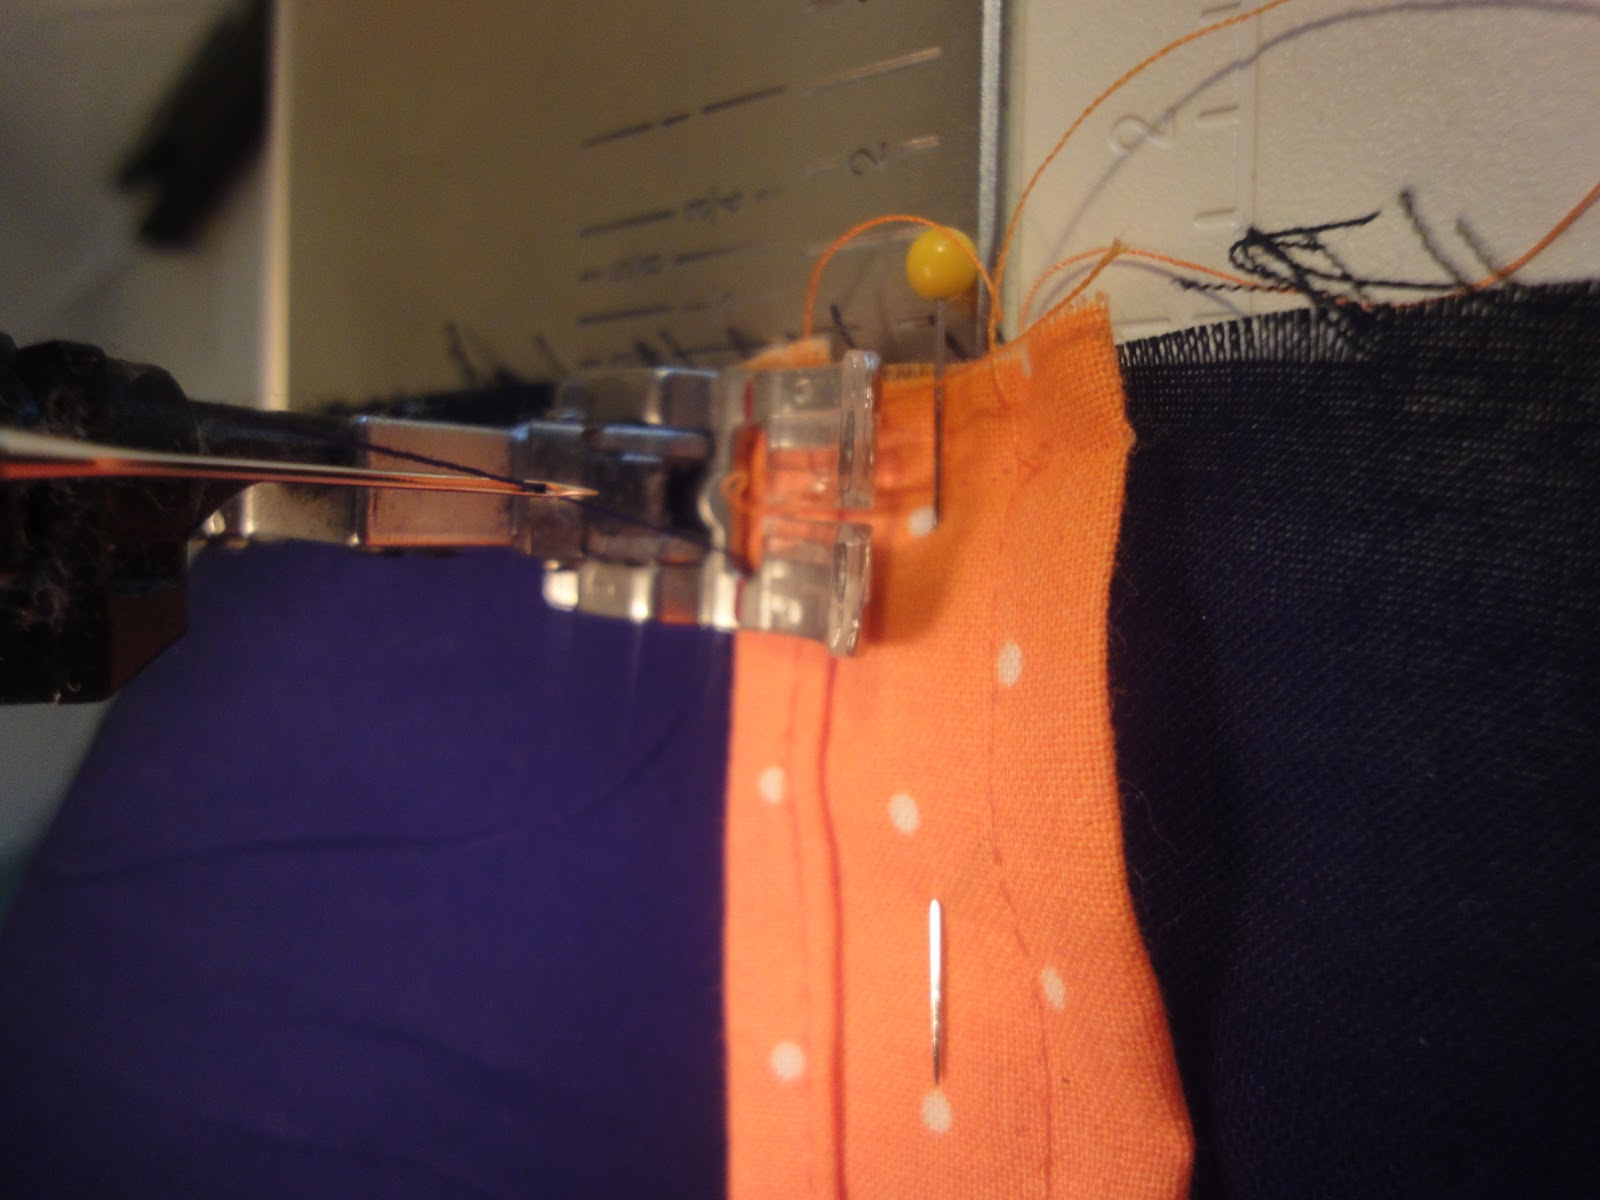
27. Match the side seams and pin around the top edge.
28. Sew with a 1/2″ seam allowance all the way around the top of the bag.
29. Turn the bag right side out through the small opening in the lining.
30. Sew up the lining with a small seam allowance.
31. Stuff the lining inside the bag, iron around the top and pin.
32. Sew with a 1/4″ seam allowance around the top to finish the bag – making sure you keep the handles free as you go!
33. Grab your cute Halloween Monkey and have some fun Trick-or-Treating this year!
ps… if Halloween isn’t your thing, this tutorial would also be great for reusable shopping bags… just play around with the size of the outside and lining to make it bigger.
It’s also a great toy bag. My son also loves putting his toys inside the bag and then dumping them out. It’s perfect for him to tote around the house, too – just his size. I might just have to make another one for him to use all year long!
Thanks for letting me stay here awhile, Heidi!
I really enjoyed my visit!
Thanks for the tut, Rebecca!


Thank you so much. Such a great tute and adorable bags too.
the bags are so cute! I love the idea to make them for reusable shopping bags! 🙂 I think I will be adding your tutorial to my "to do" list! 🙂 Thanks!
Im your newest follower! Id love for you to check out my blog http://craftycierra.blogspot.com/ & follow me back! I would love to do a blog swap with you! If your interested, please email me at CierraLarsen@hotmail.com! Thanks!