Sharing is caring!
I am so excited to be a guest on HoneyBear Lane! I love Heidi’s blog and I am so inspired by her projects.
My name is Dagny and I am the creator of the blog Finally Finished Crafts. I chose the name because I love the feeling you get when you finally finish something, but I have a habit (that I’m trying to break) of abandoning projects before they’re done. I am a stay-at-home mother to my nine-month-old son. I got my love of crafting and creating from my father. He has always tried to make things that look better than he could buy for the same price: Halloween costumes, decorations, toys, large fake boulders for his yard. I spend most of my time making clothes, toys, and gourmet baby food for my son, but occasionally I find time to make something for myself. I hope you enjoy this tutorial and feel free to stop by my blog to see more of my projects.
Today I’m sharing my DIY Easy Headband Makeover.
I’m sure you’ve seen all the headband tutorials and posts out there in blogland lately. They are becoming super popular. I think there are so many tutorials in part because if you’re the least bit crafty it can be difficult to rationalize spending money on something you could easily make yourself. I decided to make myself a few cute headbands to see how I could incorporate all the ideas I’ve seen lately.
I started with a cheap set of Goody gals pastel headbands (they were around $3 for 5 headbands) I got at Target. Each headband is 1/2″ wide.
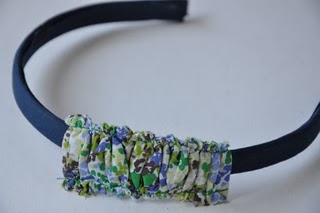
I wasn’t crazy about the pastel colors so I used some navy double-fold bias tape that I had leftover from another project to cover the headband I was working on. I partially unfolded the tape before I began gluing it to the headband with Fabri-tac fabric glue. The widest part of the bias tape was exactly 1/2″. I glued that to the top of the headband and then folded over the short unfolded side and glued it to the bottom.
By leaving the other side folded I had a nice finished edge to glue down that covered up everything perfectly.
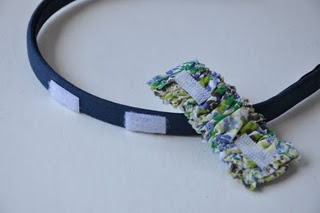
Since I liked the versatility of the navy so much I decided to make my embellishment interchangeable. I added some heat and bond Velcro to both the headband and my ruffle. You’re supposed to iron the Velcro from the back but I couldn’t iron through the thickness of the headband. Instead, I covered the Velcro with a dish towel and ironed through that right onto the loop part. It worked out just fine. I ironed the Velcro on the ruffle from the other side like I was supposed to.

I used a scrap of fabric that I had left after taking in a shirt that is now too big (yay!). I cut a rectangle and then pinked each of the long sides so that I could leave them raw. I basted along each of my pinked edges and gathered the threads at the same time to make my little ruffle. I like that it has some nice texture and dimension without being a big puff on top of my head. Once I was happy with the size of the ruffle I sewed along my basting stitches and pulled them out. To finish the ruffle I folded each end under and glued it in place and then added the Velcro mentioned above. The longest part of this project was waiting for the glue to dry.
Tip: I have a bunch of tiny clothespins that I got at a party supply store in the baby shower aisle. They are fabulous for holding all sorts of small things together with just a little pressure while glue dries. I used them to hold down my bias tape while it dried and my husband uses them when he’s doing paper crafts.
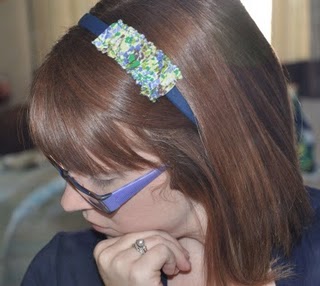
It’s really quite difficult to take a decent picture of the top of your own head.
Overall, I’m very happy with how this little project turned out. I like the idea of using a headband as more of an accessory rather than a utility object, like a rubber band for a ponytail. Now I just have to think of four more ways to dress up those others I have lying around.
Now go give your headbands a new life! Good luck!


Such a cute headband!! I can't wait to make over some of the many headbands that I have collected.