Sharing is caring!
I LOVE LOVE LOVE this method of making continuous binding. I love it so much I want to marry it. The first time I tried to bind a quilt I didn’t even know there was a method. The second time I just bought pre-made binding, which is a huge mistake: it’s very hard to sew. I ended up hand sewing the entire thing and it took forever and hurt my hand. So the third time, I studied it a lot and figured out how to do it right. But when it came to making the binding, I was clueless. I spend THREE HOURS trying to cut on the bias and sew it all together. Talk about nightmare. So when I found this little baby, that took me literally a half hour to do, I did a short jig.
This first part is straight from About.com. It’s a great tutorial, and you can just visit the link if you want.
To calculate how much binding a square of fabric will produce:
length = area of square divided by width of binding strip
Example:
For a 20″ square, area = 20″ x 20″ = 400″ square inches
binding strip width = 2″
400″ square inches area divided by 2″ width = 200″ binding
To estimate how large the square must be to produce the binding length you need:
1. Multiply the length of the strip needed by its width to find its area.
2. Determine the square root of the area to estimate the square size needed.
Example:
Strip needed is 2″ wide by 250″ long
2″ x 250″ = 500″ square area
square root of 500 = 22.36
Round up and cut a 23″ fabric square
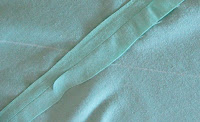
***First off, I apologize that you can’t see the drawn lines super clearly since I used chalk and the fabric is light colored.
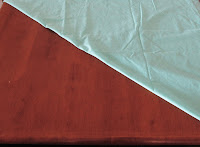 |
| So, you start with a square of fabric. Fold it diagonally, so it makes a right triangle. Iron it if you want, then cut down the fold. |
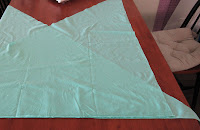 |
| You now have two right triangles. Lie them opposite to each other like this, making sure that the overhangs are equal. Sew the bottom. |
 |
| Open it up, iron the seam open. |
 |
| Starting at one end, use a ruler and a fabric pen or chalk to draw lines up the fabric. Mine are usually about 4 inches apart. |
 |
| This is what it should look like. You just draw your line right over the seam. |
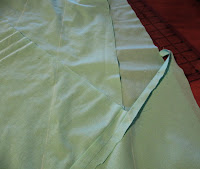 |
| Fold the fabric so it becomes like a tube, bringing the bottom of the fabric up to the top and lining up the lines. Offset the fabric so that the first column doesn’t line up with anything. |
 |
| Pin the fabric together like this, so you can sew it and the lines stay lined up. |
 |
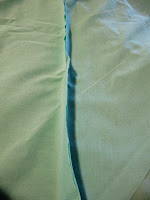
| Iron open the seam again. See how the lines from each side become one straight line? Now you have a big tube of fabric. |
 |
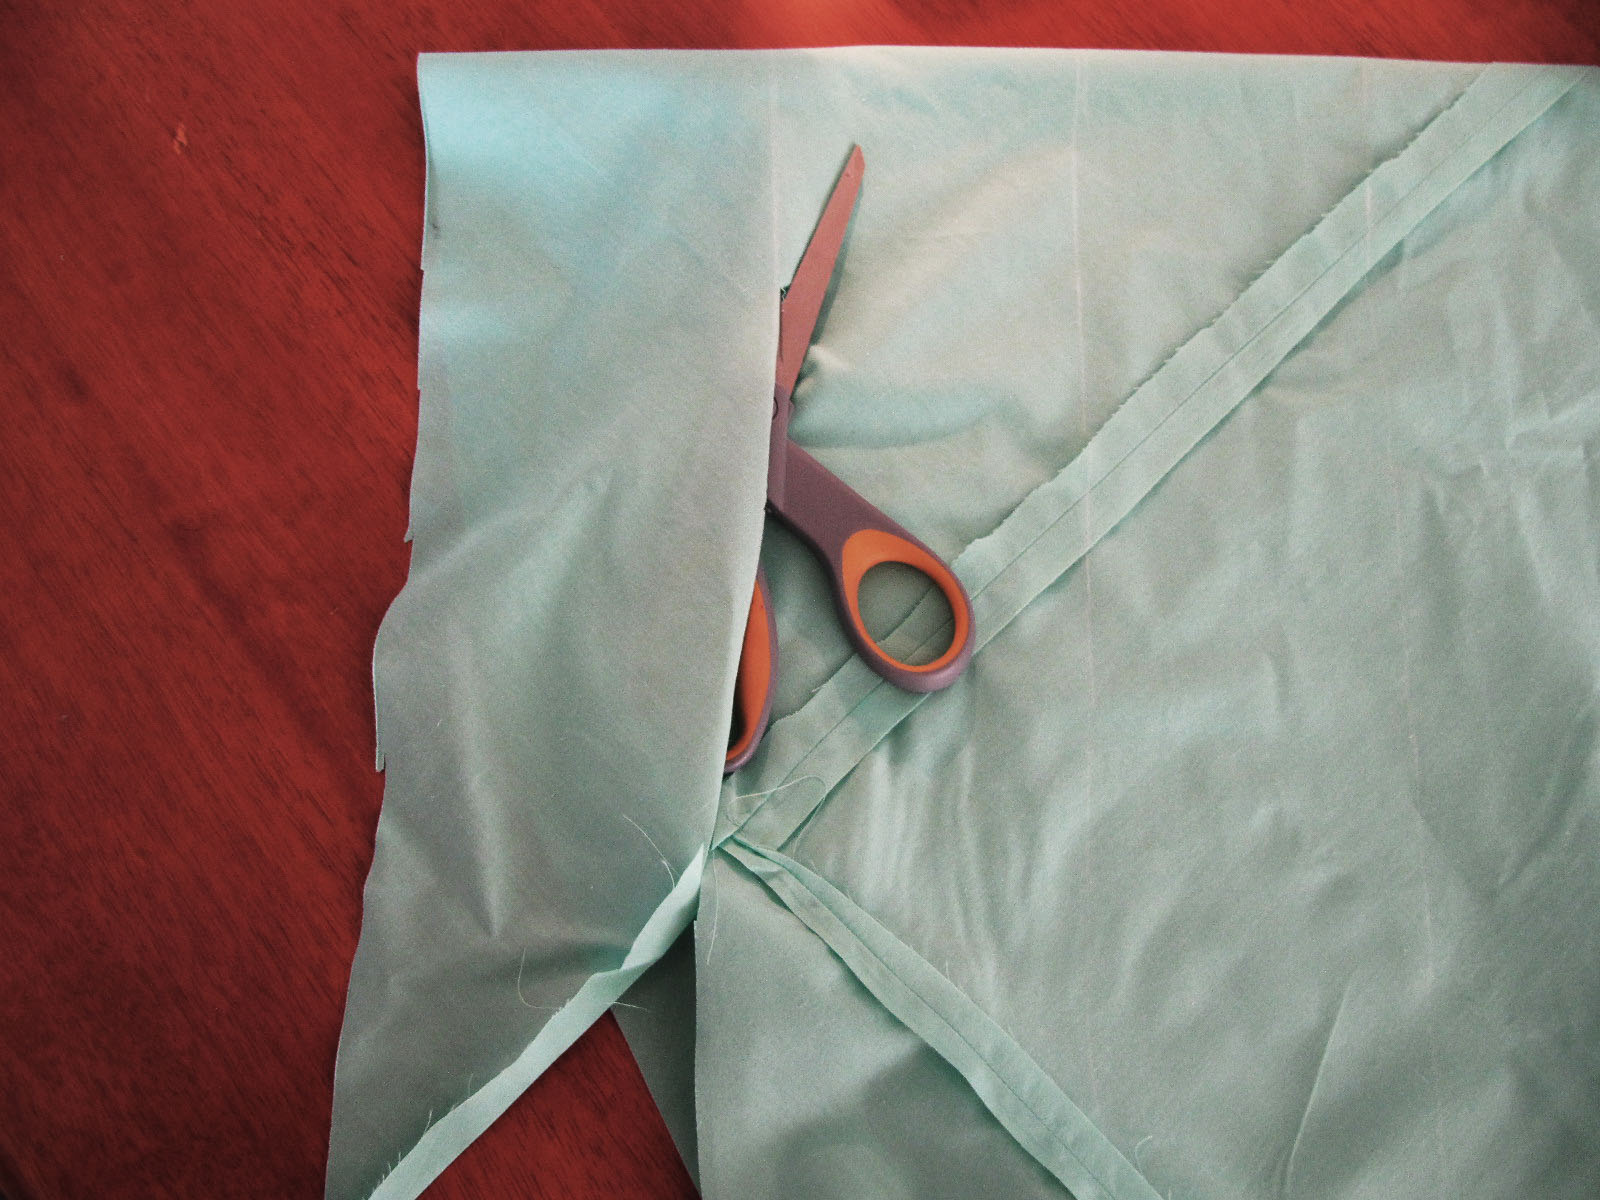
| Starting with the first offset column, start cutting on the line. Follow the line, and you will cut one super long strip. |
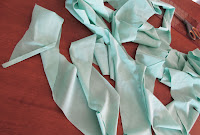 |
| See? Ta da! |
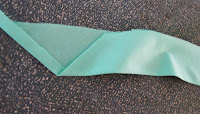 |
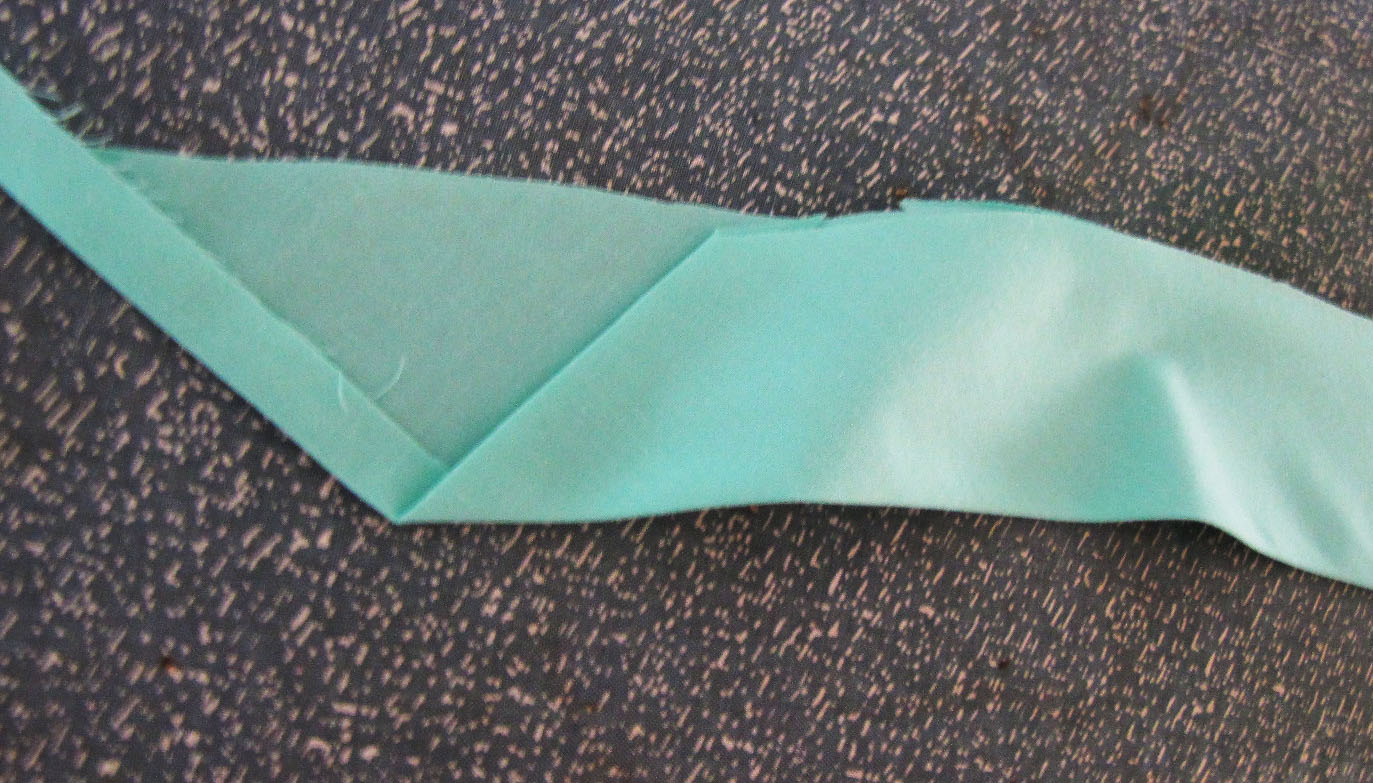
| Fold the fabric in half and iron it. |
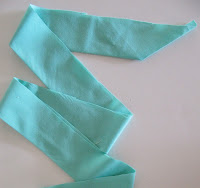 |
| And there you have it! Continuous binding, cut on the bias. Why do we do it on the bias? It’s supposed to hold up better with use and time, and the seams aren’t as prone to coming undone. |


they are also cut on the bias so that it has some stretch to it so it doesn't go skewampus (word?) and pucker funny when you sew it on.
Very cool, I have never seen that before. I am not sure I completely follow the instructions, will have to try it though and see if I "get it!" Thanks, your blog is very nice!
If you have time to come up with a better tutorial, I would be eternally grateful 😉
Thanks for the tutorial. I also checked out about.com to clarify which direction to draw my lines on. I’ve never made my own bias tape before. I think it will really add to my quilt. http://quilting.about.com/od/bindingaquilt/ss/binding_strips_5.htm
Ah, I figured it out! Got hung up on the “fold over to make a tube” section, but after following your instructions on a standard piece of paper and tape, it finally clicked! Awesome! Thanks for sharing!
Very hard to envision without the entire picture of the fabric. I am hung up on the “fold over to make a tube” too. I will have to take Nicole’s suggestion of trying this with paper and maybe it will click for me too! Thanks for the steps.