Tutorial: Free-motion Quilting by Vanessa G.

Hello HoneyBear Lane readers!
My name is Vanessa and I am thrilled to be sharing my machine-quilting tutorial with you today! I’m from Utah but currently reside in Florida where my husband attends law school. We have been married seven years and just had our first baby, Olive, six months ago. I am lucky to be home to take care of my sweet family and have spent the last six months trying to figure out how to best share my creativity now that time will allow it.

I have been quilting since I was sixteen but had little time to do it because of my former full-time banking career. I created Lella Boutique and am slowly adding items to my Etsy shop where I accept custom orders for quilts, stitcheries, and other decorative items. I am also starting a blog in February to document my crafting adventures while sharing the tutorials with you. I just found out that a couple of my stitcheries will be featured in McCall’s Quick Quilts in the upcoming May issue!
I have known Heidi since kindergarten. When she asked me to do this tutorial, I just HAD to do some digging into my old photo albums. Here we are, in all of our first-grade glory.

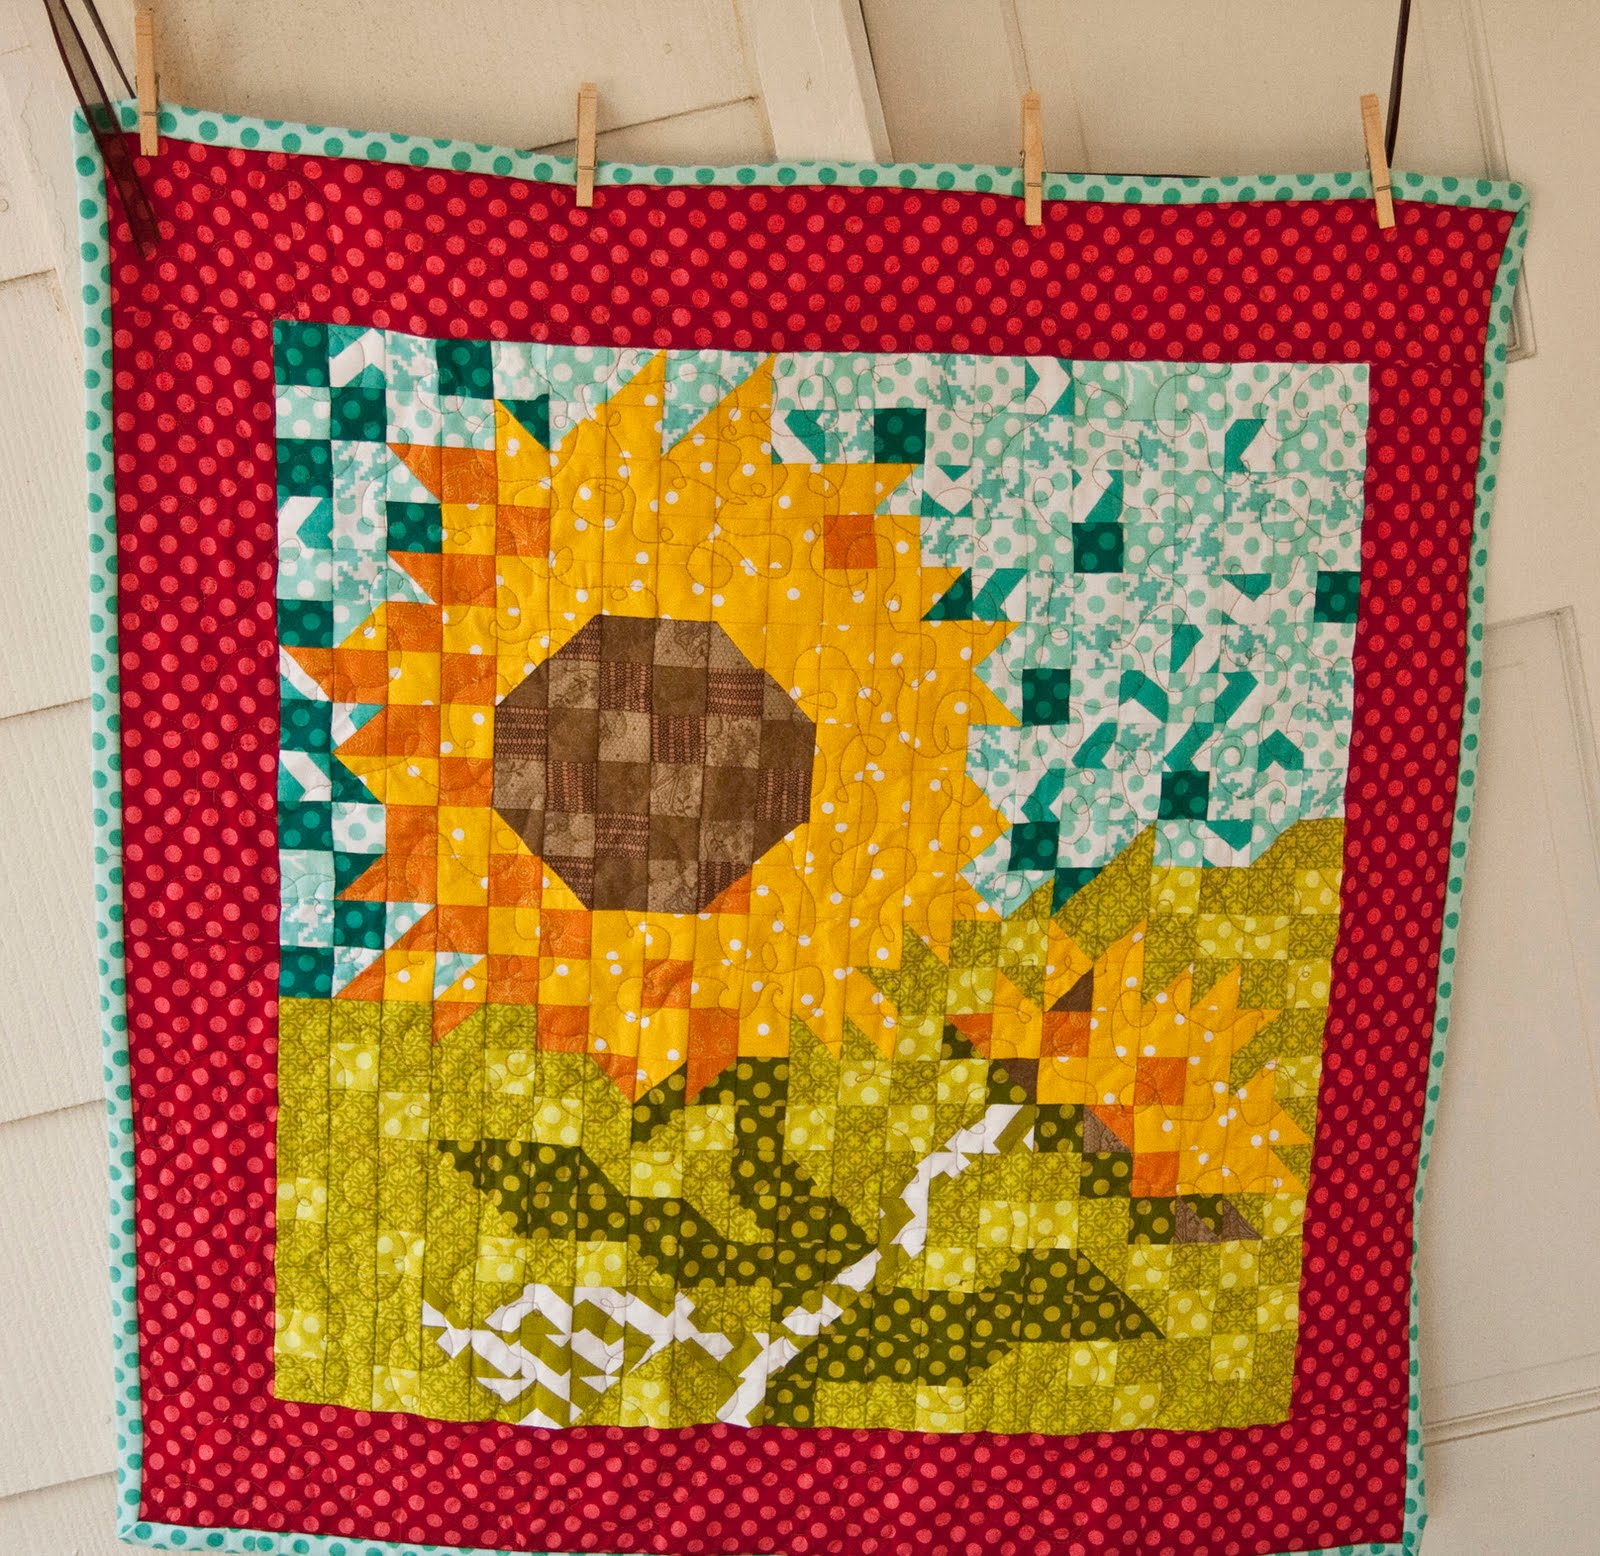
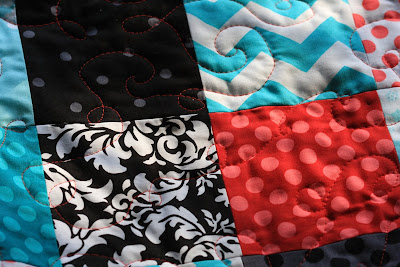
One of the first things people notice about my quilts is my swirly, freehand quilting. This machine-quilting method is not only stunning–but surprisingly simple. It is perfect for small projects like baby quilts and table runners. For larger projects, I recommend taking your quilt to a professional who will be equipped with a long-arm quilting machine.
Let’s begin!
Careful basting of the quilt beforehand is absolutely essential so the quilt layers won’t shift during freehand movement. Here are a couple of tips to help ensure successful basting.
- Prior to basting the quilt and batting layers together, iron the quilt front and back pieces with a starch spray.
- Make sure the back piece and batting are slightly larger than the quilt top. (If any kind of shifting occurs, you’re covered!)
- Use a good quality basting spray. I love Sullivan’s Original Quilt Basting Spray.
- As you baste each side to the batting, smooth away any wrinkles. For particularly difficult wrinkles, lift that corner of the quilt and gently lay down again–smoothing it as it lands on the batting.
- Once the quilt is basted together, insert safety pins throughout the quilt–another precaution used to prevent shifting.

The next step is to prepare your sewing machine. Not just any presser foot will work–you need to change to a darning foot. (If you don’t have one, check with the manufacturer of your machine to see if they make one.) Lower the feed-dog on your machine to allow free movement of the fabric.
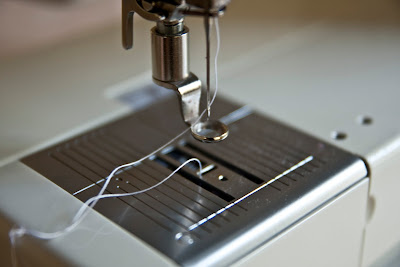
Position a corner of the quilt under the machine. Lower the foot onto the fabric. Activate the “needle stop down” feature on your machine so the needle will stay in the fabric when you need to take pauses.
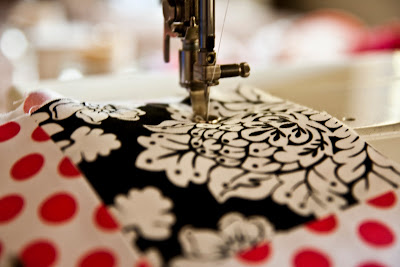
Using both hands, move the fabric around in a random swirl pattern. Make frequent pauses as needed to adjust the surrounding fabric, remove safety pins, etc.
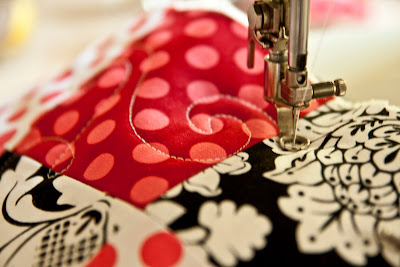
Don’t let your quilt hang over the edge of the table–the weight of the quilt will pull on the needle and cause unnecessary tension, not to mention make it difficult to work. Keeping the quilt on the table (or at least your lap) will make it easier to maneuver. Here’s a video to help show you what this process should look like. (Do NOT feel the need to go as quickly as I do–that’s how fingers get run over and quilts messed up.)
Practice, practice, practice! Before you attempt this on the quilt you have been laboring over for weeks, do a test run on scraps until you feel comfortable. Also check the back side periodically to make sure no fabric has bunched up. (Your careful basting will help avoid this!) Should this occur, you will need to pick the stitches out, smooth the area, and resume.
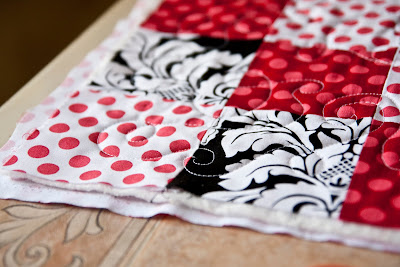
Ta da! Congratulations! Now you will want to quilt everything in sight.

Muchas gracias por el tutorial y las explicaciones, yo siempre me preguntaba como se hacía.
Me gusta mucho tu blog.
Núria.
Your quilts are beautiful! I have the foot…I've just never been successful. What is your tension when you free motion?
This is EXACTLY what I needed – thanks so much for the tutorial!
Valerie: The thread tension has not been altered from its standard setting (5 on my Bernina). You could definitely experiment though on some scraps of fabric to see what you like the best with your machine! Hope this helps,
Vanessa
I'm wondering where you guys get your fabrics. My local fabric shops don't have fabric that is nearly as pretty as what you show.
I was wondering if maybe you order online from somewhere.
Thanks.
Jackie: Are you going to a quilt shop or a chain? There is a world of difference. Quilt shops carry fabrics that are a lot better quality–generally a higher thread count. (They also tend to carry the cute brands we all like where chains do not.) Quilt shops are kind of snobbish–they won't carry a brand if the chains do. You may just want to explore other quilt shops in your area–or move to the online option. I have found that etsy has some good fabric stores–and I think one of them is a sponsor for Heidi (SkyReve?)
By the way, I guess the sound wasn't working on the video link so I have reloaded it to my youtube account with the sound restored. Sorry I didn't catch this sooner!
Thanks for the tutorial! The sound cuts out midway through for me…what do you do when you're starting/stopping in the middle of the quilt? Backstitch at all?
Thanks for the tutorial!! So excited to try it out on my quilt that I've been working on at http://www.danamadeit.blogspot.com
Thanks so much for the tutorial. I am about to attempt doing this for the first time and I was wondering what stitch length are you using?
I love the little puppy quilt. I have a GD that would love it too. Is there a pattern or link to it?
I just finished my first quilting class (super excited) and we did a very basic straight line machine quilting. I have wanted to do free range but am TERRIFIED! You make it look so easy! Can you use a walking foot? Or do you have to have a darning foot? Also, I don’t think I can lower the feed dogs on my machine. I hope this doesn’t make a huge difference…
You can’t use a walking foot for free motion quilting but darning feet are not too expensive. Don’t be afraid of it–seriously! It’s super easy and very fun!
How do I set my tension, and is my quilt going to be so loose under my darning foot? I am having so much trouble I can’t get started?
Vanessa I tryed to go into your Esty store and it keeps coming up error. Could you send me a link please.
What a wonderful video and tutorial! Very well done! Yes, you’re most definitely right – practice is absolutely the key to free motion quilting.
Love the quilting on the red,white,black, quilt could you show a pic of the whole quilt, thanks, or is it for sale thanks
Thanks, but this quilt belongs to a friend of mine. Her blog is Lella Boutique.
If some one desires to be updated with latest technologies then he must be go
to see this web page and be up to date all the time.
Dirty Porn Photos, daily updated galleries
http://porn.shack.bestsexyblog.com/?nayeli
hot gay black teen porn uncle fucking nieces free porn porn webpages free black pimp porn sites porn video masturbation teen