Catablog · Christmas · crafts · guest post · Uncategorized
Make a JOY Banner with Lil Luna!
Hi there Honeybear Lane Readers!
My name is Kristyn, and I blog over at Lil’ Luna.
Come on over and say hi!
I’m so happy to be here today.
I love Heidi and love that we’ve been able to get together and craft lately.
SO excited she is having a baby and wish her luck with that.
Did you know there are SO many inexpensive but CUTE crafts you can make around the holidays?
This next craft I’m going to show you cost $1.50 if you buy the supplies, or if you are like me and have lots of scrapbook paper laying around it’s FREE! You heard me right – FREE!
Here is how you can make a super easy and cute JOY sign for cheap…

SUPPLIES:
-Cardstock Scrapbook Paper
-Patterned Scrabook Paper
-Glue Stick
-Scissors
-Hot Glue Gun
-Tulle
DIRECTIONS:

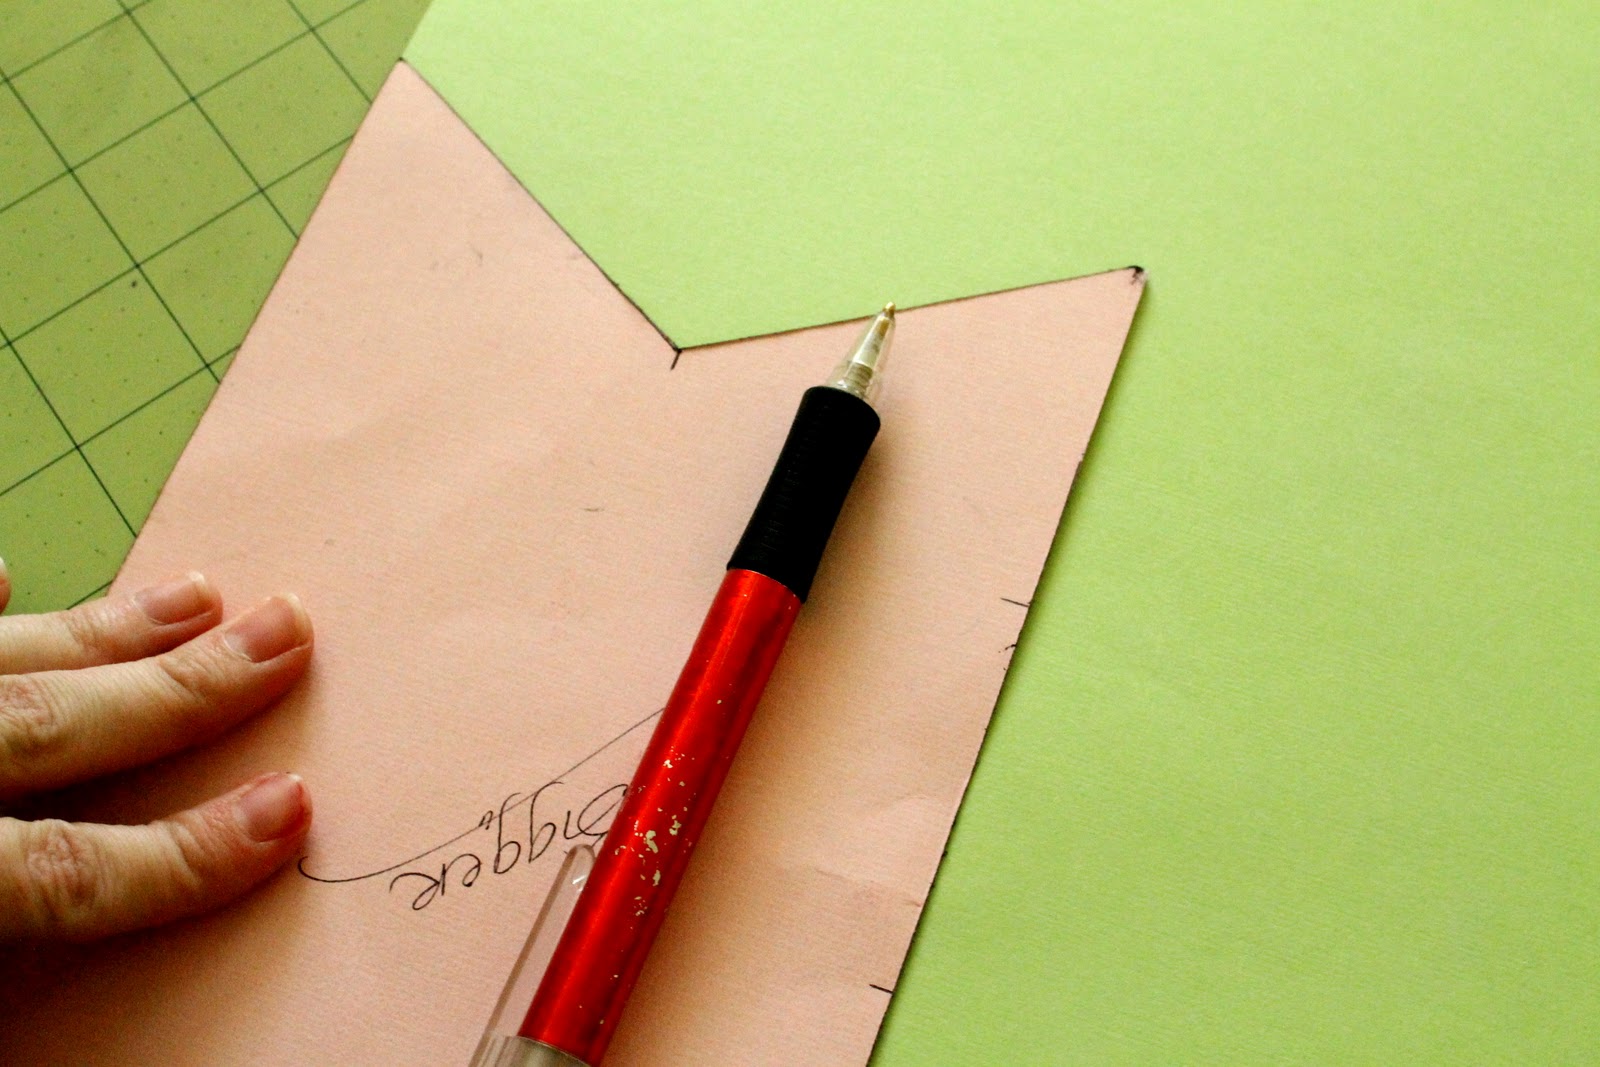
1. Decide on what kind of shape you want to use for the banner. I did a Pennant Shape, but you can do circles or even triangles. Make your pattern and make two sizes of it {one a tad smaller than the other}. Trace the larger pattern on to your cardstock and then trace the smaller pattern onto your patterned paper. Cut out.

2. You will then glue the smaller pattern on to your larger pattern.

3. From there, I made paper accordions. To do that, cut out strips half the width of what you would like your paper accordion to be. For example, if you want a 4 inch accordion, then cut your strips 2 inches wide. Your will need 2 strips per accordion. Then, siz sag the entire length of the paper. You will hot glue the beginning and the ends of the paper to your other zig-zagged strip. Then you will in the edges of the paper and place a dab of hot glue. Hold until it dries.
4. Hot glue your accordion onto your paper letter shapes.
5. Then trace your letters onto your glitter paper. To do this I cut out letters {Coney Island Font} and traces it backwards onto the back of my glitter paper. I then cut it out and hot glued it to the center of my accordion flowers.
6. Hole punch the tops and string with ribbon or tulle.
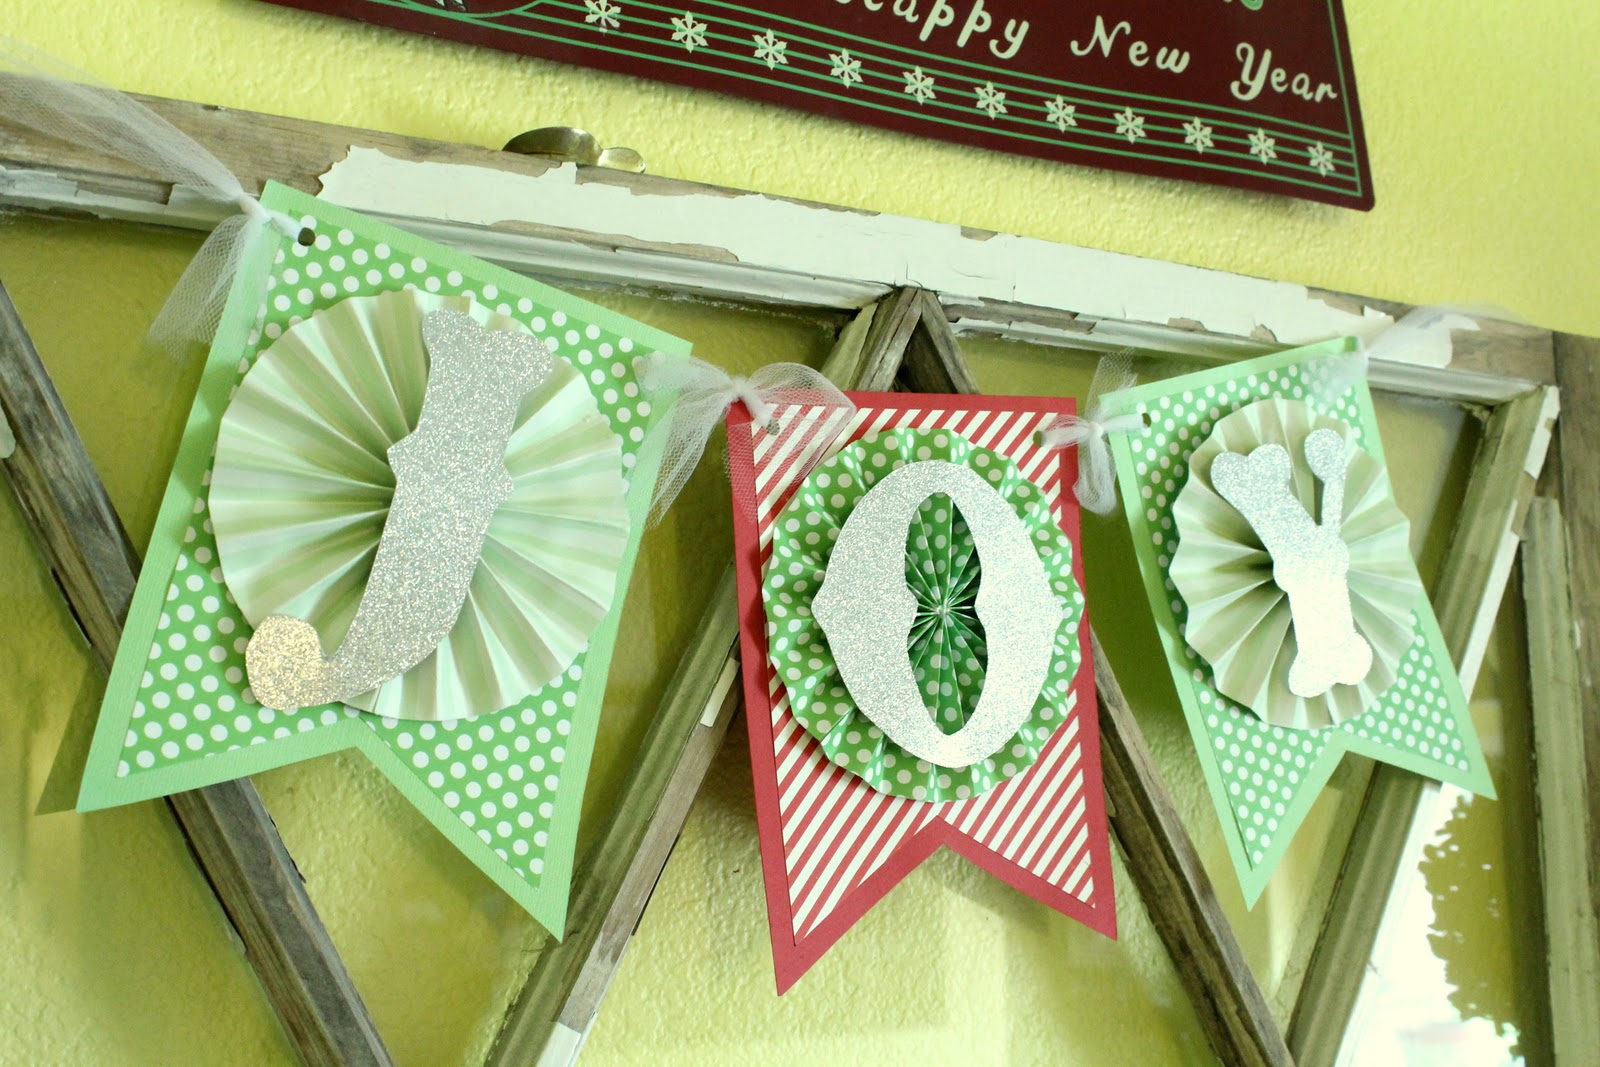
Voila!
A super easy, cute but inexpensive Banner!
A super easy, cute but inexpensive Banner!
I hope you like it.
Be sure to come on over to Lil’ Luna and say Hi! I would love to have you. 🙂

So cute! I love the banner, love the layering!
Natalie
http://www.projectdowhatyoulove.wordpress.com
What a cute project! Totally going to make one.
By the way, the link isn’t working to Lil’ Luna- not sure why, though. I google searched her instead. 😀 SO cute!
Thanks for the heads up–Kristyn is currently transitioning to a WordPress hosted blog so the link might not work properly for a bit.