Butterfly Wing Onesie by Sumo Sweet Stuff
Hello everyone!
I’m Sumo, or Summer if you wanna get formal.

I blog over at Sumo’s Sweet Stuff.

It’s my little place in the blogging world where you can come to find sewing and crafting inspiration. Sewing is my favorite creative outlet, but I’m not afraid to bust out the Mod Podge and paint when the mood strikes. You might also catch me professing my love of Target (or the popcorn store as we call it), talking about my relationships with Lucy (Cameo) and Veronica (sewing machine), or bragging about my three beautiful girls. I have an extreme fondness for Diet Coke, my minivan, historical fiction, and most sweets.I just love Heidi, and am so glad that she is living here in Utah now. Our kiddos are all pretty close in age, so I’m thinking there are some play dates in our future.
When she asked me to be a part of her baby series, I had grand plans of making up a new tutorial for her. But between summertime, building a house, and traveling (not to mention three kids three and under!) it just didn’t quite happen. Not to worry, though, I’ve still got something to share.
I made this butterfly wing onesie back when my middle daughter was just a month or two old. (She’s almost two and a half now!) I still love it, and I hope you can see past the yucky pictures (I’m no professional now, but I definitely know how to take better pictures) and appreciate the sweetness of this onesie.
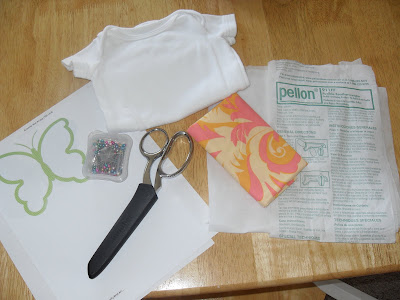
Here’s what you need:
– onesie (or a t-shirt would work too, for older kids)
– fabric
– interfacing
– iron
– sewing machine/accessories
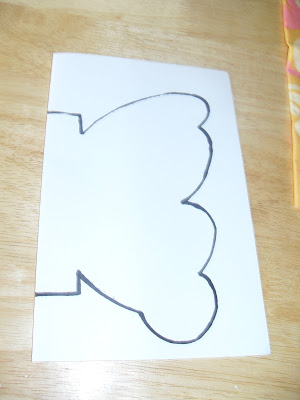
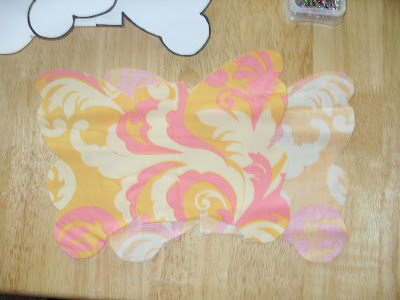
The first thing I did was a Google image search for butterfly wing outlines. I picked out the one that I liked and printed it. Then I used it to freehand the wing a bit bigger.

Next I traced it onto a folded piece of paper so that I could give myself a little bit of a body to attach it to the onesie.
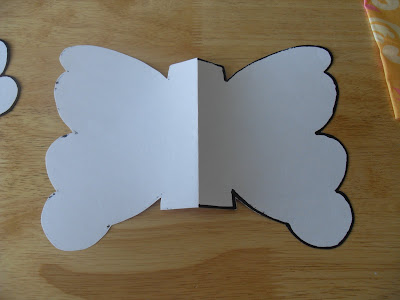
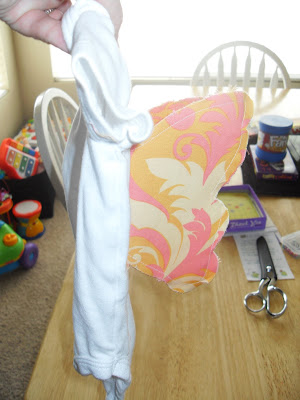
Then pin it onto your fabric (I doubled mine up) and cut it out. This will give you double fabric of the entire wing set.
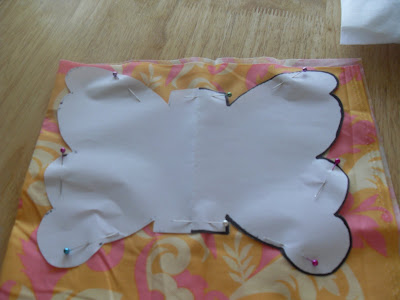
Next pin the pattern to your interfacing and cut it out. After you’ve cut it out, trim around it again, going in about a quarter inch.

Iron on the interfacing to the wrong side of one of your pieces of fabric.
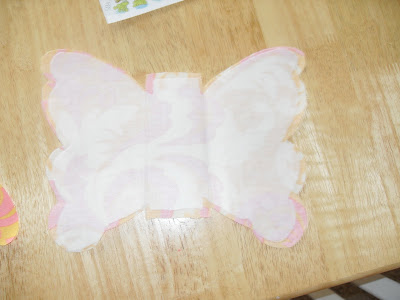
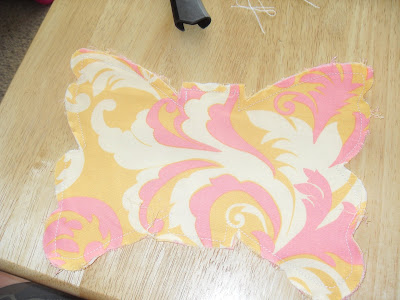
Pin both wrong sides together, and do a quarter inch hem around the edges.

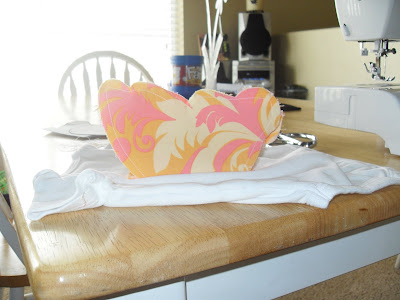
I then frayed my edges to mess them up a little bit.
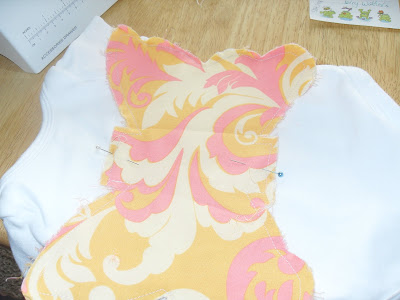
All that’s left is to sew the wings on to your onesie! Don’t look too closely at mine – I had a little mishap so it’s a little crooked!
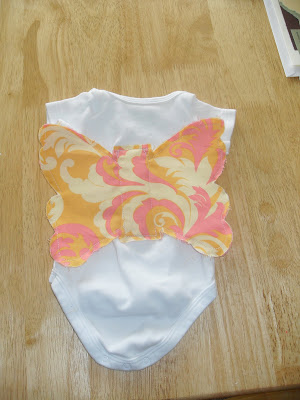
Now put them on the cutest baby body you can find and you’ve got yourself a photo op!
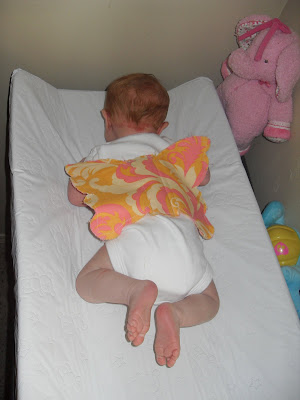
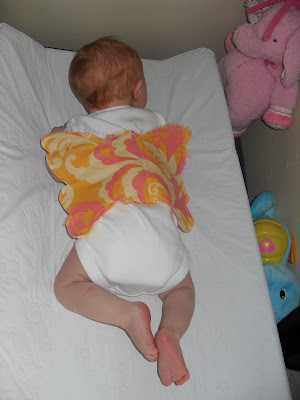
This onesie is size 0-3 months. I think next time I would do a smaller set of wings for that small of a onesie so that they would stay up on their own better when the baby is lying on their tummy. The bigger size of wings, like I used here, is good for babies that are sitting up, because then the wings will naturally stay out like they are in the picture that I am holding the onesie up.
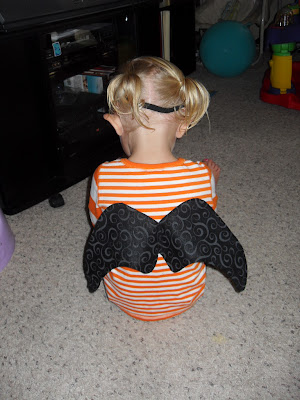
If you like this idea, be sure to check out my bat wing shirts for a holiday spin on it!
Thanks so much for having me Heidi! Hope to see you all over at Sumo’s Sweet Stuff!