Ombre Windsor Chairs
One of the first projects I did for
![]()
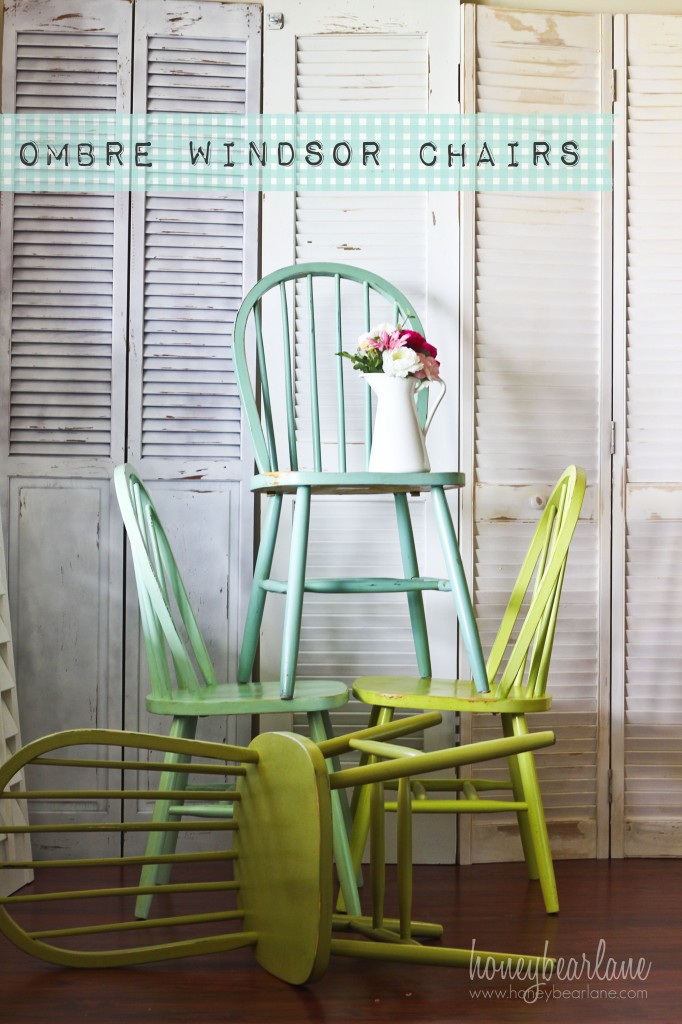
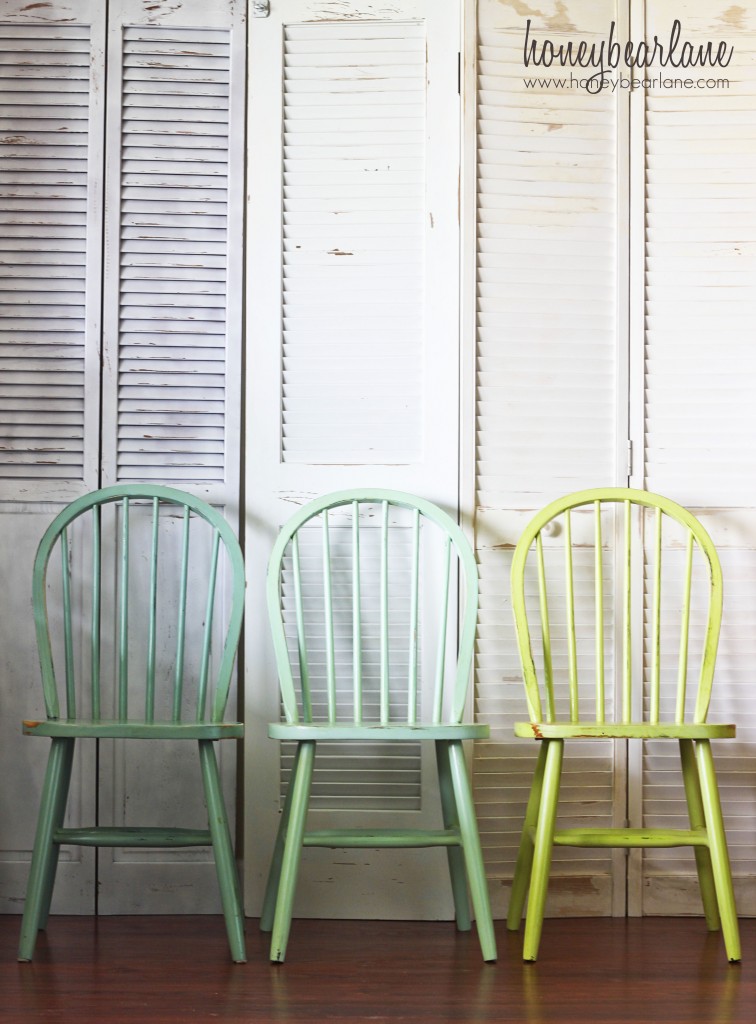
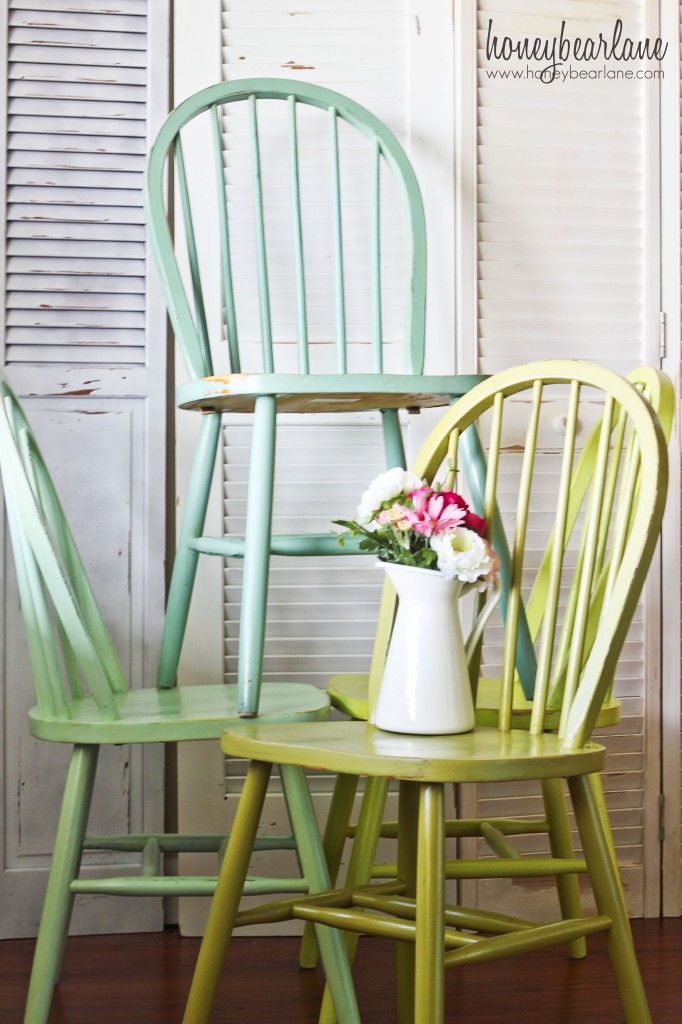
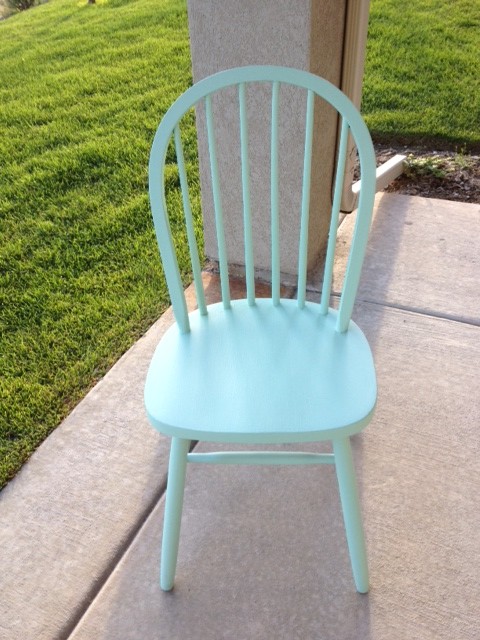
was tackle the dining room chairs. They are the very common and simple Windsor-style chairs and I debated even keeping them since two of them had broken and we threw them away. But right now I didn’t have the time to search for new cool chairs so I decided to paint these. And I love them! The different shades of green and blue add a calming effect in my dining room. I can’t wait to show you the final dining room reveal.
The colors I used: turquoise–Martha Stewart Yucca Plant, aqua–Martha Stewart Sea Glass, lime green-Glidden Granny Smith, sage-Glidden Spanish Olive. I bought all of them at Home Depot. AND I painted each chair with only a sample size of paint which costs about $3 each. At first I was going to paint them all the Yucca Plant color but then I changed my mind and got a little crazy with paint colors! And if you can’t tell by my recent blog and logo redesign–I LOVE LOVE LOVE green and aqua together.
Click to read about how I painted them!
Here’s my process:
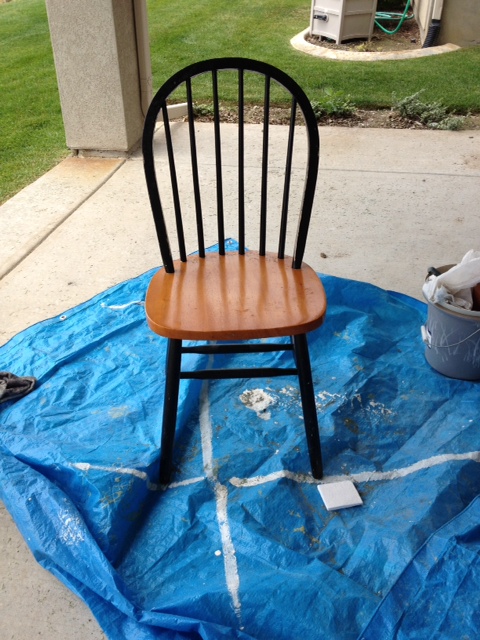
Here’s my original chair. Pretty exciting, no? Also in terrible shape. They’d taken a beating from moving three times and surviving kids. So this is what I normally do to paint solid wood furniture:
Preparation:
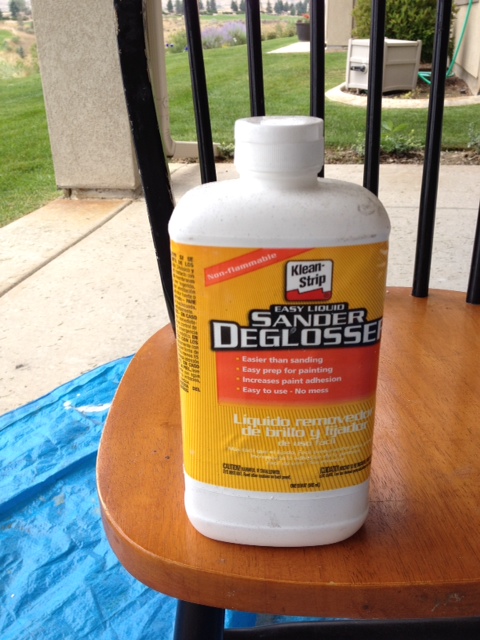
First I saturate a cloth with Liquid Deglosser and wipe down the chair really well. This is also the step where I wipe off any residual gunk. This works kind of like sandpaper in liquid form: it takes the sheen off the paint.
However I don’t feel confident painting with only this step, so I took my trusty Mouse palm sander and went over the surface with an 80 grit paper.
I didn’t sand off all the stain and paint, just to create a dull surface for the paint to adhere to. After this, I used a microfiber cloth with mineral spirits to wipe off all the dust. Or you can use tackcloth.
Painting:
Furniture restorers will probably squirm when I say this, but I used those cheap-0 dollar brushes to paint nearly everything! I have a bad habit of washing out my brushes right away so if I let one harden, no biggie–I can throw it away. I painted even strokes in the same direction.
For one of the chairs I actually let my little boys help me paint–and that one has a lot more gobs than I would have liked. But they are just for me so I don’t really care and it’s fun to know they helped with it.
I would paint one coat and let it dry before painting another coat. I didn’t really sand in between coats though, although I normally would. I’ve learned along the way.
For the distressing, I used a 220 grit pad on my Mouse sander and just went to town on my chairs. I really wanted the distressing to show through so I just had fun with it. Distressing is hands down my favorite part…I love how it really brings out the character in the piece. I tried to make it look natural for the most part–distressing where it would naturally rub away over time.
To seal them, I painted Minwax polyurethane over the top. I did two coats and sanded in between.
Easy as that. Just time consuming. But over all it was fun and I love the finished result!
Linking up to:
Thrifty Decor Chick





I really liked this! I have a question for you. I have a kitchen set from my parents that I want to paint. It’s two benches and a table, all kind of country-ish in design. I am thinking of painting it lime or chartreuse to make it a little more modern. My question is, the table top is made of individual planks so dirt and grime can get stuck down in there. I would like to “even” out the surface a little more before I paint it. Any suggestions? I’m not sure I want to completely fill in all the crevices, but at least make it harder for food crumbs to get down in there. I can send you a photo if you need to see it. Thanks!
I think you could fill in the crevices with wood putty/filler stuff and still keep the appearance of the planks. Good luck!
wowza Heidi – it looks amazing!!
Thanks Mandy! The colors are so fun.
They look awesome! I love the colors you chose!
Thanks! I hope you are doing okay!
Heidi these are awesome!! I love the colors you chose – they are beautiful!!
Thanks Bev! xoxo
Love these, Heidi!! The colors are soft and pretty… you did a beautiful job with them.
Thanks Shannon!
Love your chairs!! 🙂 So pretty!!
LOVE these! Can’t wait to see the rest of your reveal!
Wow these chairs look incredible. You have given me some serious inspiration.
I also have an old set of windsor chairs that I would love to paint this way. Great idea! Question – what does the table look like? Do you have a picture of the table and chairs all together?
I did a dining room reveal a few posts later–it’s still recent on my blog.
I have the exact same dining set! I’ve been looking for over a year for a way to change it up, you have inspired me! Thank you for sharing!!!!!!
Thanks for stopping by! I think this dining set is common so it’s been fun to find a way to make it very unique and all mine!
I have chairs like this and have been wanting to paint them. I have been too scared to tackle this project, but seeing your adorable results makes me want to go get started. Pinning this 🙂
Great! You can do it–it’s not that hard!
These are great! Thanks for posting the color names. Did you use flat or semi-gloss paint?
Oh wow Heidi!!! I just love your gorgeous chairs! May I feature this on my Facebook fan page today (linking to you of course!!!). Let me know, Heather
Yes of course! Thank you!
Thank you – your home is truly gorgeous, you’ve done a beautiful job!!
I really love the colors you chose, so fresh, bright and appealing. I really like the ‘weathered’ look and I hope I can create something like that for my homw.
I am about to paint very similar chairs. A friend who just painted hers suggested spray paint. What do you think?
Spray paint is okay but I never have as much luck with it. It’s hard to avoid drips and to get even coverage. It’s also tricky because there are so many angles you can’t quite reach so there will be spots that don’t really get painted. Also you don’t have as wide variety of colors, and since I did mine in an ombre scheme, I needed to do regular latex paint. But it is faster!
i love the chairs. Was wondering where you got the doors in the background of the picture.
Susan Harrell
Thank you! I actually got them at the ReStore Habitat for Humanity and distressed them myself.
Your chairs look amazing!
I have nearly the same Windsor chairs and I’m aiming for the same amount of distressing as you did. However, my chairs are going to be black.
My question is this: does the brush on polyurethane that you used mask any inadvertent paint brush strokes? I have a couple spots where the spindles join the chair that have some brush strokes. My chair being black, it’s all the more obvious. Not looking for showroom perfection, just curious before I go purchase the Minwax.
Also, if I choose a Minwax product with an amber tone, will that warm up the black or does that only work on lighter paint?
Thanks for any advice you might have!
I think polyurethane on black won’t have much of an effect on the color. However I actually just today repainted these very chairs since they’d taken a beating from my kids. And this time I’m going to spray them with a polycrylic spray and see how that works. My polyurethane brushed on was very hard to prevent brush strokes and drips. I would probably recommend a spray or a wipe-on.
Hi! I love these colors and your distressing is wonderful! I’m in the process of repainting my Windsor chairs, right now they are just plain oak. I painted one a few days ago with a chalk paint, ( first time I’ve painted furniture), two coats of it, followed by two coats of minwax wipe on poly.
I noticed tonight that when I barely ran my fingernail across the chair the paint chipped off. I’m not sure if this is the paint or poly not right but it needs to be more durable. I have 4 rowdy kids!
So..
I’m wondering if I should maybe just do the next chair in just the regular Glidden paint I got? And try polycrilic?
I don’t have any primer , just my sander and some liquid deglosser. It doesn’t look like you primed yours first though?
As crazy as it sounds its a pain for me to run to the store and get primer if I don’t need to. I live 35 miles from “town”;)
Thanks for any advice!!
I would give the paint a week or so to really cure before trying to scratch it. It might just take some time to adhere. However usually the reason that paint chips off is because the surface it is on is far too slick. And if it was a commercially sealed chair, they use some serious laquer on those. I know that people always say you can just paint straight on with chalk paint but it is always more of a gamble to not rough up the surface first. I just repainted these very chairs with Annie Sloan chalk paint and mine are holding up really well, even with painting straight over polyurethane. I would maybe put on a few more coats of poly. Latex paint will still scratch off if the surface is not rough underneath. It’s hard to give perfect advice when I haven’t seen your chairs in person. Best of luck!
What are the color’s name? and brand of paint. thanks.
Hi there,
we would like to use some of your directions (referencing back to you) for painting the chairs. How do we get permission? Thanks!
Please email me at honeybearlane@gmail.com. Thanks!
Hi was going thru Pinterest wanting to pain my dining room set and hutch, wanting a little color back in my life, so how do you keep the back of the chairs from crackin chipping, etc. Want them to be used
These chairs turned out so cute! I love the color. I am working on updating our kitchen here in Paradise, CA and would love to paint our chairs. We are having our kitchen cabinets painted next week so maybe after that! Thanks so much for sharing!!!