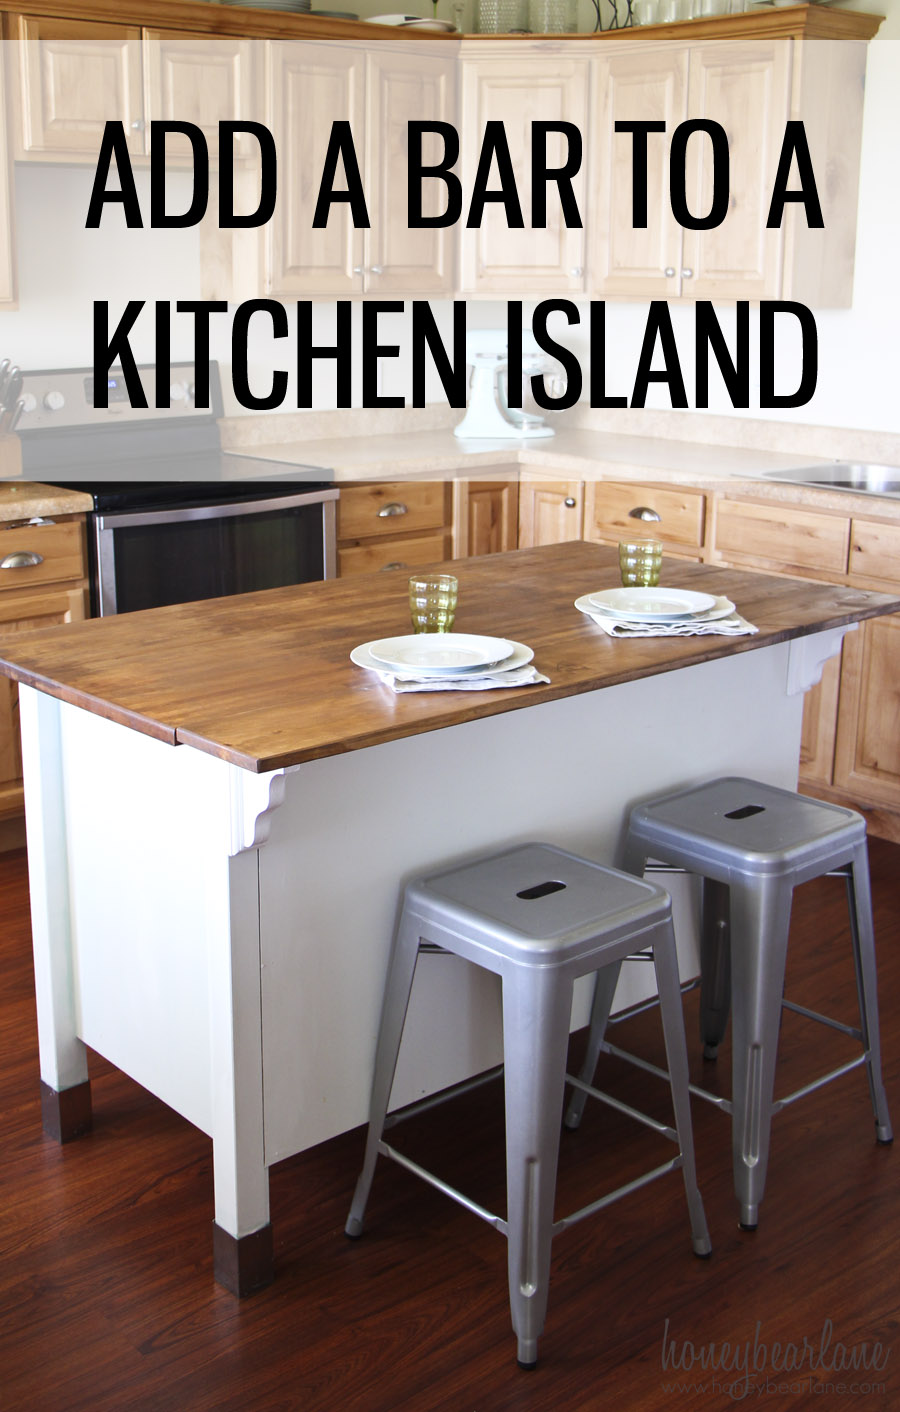
Adding a Bar to a Kitchen Island
I did something kinda cool last week. I added a bar to a kitchen island.
I was cleaning up the kitchen and I decided to rearrange the furniture to change things up. That’s how it is with us decor-obsessed, we are always changing things around. I have a square kitchen/dining area and since my island is from IKEA and moveable, I change it from facing the window to facing the family room. Usually when it faces the family room, I move the kitchen table to be in front of it. But I don’t love it there because then the chairs are always out from the kids sitting in them and not pushing them back in and it looks sloppy.
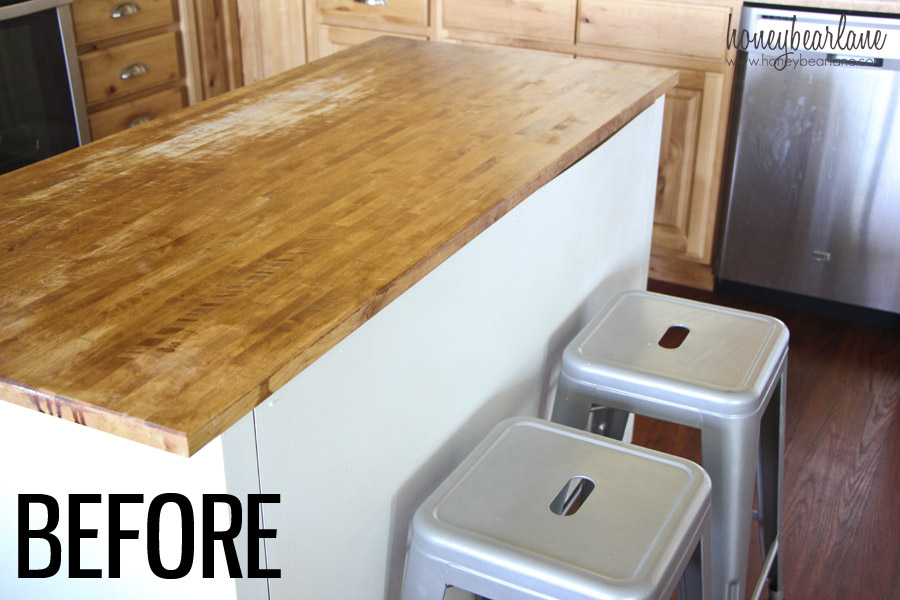
What I really wanted was a bar. Another place for the kids to sit and eat and hopefully not get my kitchen table covered in Mac n Cheese. I already had some bar stools, and they looked good there. But there was no overhang and therefore nowhere to put your legs when you want to sit and eat. Also, my island looked pretty bad. I cut straight on it and the initial staining of it went horribly wrong (for the record, I do NOT recomment stain+poly combos.)
So I figured all I needed to do was get a board cut to the same length and hold it up with some corbels. The ideal way to do this would be with another piece of butcher block, but that’s pricey and wasteful. And in six months this island is going in the garage to serve as my new workbench. So I’m not super picky about the perfection of the bar.
Basically what I did was buy a 1x8x6 and cut it to the same length as the butcher block. Then I used the Kreg Jig to attach them to each other.
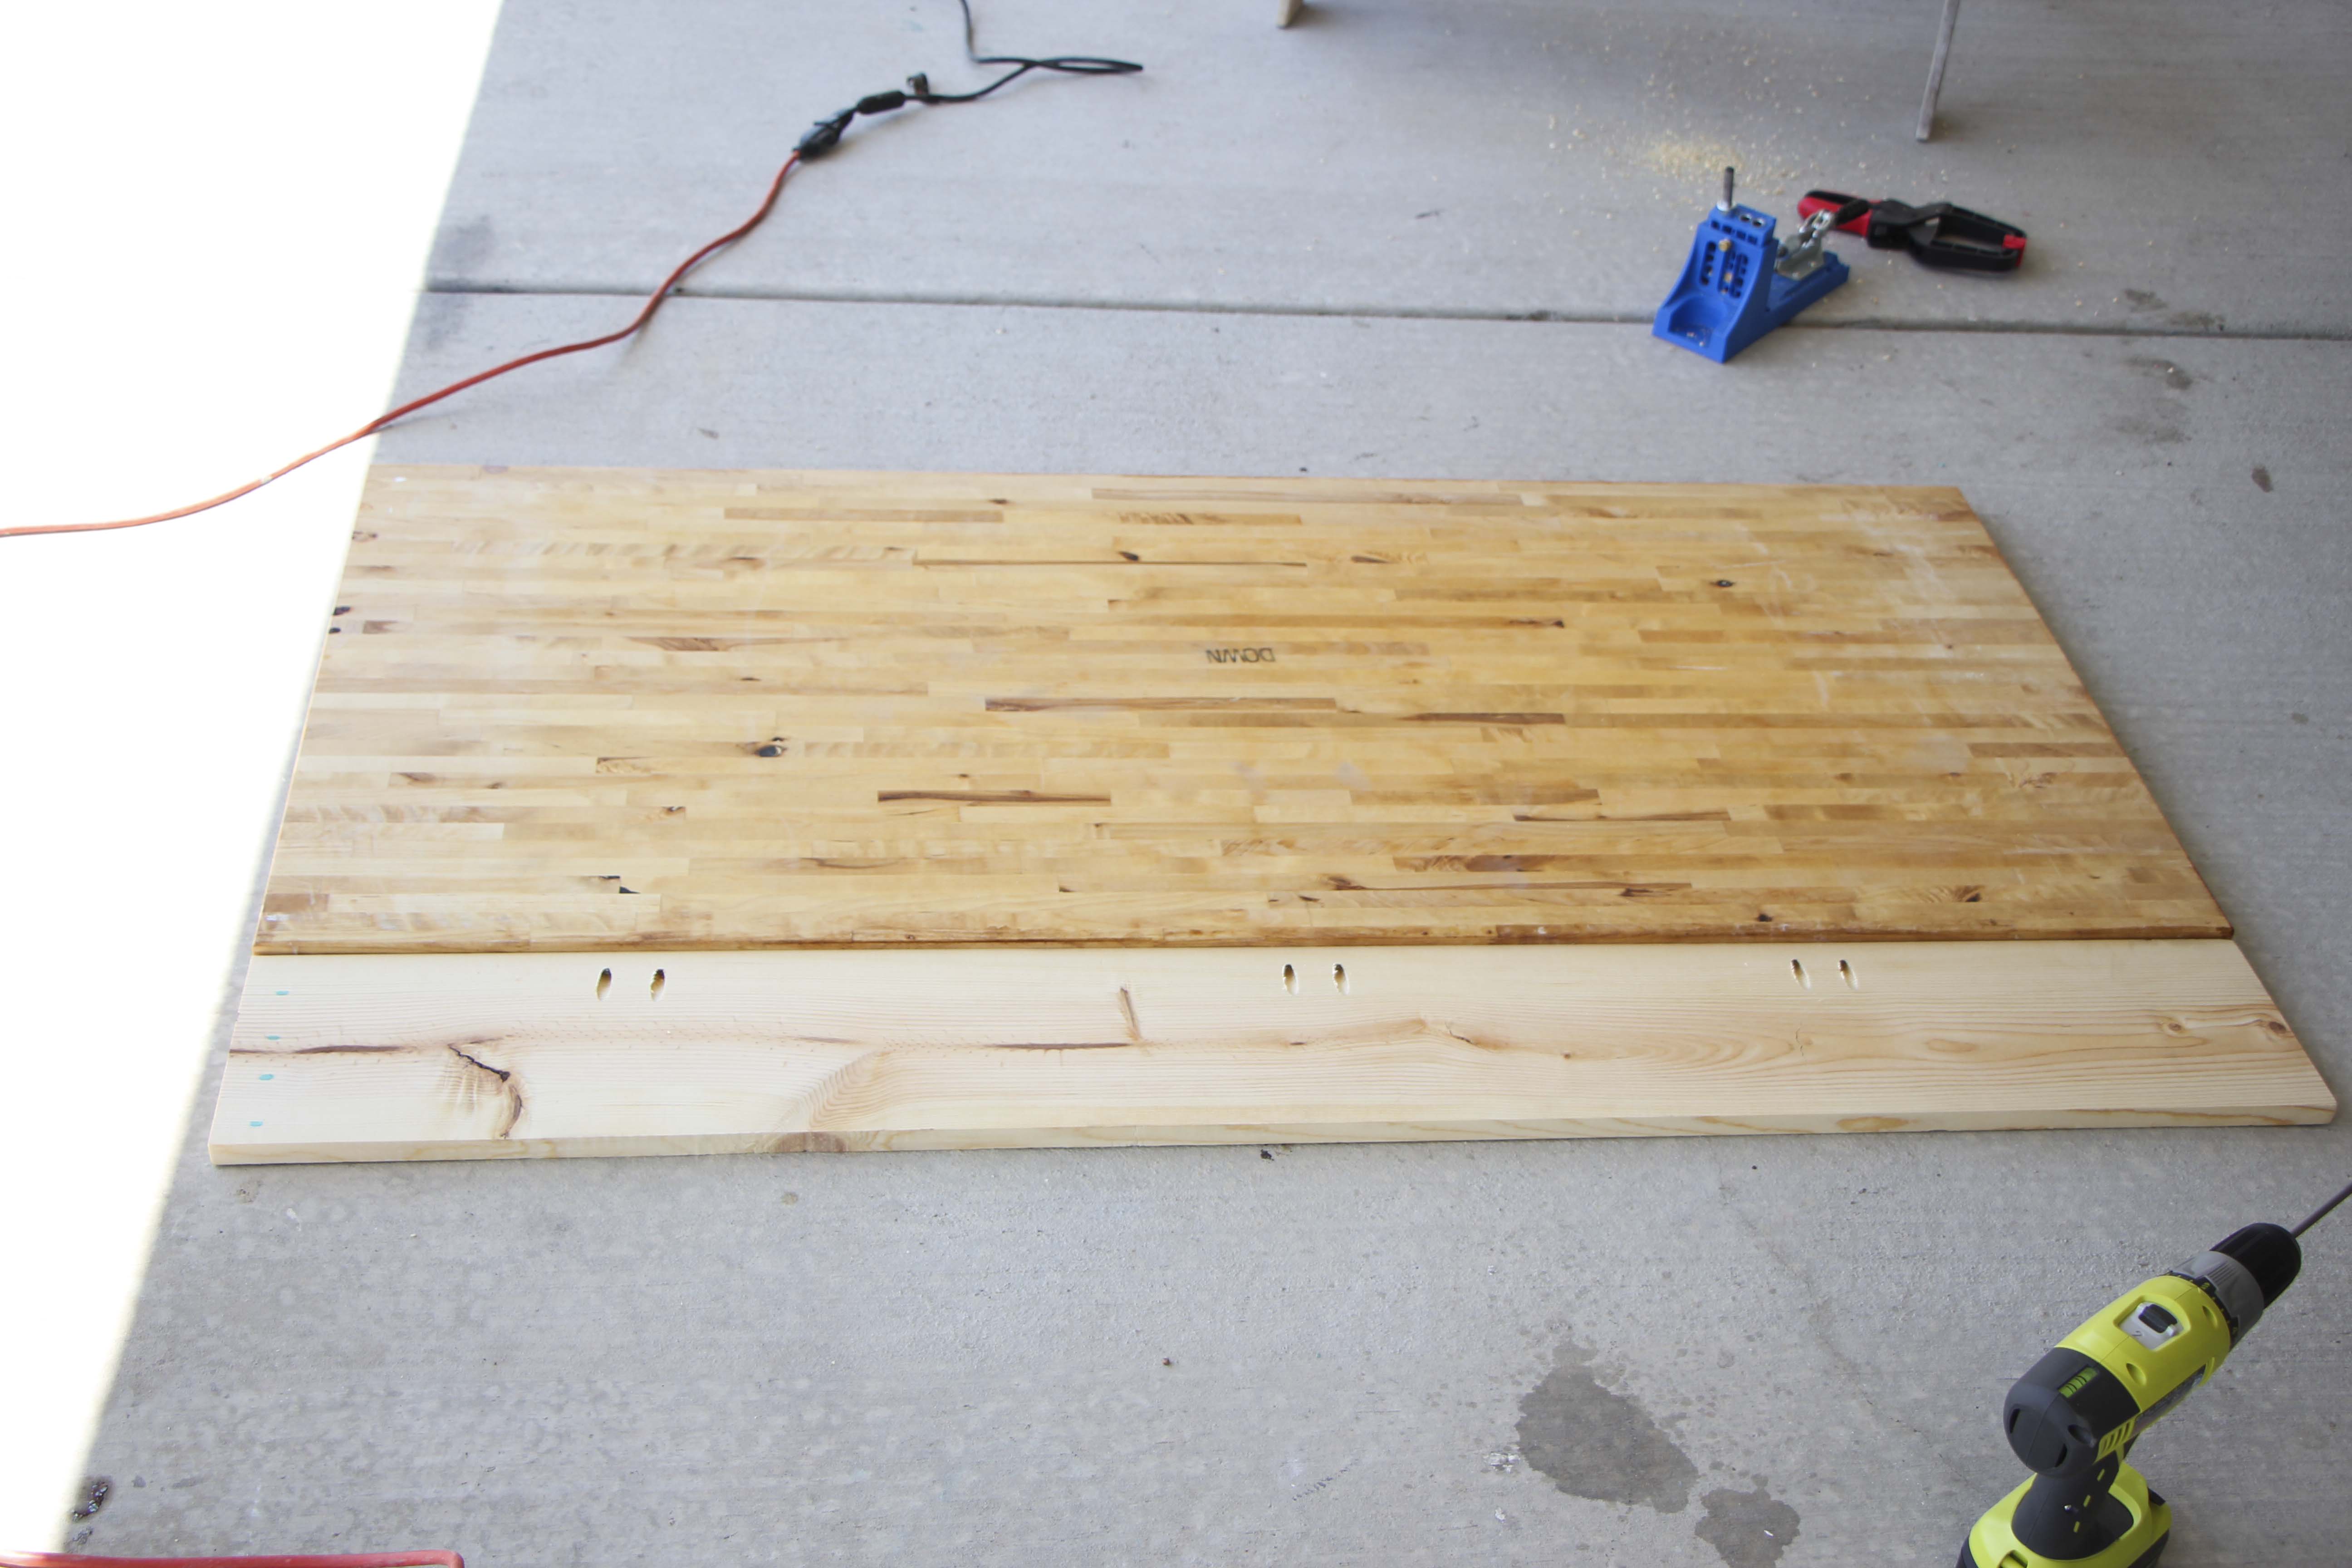
Then I sanded them both very well and stained them the same. I used Early American, but I also had some of those Minwax staining cloths in other colors which I kind of mixed on top. It actually stained kinda weird. Because I was almost out of Early American, I dumped the pot on the butcher block. And I learned I should not have done that. Because it just soaked in that spot and made the stain take quite unevenly. So…lesson learned. I still make it look decent though. And like I said—in the garage in six months.

I bought some small corbels from Home Depot and painted them white. Then I hung them on the edges of the island where the solid wood legs were. I put some wipe-on poly on the butcher block/bar and after it was all dry, I moved it inside to the island. It fit just fine and I had accounted for the small discrepancy in width between the butcher block and the extension. Although one side was a titch too high as you can see.
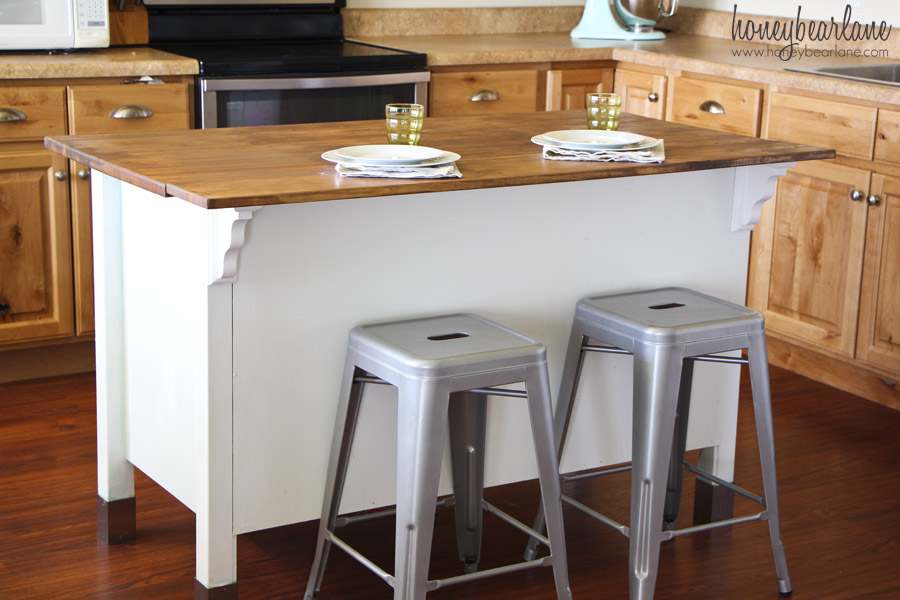
This was a quick and easy project that has really helped me out. I love this little island extension. It’s perfect for my kids to eat breakfast and lunch on and makes me have to clean my table a lot less. Plus my island top looks WAY better than before. And I’m not even cutting on it anymore.
What do you think? Would you do this to your island?
LOVE this DIY! My husband and I are in the market for a kitchen island. I wasn’t sure if I wanted to DIY one myself or swing by IKEA. This definitely gives me inspiration either way!!
Savannah
Hope you can figure out a good option for you guys. This was pretty easy!
Pinning it. It needs to be shared with the world. Such a great idea!
Thanks! It has changed my life, haha.