Simple Sawtooth Star Quilt Pattern
This post first appeared on the Riley Blake Designs Blog Cutting Corners College.
I love the Sawtooth Star and I wanted to make a quilt in the new Riley Blake Fabric “Twice as Nice”. I love this fabric line and I love how this quilt turned out. It feels like it’s been forever since I made a quilt and I forgot how fun and satisfying it is.
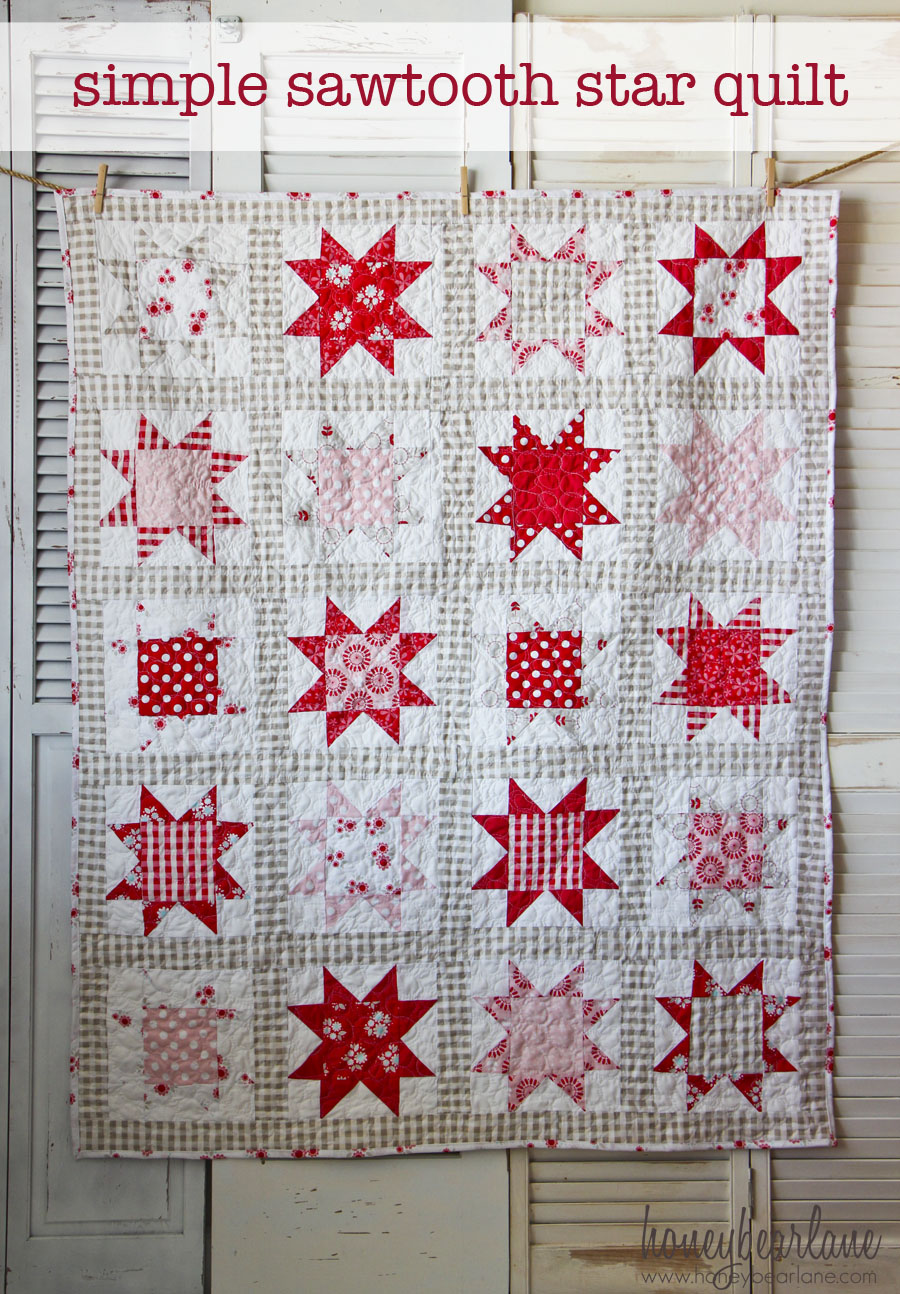
This is my new favorite quilt. I really love star quilt patterns and I see many more in my future.
Here’s the sawtooth star quilt pattern:
What you’ll need:
1/4 yard of multiple fabrics. I used the following from “Twice as Nice”:
Spice Garden Pink
Spice Garden Gray
Spice Dots Red
Spice Dots Pink
Spice Petals Red
Spice Petals White
Spice Plaid Red
Spice Plaid Gray
Spice Blooms Pink
Spice Blooms Red
Basic Colors Pepper
1/2 yard for filling in the stars: white broadcloth
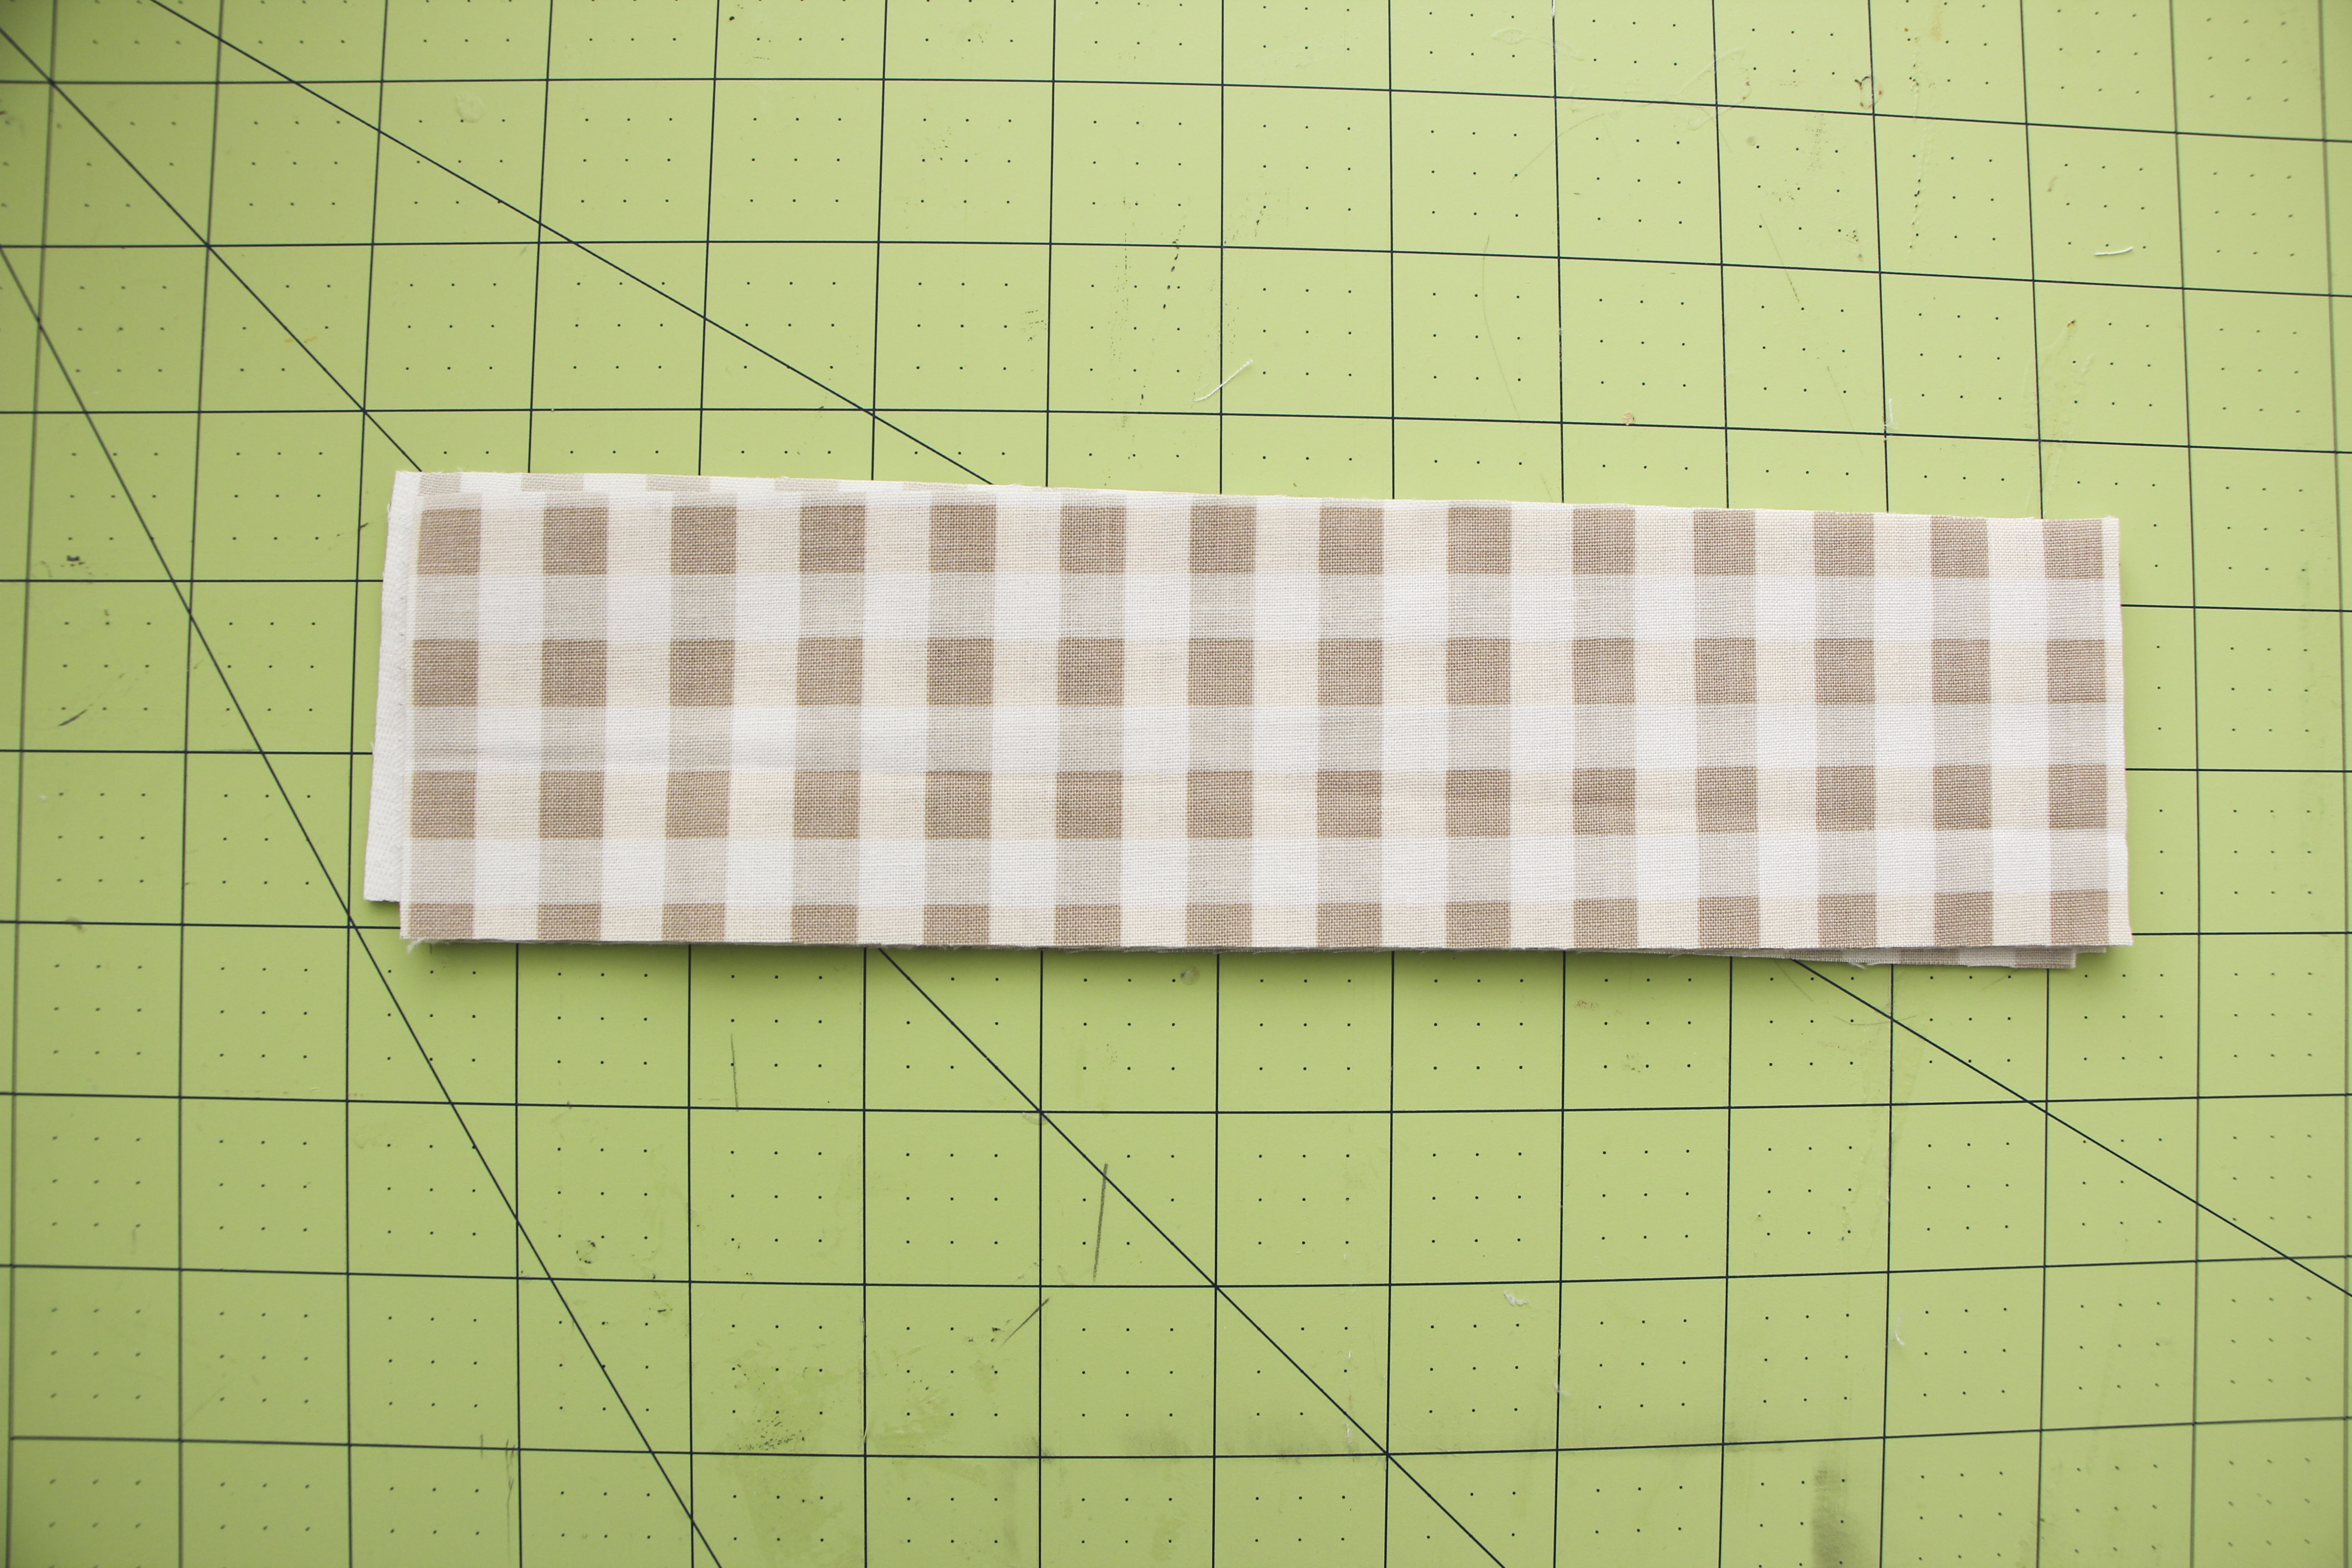
1 1/2 yard for sashing: Spice plaid gray
2 yards for backing: White broadcloth with Twice as Nice scraps
1/2 yard for binding: Spice petals white
Cut List:
20 5 3/4″ squares of white broadcloth
80 3 1/8″ squares in each Twice as Nice fabric (four for each star, 20 stars)
80 3″ squares of white broadcloth
20 5 1/4″ squares of Twice as Nice Fabrics (star center)
25 2 1/2 x 10″ strips of Spice Plaid Gray
7 2 1/2 x WOF” strips of Spice Plaid Gray
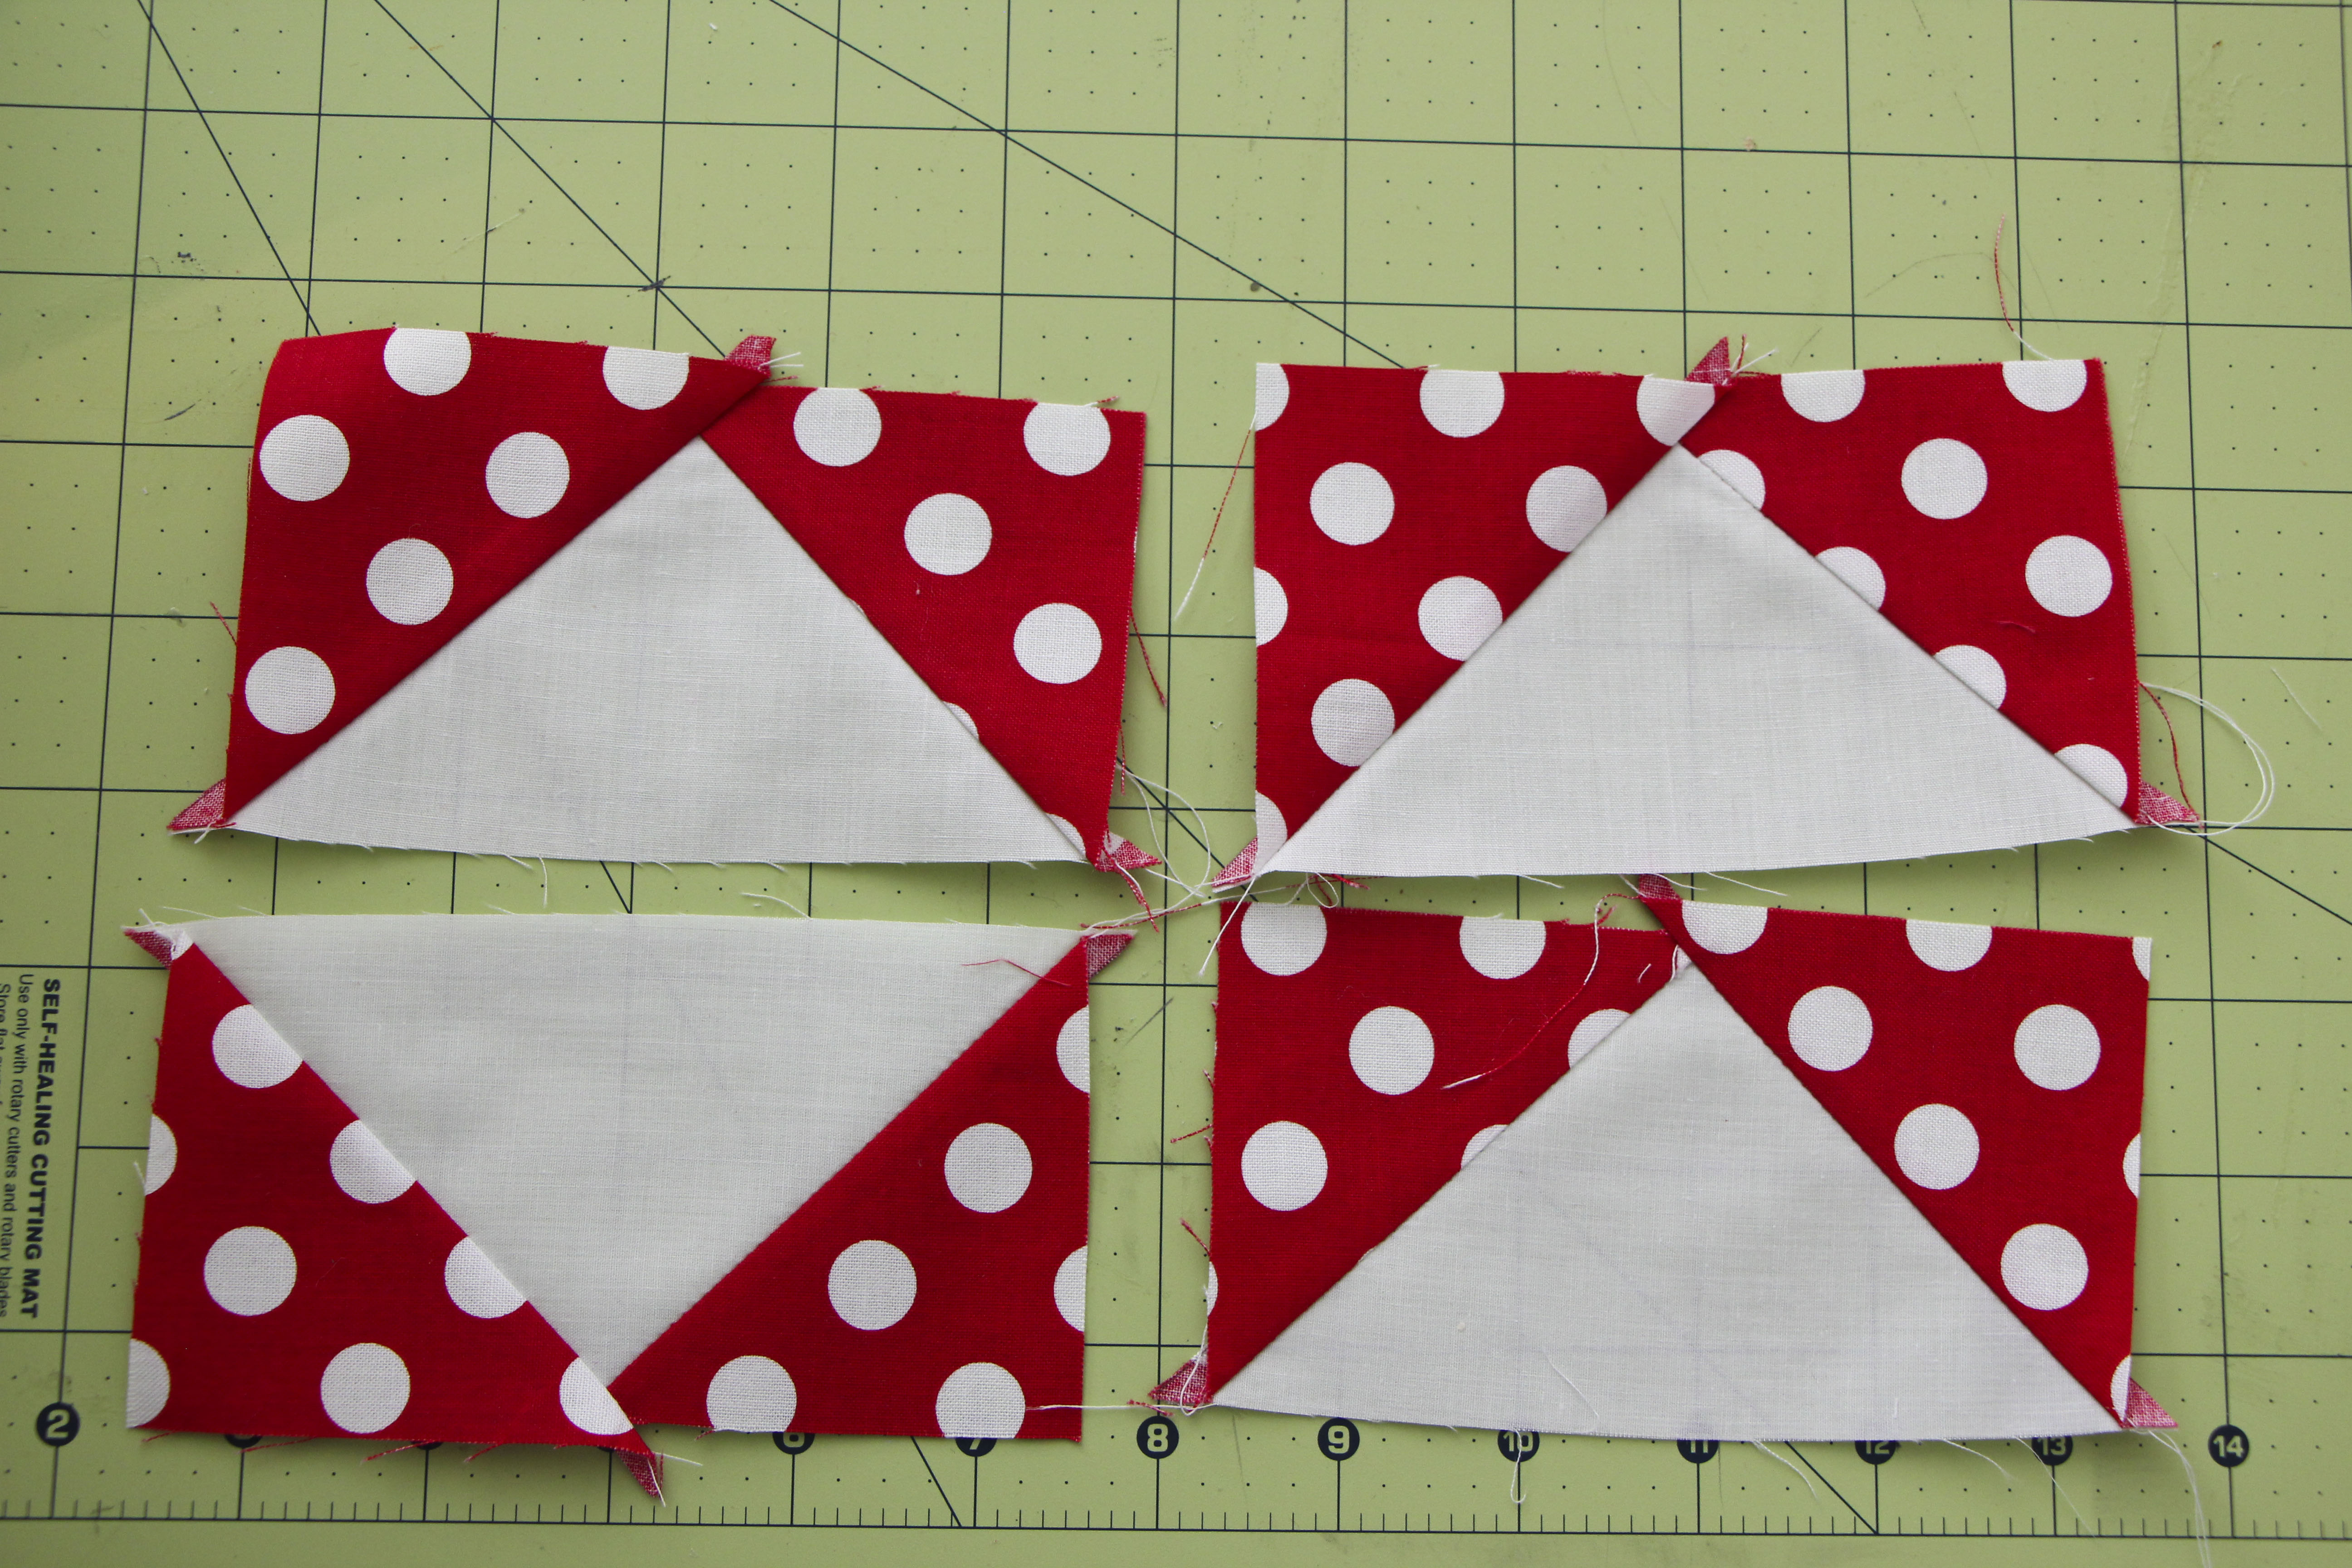
Now that you’ve cut all your fabrics, It’s time to sew a bunch of Flying Geese. I have a method that creates four a a time and really saves time!
Repeat that until you have 80 Flying Geese.
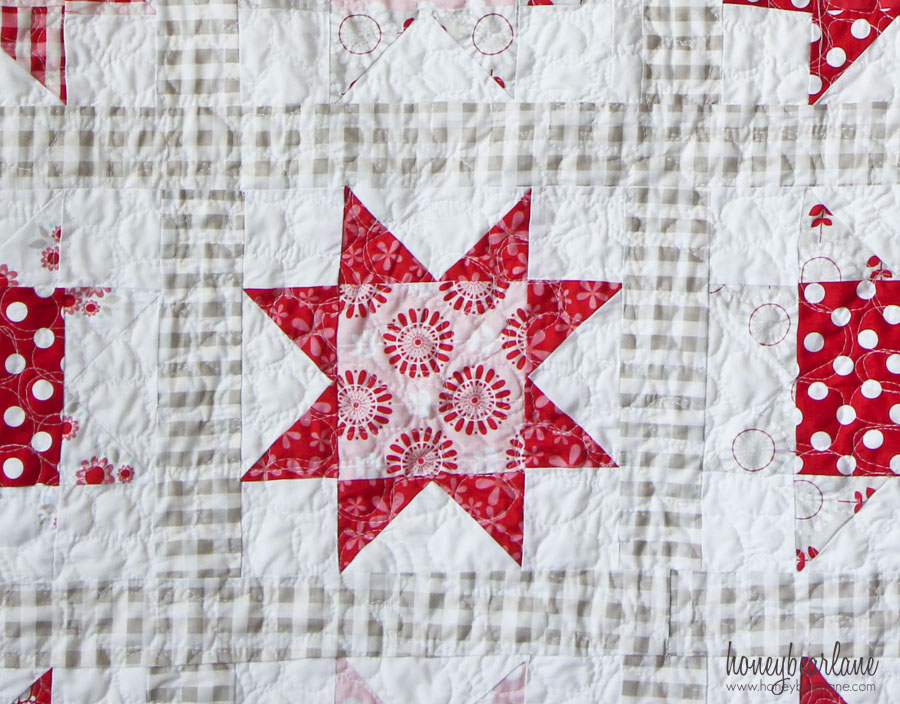
To assemble the star:
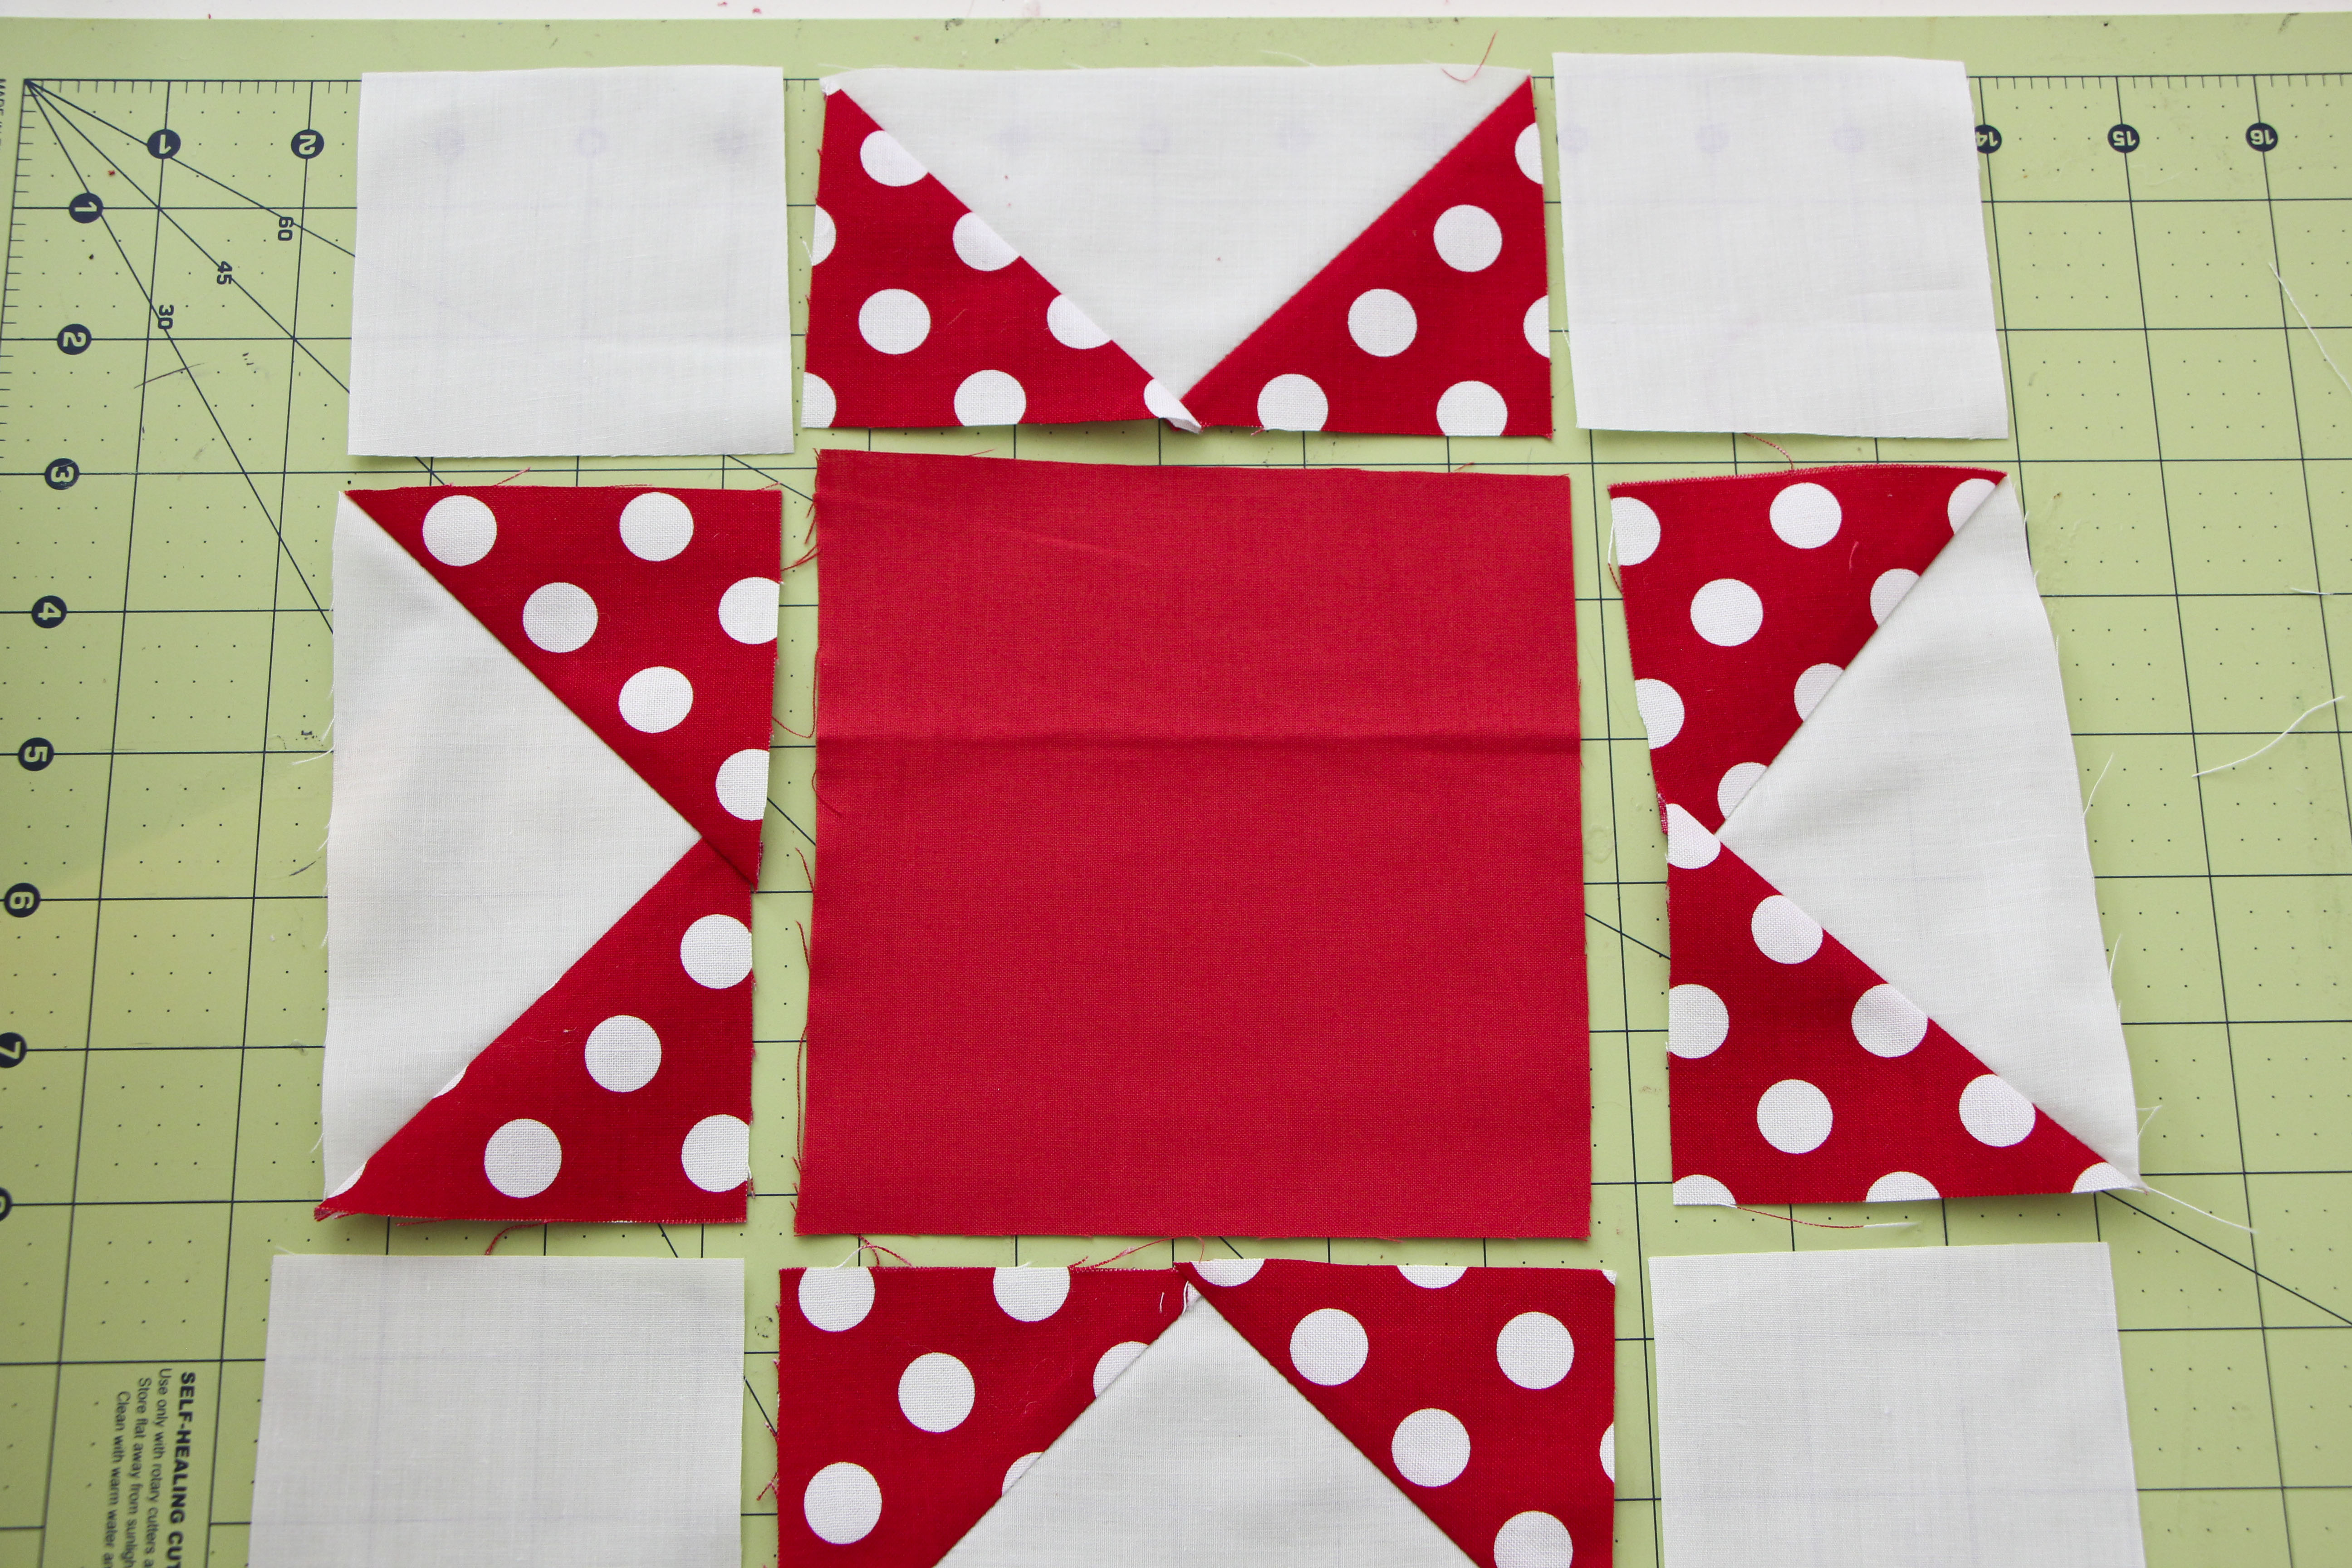
Place one 5 1/4″ square of Twice as Nice fabric in the center. Then pick coordinating Flying Geese to go around the center square. Use the 3″ squares of white broadcloth to fill in the corners.
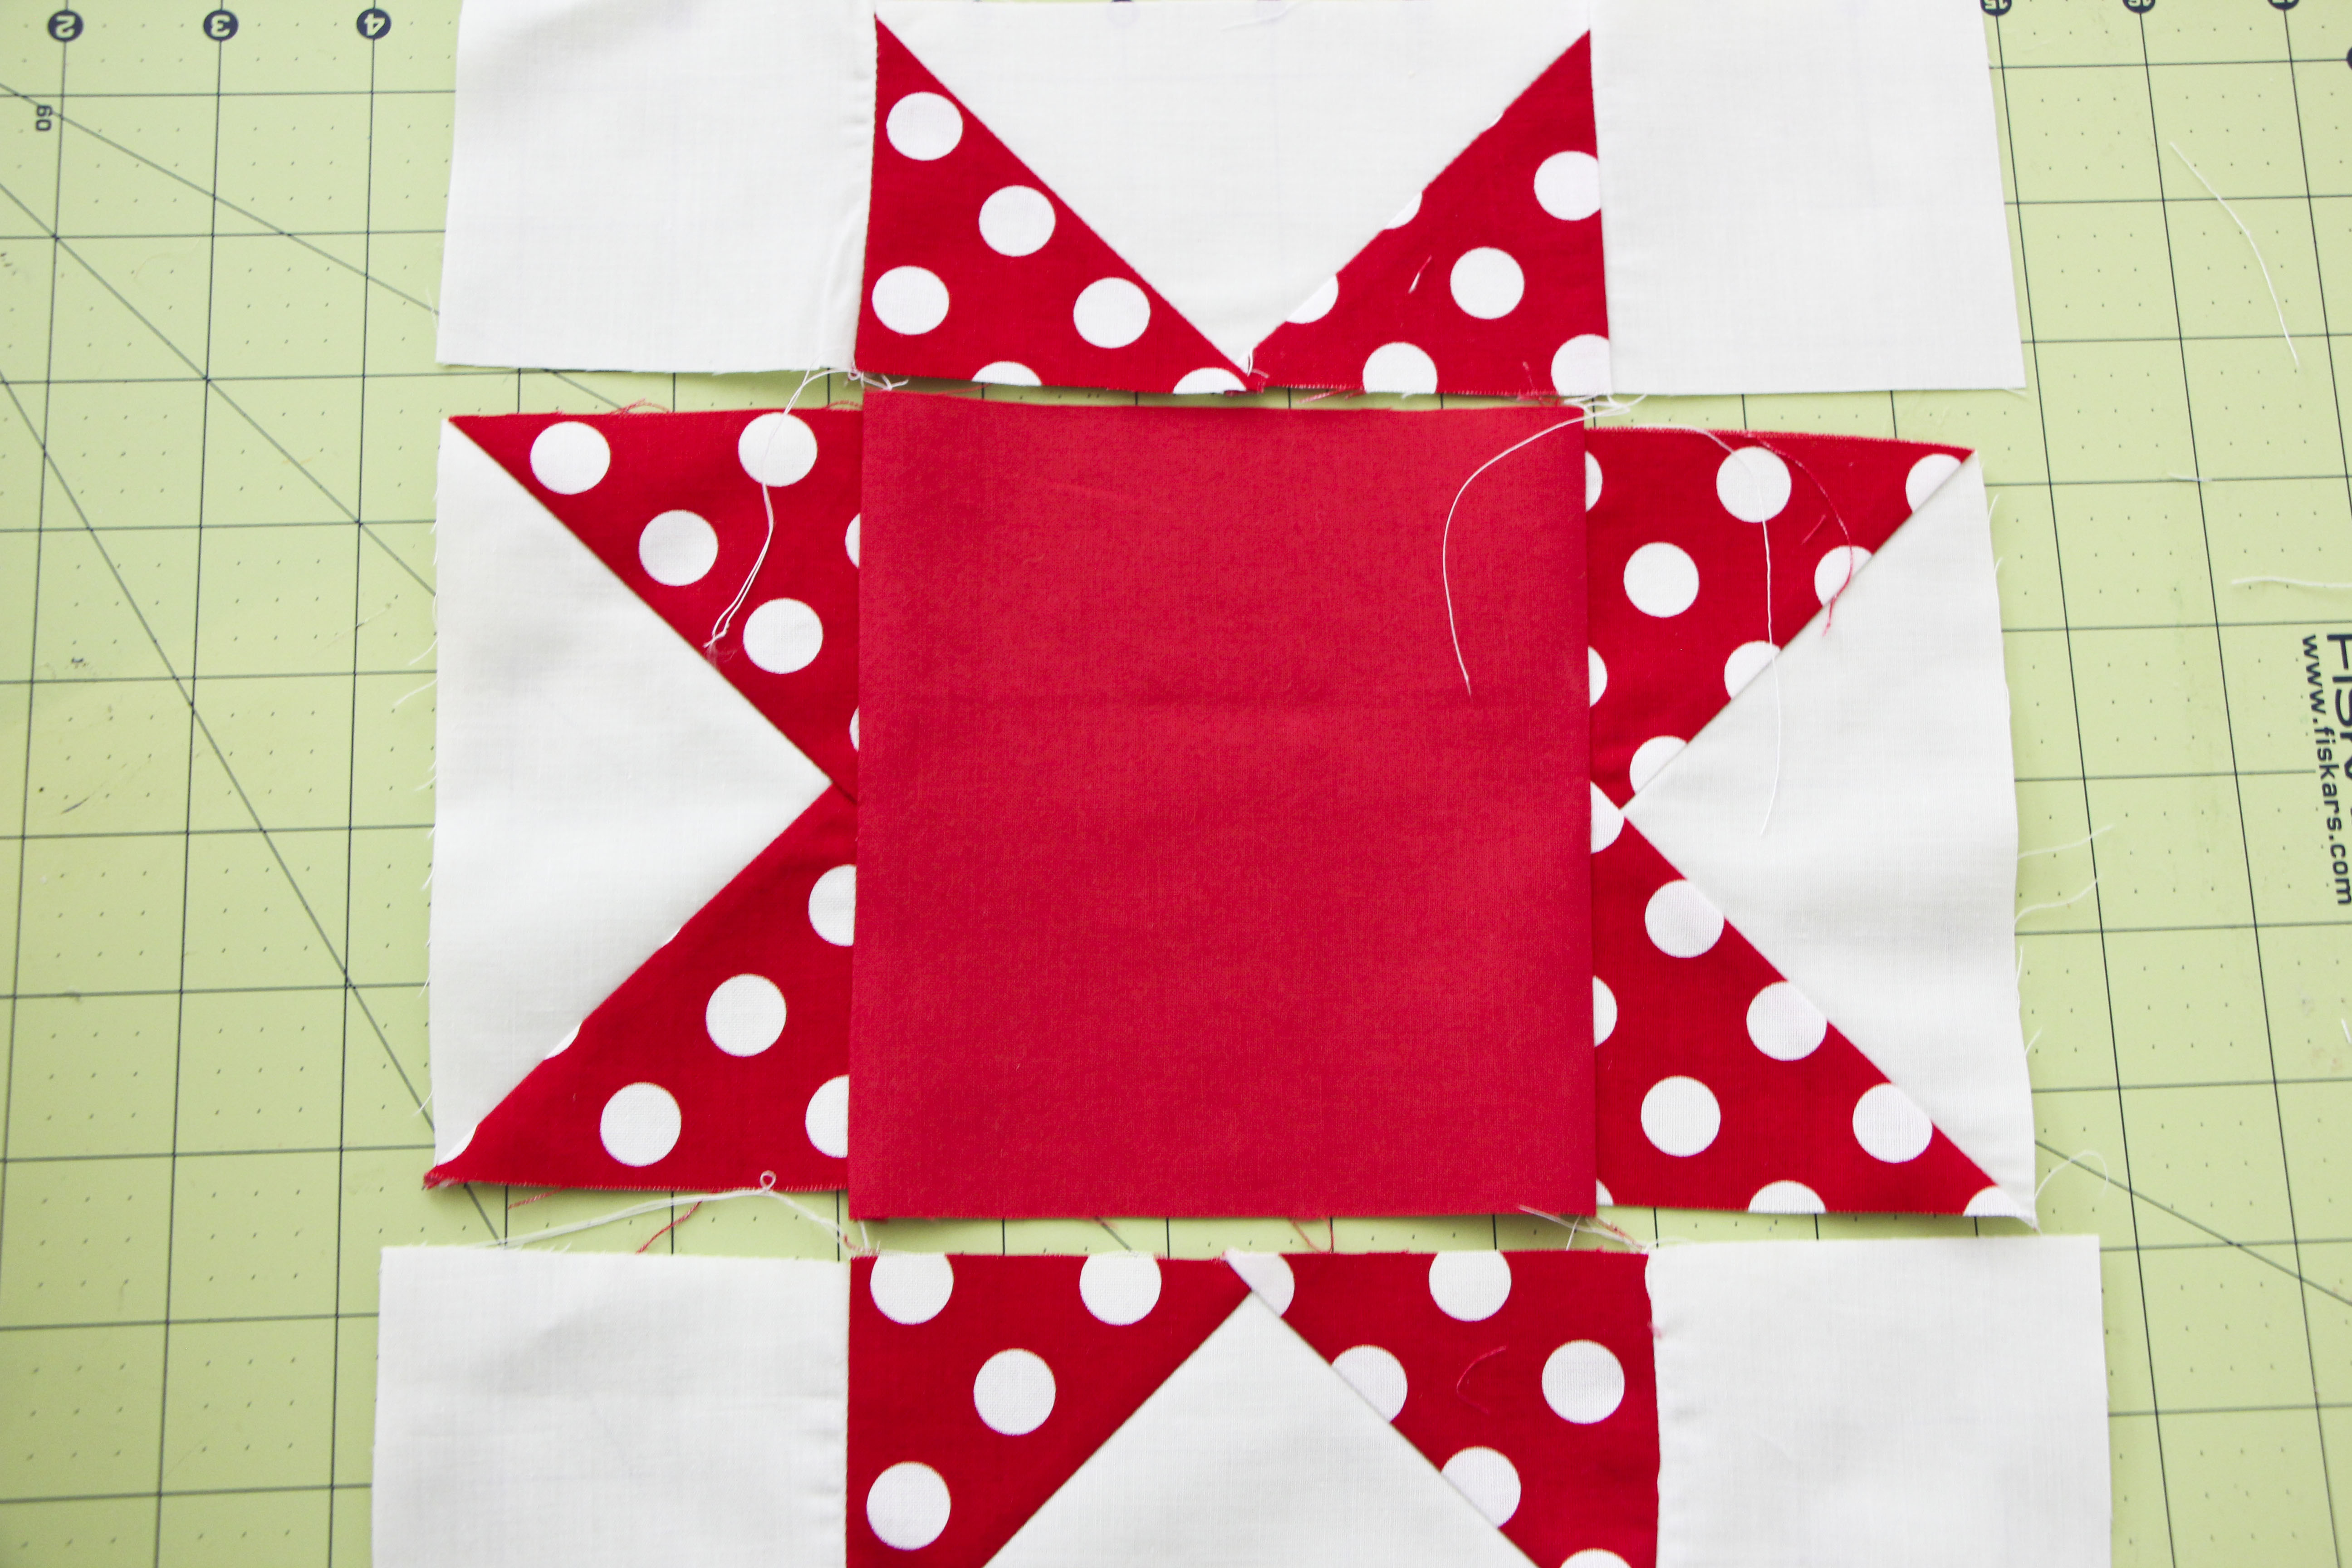
Sew each row together first–the top row (3″ square + Flying Geese + 3″ square), then the middle (flying geese + 5 1/4″ square + flying geese), then the bottom row (3″ square + Flying Geese + 3″ square). Use a 1/4″ seam allowance.
Iron them all flat, pressing seams inward. Then line up the seams of the top and middle rows and sew a 1/4″ seam. Repeat with the bottom row. Iron open, pressing seams inward.
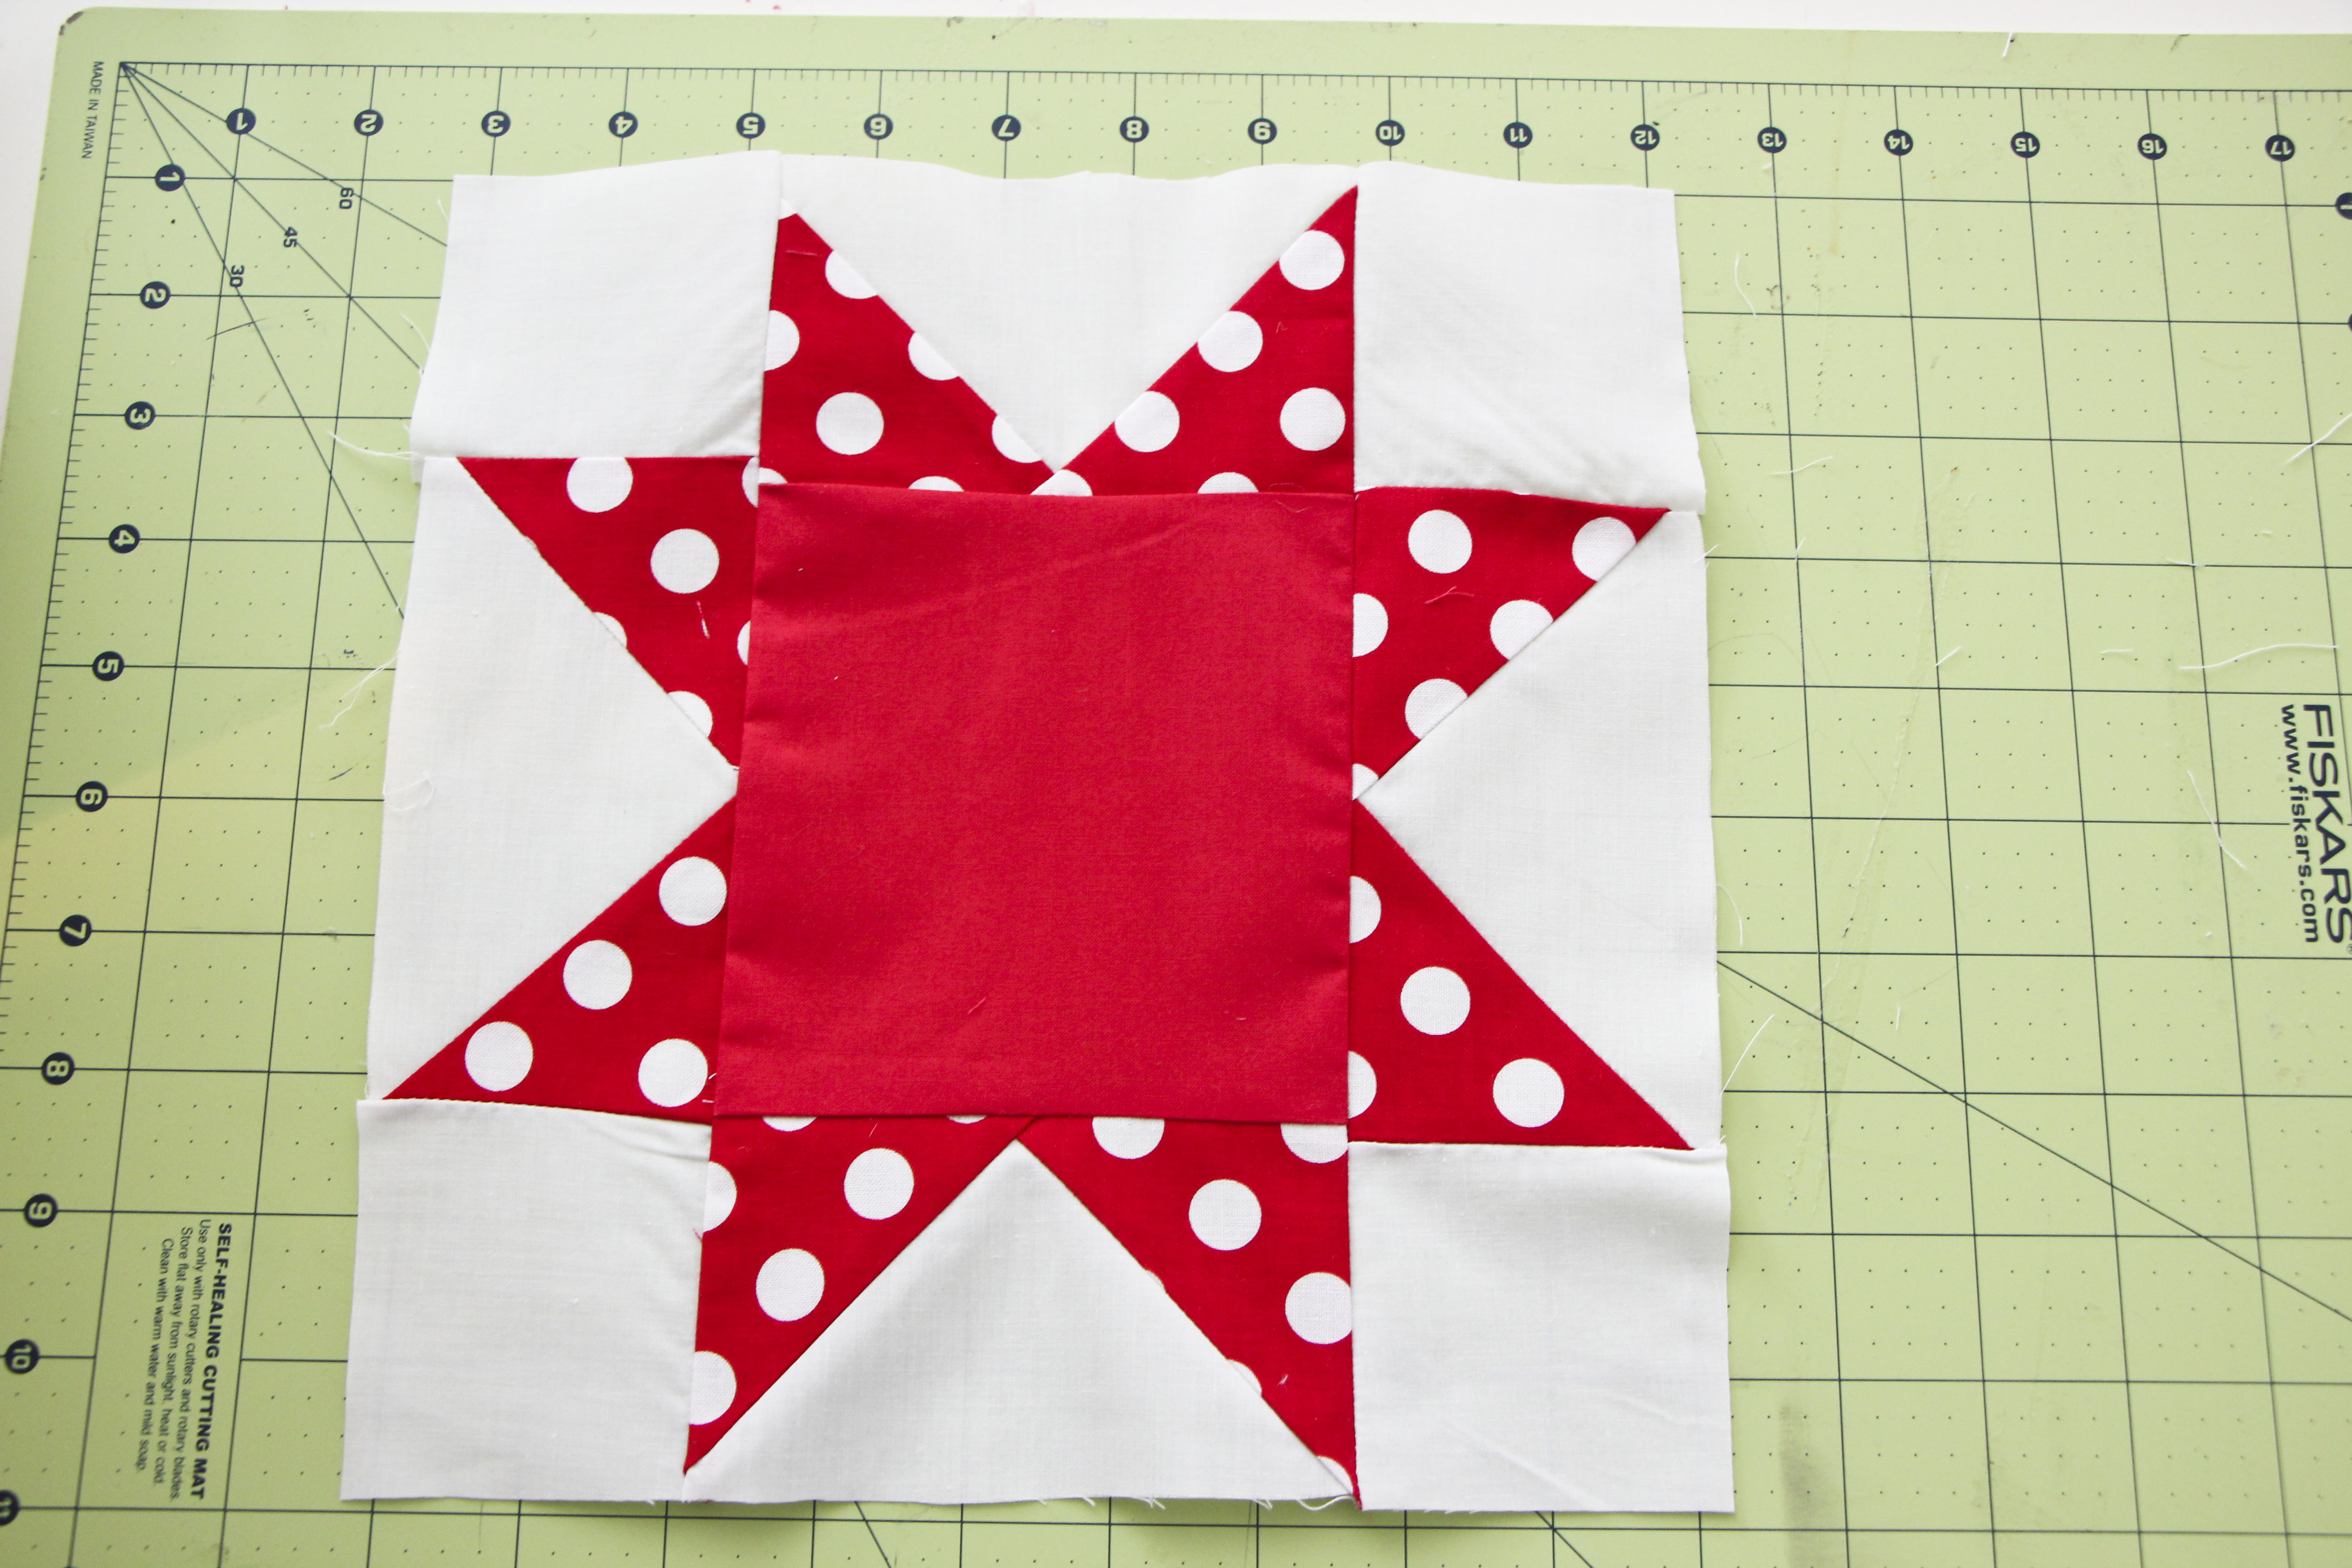
Now you have a star! Repeat until you have made all 20.
Once you have all 20 stars, you can add in the sashing. First make sure you trim you stars so they are all the same size. Mine ended up being 10″x9 3/4″. I could have made them square but they were all that size so I left it. If you want it to be square, just make sure you sashing is the same length as the size.
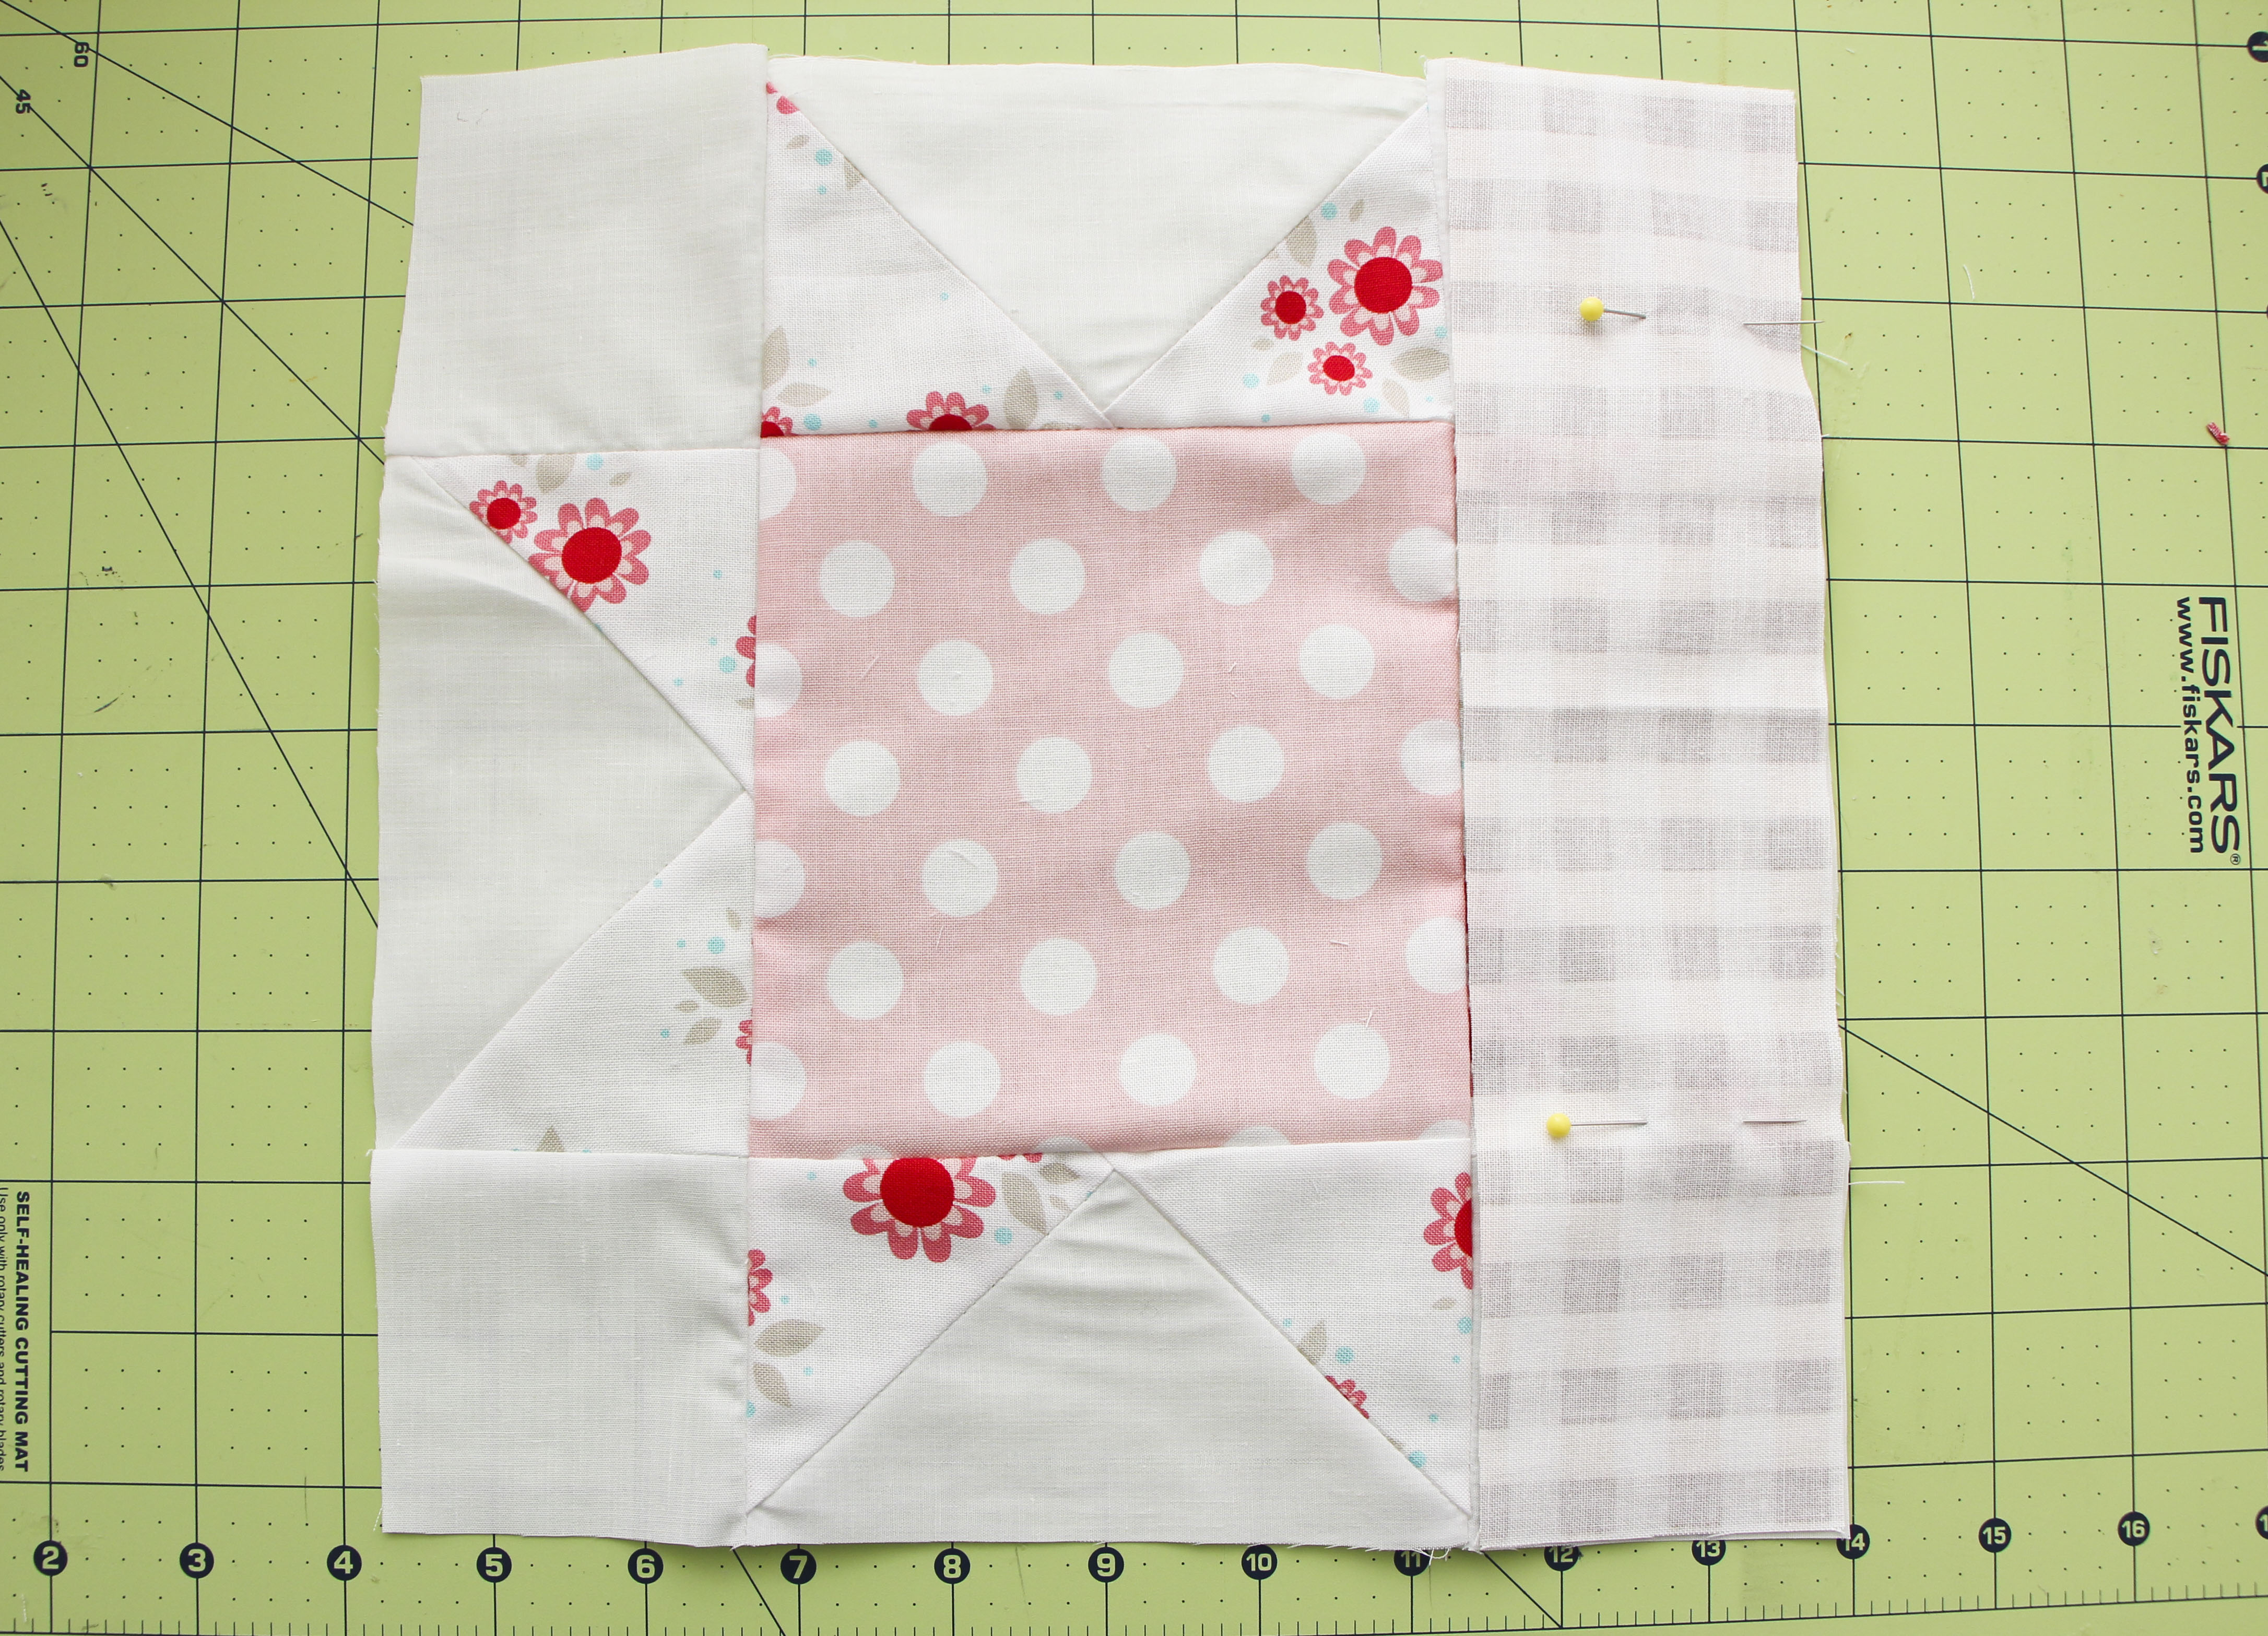
Sew the sashing to each star by horizontal rows. Press the seams down. To sew the long sashing strips on, first sew all the long strips together and press the seams down. You will have one really long strip of sashing, but this technique ends up saving you fabric.
Sew the long sashing onto your first row at the top. Cut it off when it reaches the end, and repeat with all the rows. Make sure to lay it out so you can see where to sew what.
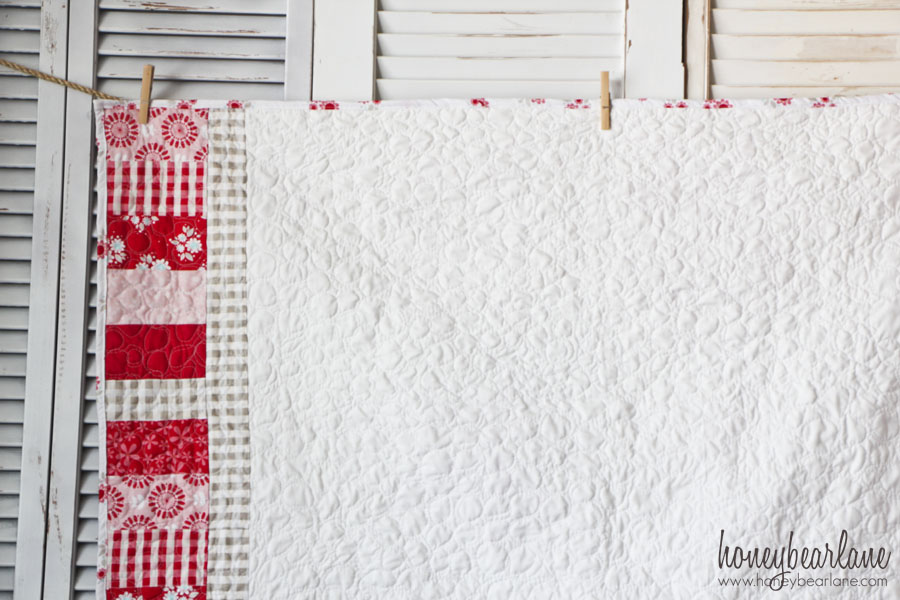
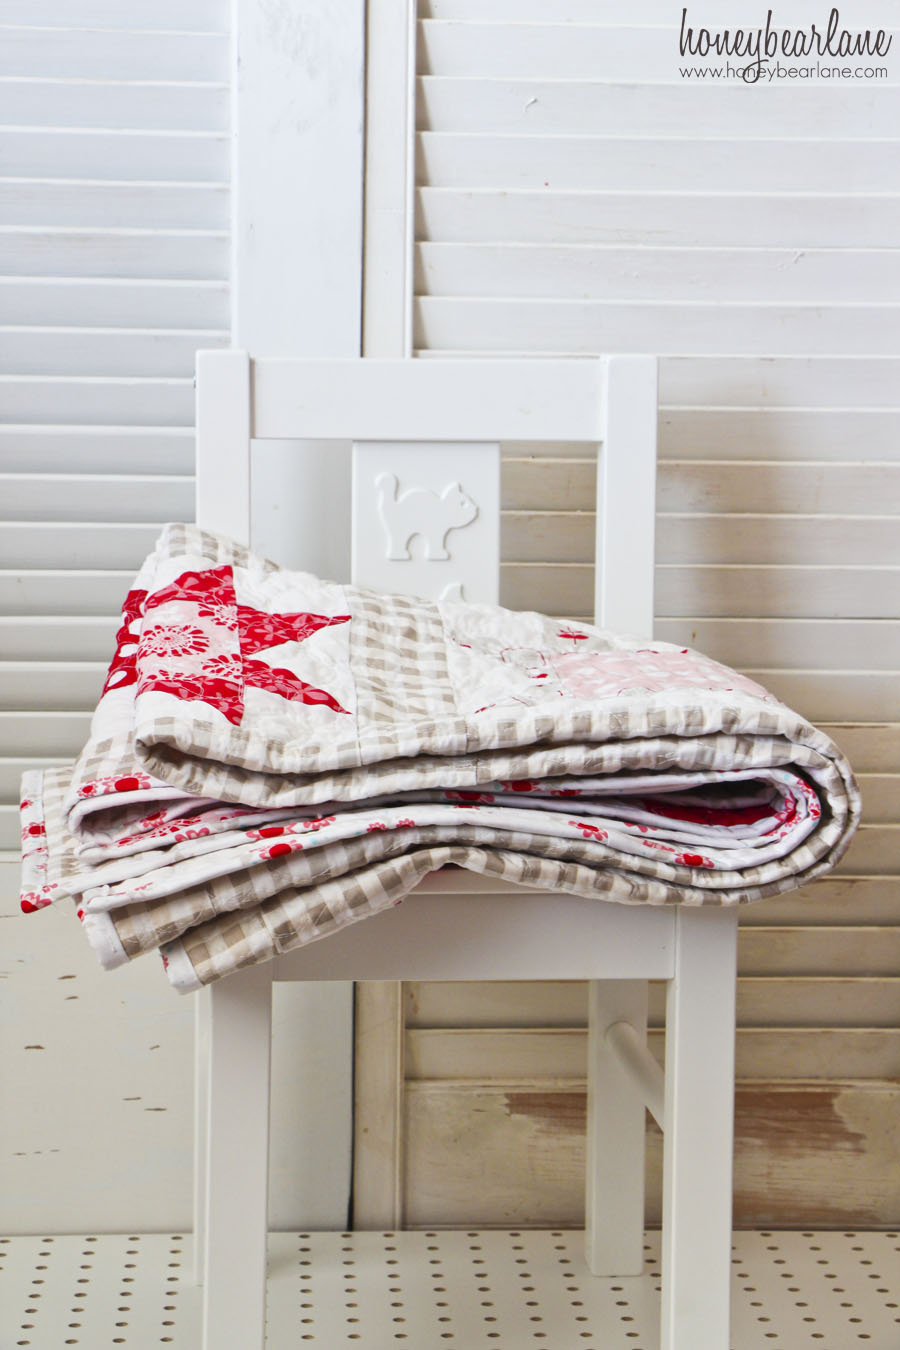
Once you’ve finished the top, iron everything again. Sew your backing (Since the backing fabric isn’t quite wide enough, I made a little pieced pattern of my leftover fabrics to extend the width. And it’s cute!) Iron the backing. Baste the quilt.
Quilt the layers together–have someone else do it or do it yourself with a darning foot on your machine. I did a bubble pattern. Bind with a 3″ wide strip of Twice as Nice Fabric, I used Spice Petals White.
You probably don’t have time before Christmas to make this sawtooth star quilt pattern but it would make a great winter or Valentine’s quilt!
This is such a beautiful quilt and the colors are so fresh. Thanks for sharing it and I hope you and your family have a wonderful Christmas.
Thanks Diana! I hope you had a great holiday!
it turned out amazing – great job Heidi!!
Heidi I simply love this quilt. I bought all the fabrics and started this morning. I’m havng trouble with my flying geese are 2 3/4 high but you have me sewing to a 3 inch square. Any suggestions of what I’m doing wrong. Thanks Pat
That’s because once you sew the 2 3/4 flying geese to the 3″ square with a 1/4″ seam allowance, it will allow for you to still have a 1/4″ seam allowance for the other sides of the square and make all the corners line up.
I love this quilt and am in the process of cutting out the pieces for one. My question is in the photo of your flying geese units, the red points go right up to the edge of the fabric. yet when they are sewn together the tips are not cut off. How is this possible? How can I leave a 1/4 inch space so when sewn together the tips will not be cut off? does this make sense?
Yes, it makes sense. That is the purpose of a flying ‘goose’ piece…it’s supposed to leave about a 1/4″ of space so they can be sewn together without chopping off the tips. If you follow the instructions precisely it should leave that space. If you don’t understand my instructions for flying geese, maybe try googling it and reading a few other tutorials. With some practice, it will work out for you. Just make sure you are very, very precise…that’s the trick with quilting!
I love this quilt! I’m wondering what are the finished dimensions?
hello made my day finding your blog, the star pattern is too me one of the best tutorial , I have found thanx so much an soooooo happy great blog . renee
How big is the finished quilt please?
It is so beautiful, thank you for sharing this patern!
I can’t tell you precisely off hand since it’s in storage, but it’s a lap size blanket…probably around 40 by 50?
I’m afraid your white piece measurements are off by 1/4 inch. They end up larger than the flying geese they are sewn to and must be cut off to make square pieces.
The middle red is off as well.
Pingback: Howt to Make Rag Quilts | Ideas4DIY
I agree. The square is off by 1/4 and the white squares are off by 1/4. Even with seam allowances , the pieces flying geese are undersized for the center square and white corner squares.
the saw tooth block looks easy to make