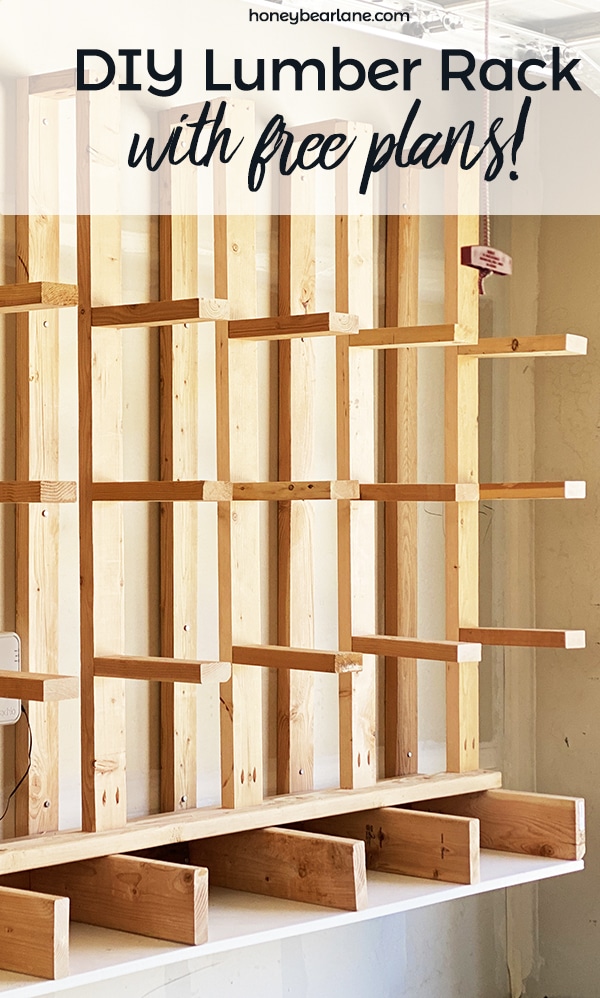
DIY Lumber Organizer Plans
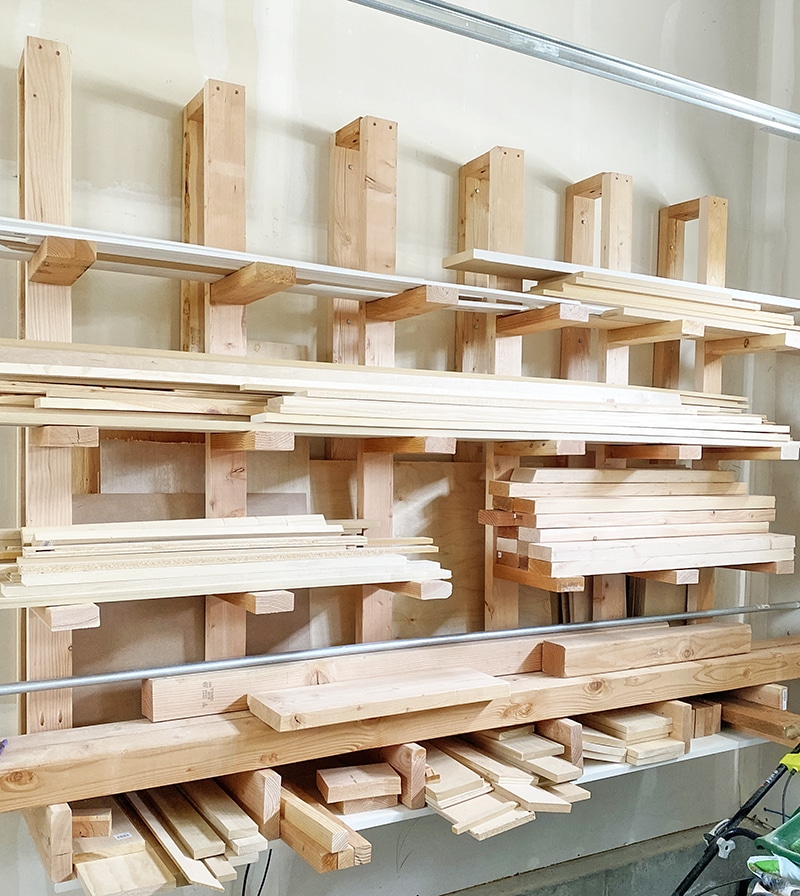
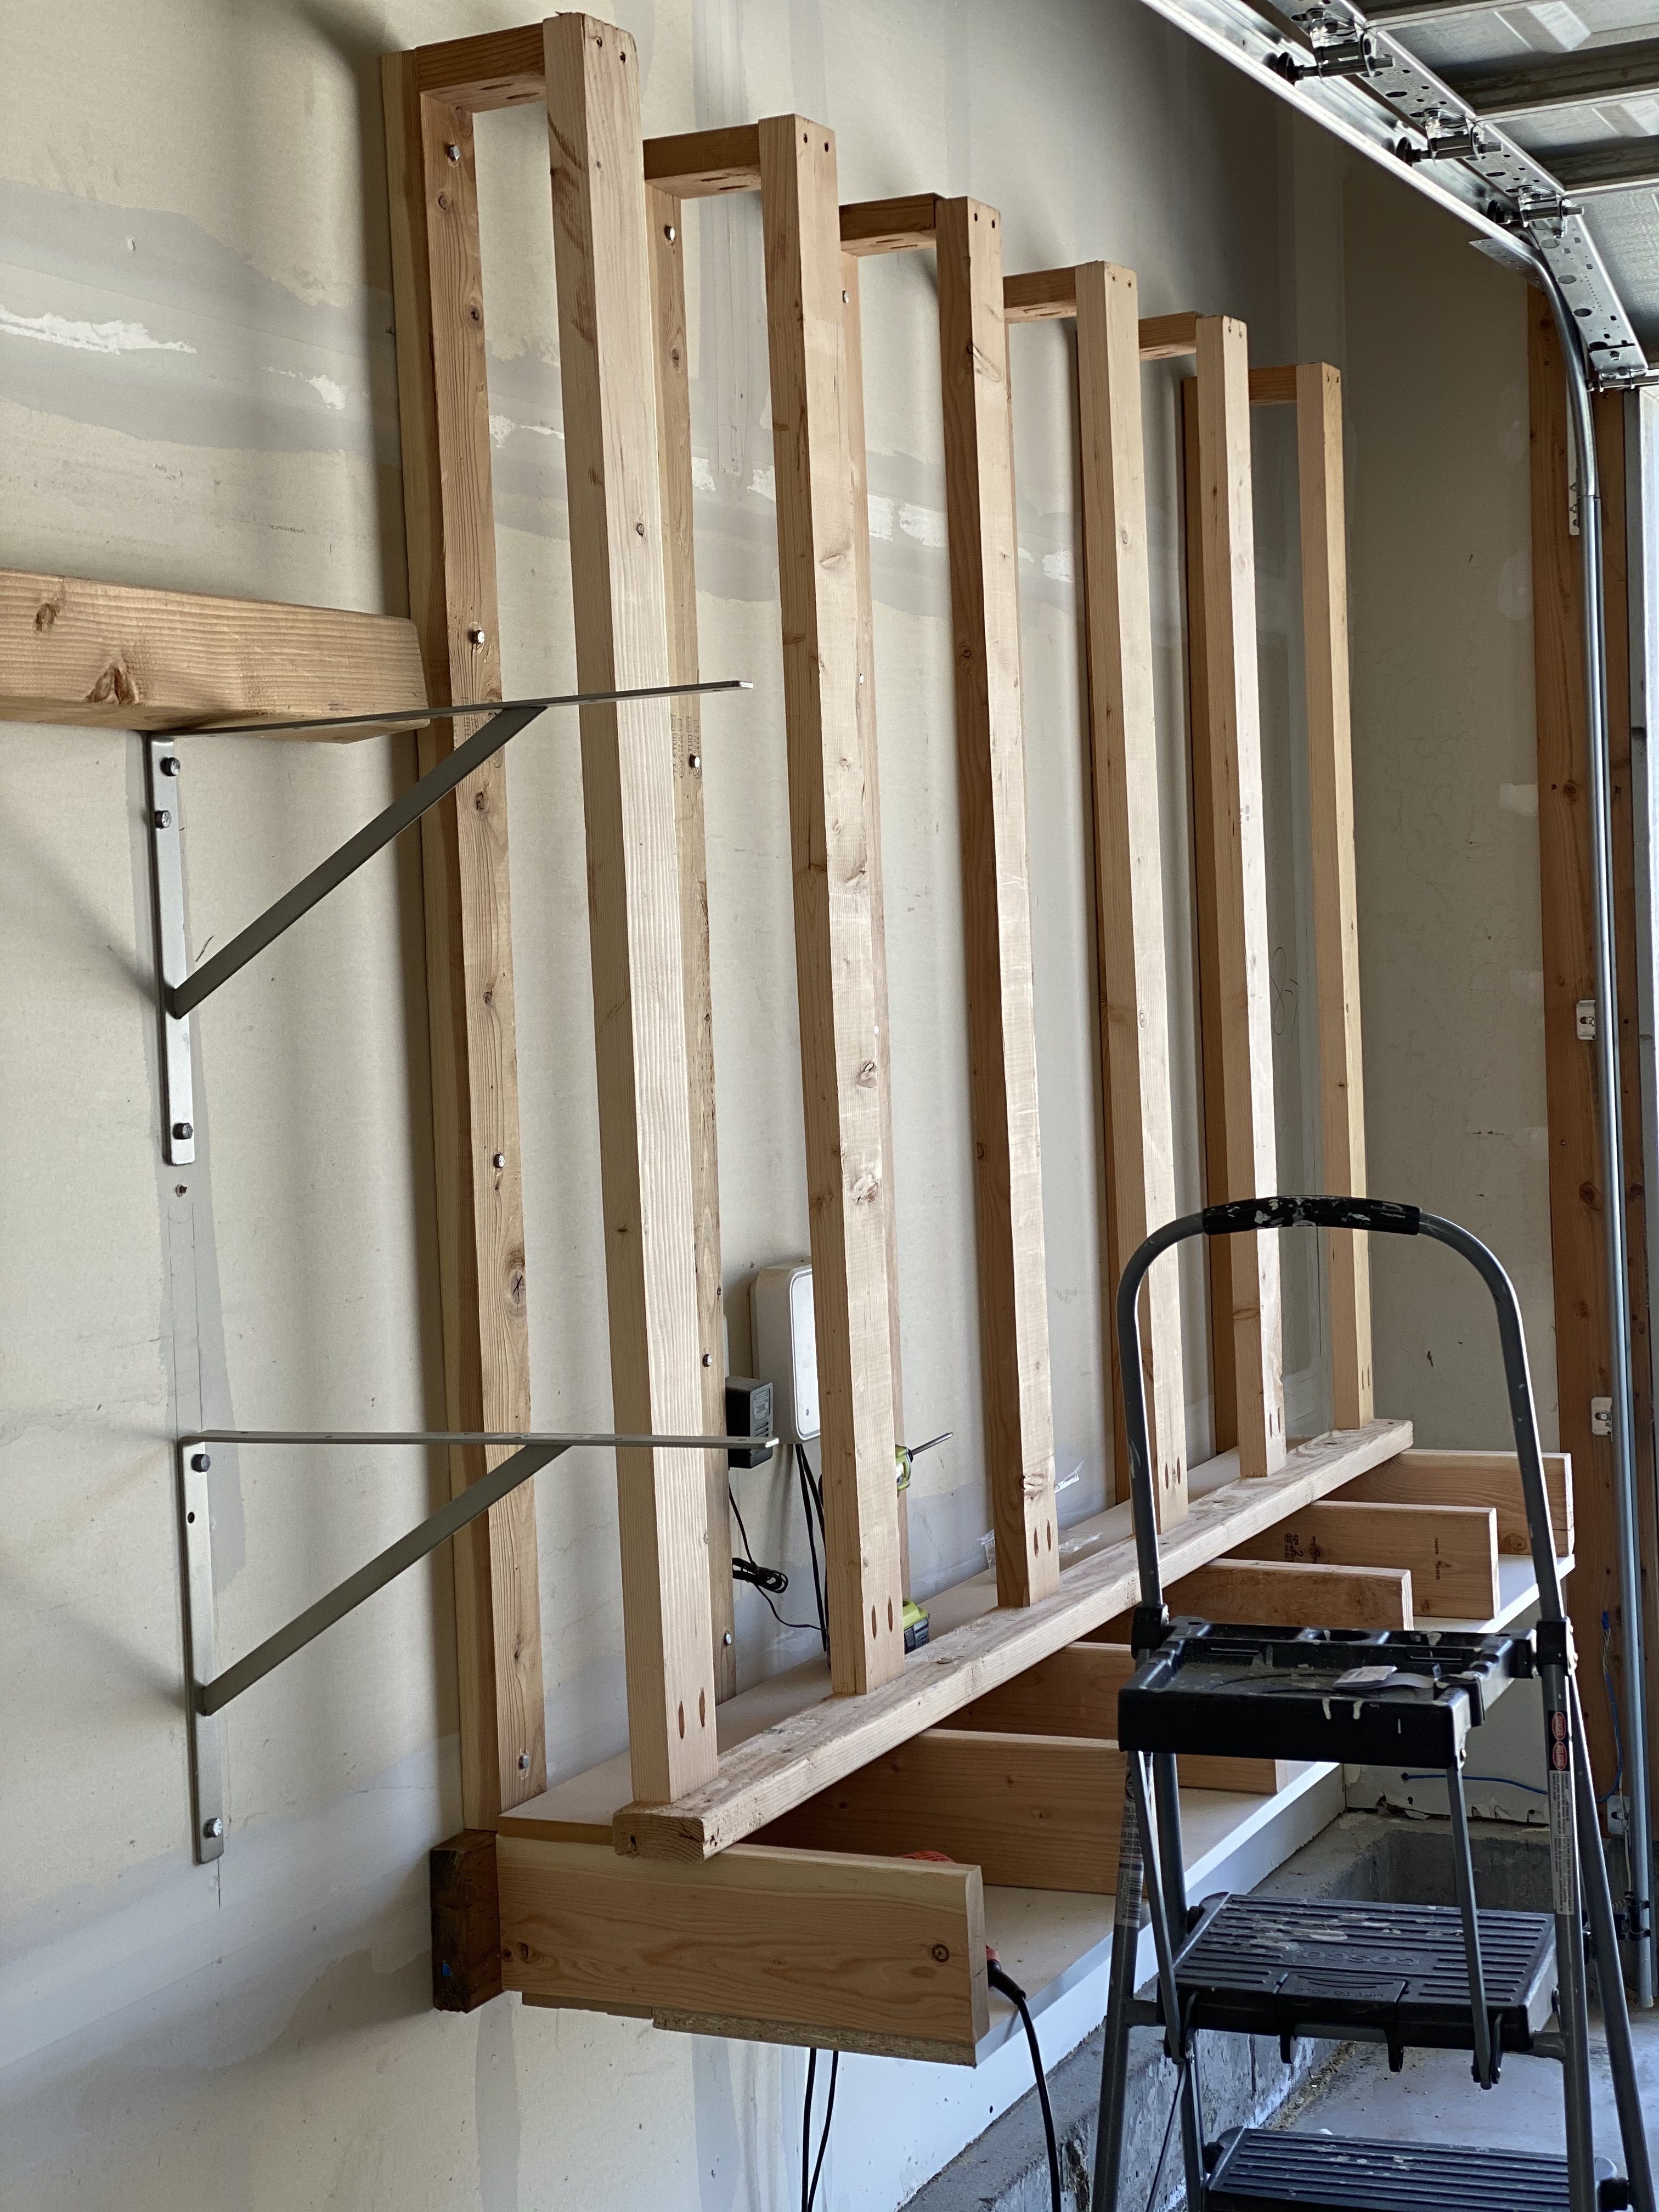
As part of the basement getting finished, all the stuff from the basement has to go somewhere else for the time being. This means the garage needs to be cleaned up and organized. I was trying to figure out where to put my pegboard so it could be usable. The only good spot is where my lumber shelves were. My lumber shelves were basically just a few heavy duty brackets and they were not a great solution. All the short pieces of wood got lost in between the long ones and it was an accident waiting to happen. I decided to create my own DIY lumber organizer plans and this is the end result! As you can see, I have a lot of wood and stuff to store.
I searched Pinterest for some solutions and inspiration. I found a lot that were basically what I already had, and others which were carts on wheels. I needed something up higher on the shelves because we have mice and voles that like to come in and out of the garage and make nests in wood piles. To combat this problem, we try to have as little as possible touching the ground. I found this man’s lumber organizer and loved it. He didn’t have any plans for it so I created my own and made it more tailored to my own wall. I loved everything about this design because it had space for long boards, short little scrap boards (which I have a ton of) and space for large plywood pieces. Most designs I found lacked one or the other.
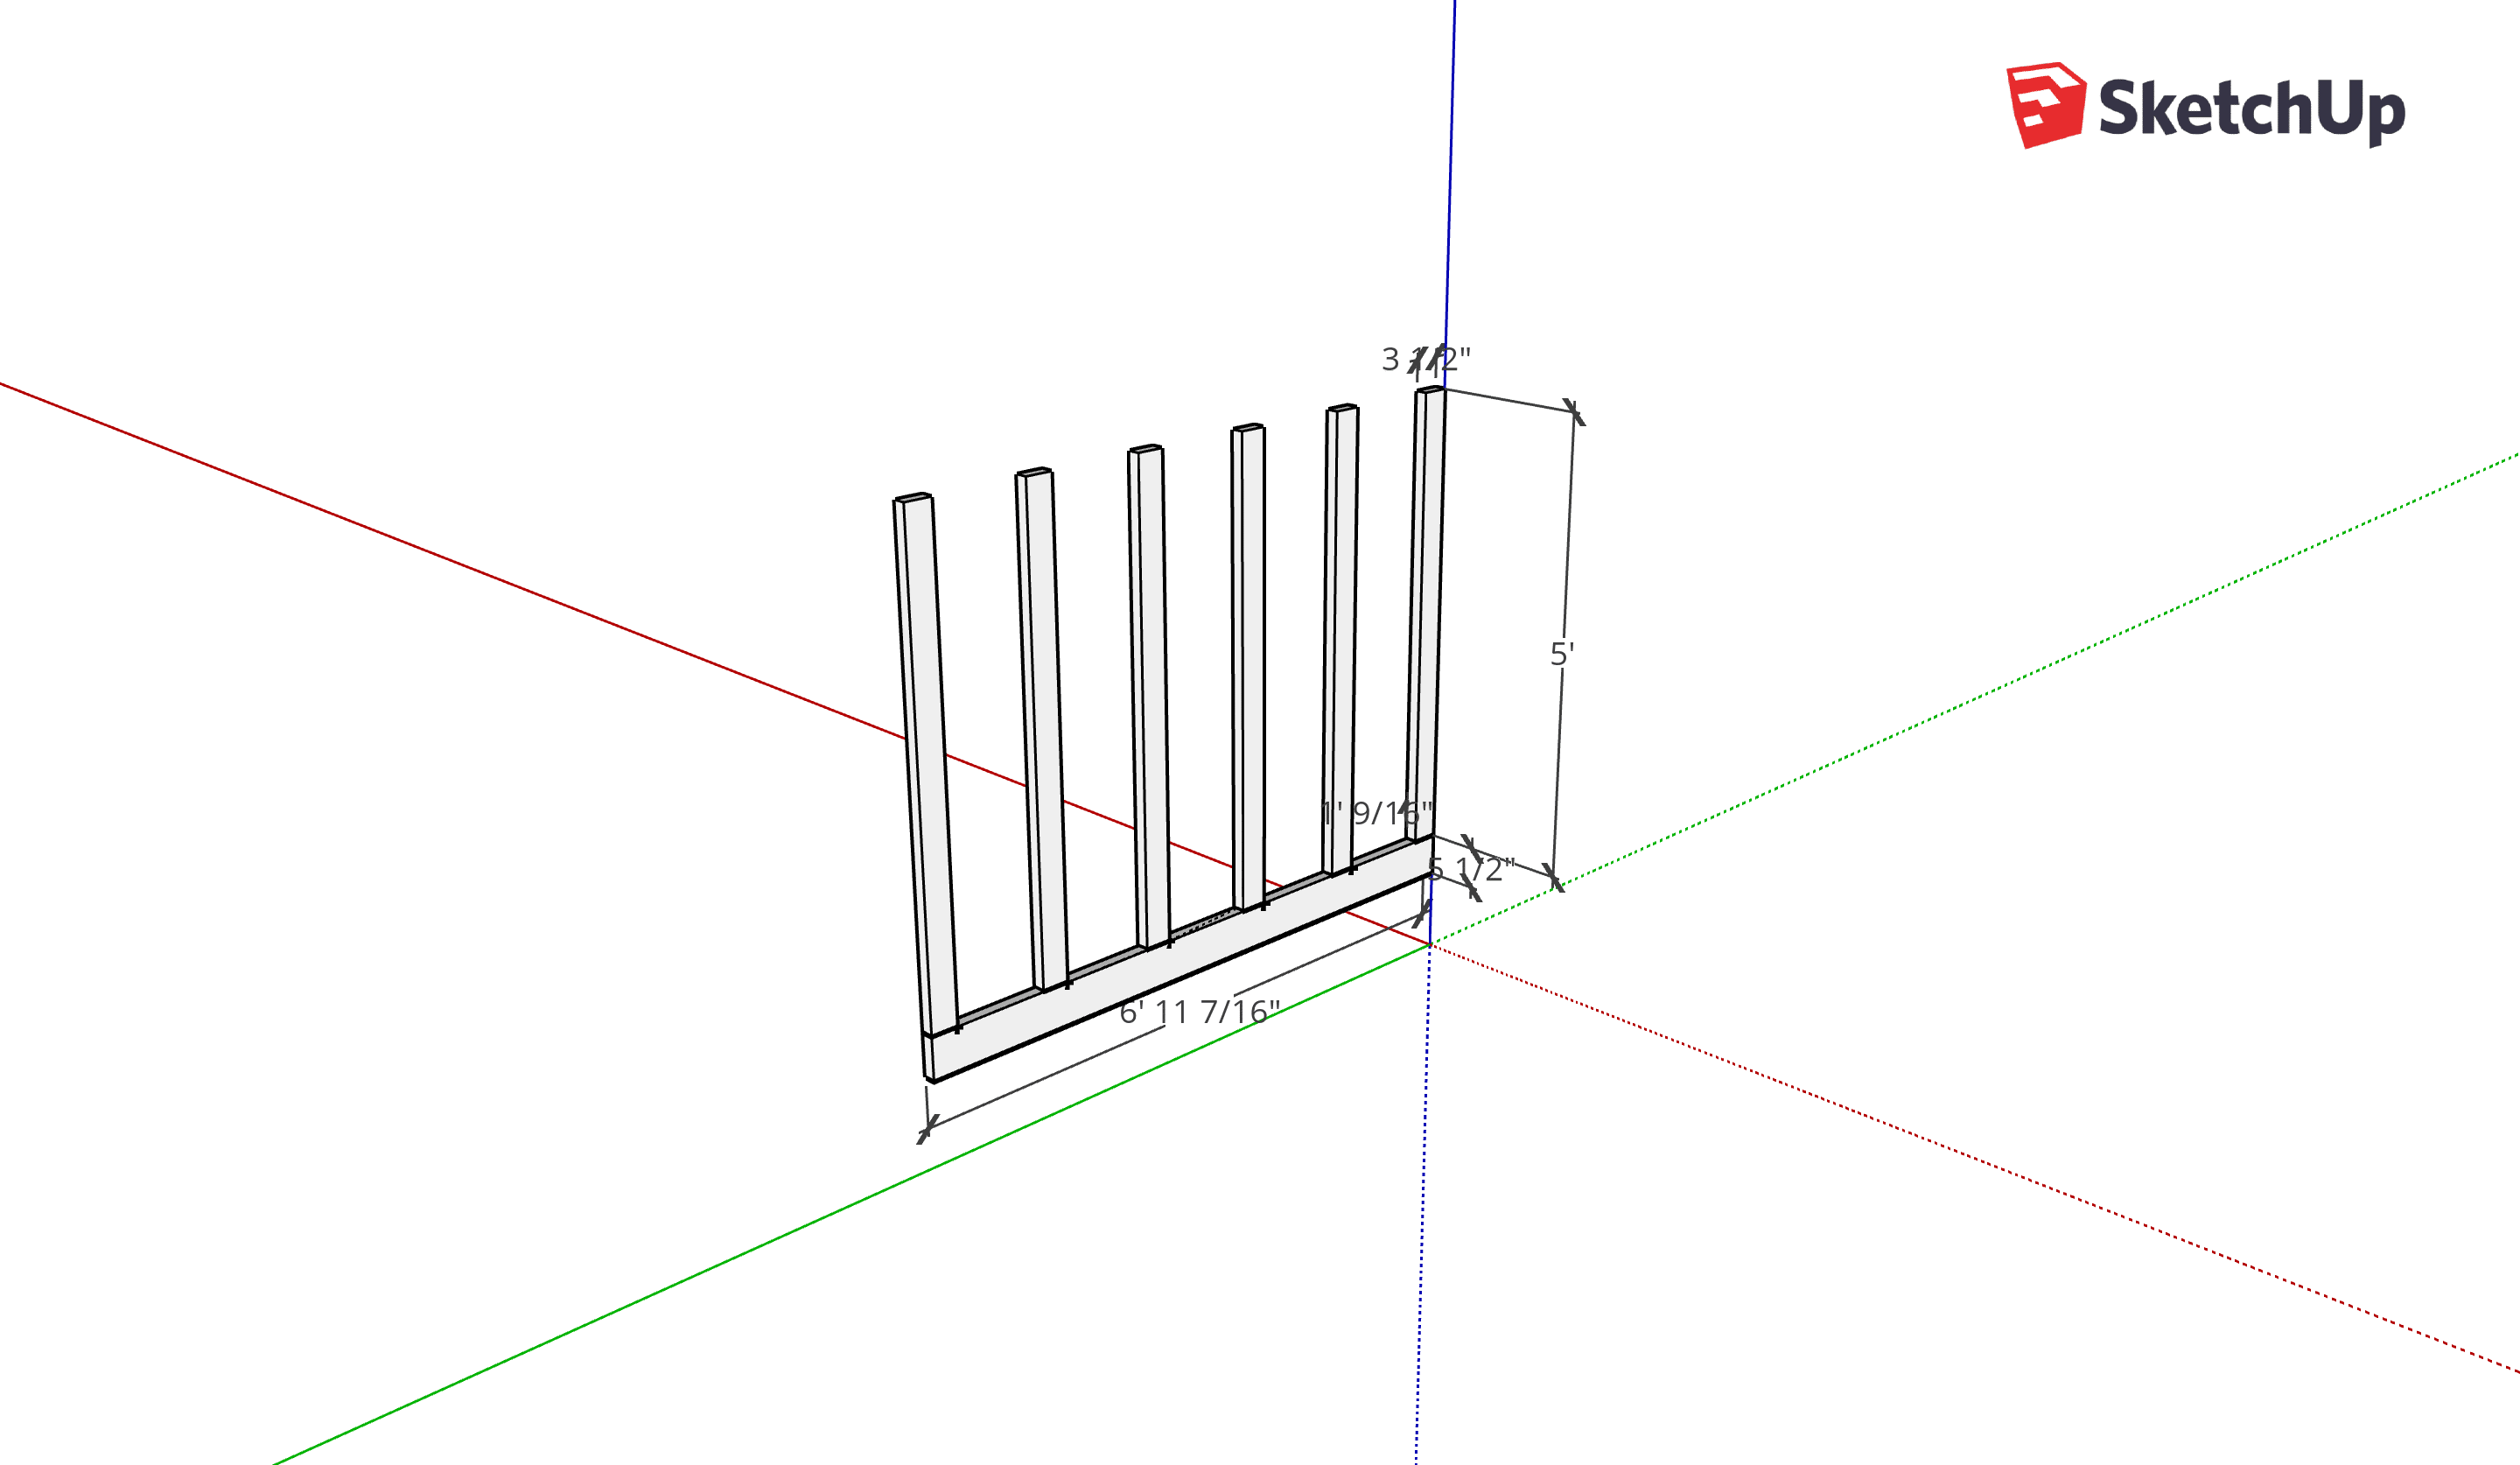
This consists mainly of 2x4s with a couple of 2x6s and plywood. It can hold your short cut pieces, long planks, and large pieces of plywood without anything slipping out the bottom or sides. It only protrudes 19 inches from the wall so the weight is not too front heavy. It’s held together with pocket screws and screwed into the studs in the garage wall with lag screws.
Just FYI–I’m sharing pictures that I took of my build, but I used a ton of scrap material for this so I didn’t have to buy anything. So if things in my photos look different than my supply list and directions, that’s why.
Supplies:
- (6) 2x4x10
- (5) 2x4x8
- (2) 2x6x8
- 1 piece of plywood at least 8’x2′, or you can use planks at least 5″ and 11″ wide and 7′ long.
- 3 1/2″ 1/4 lag screws
- 2 1/2″ pocket screws
- 2 1/2″ wood screws
- nails in nail gun (optional but helpful)
DIY Lumber Organizer Plans:
Step 1: Nail the 7′ 2×6 to the wall horizontally. Then nail the 5′ 2x4s vertically. Now you can drill holes into the studs and then screw in the lag screws so it’s very secure. Make sure your top lag screw is at least 2″ from the top (you’ll be attaching something at the top.)
BTW: I’m aware that sometimes the measurements on my Sketchup pics say weird things like 15/16 or whatever. Feel free to round up or down…I’m prone to making mistakes like that.
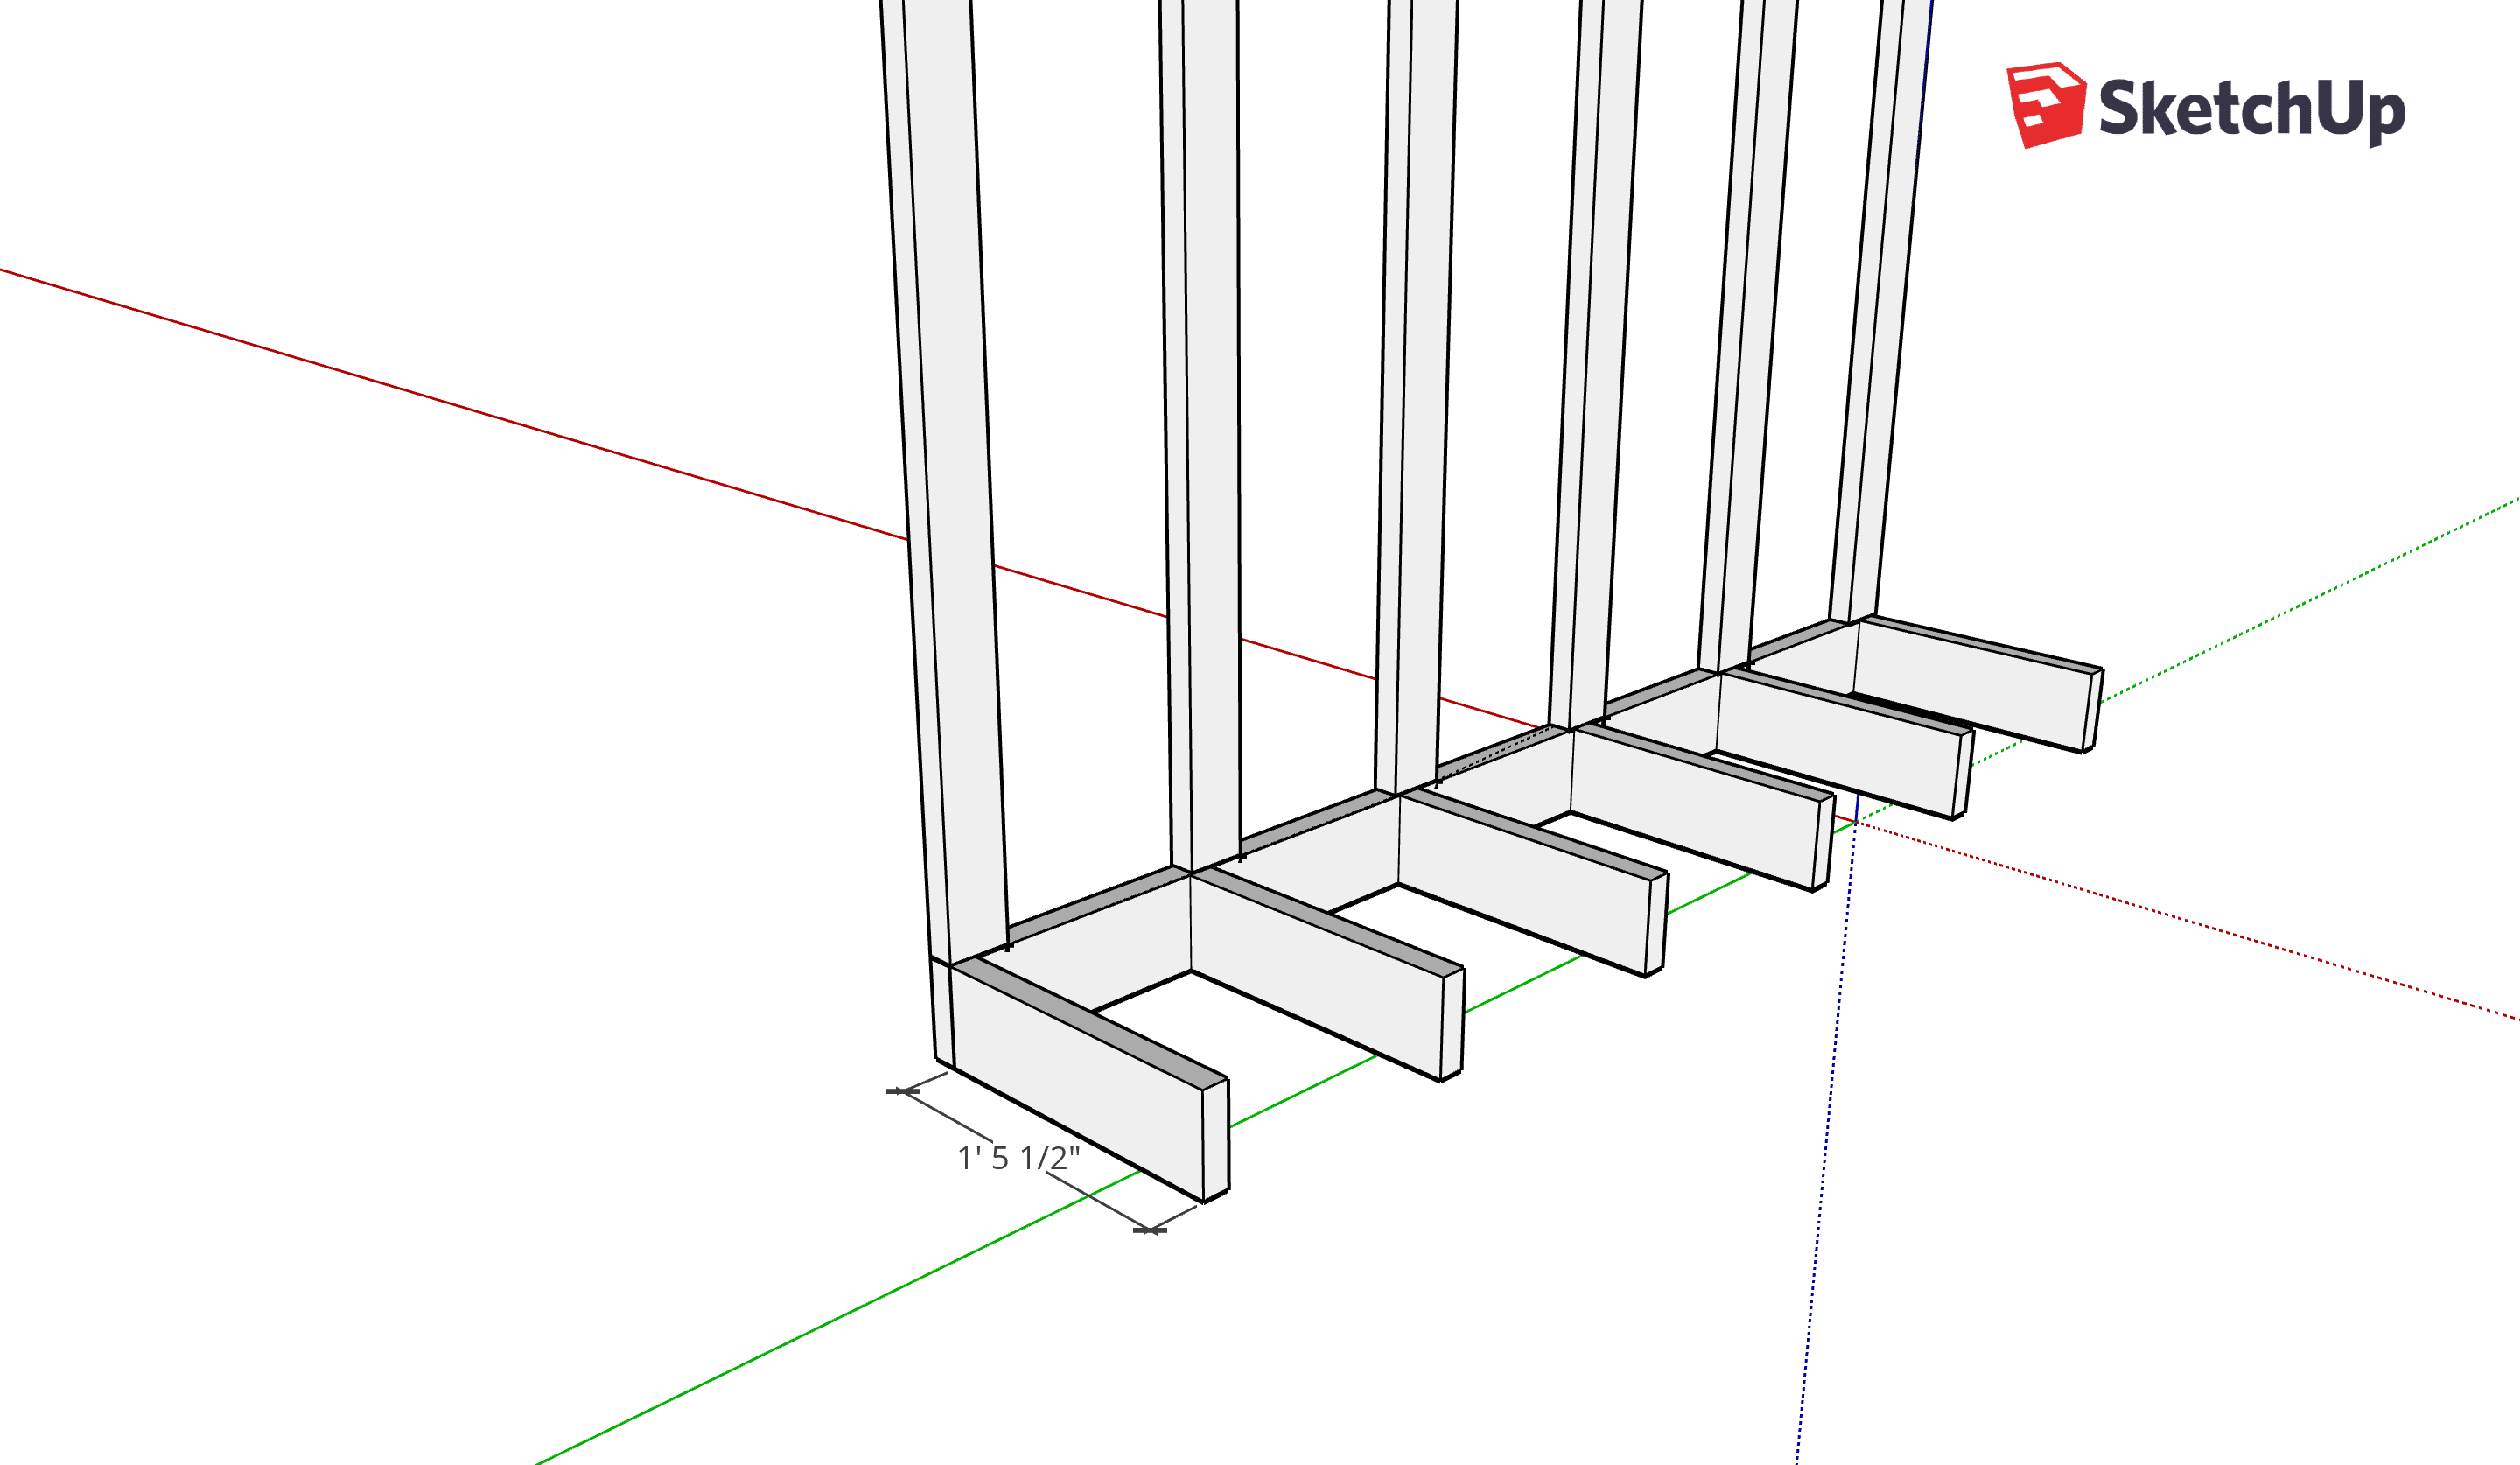
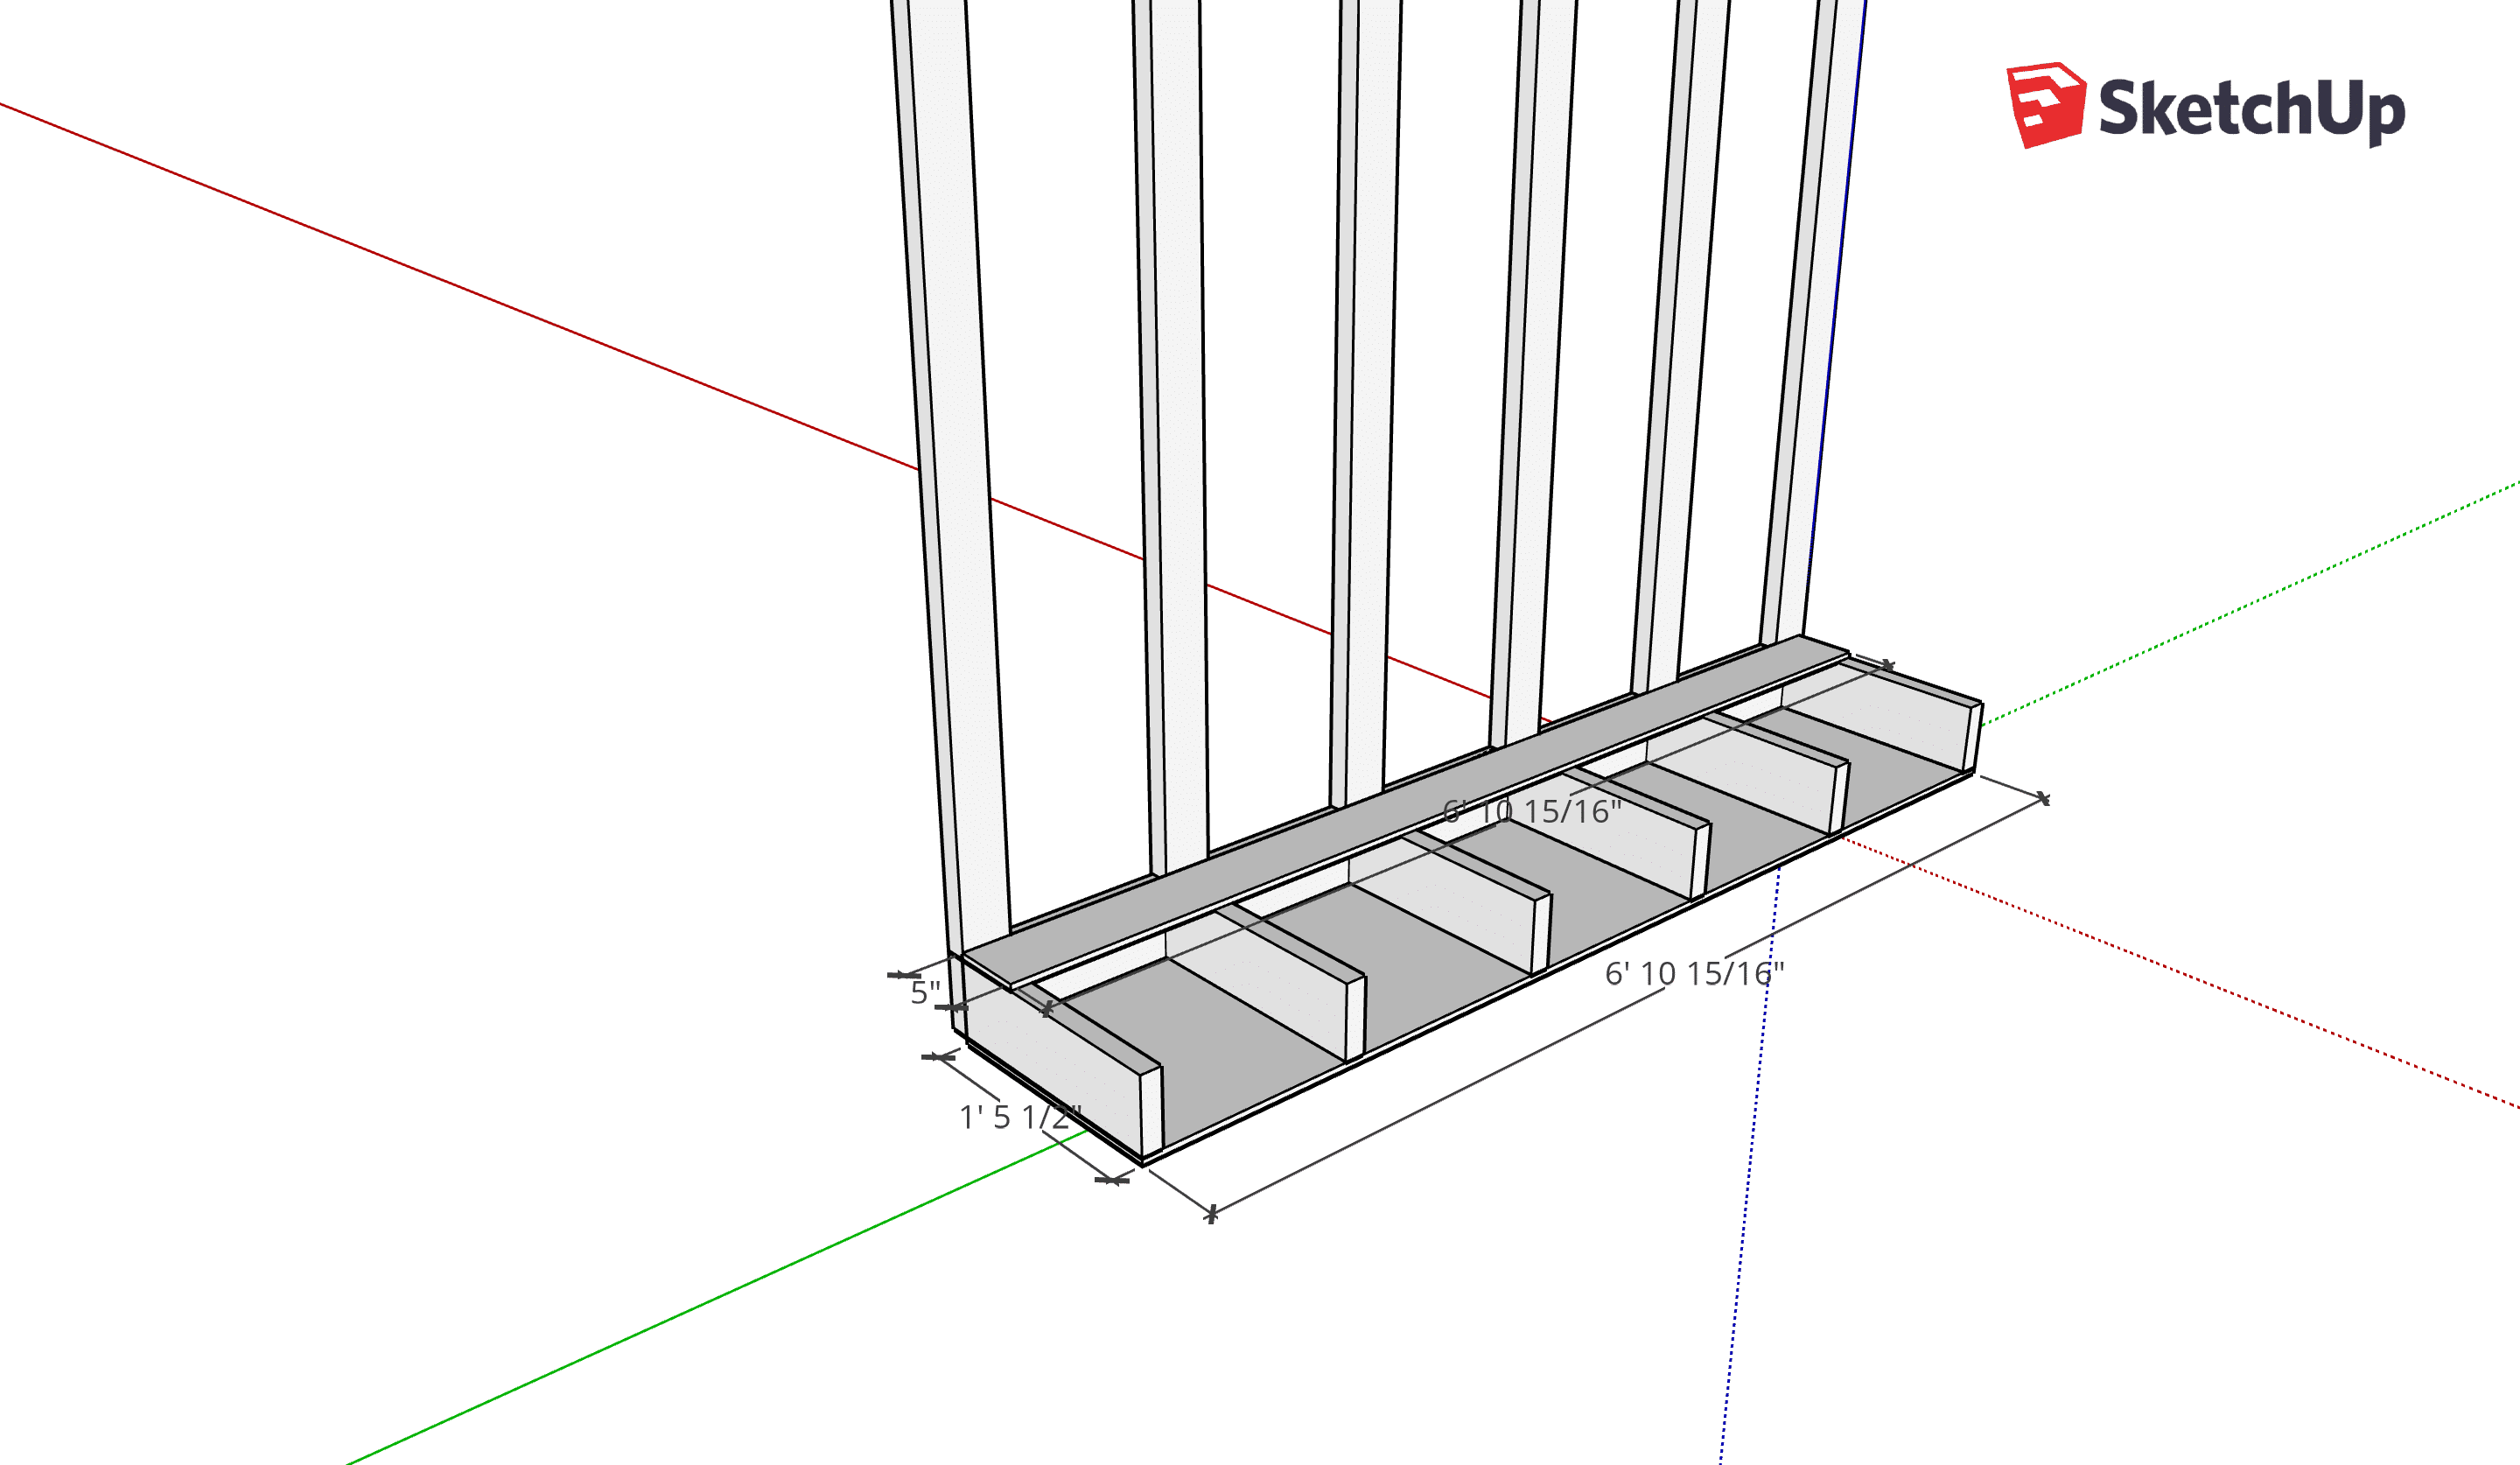
Step 2: Assemble the bottom organizer by laying out all 6 of the 17.5″ 2x6s on your work surface and then laying the plywood on top. Shoot some nails to hold it in place and then secure with wood screws. Place the unit on a support (or have someone hold it up) so you can screw the pocket holes into the 2×6 on the wall. You could also do it in place but this saves some awkward bending.
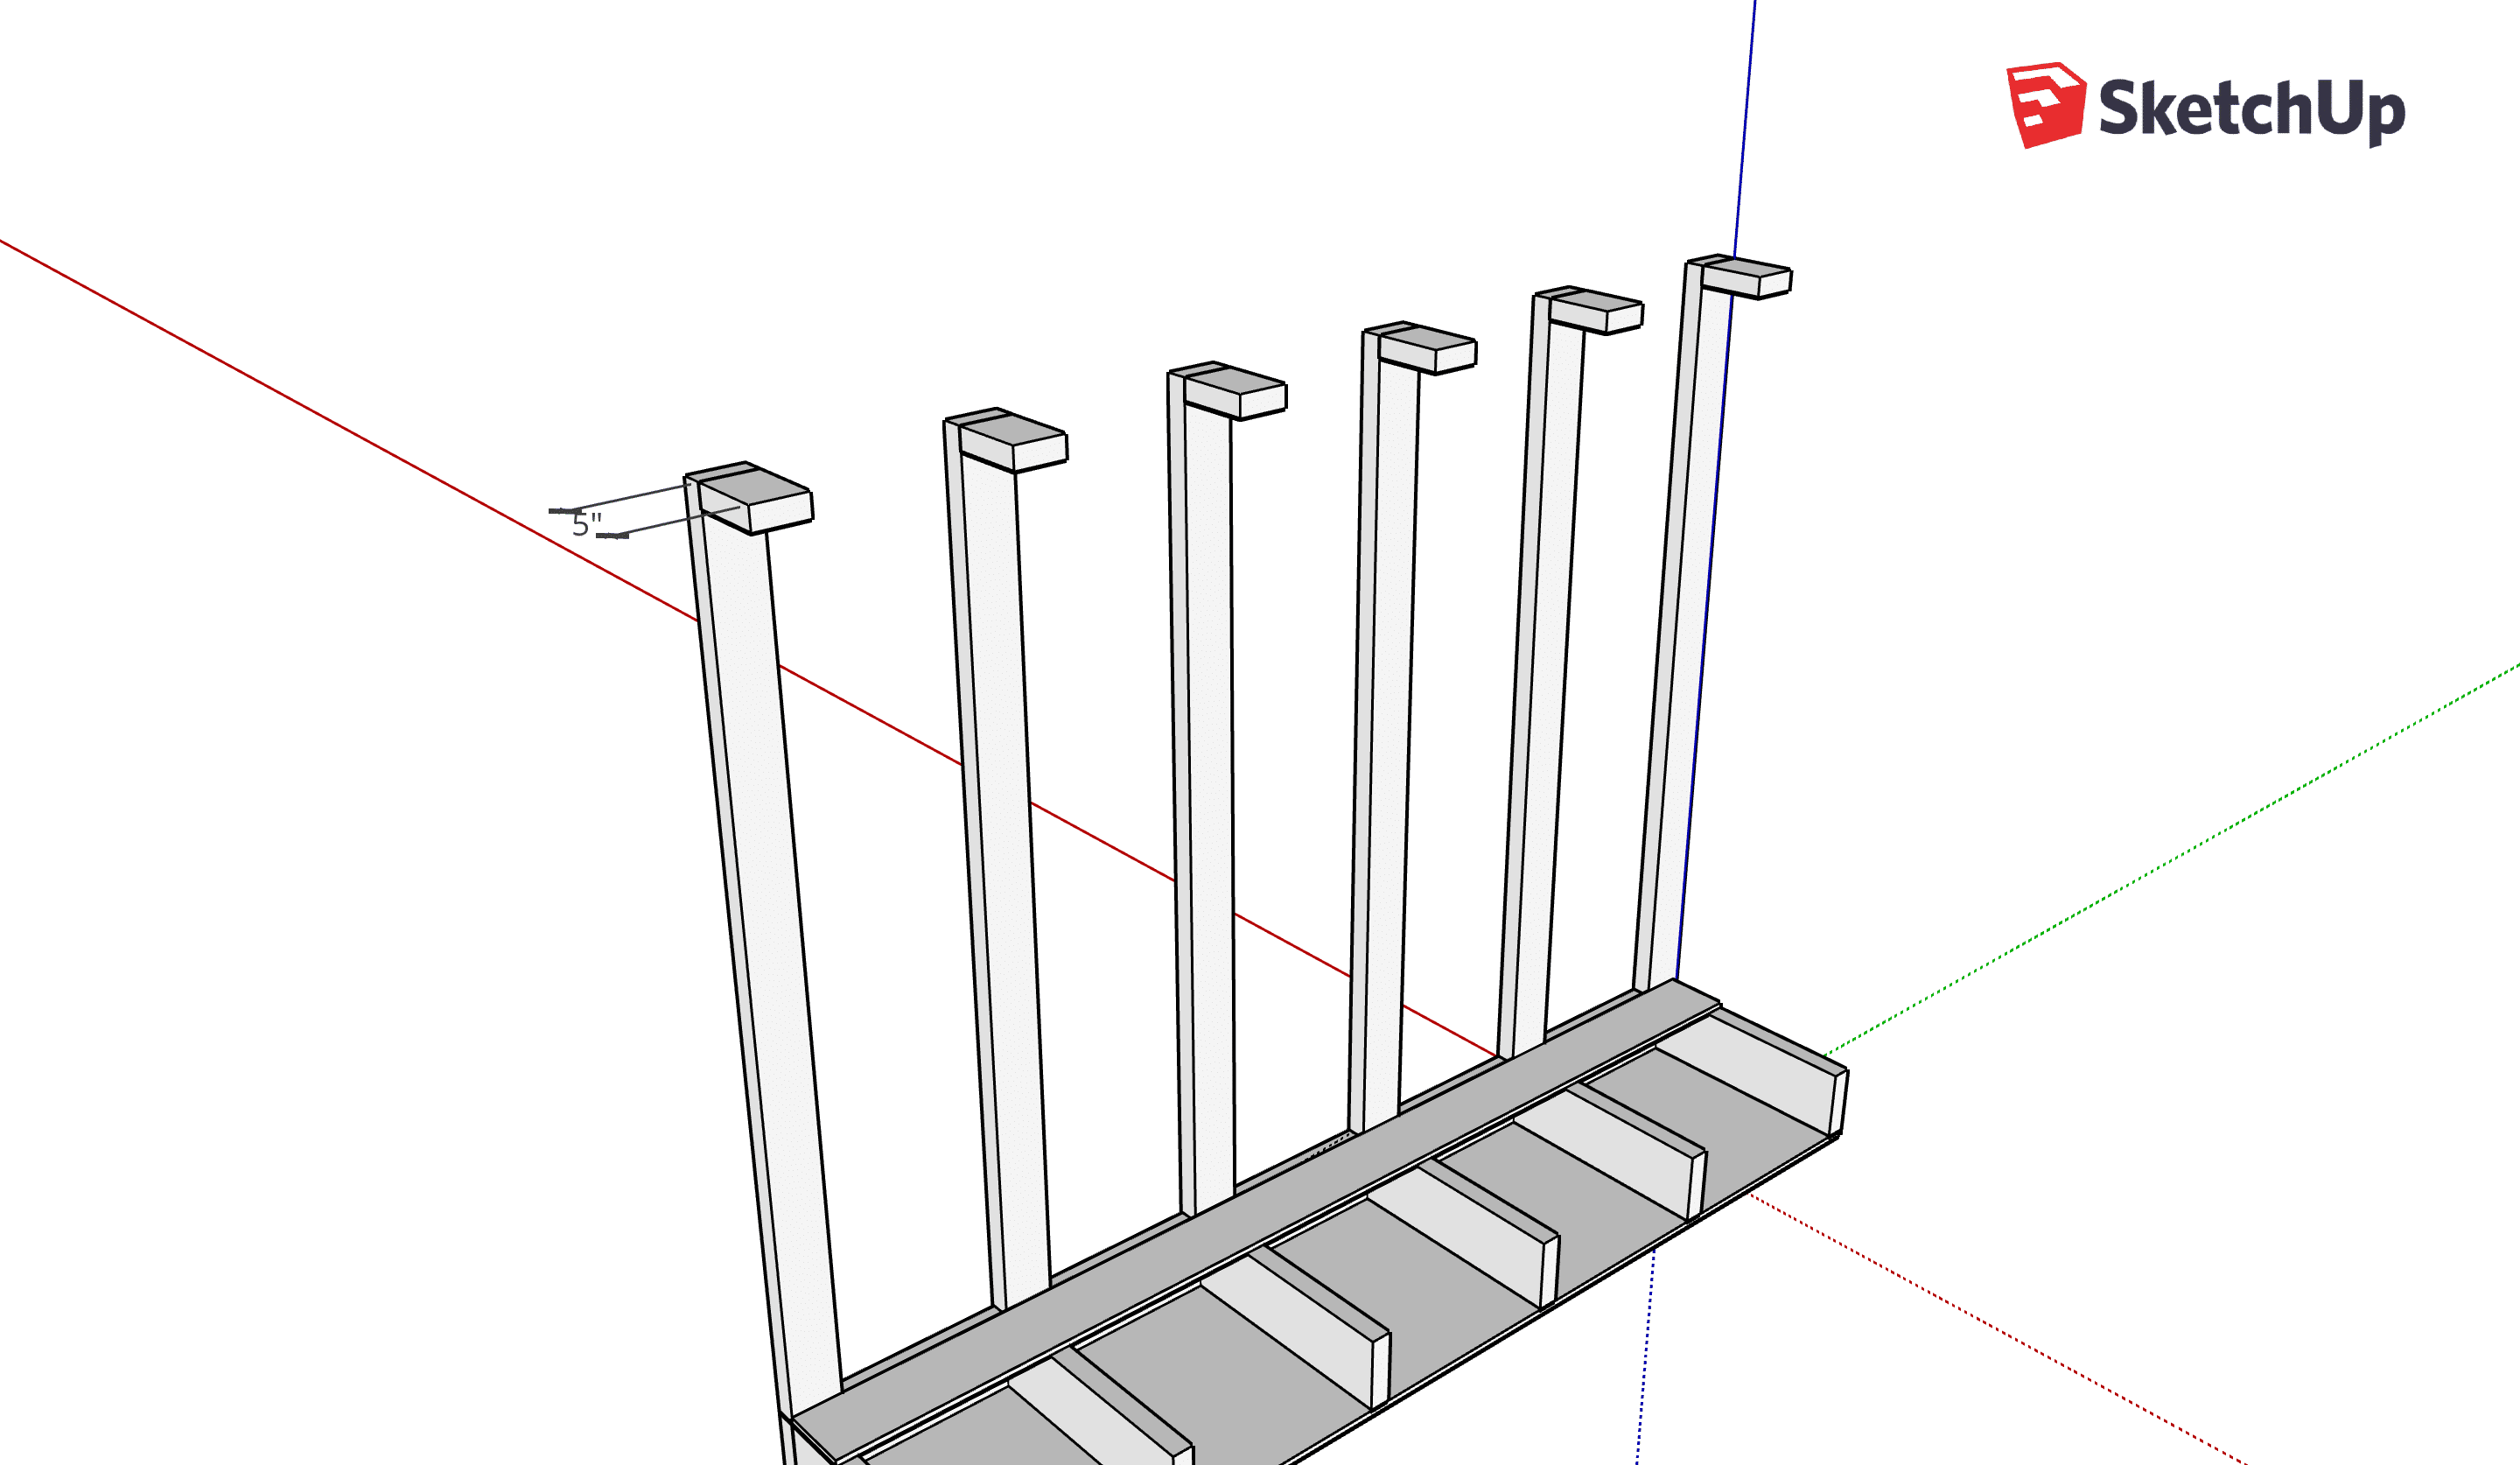
Step 3: Nail the 5″ plywood in place and then place a 2×4 next to it, securing with screws. Add the 5″ 2×4 pieces to the tops of your vertical 2x4s by screwing the pocket holes.
Step 4: Screw the 4′ 10.5″ 2x4s into the horizontal 2×4 with pocket screws. Then attach them to the 5″ pieces on top as a butt joint with wood screws.
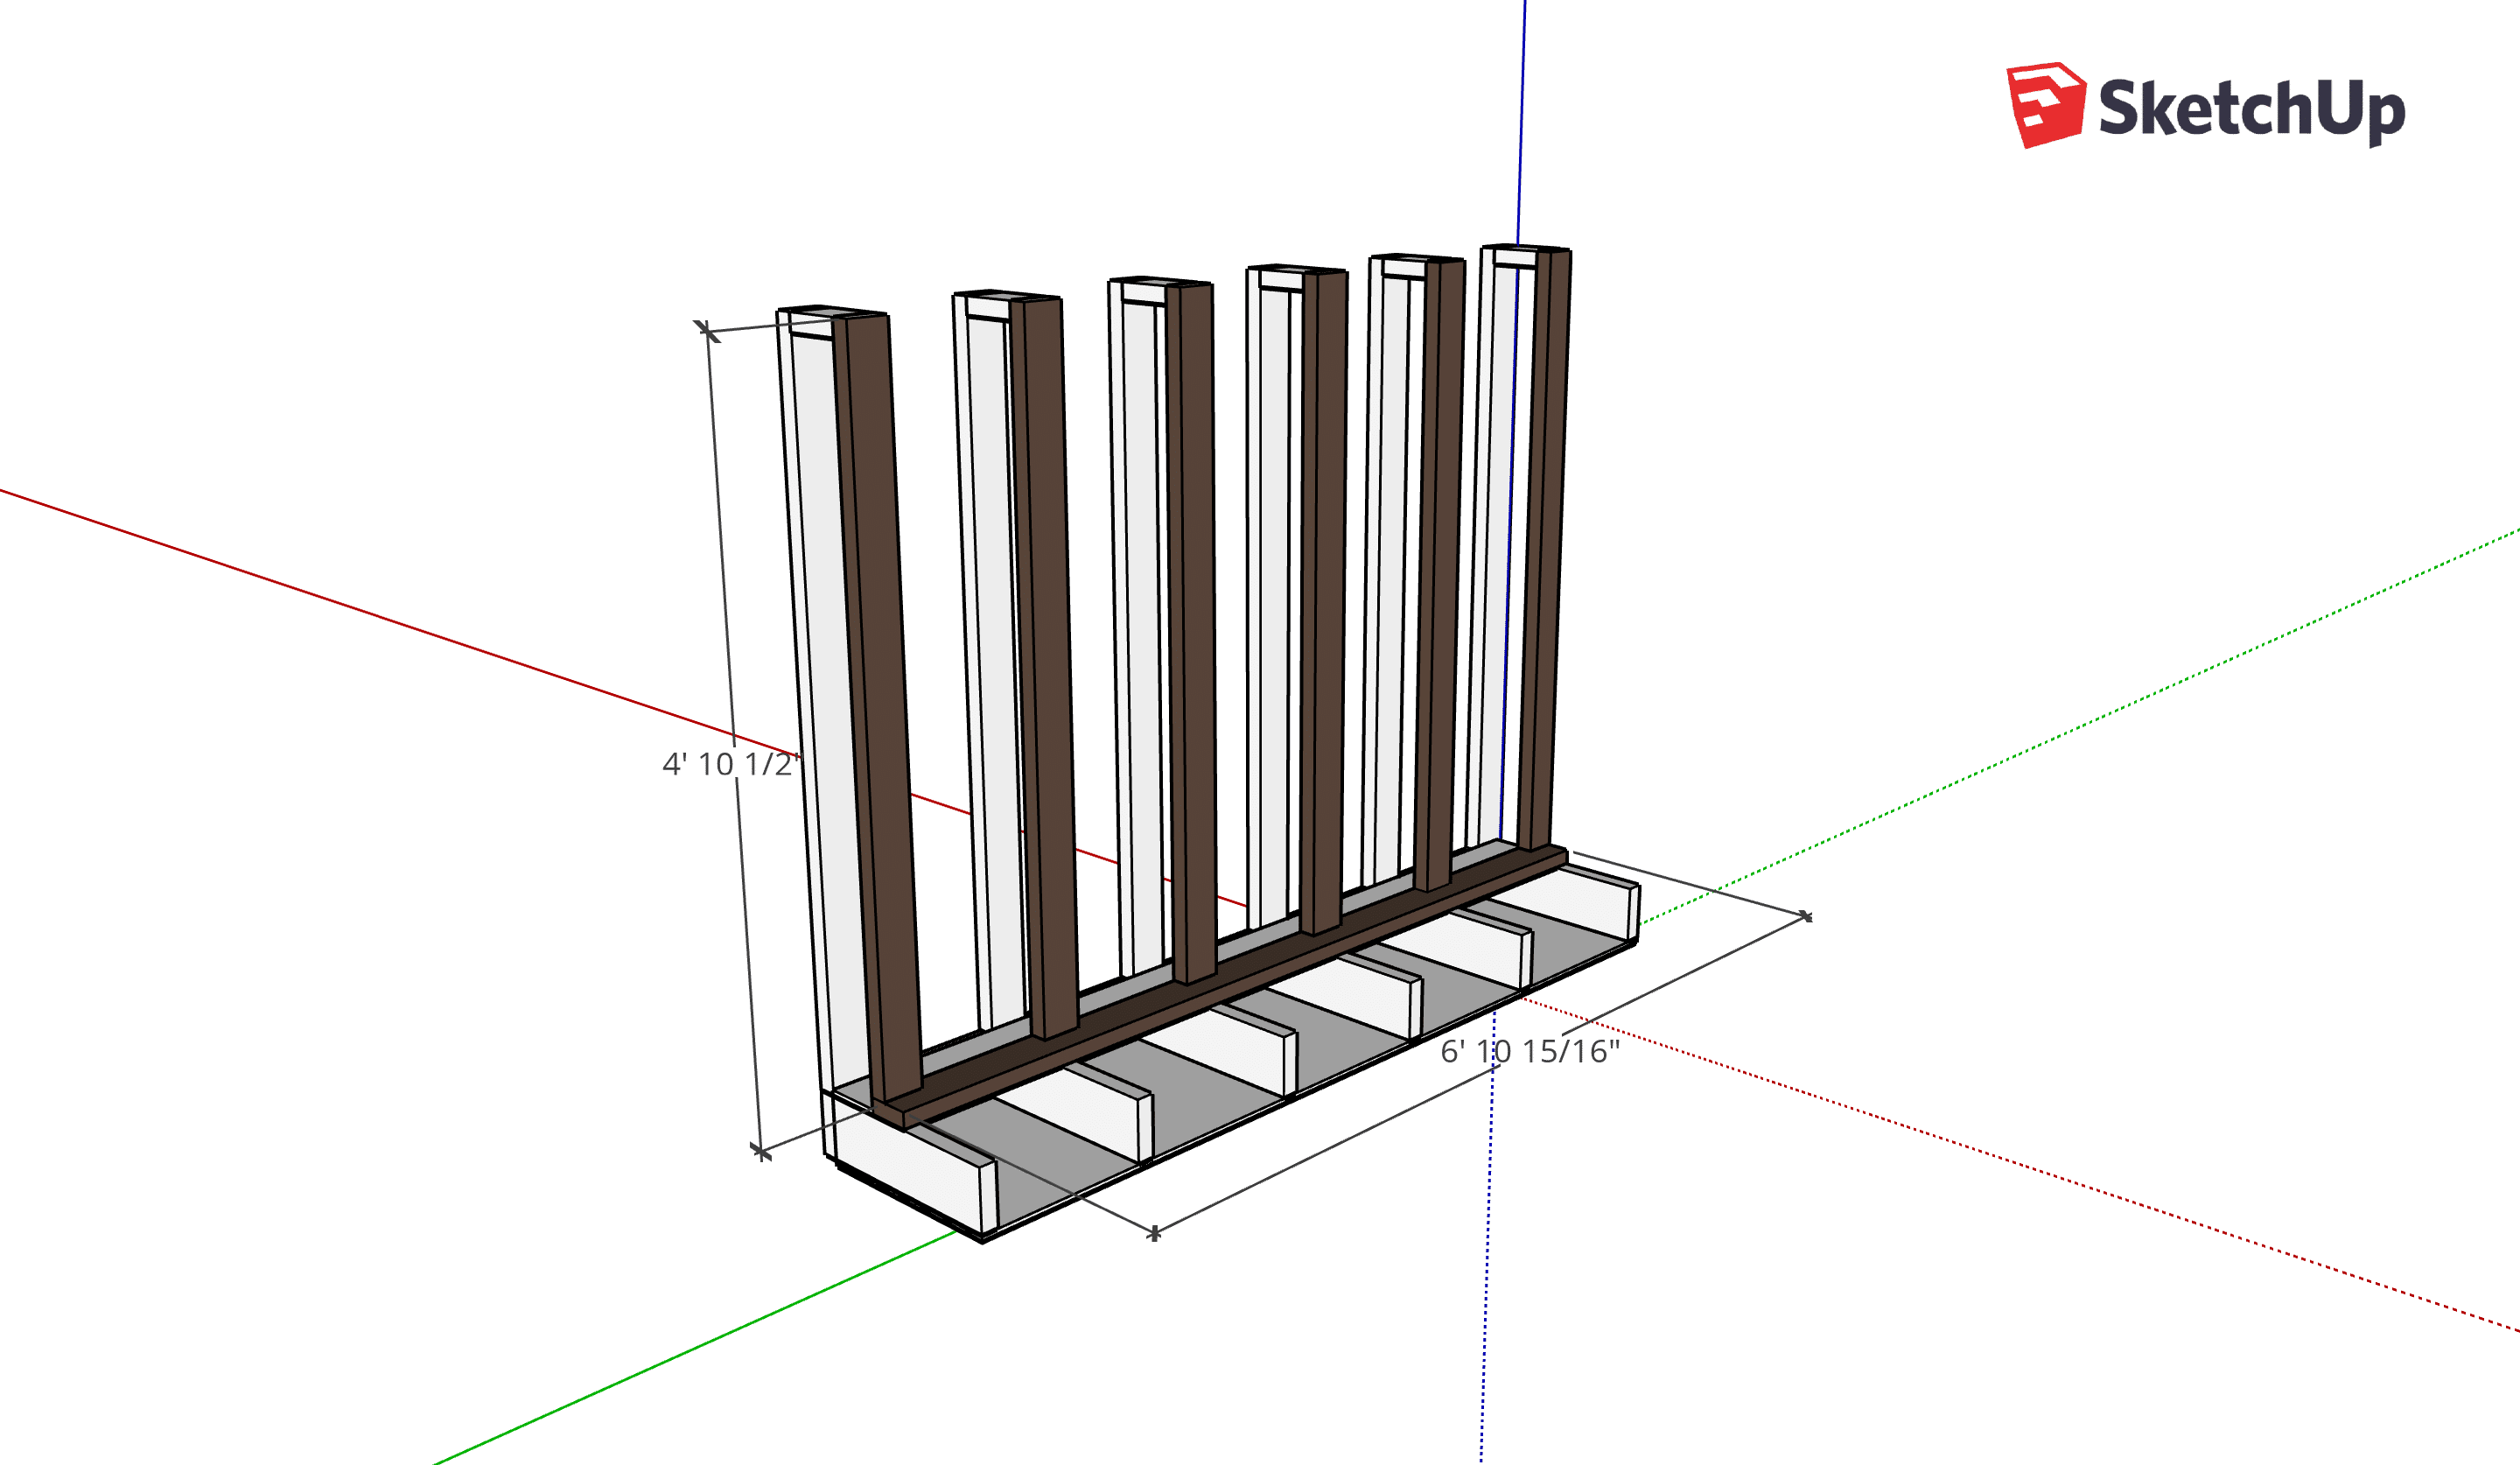
Step 5: Mark each front vertical 2×4 approximately every 12″ so that they will line up and make a level shelf. Attach the 11″ 2×4 bracket pieces in with pocket screws.

There you have it! A super sturdy lumber organizer with spaces for all different types of lumber. If you wanted to get really fancy you could nail a 1/4″ sheet to the front of the back 2x4s which would make it easier to slide large boards in and out. This doesn’t have a ton of room since the profile is less than 20 inches, but I had to make it short enough to tuck behind the garage door track. Besides, it has 3 (or even 4 if you use the bottom rack) shelves for lumber piles and this way they won’t get too full which is a hazard and hard to find what you need.

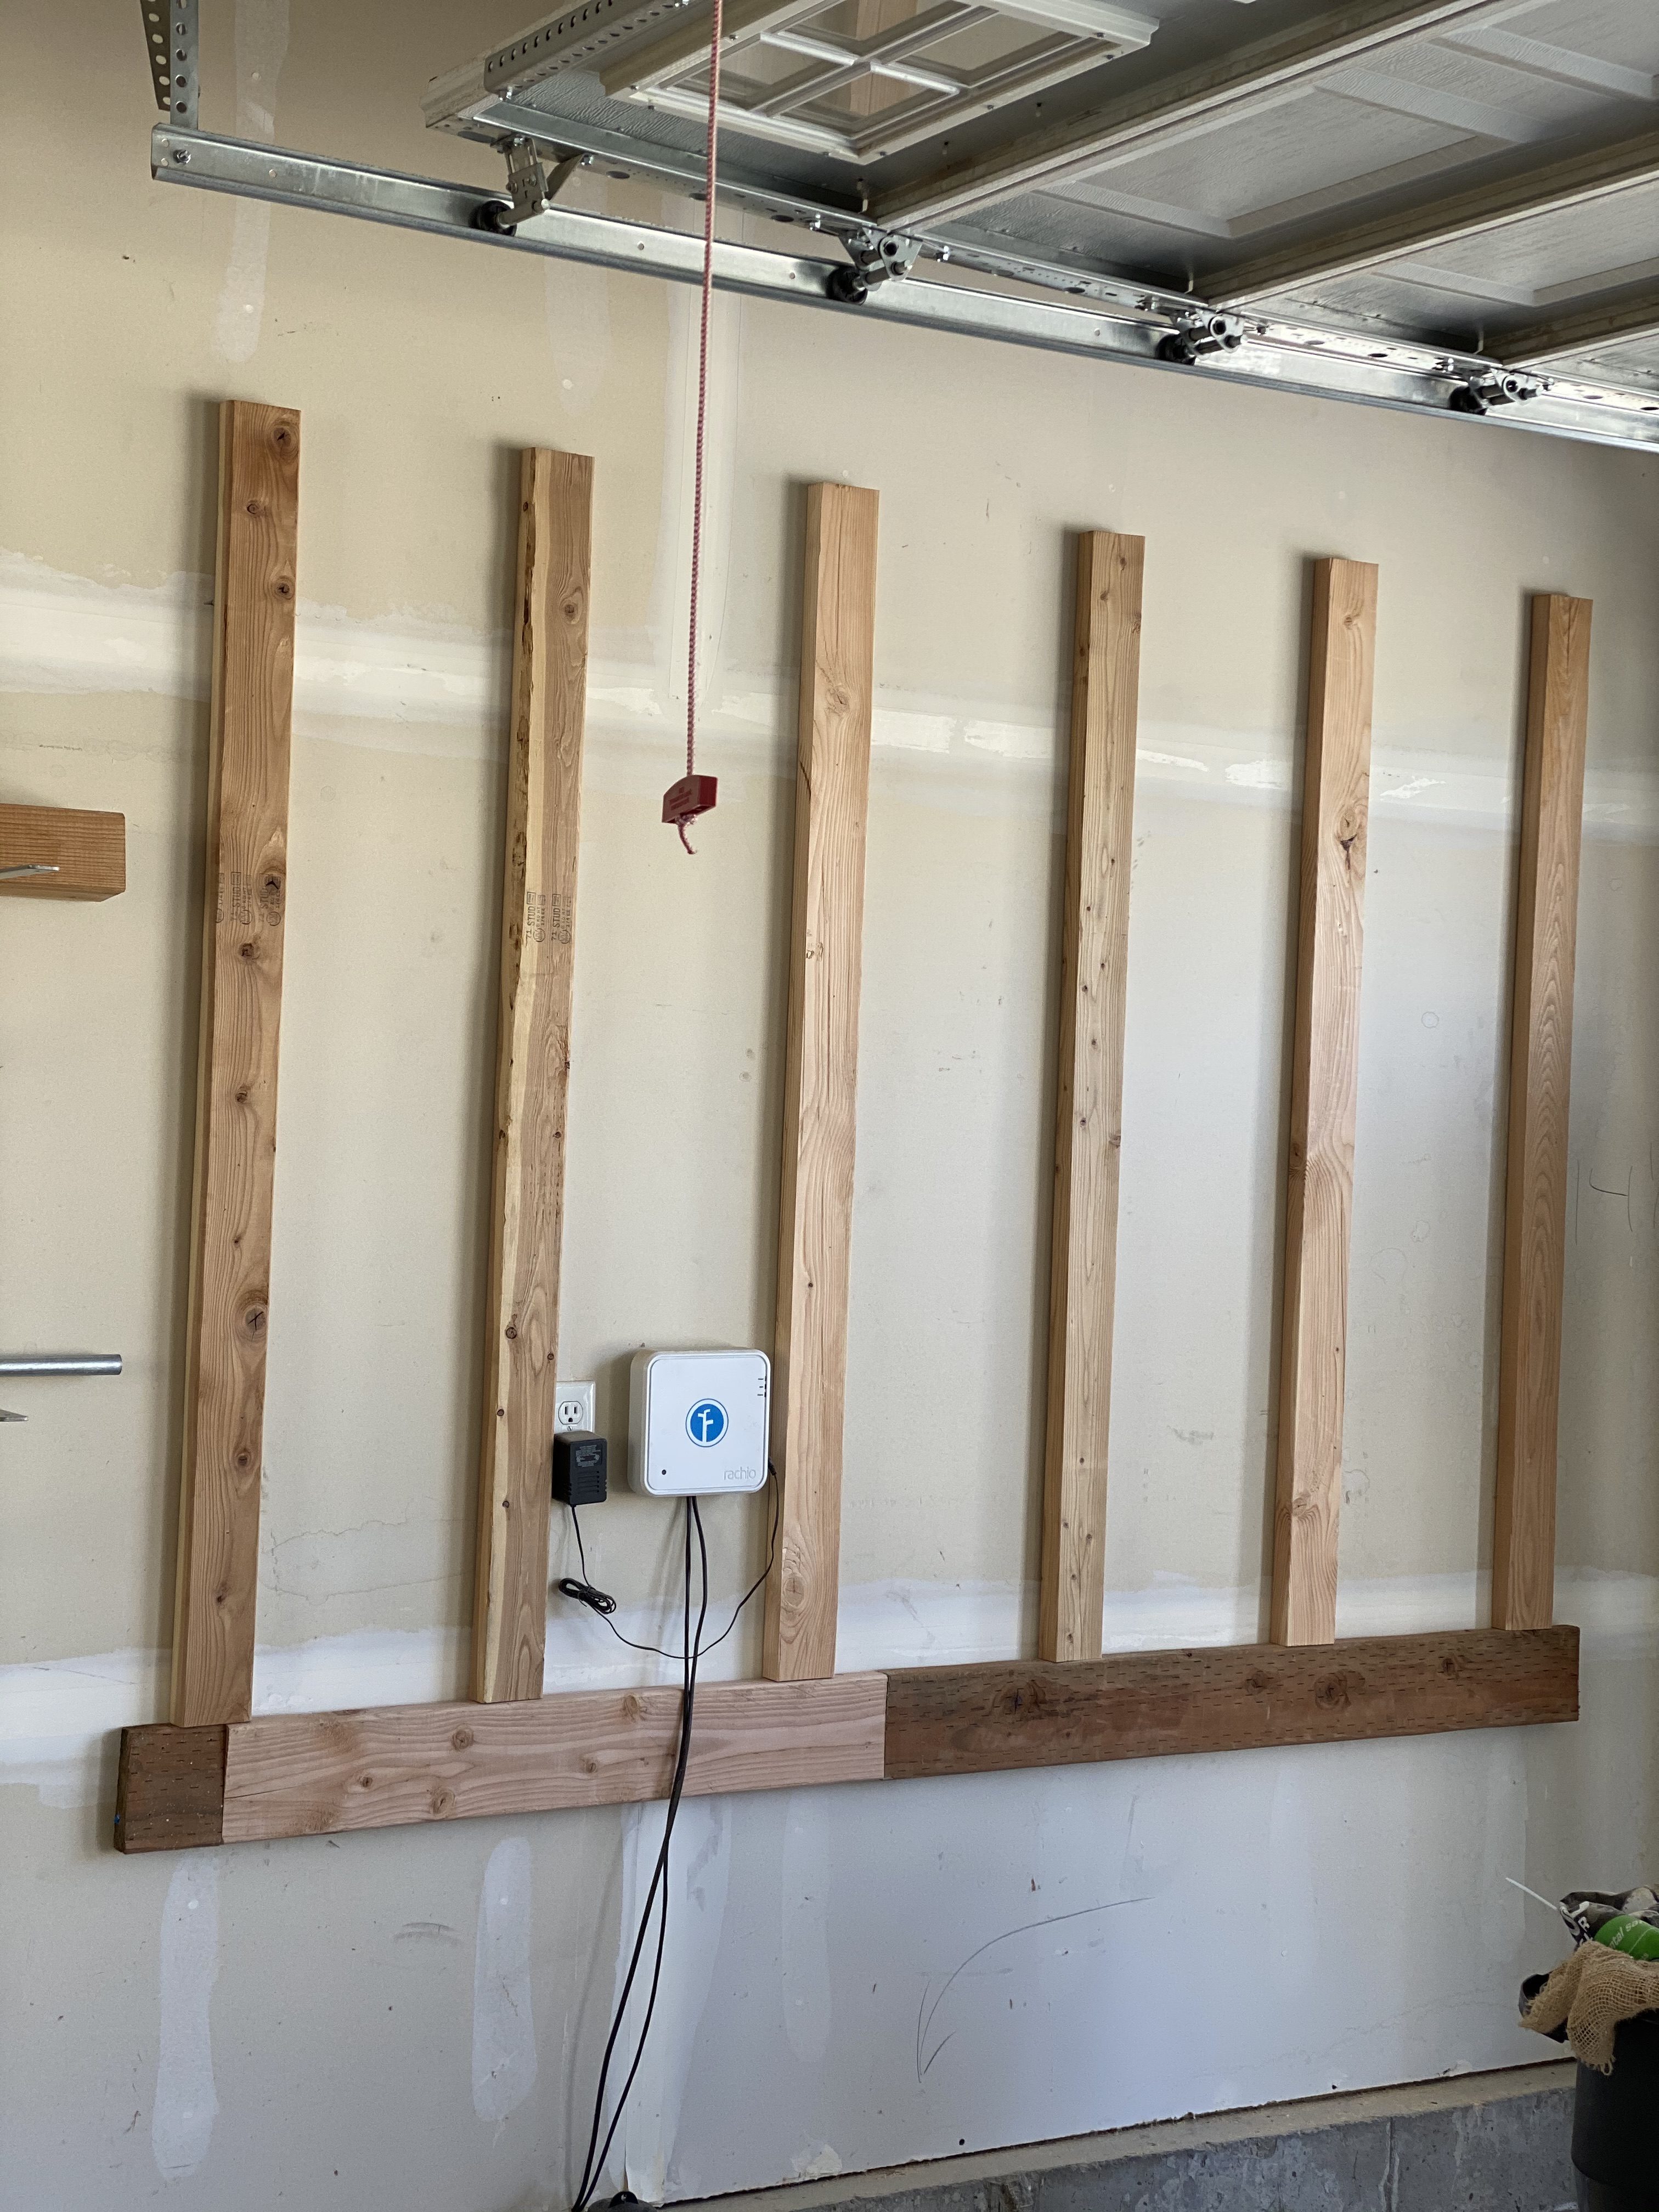
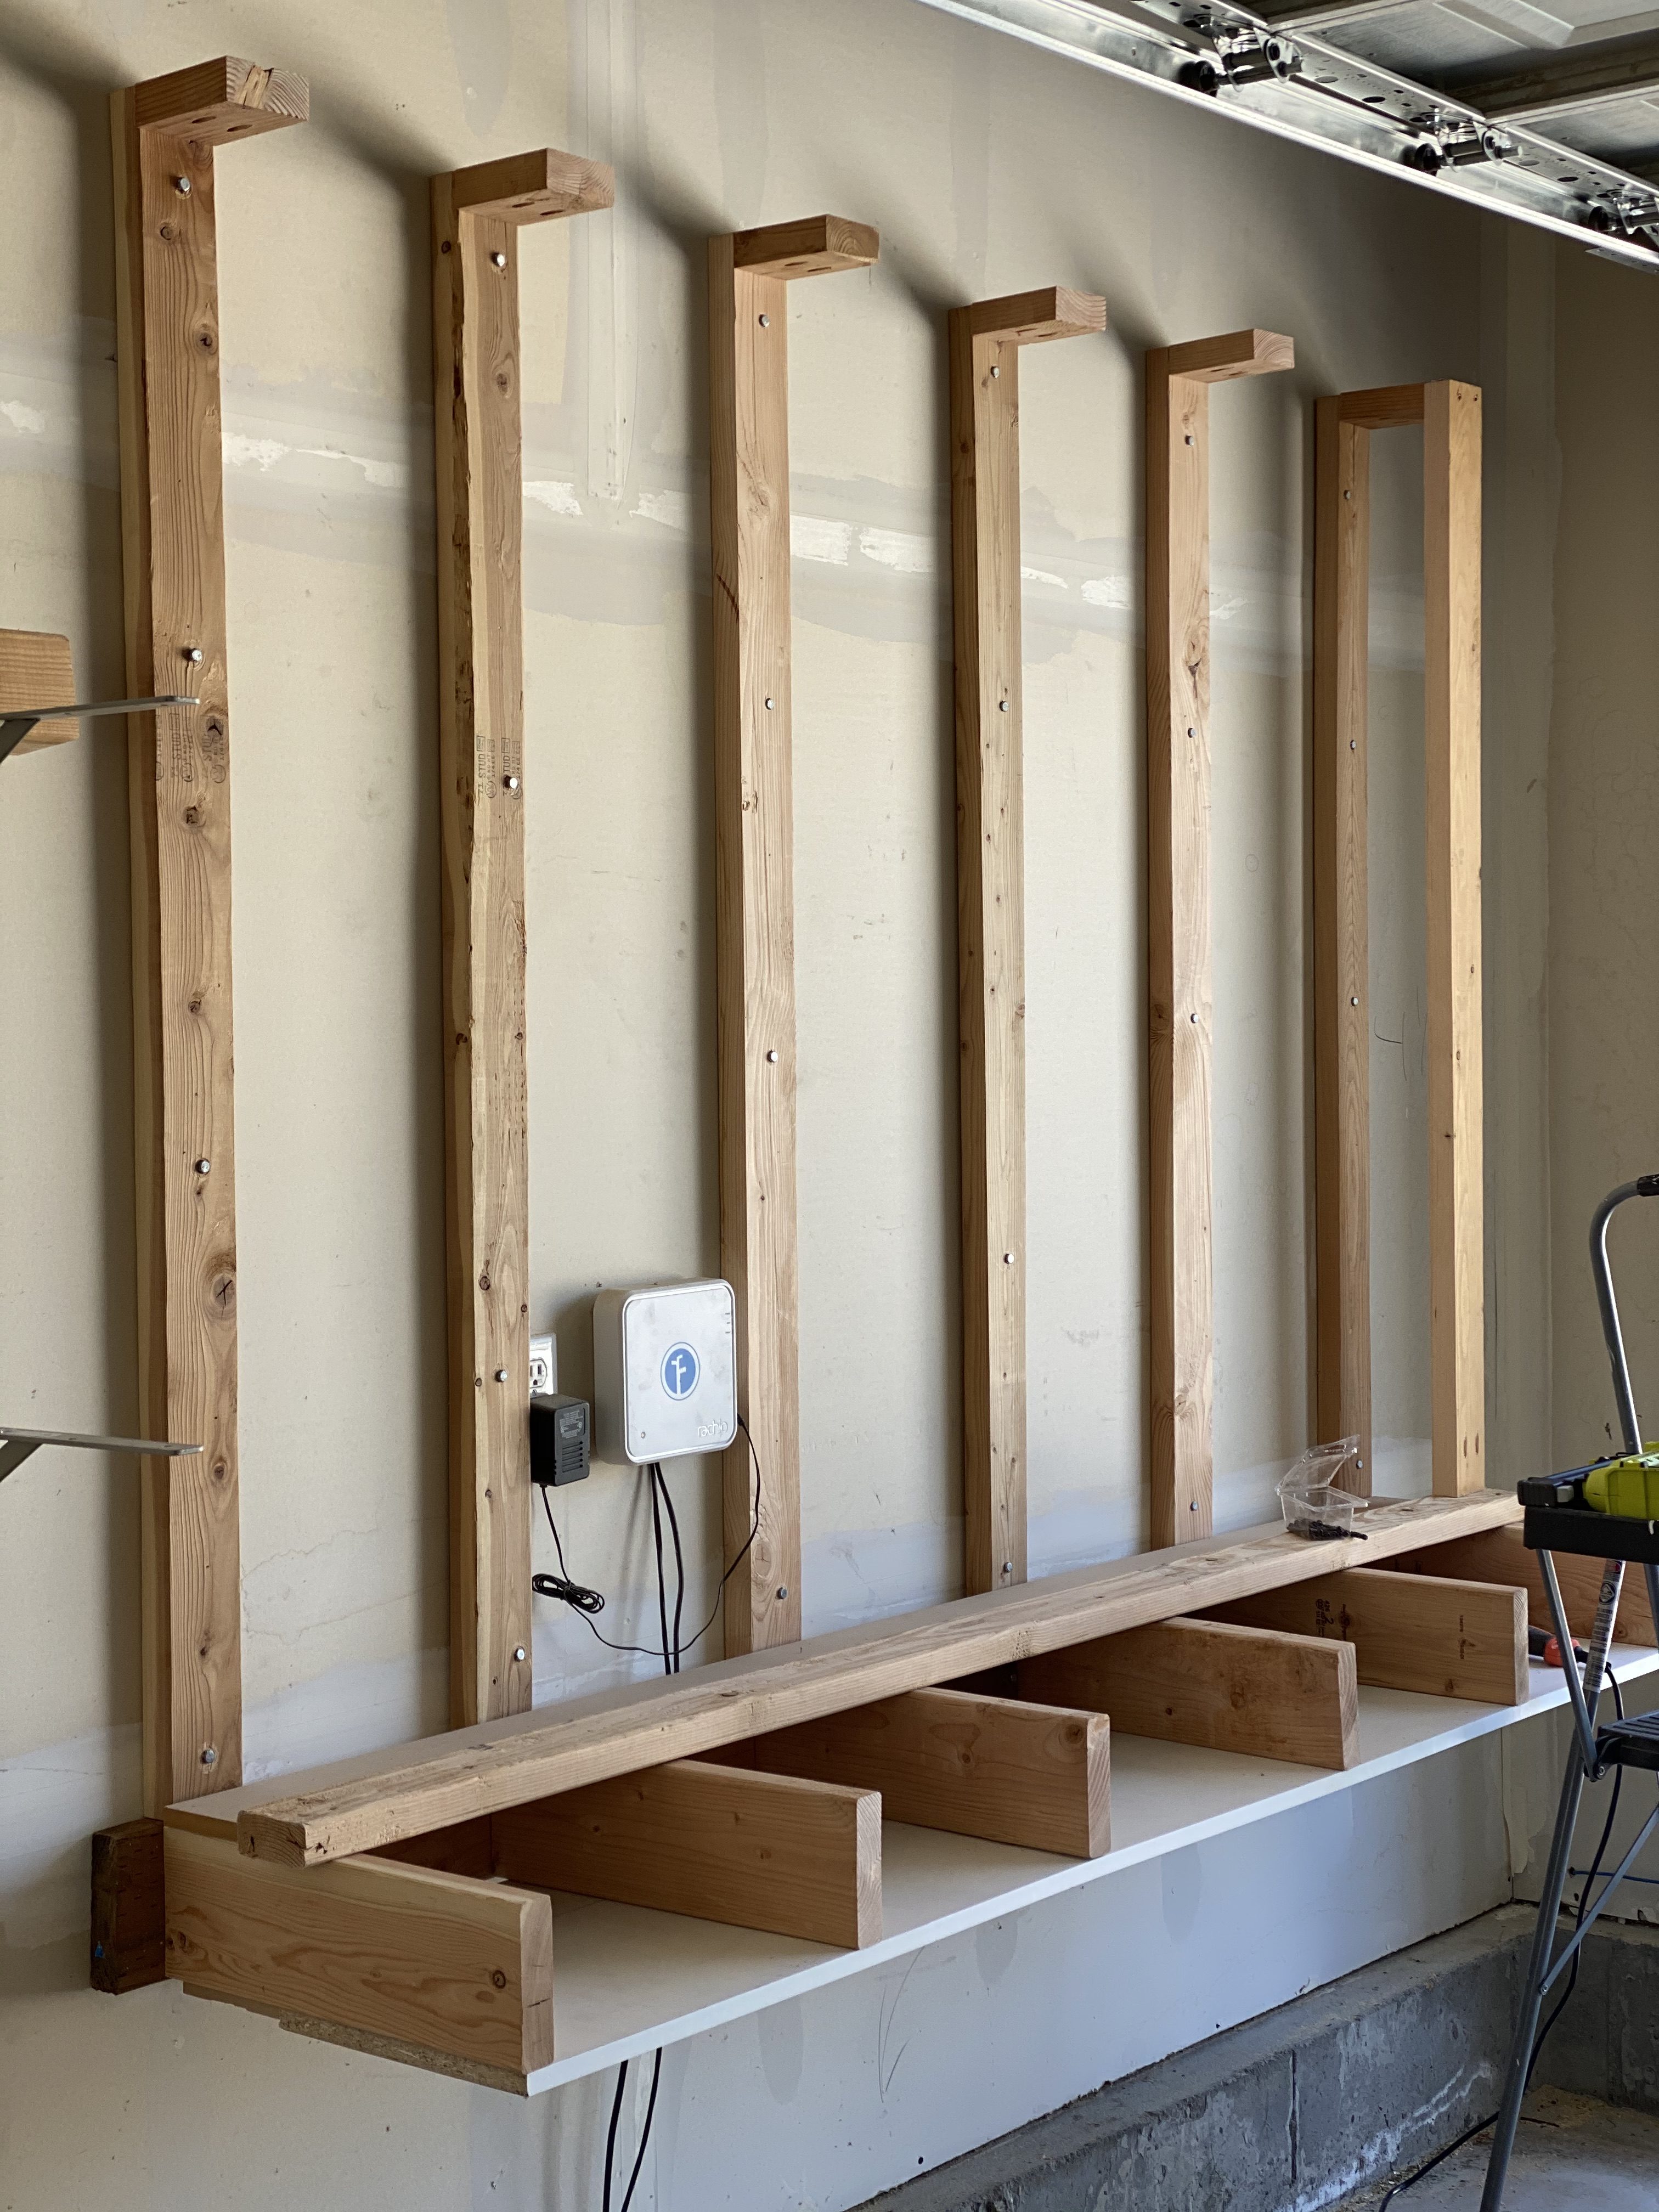
Having this lumber rack has made my life SO much easier. It’s so easy to find what I need for lumber. It’s not the prettiest picture, but sometimes things are purely utilitarian. You can see that there is an outlet with some corded stuff plugged in right there which wasn’t ideal, but we don’t really need to access that stuff ever (it’s our Rachio smart sprinkler system) so it’s not a huge deal. I’ve been trying to get my garage more organized and this definitely helps a ton! I actually built this two years ago and it has held probably over 1000 pounds of lumber and is going strong. If you’re looking for the perfect DIY lumber organizer plans, here they are!
Ms. Heidi, I notice that in the photos you have mounted the 15 2×4 brackets horizontally but in the SketchUp image you have the brackets mounted vertically. I know you said, “I used a ton of scrap material for this so I didn’t have to buy anything. So if things in my photos look different than my supply list and directions, that’s why.”. But this difference has nothing to do with the quantity nor the type of material used.