Cute Vintage Play Kitchen
This is a sponsored post written by me on behalf of Duck Brand. All opinions are 100% mine.
My summer project has been building out and decorating the little playhouse we had made last summer during our basement finish. It’s been a pretty fun project–making things on a small scale. It’s all so cute! So I jumped at the chance to work with Duck Brand when they wanted to promote their Removable Adhesive EasyLiner® paper–I had the perfect idea for it. I looked at their designs and saw this cute one that was like the Moroccan tile that is so popular right now and I thought it would be so cute as a wallpaper for the kitchen part of the playhouse. After all was said and done, I had made a beautiful vintage play kitchen for my kids!
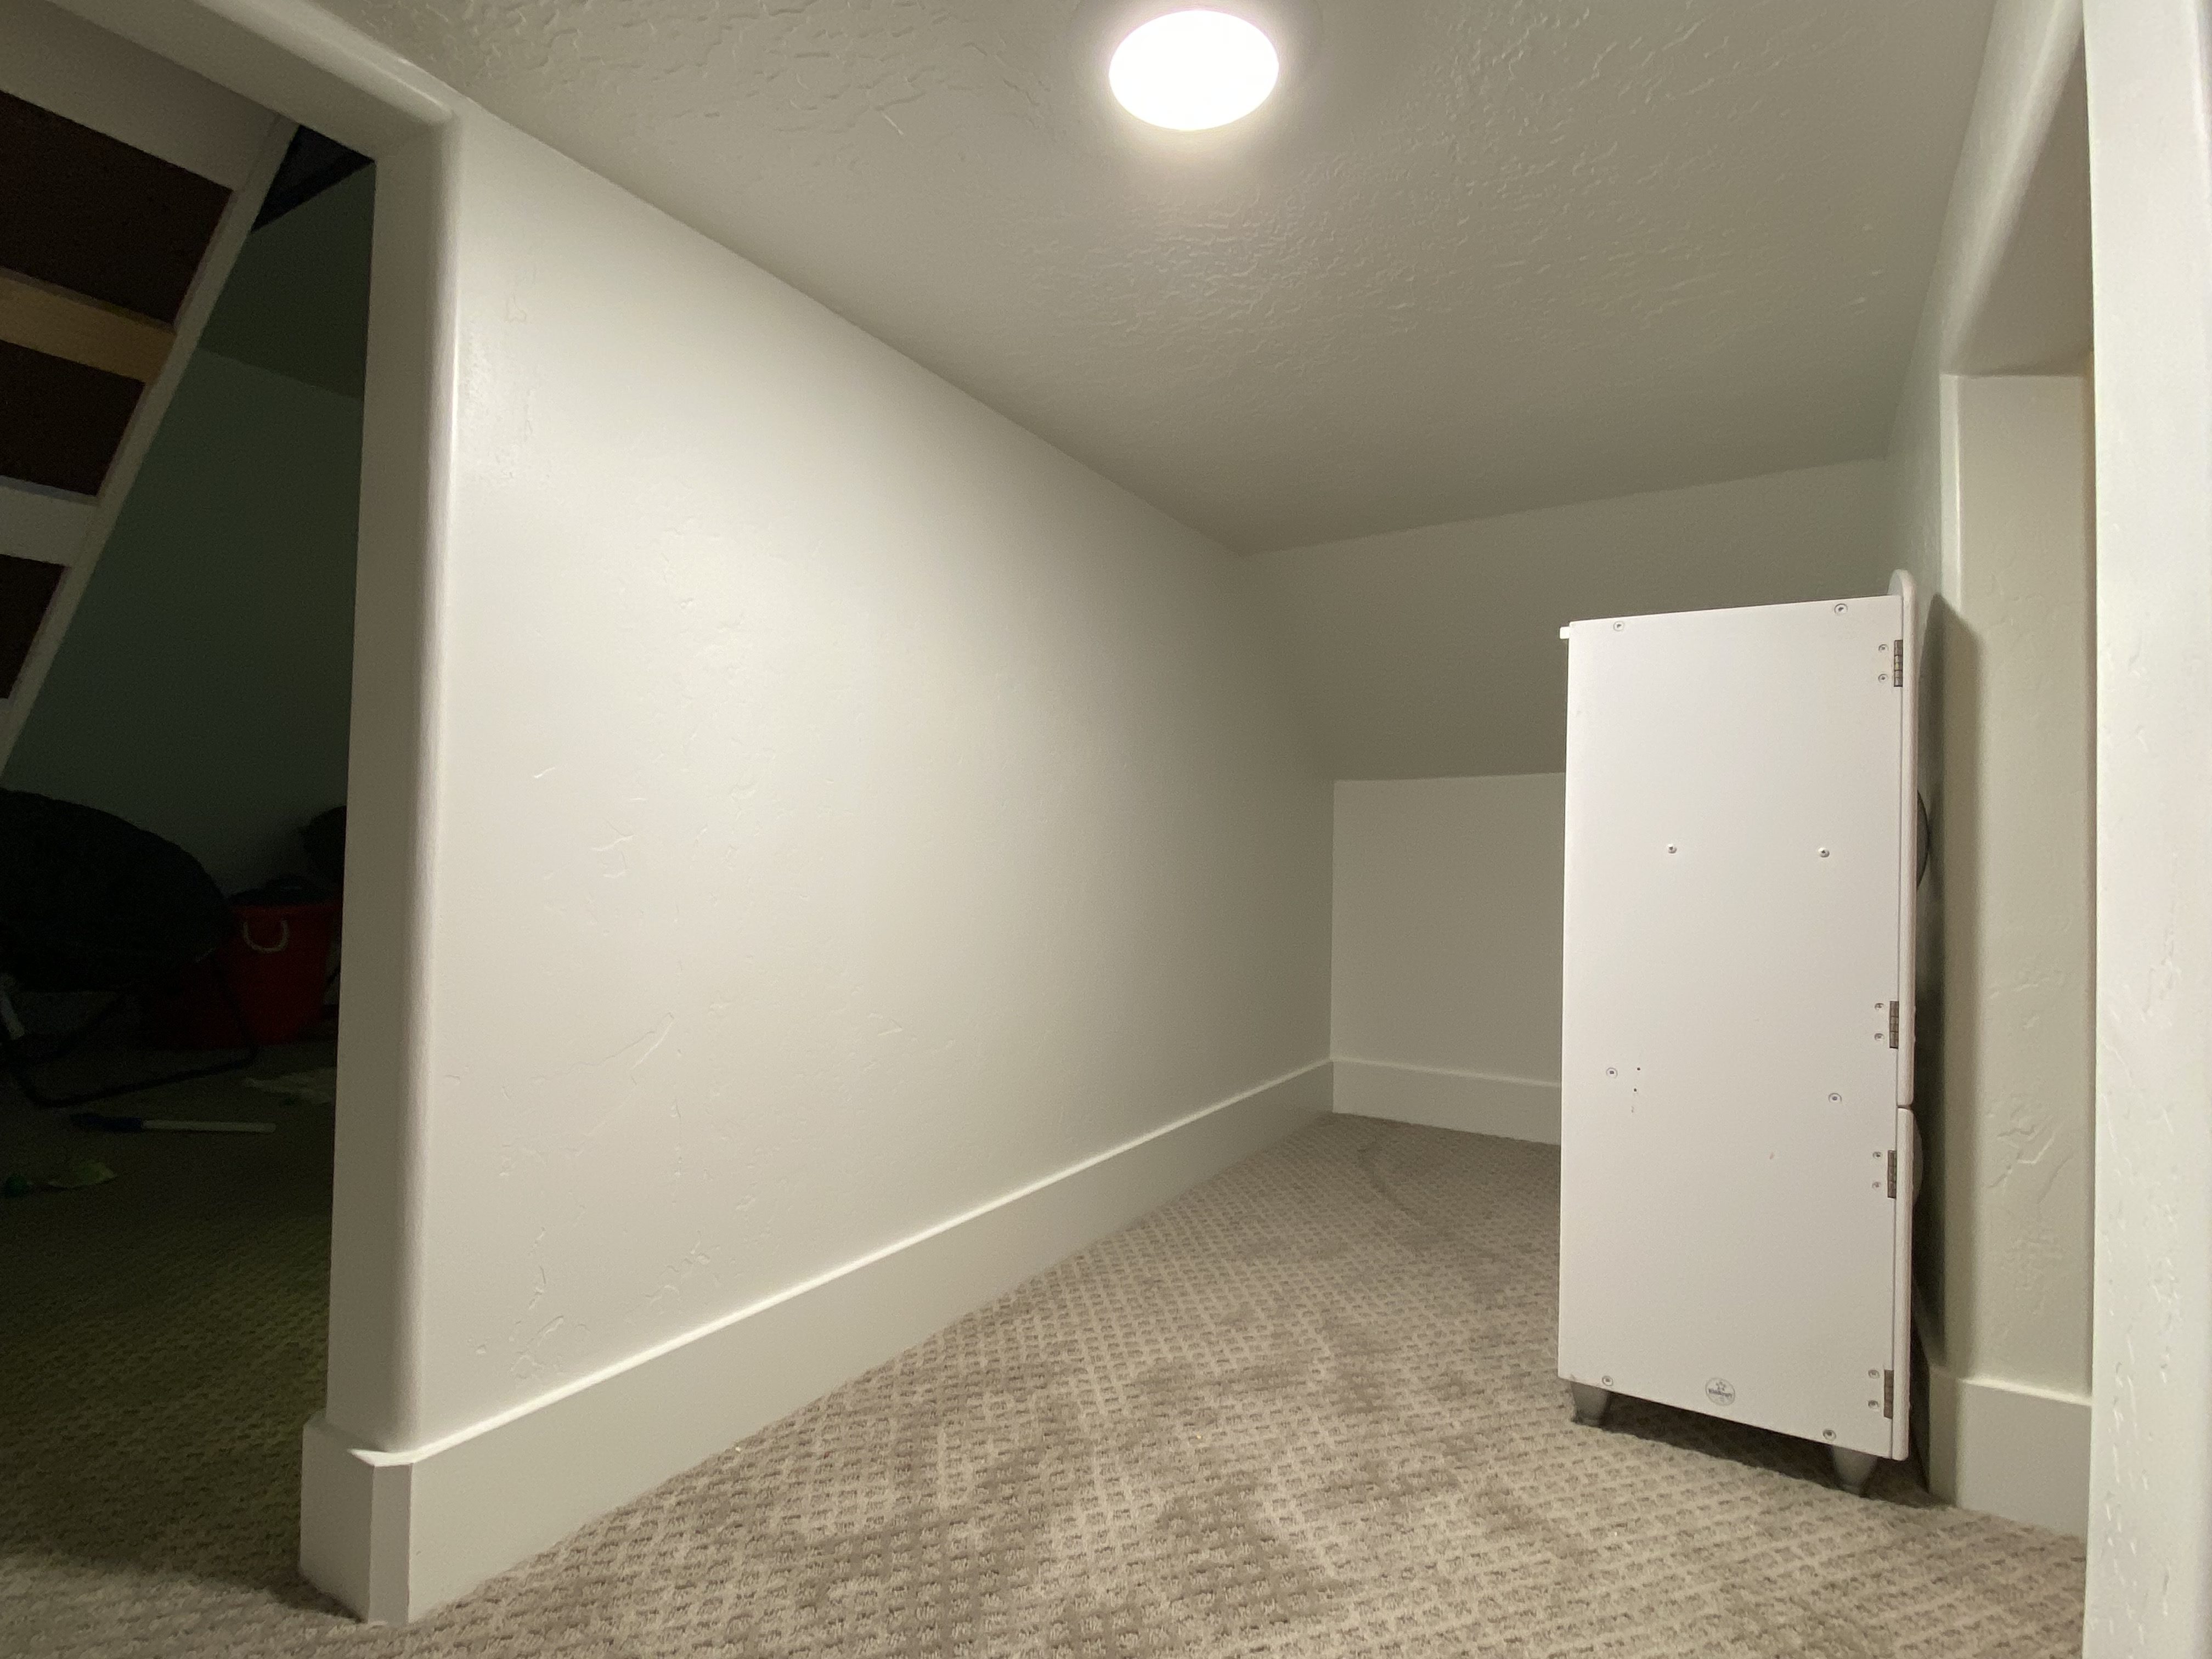
Here is the boring before:
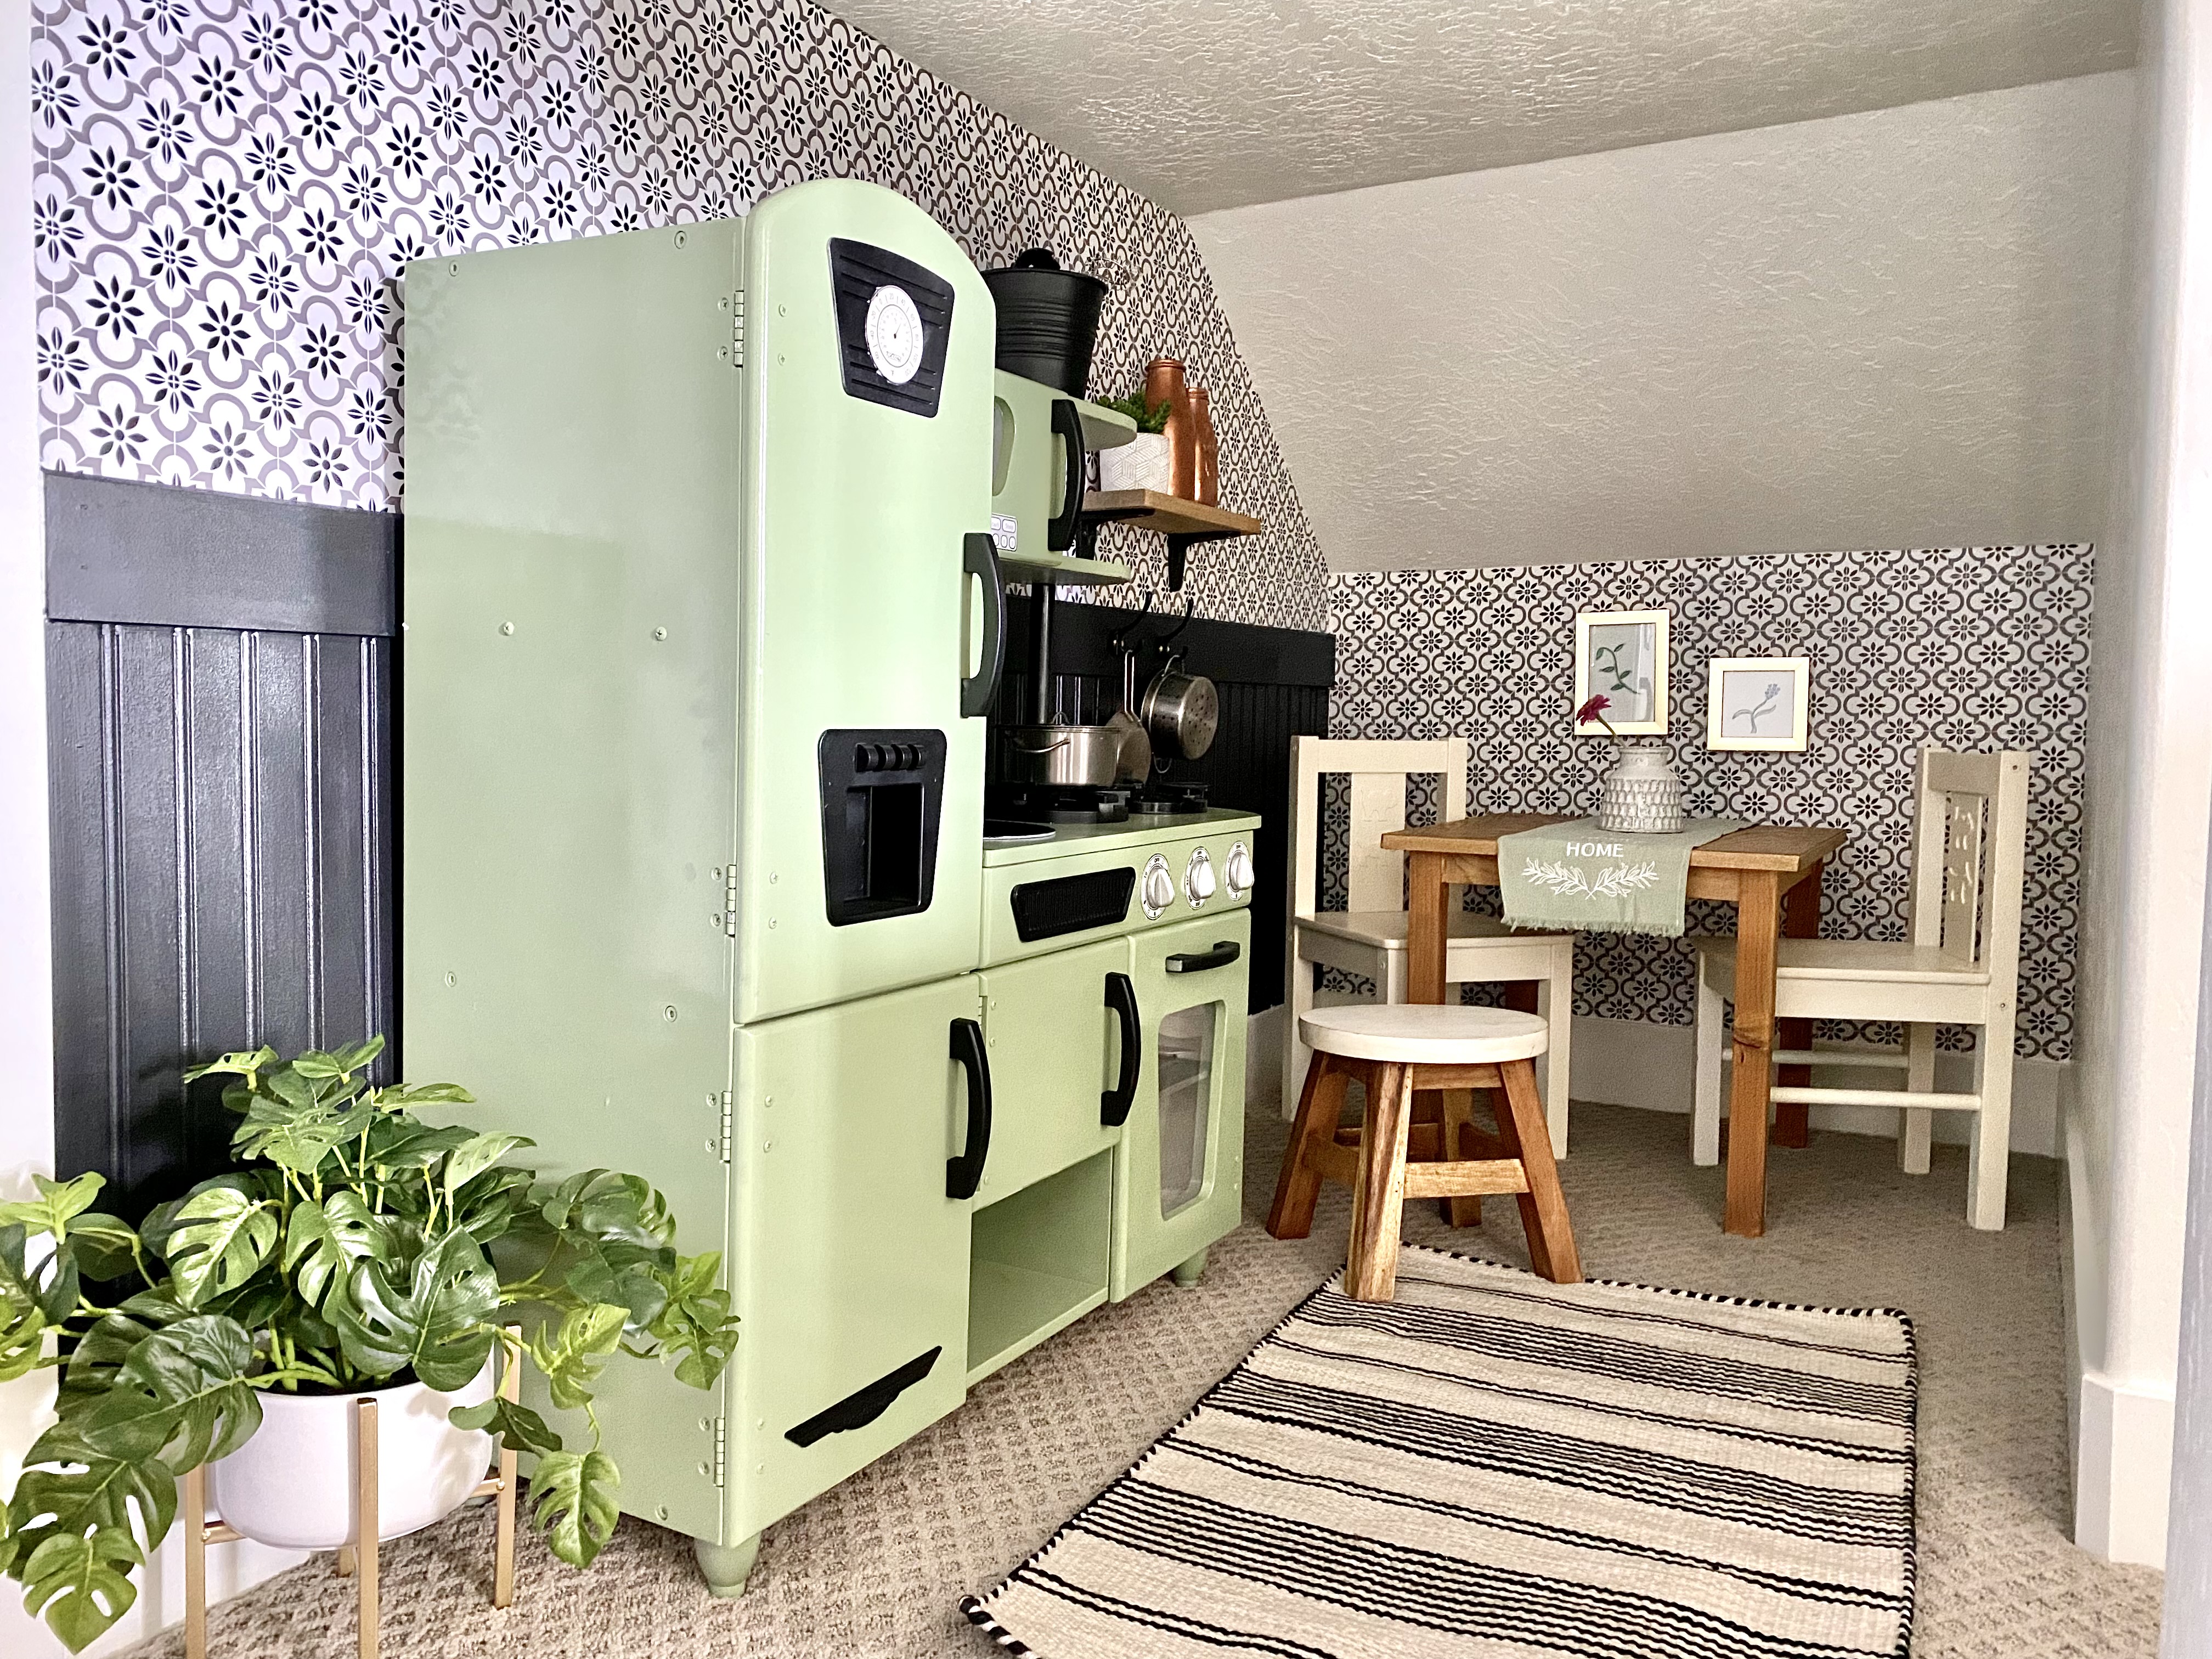
And after! Isn’t it adorable?
Here’s a quick video of the wallpaper installation:
Since the wall height I was putting it on was about four feet, I only needed to use one strip of wallpaper, running horizontally across the wall, from the ceiling down. I did try to add another row below, but it was tricky and didn’t work. So I suggest if you are doing an area wider than the width of the paper, to run the paper vertically.
I matched the edge of the paper up with the edge of the ceiling/wall and slowly pulled the adhesive backing away, smoothing the paper down as I went. You have to work slowly and carefully so you don’t get wrinkles or bubbles in the paper. I cut the paper into smallish sections to make it easy to work with. Then I matched up the pattern the best I could for the next piece.
It doesn’t matter at this point if the edge of the paper no longer lines up with the ceiling because you can always trim it with a razor blade. I continued doing this all the way to the other end of the wall, including where the ceiling vaults down and trimming the paper accordingly. The whole thing took about an hour. And I was so excited about the way it looked!
After the wallpaper was up, I then went to work trimming out the little pass-through and putting up beadboard. Trimming out passages is always kind of a headache because you have to cut about four inches of the baseboard off. So this took awhile. But once everything was up, I caulked it and filled nail holes and then painted it. The black paint is Sherwin-Williams Tricorn Black, my favorite rich black. I used this paint color on all the details of the facade of the playhouse which I will hopefully get to share soon!
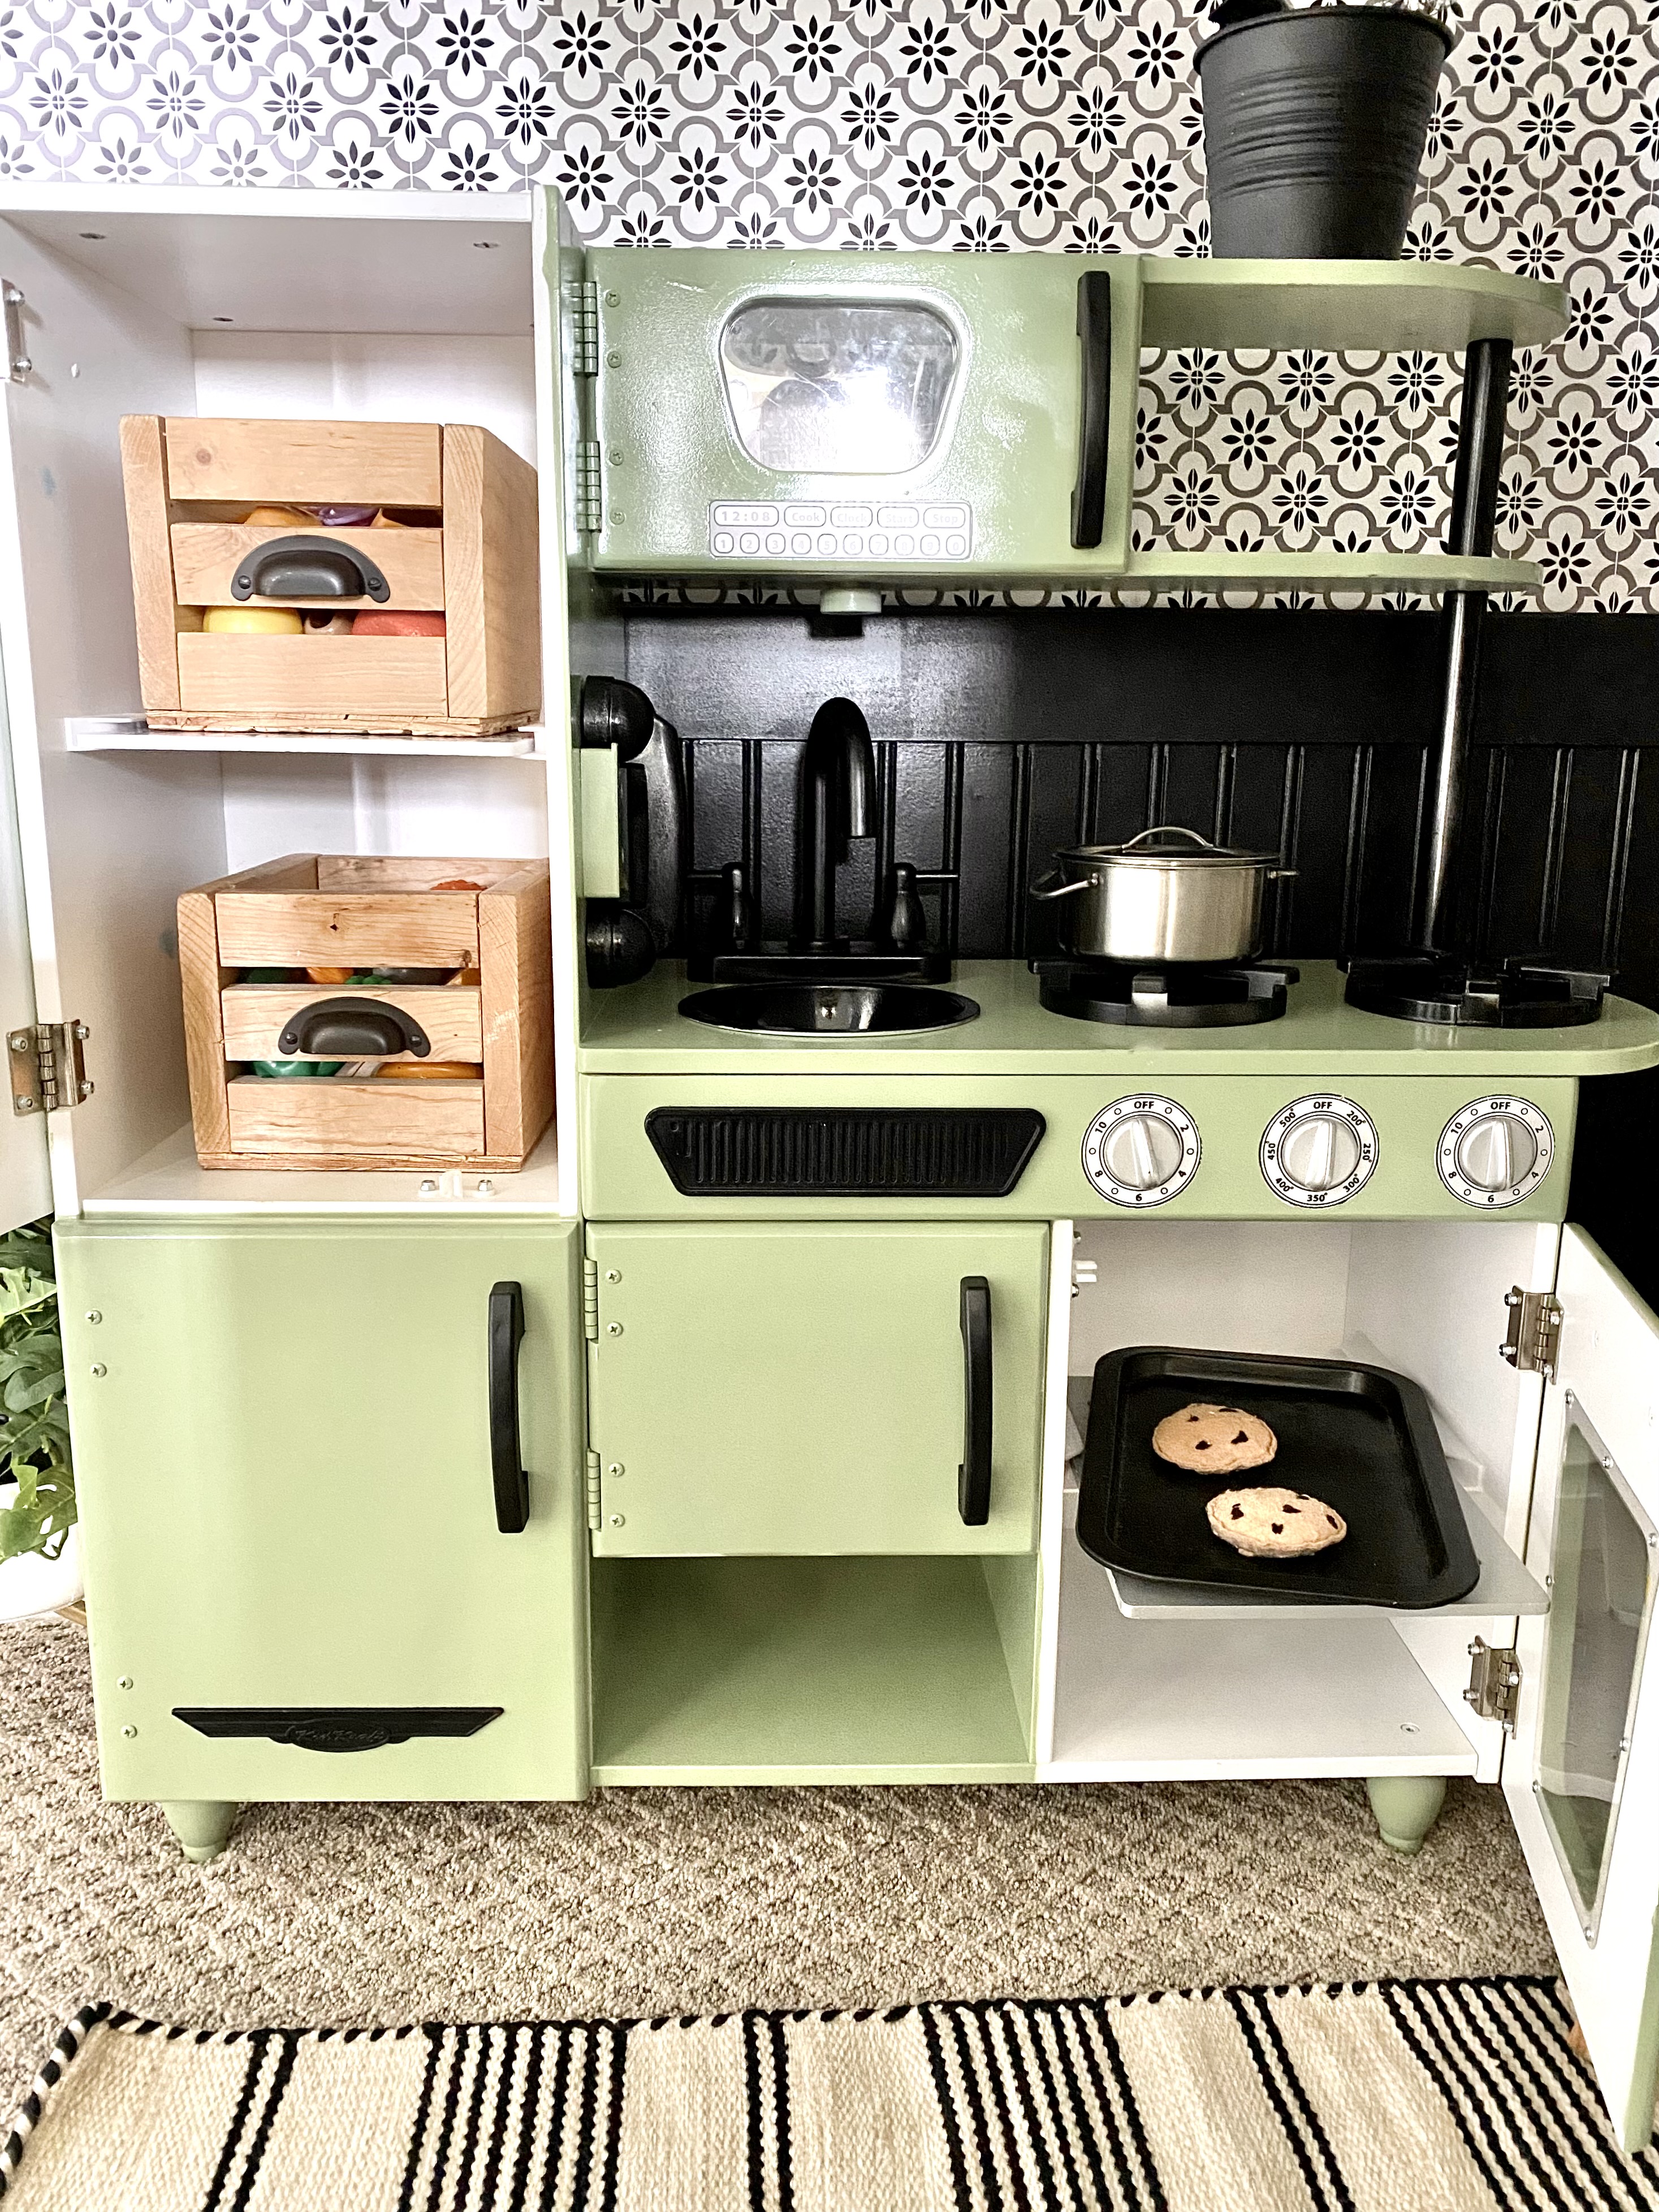
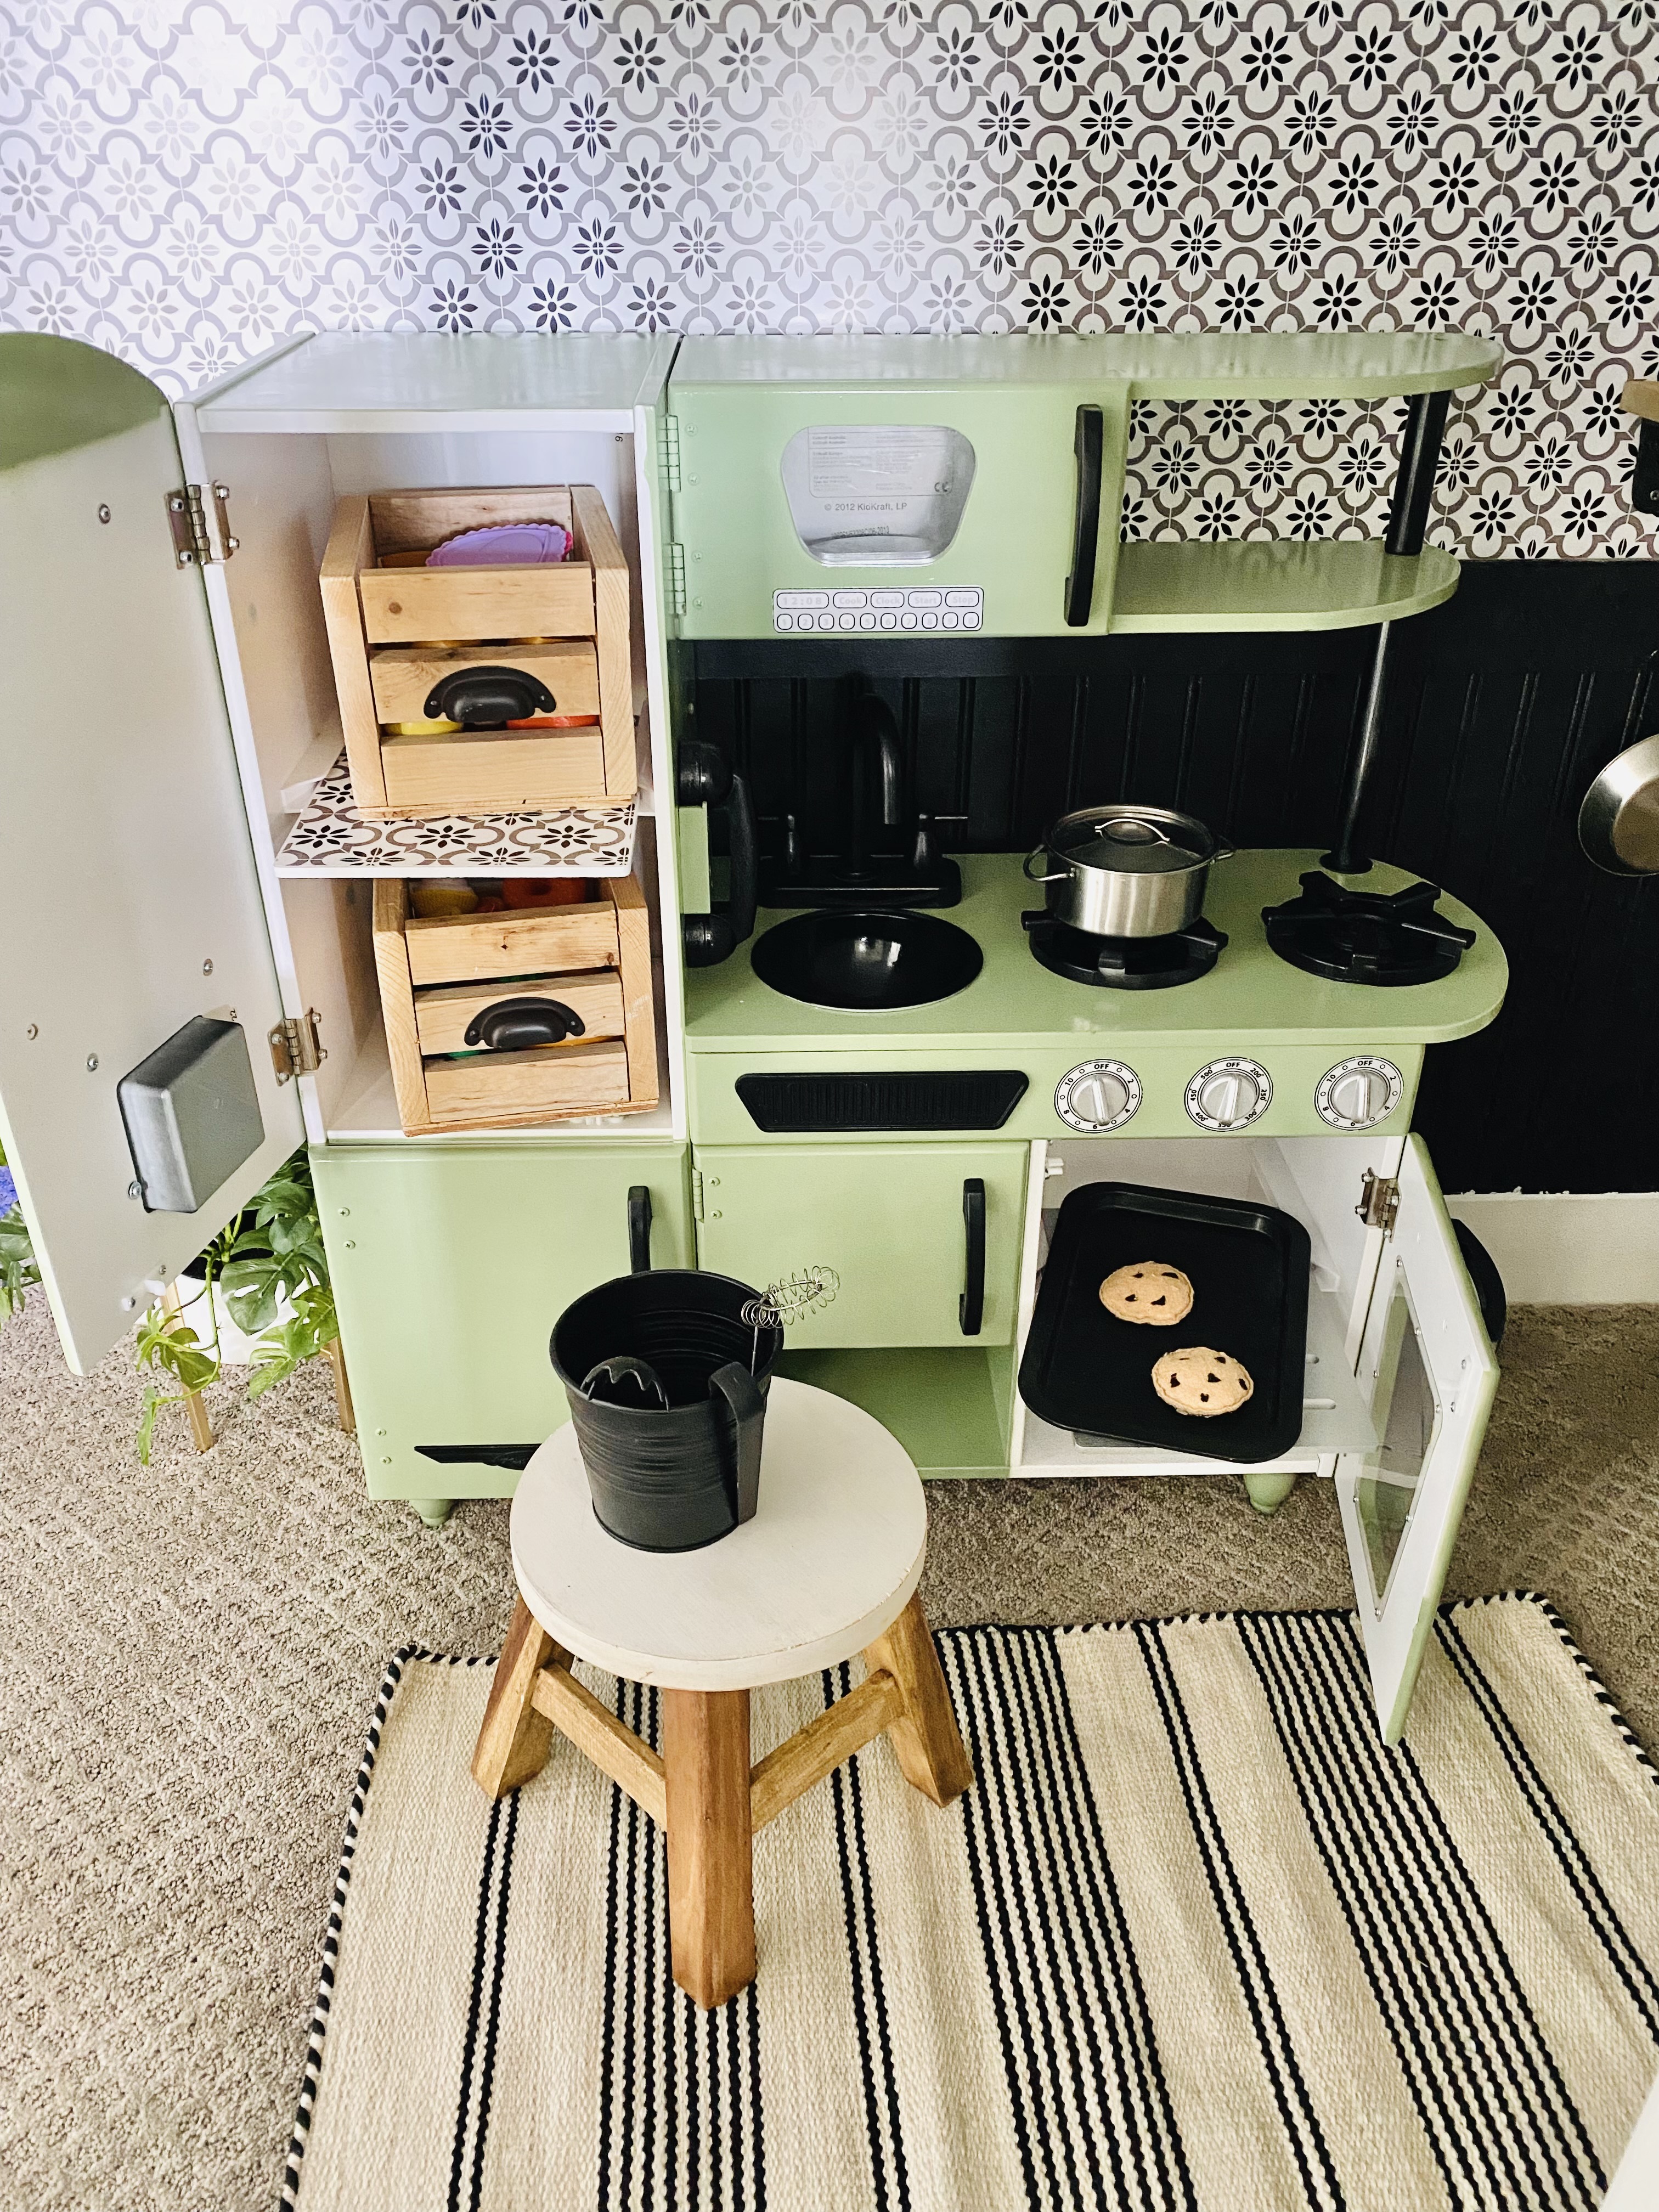
We got this cute kiddie kitchen from Amazon about seven years ago. I wanted a pop of color in this room which already had a vintage feel to it, so I ended up spray painting it an avocado green color. It reminds me of my first apartment with my husband that had the green appliances straight from the 70’s and didn’t work well. But since I chose this color from the 70’s, it definitely contributed to the feel of this vintage play kitchen.
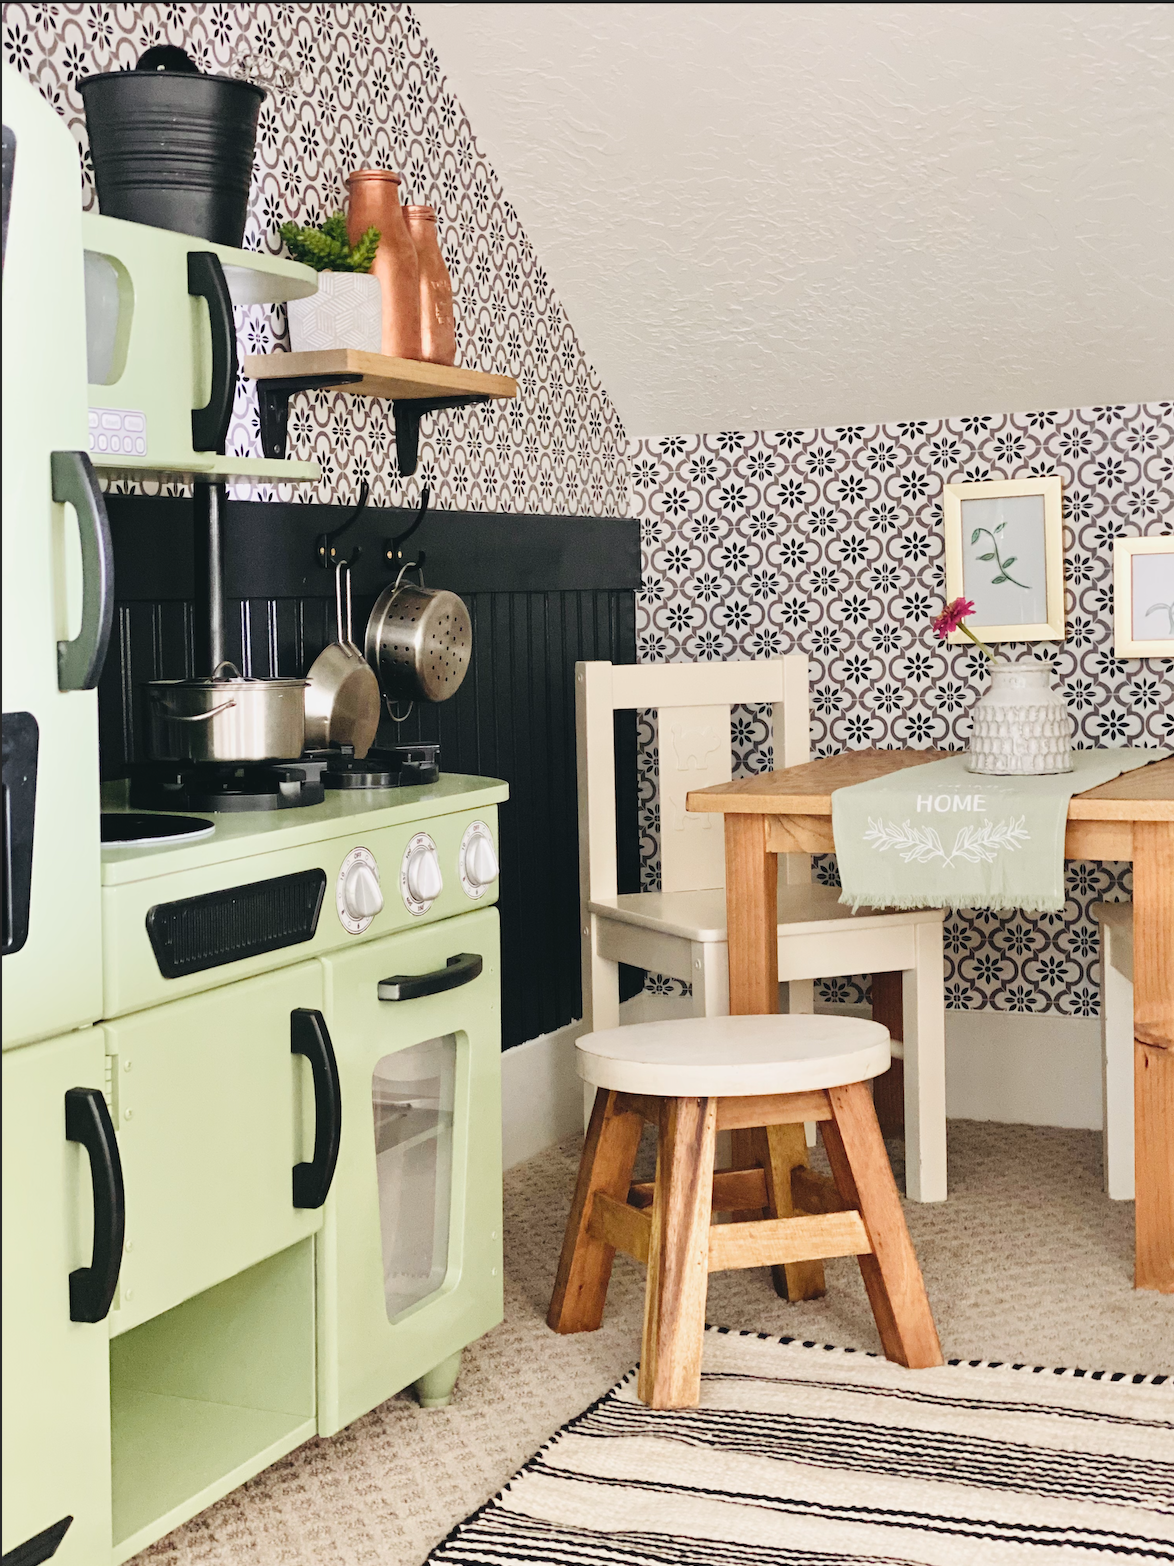
I also removed the hardware and spray painted it black which I like, but it does make the faucet hard to see against the black beadboard. Maybe I will add a faux backsplash at some point. I built this little wood crates to hold the play food.
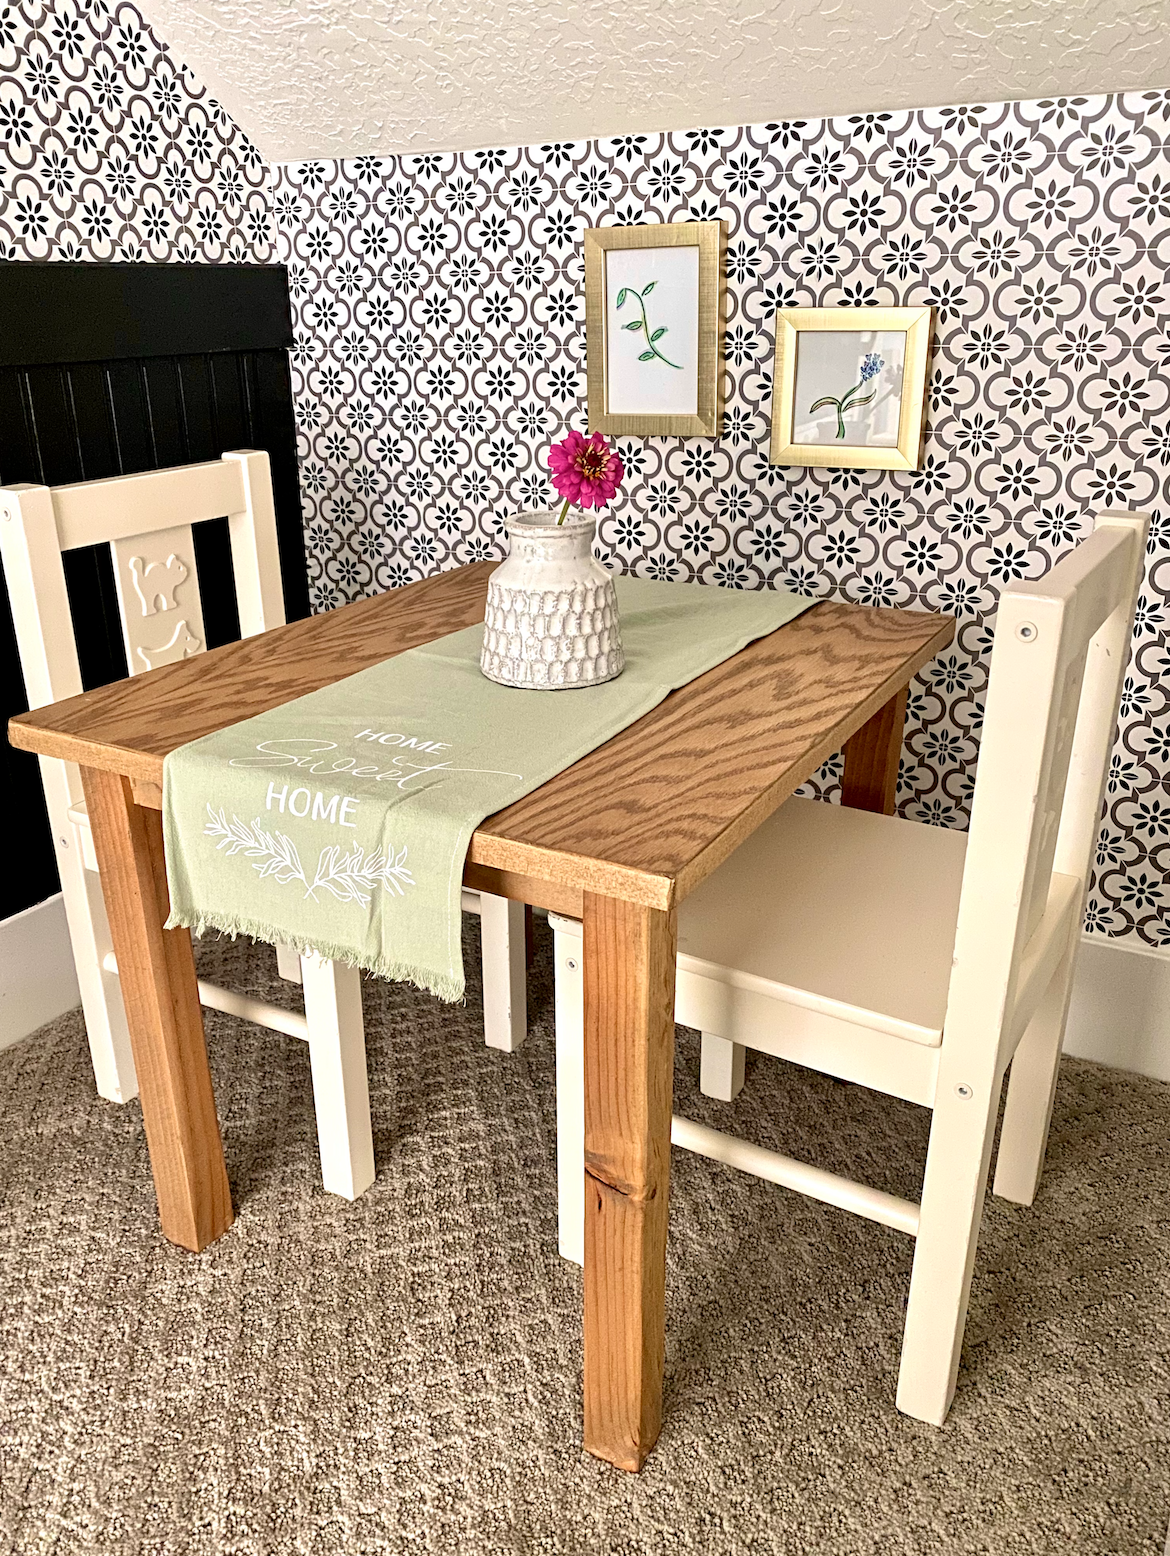
I also built this little wood table really quickly to finish the kitchen as well as adding a shelf. It’s such a cute little space now and makes me excited to decorate the other rooms in this little playhouse!
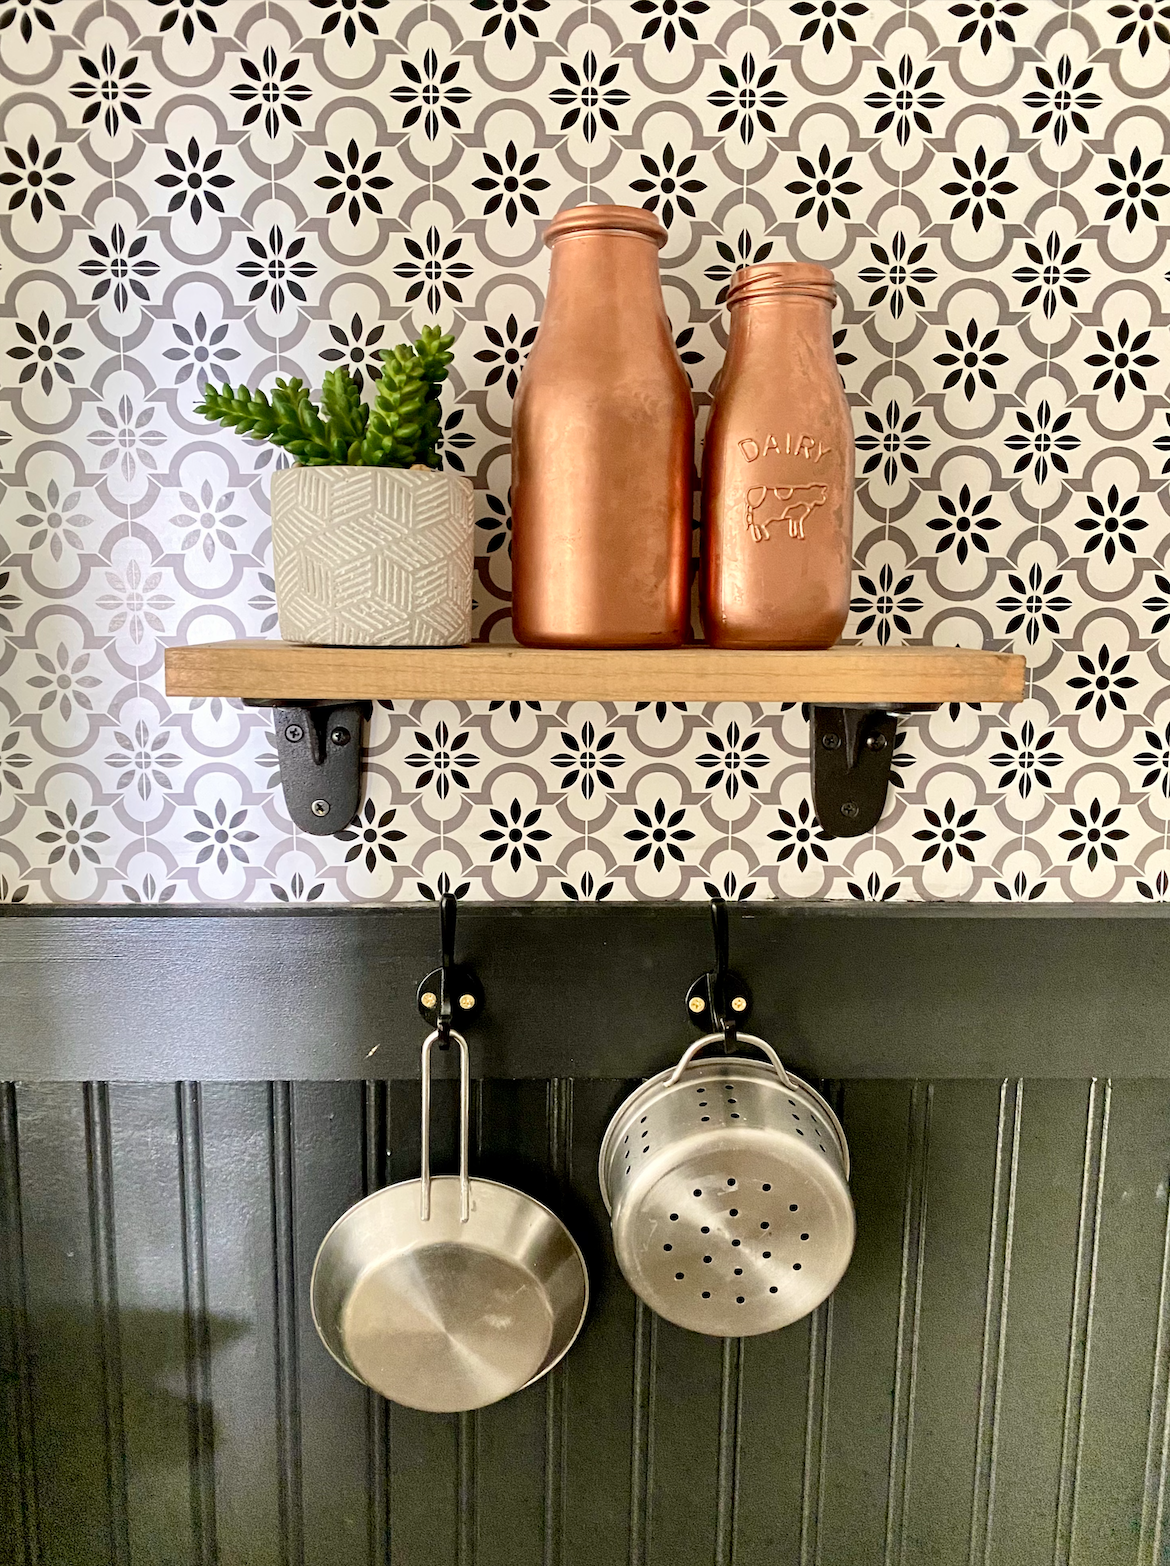
What’s so great about using the Duck Brand® Smooth Top® EasyLiner® for wallpaper in this vintage play kitchen is that if (and when) the kids draw on the wall, it’s easy to wipe clean or even replace. I added it inside the little kitchen shelves too, so cute! I can’t wait until everything is done and I can share the whole thing with you.
How cuuuute!!!
Thanks Kristen! I’m having the best time with this house haha
Hi!
Thanks for sharing this home kitchen idea. One day when I’ve my own home I’ll like to try idea there.
Wow, It looks fantastic! Great Ideas!