How to Trim a Rug to Fit a Small Space
Have you ever bought a rug that didn’t fit quite right? Or had a space in your home where you couldn’t find the right size rug? It can be tricky since most rugs come in standard sizes. I’m going to share how to trim a rug to fit a small space. This tutorial is for too-big rugs that need to be made smaller, not for a too-small rug to be made larger. This method will also only work on rugs with a backing versus woven or natural fiber rugs.
In my little playhouse, there is a “front room” that is extremely narrow, like 23″ wide. This is due to the fact that we converted two closets into a playhouse and couldn’t remove the entire load-bearing wall. So I’ve divided the playhouse into actual rooms. I showed you the kitchen that I complete this summer, and I’m *almost* ready to share the front of the house. This has been one of those projects where I got 90% of the way done and then got distracted and didn’t finish. I’m telling you, having five kids has been keeping me extremely busy and I just can’t work on my blog like I used to.
However, I occasionally will buy some stuff for a project to keep it moving along. The front room of the playhouse was one of these. I bought a little 2×3 rug from Target thinking that just maybe it could work. Nope, it was still too wide. Bending one edge of it up just looked dumb. I researched how to trim a rug and figured this is something I could do. However they recommended buying this specific rug edge binding from eBay that I just didn’t want to spend money on.
One day I was sick of trying to figure out how to trim a rug so I just randomly grabbed the rug, a razor blade and some hot glue and started working. The end result was actually pretty awesome! And this isn’t even a shaggy rug, which helps a ton to hide the seam.
Supplies:
- Sharp razor blade (like a box cutter)
- Hot glue gun
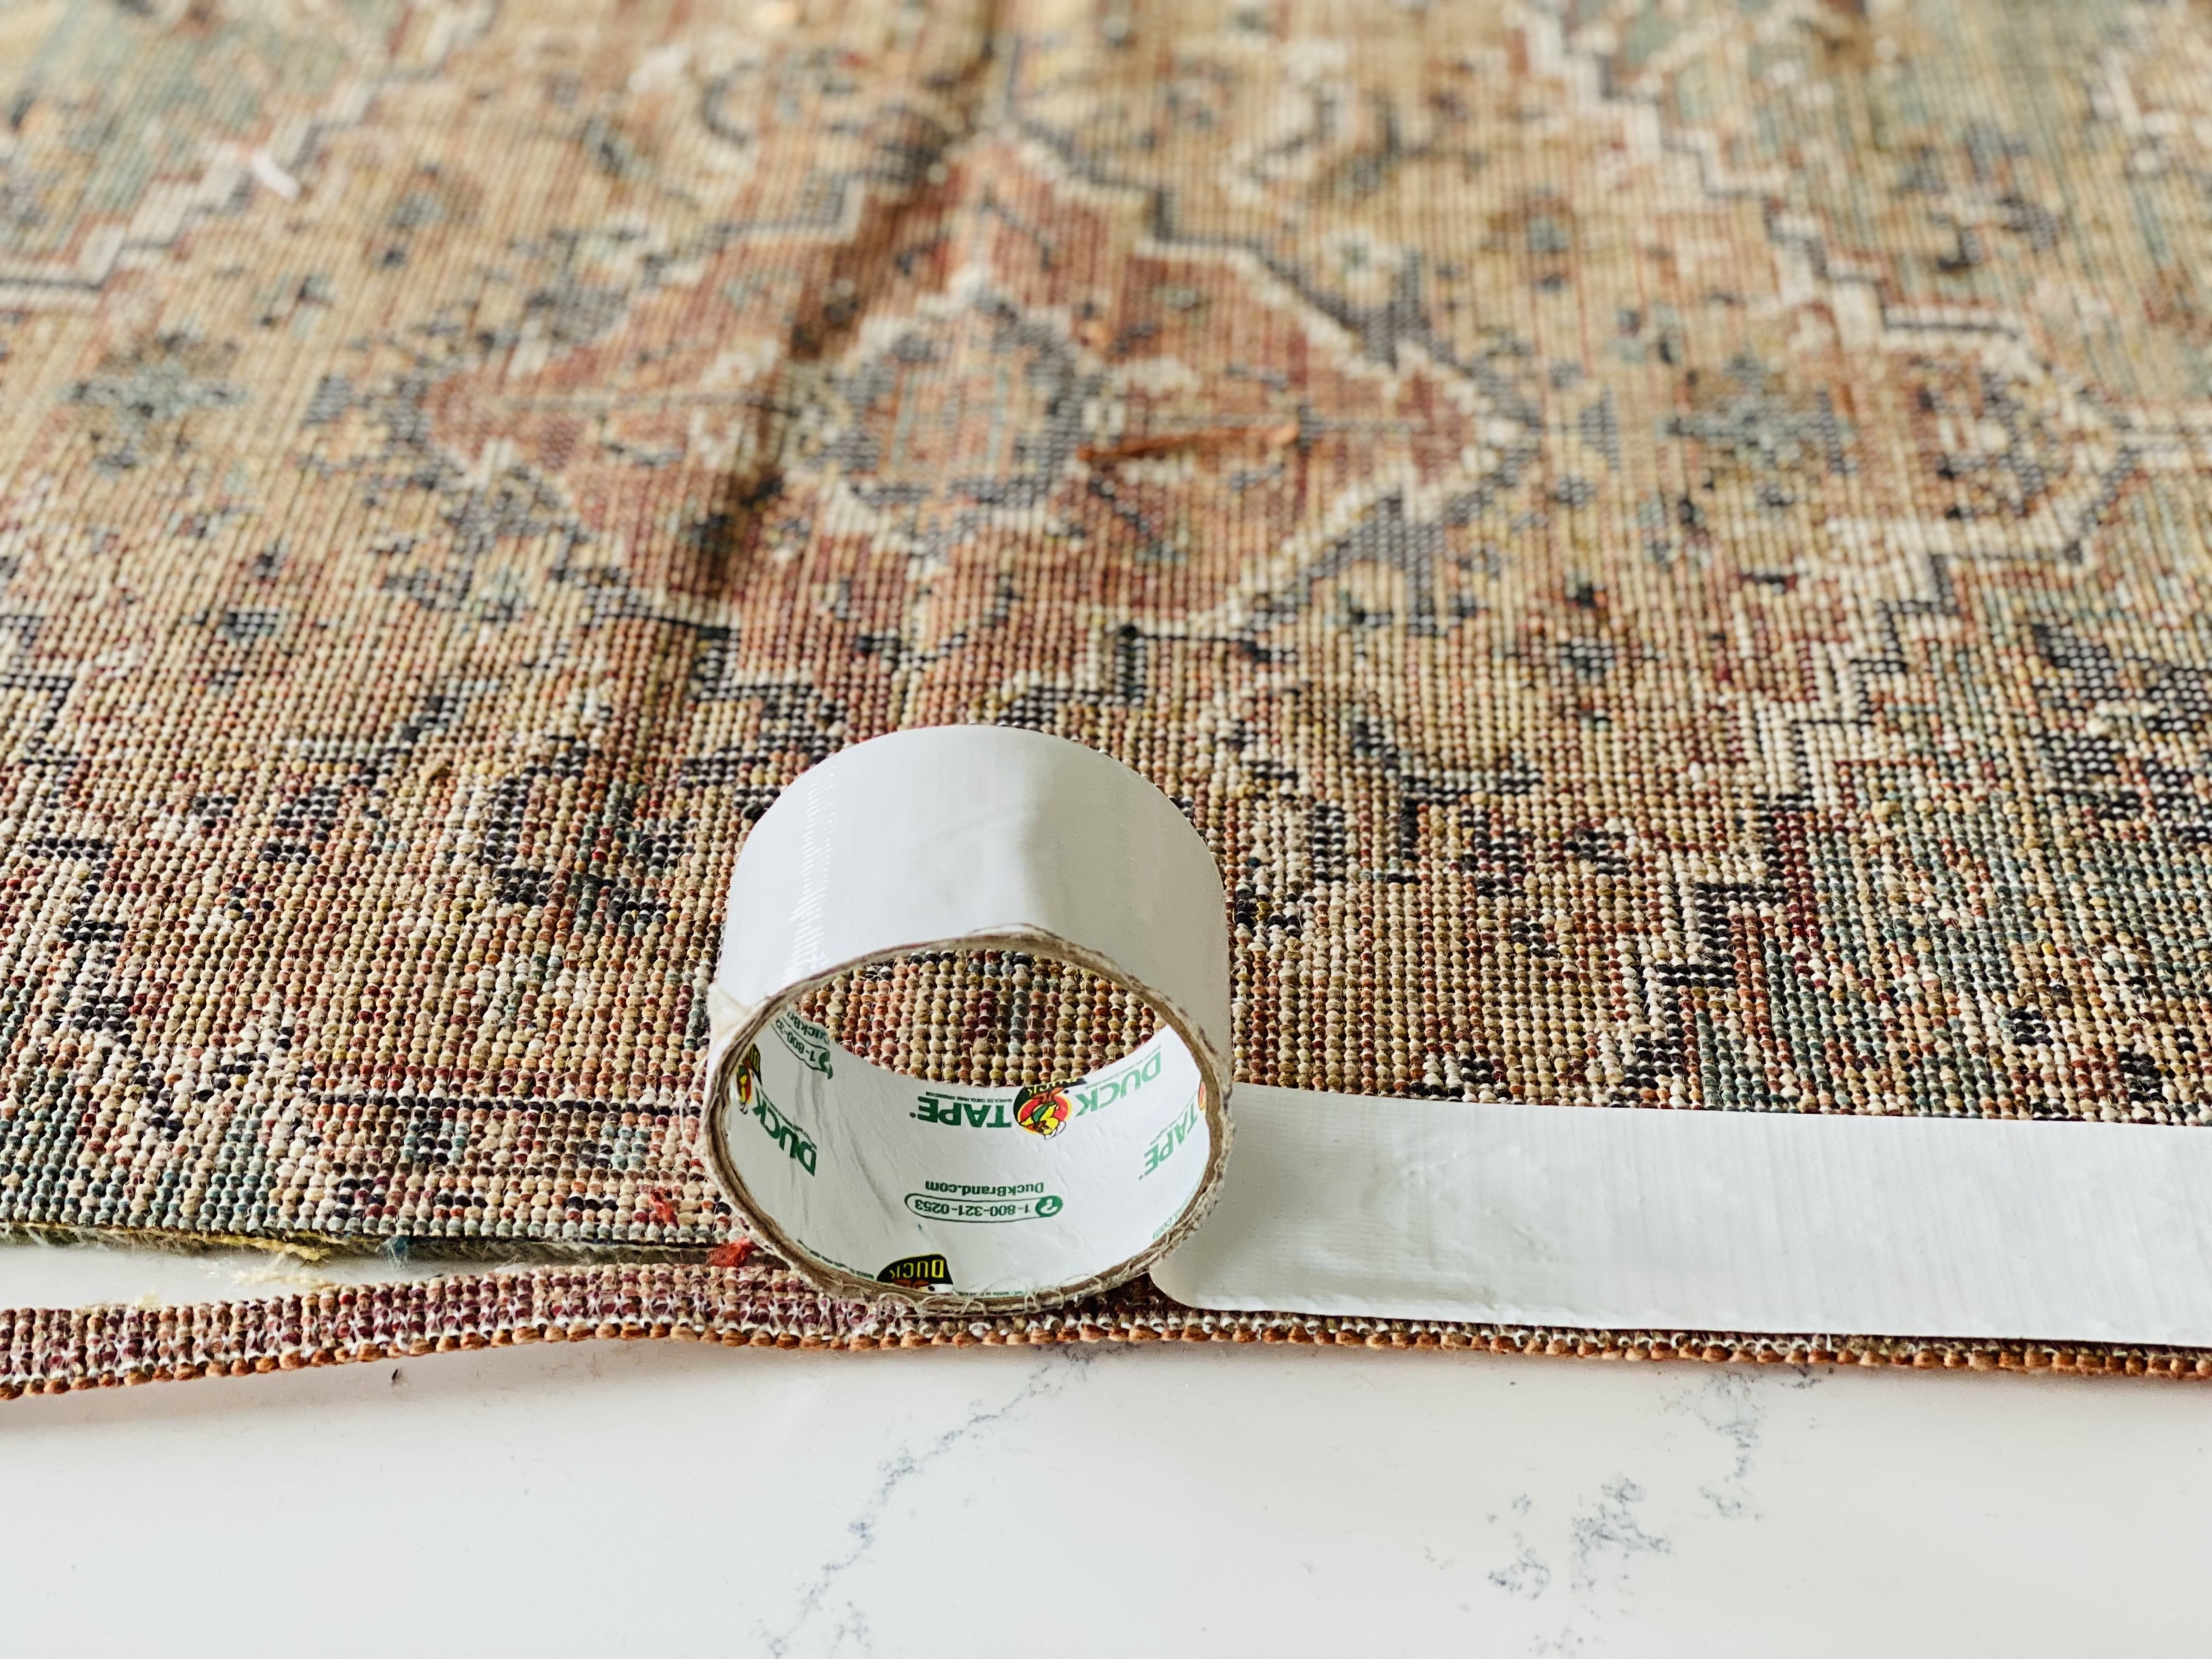
- Duck Tape
- Super helpful is a healing cutting mat and cutting guide (like you’d use for sewing or quilting)
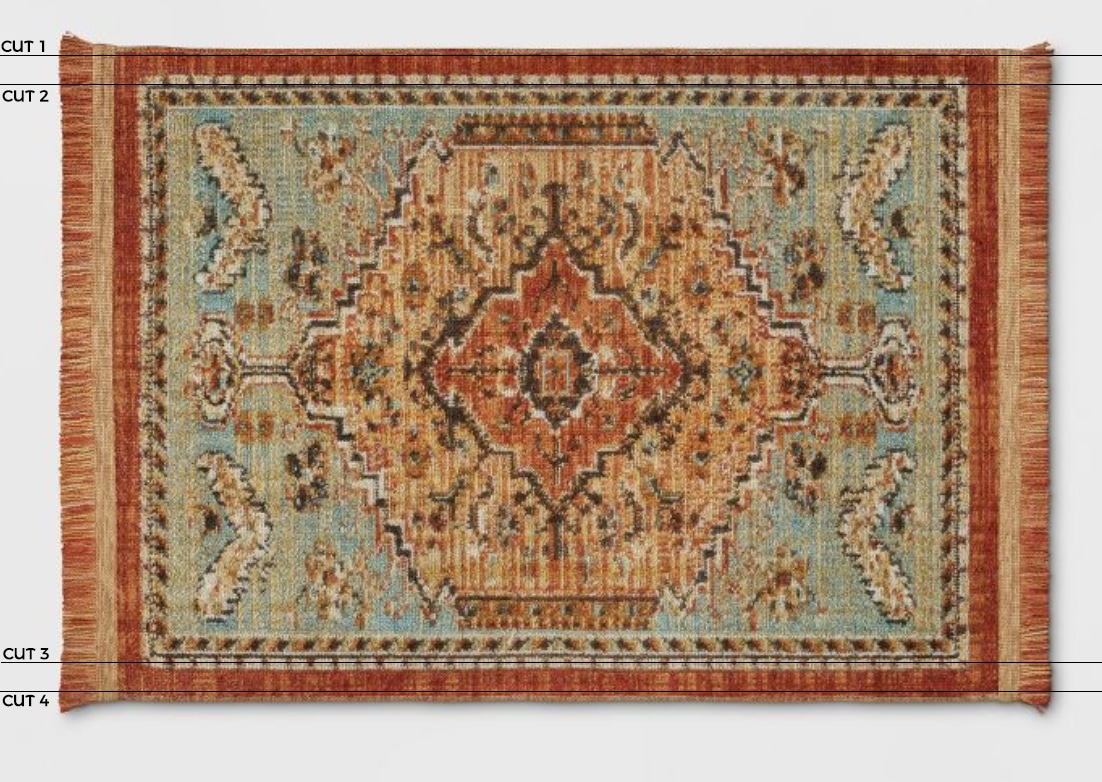
Step 1: Decide where to make the cuts
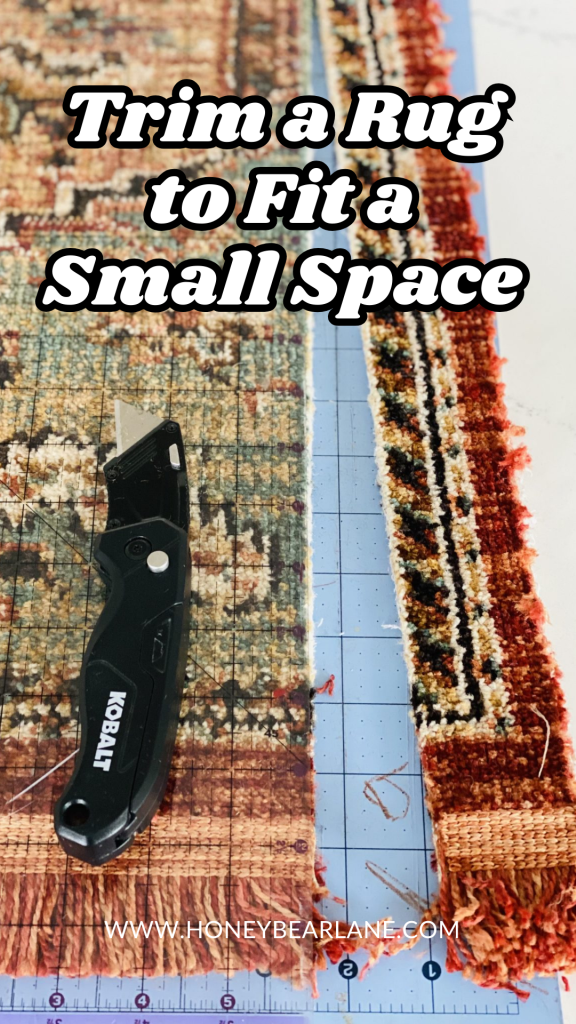
On this rug, I just needed to trim off a few inches. To keep it symmetrical, I had to trim equal amounts off of both sides. This was easier for me to do since the rug had a nice straight line for me to follow. I needed to make four cuts in order to take the width off and also retain the existing edge binding.
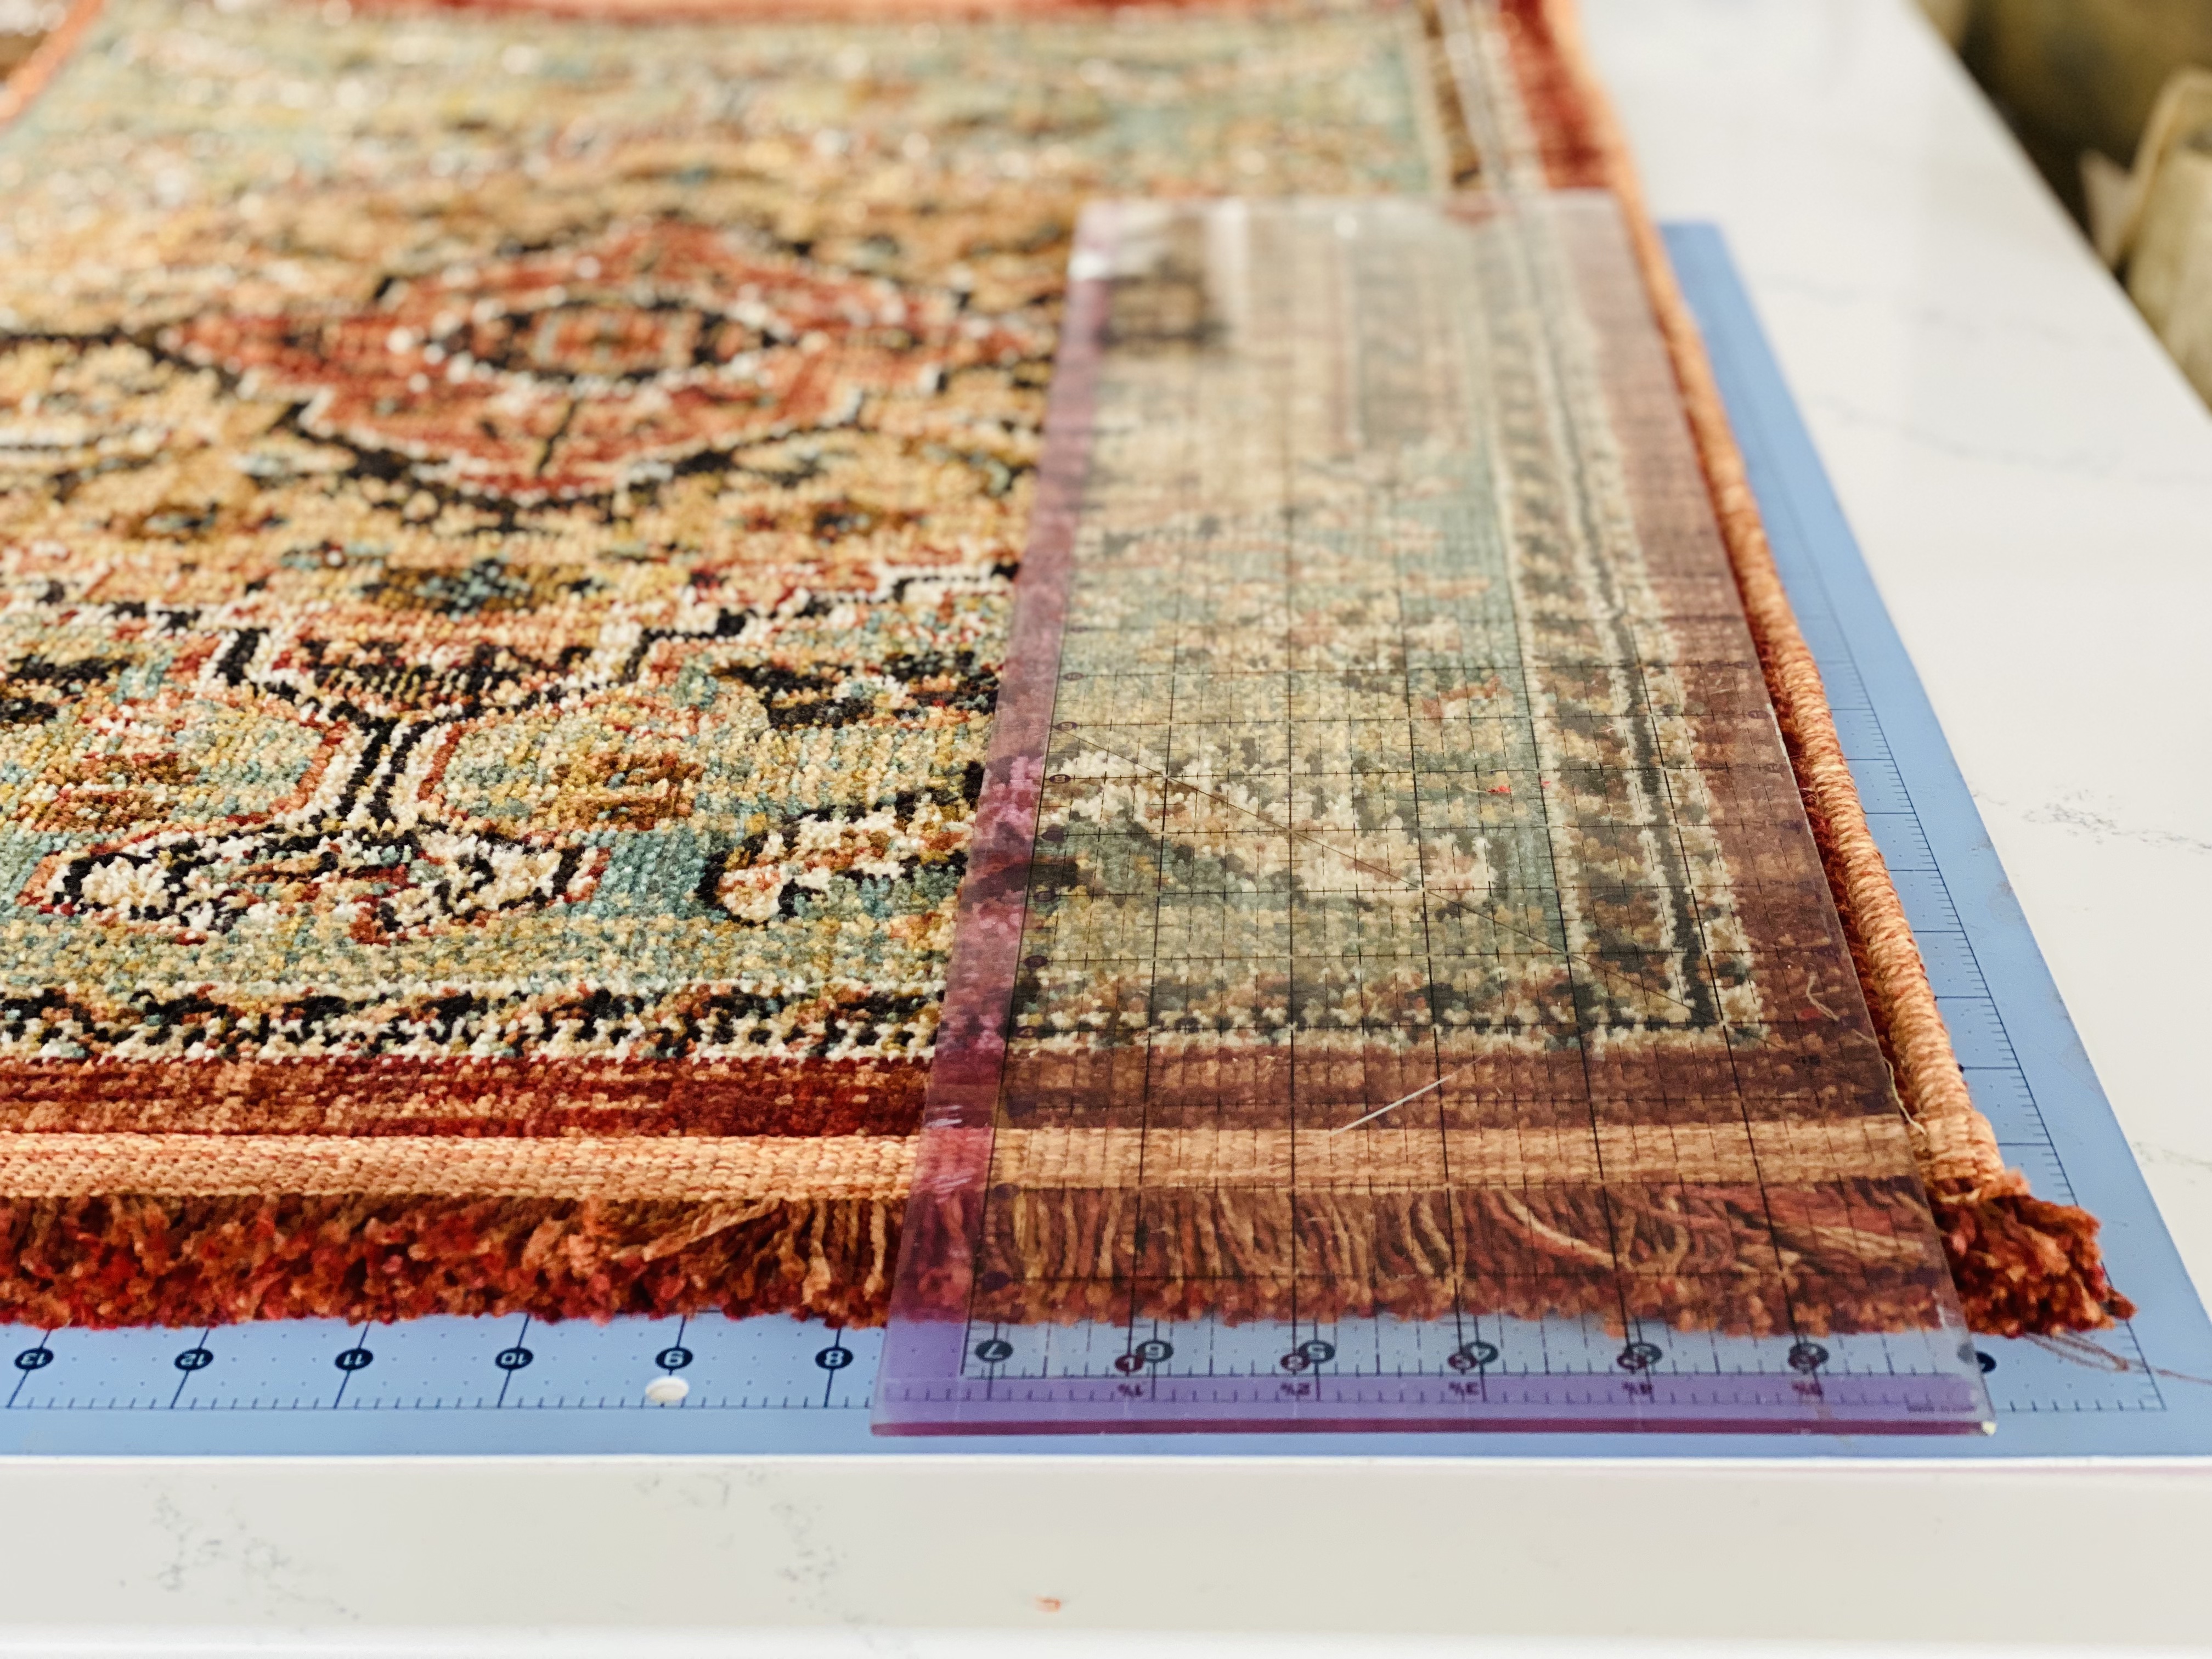
Step 2: Cut off the edge binding
I placed the rug on the self healing mat. I realize this is a lot easier for my specific project since my rug was so small. But I believe any size would work if you just work on the ground moving the mat underneath as you go. Using the cutting guide, I cut off the edge binding with the box cutter. Make sure you cut the entire edge off and DO NOT cut the loop that is on the edge binding because once that’s cut, it will stick out like crazy. Set the edge binding aside once cut.
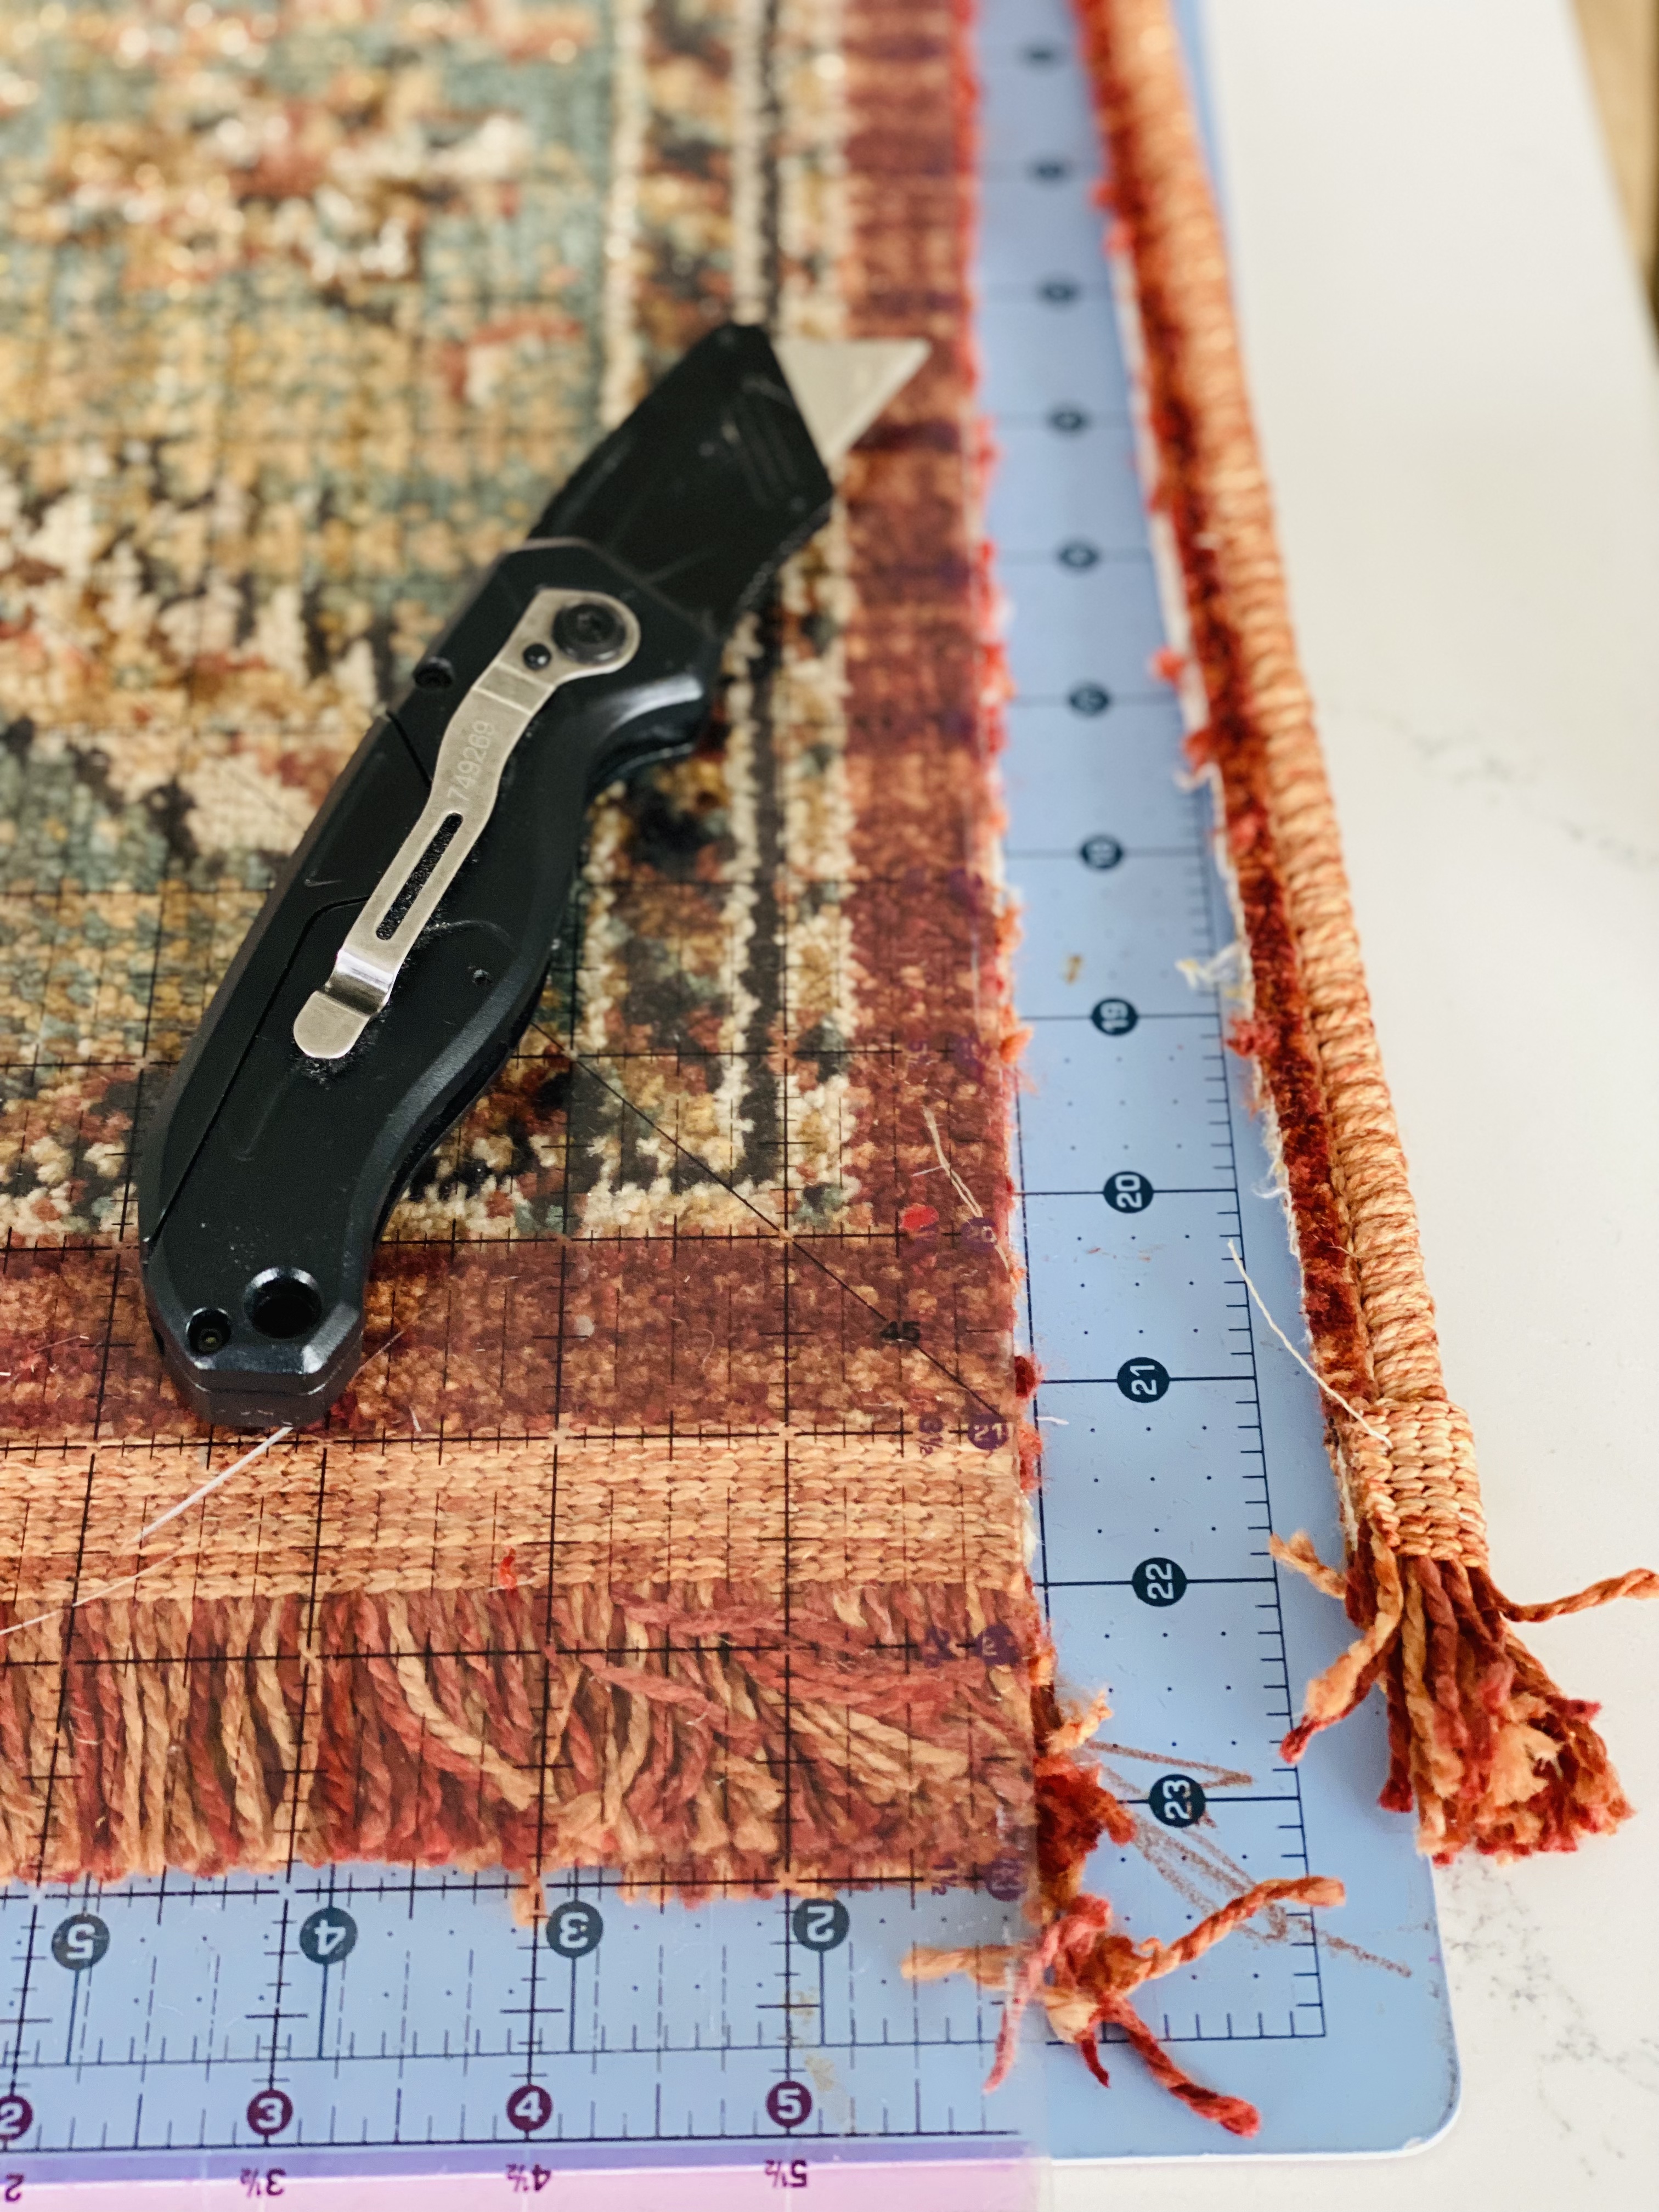
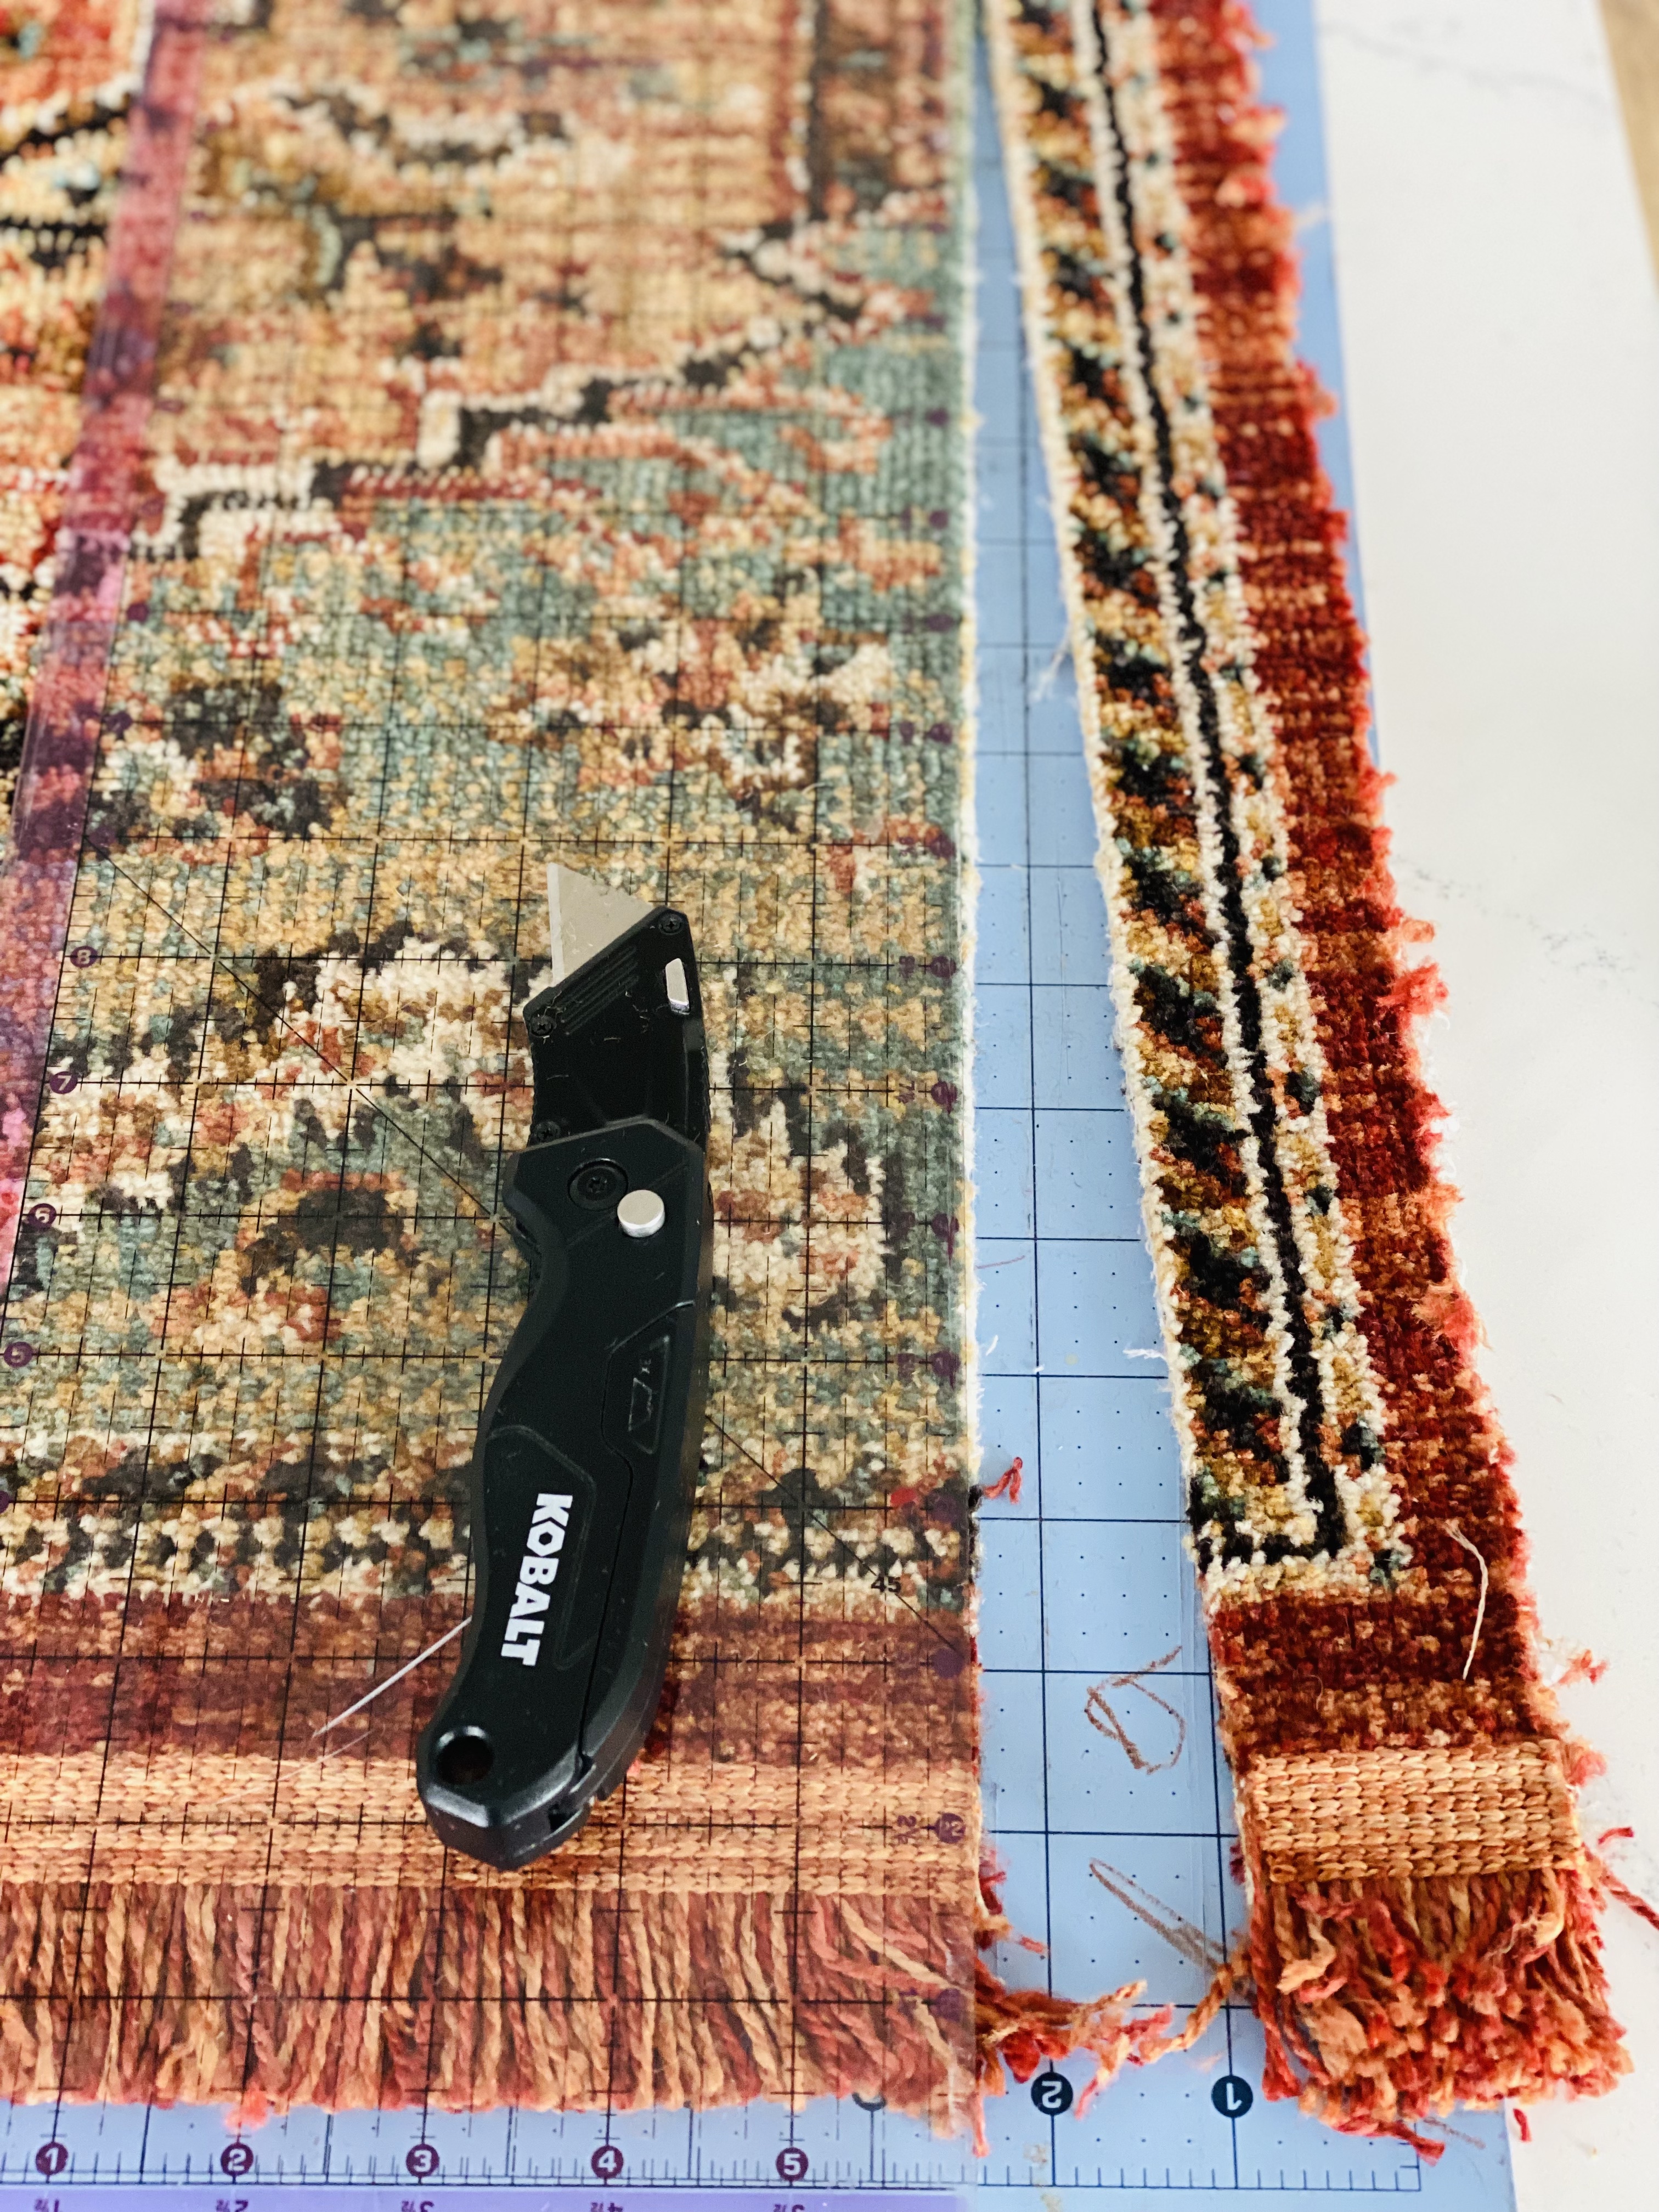
Step 3: Cut off any extra length or width
This next step is where you cut a little more off each side to make it the right length or width. You have to take care to keep the lines nice and straight. It might be a good idea to take some painter’s tape and tape the line next to where you want to cut. Like I mentioned before, this was easy for me because I just followed the line that was part of the rug’s pattern. Take off equal amounts on each side to keep it symmetrical (unless it’s a plain rug, in which case you only have to do it to one side.)
Step 4: Reattach edge binding
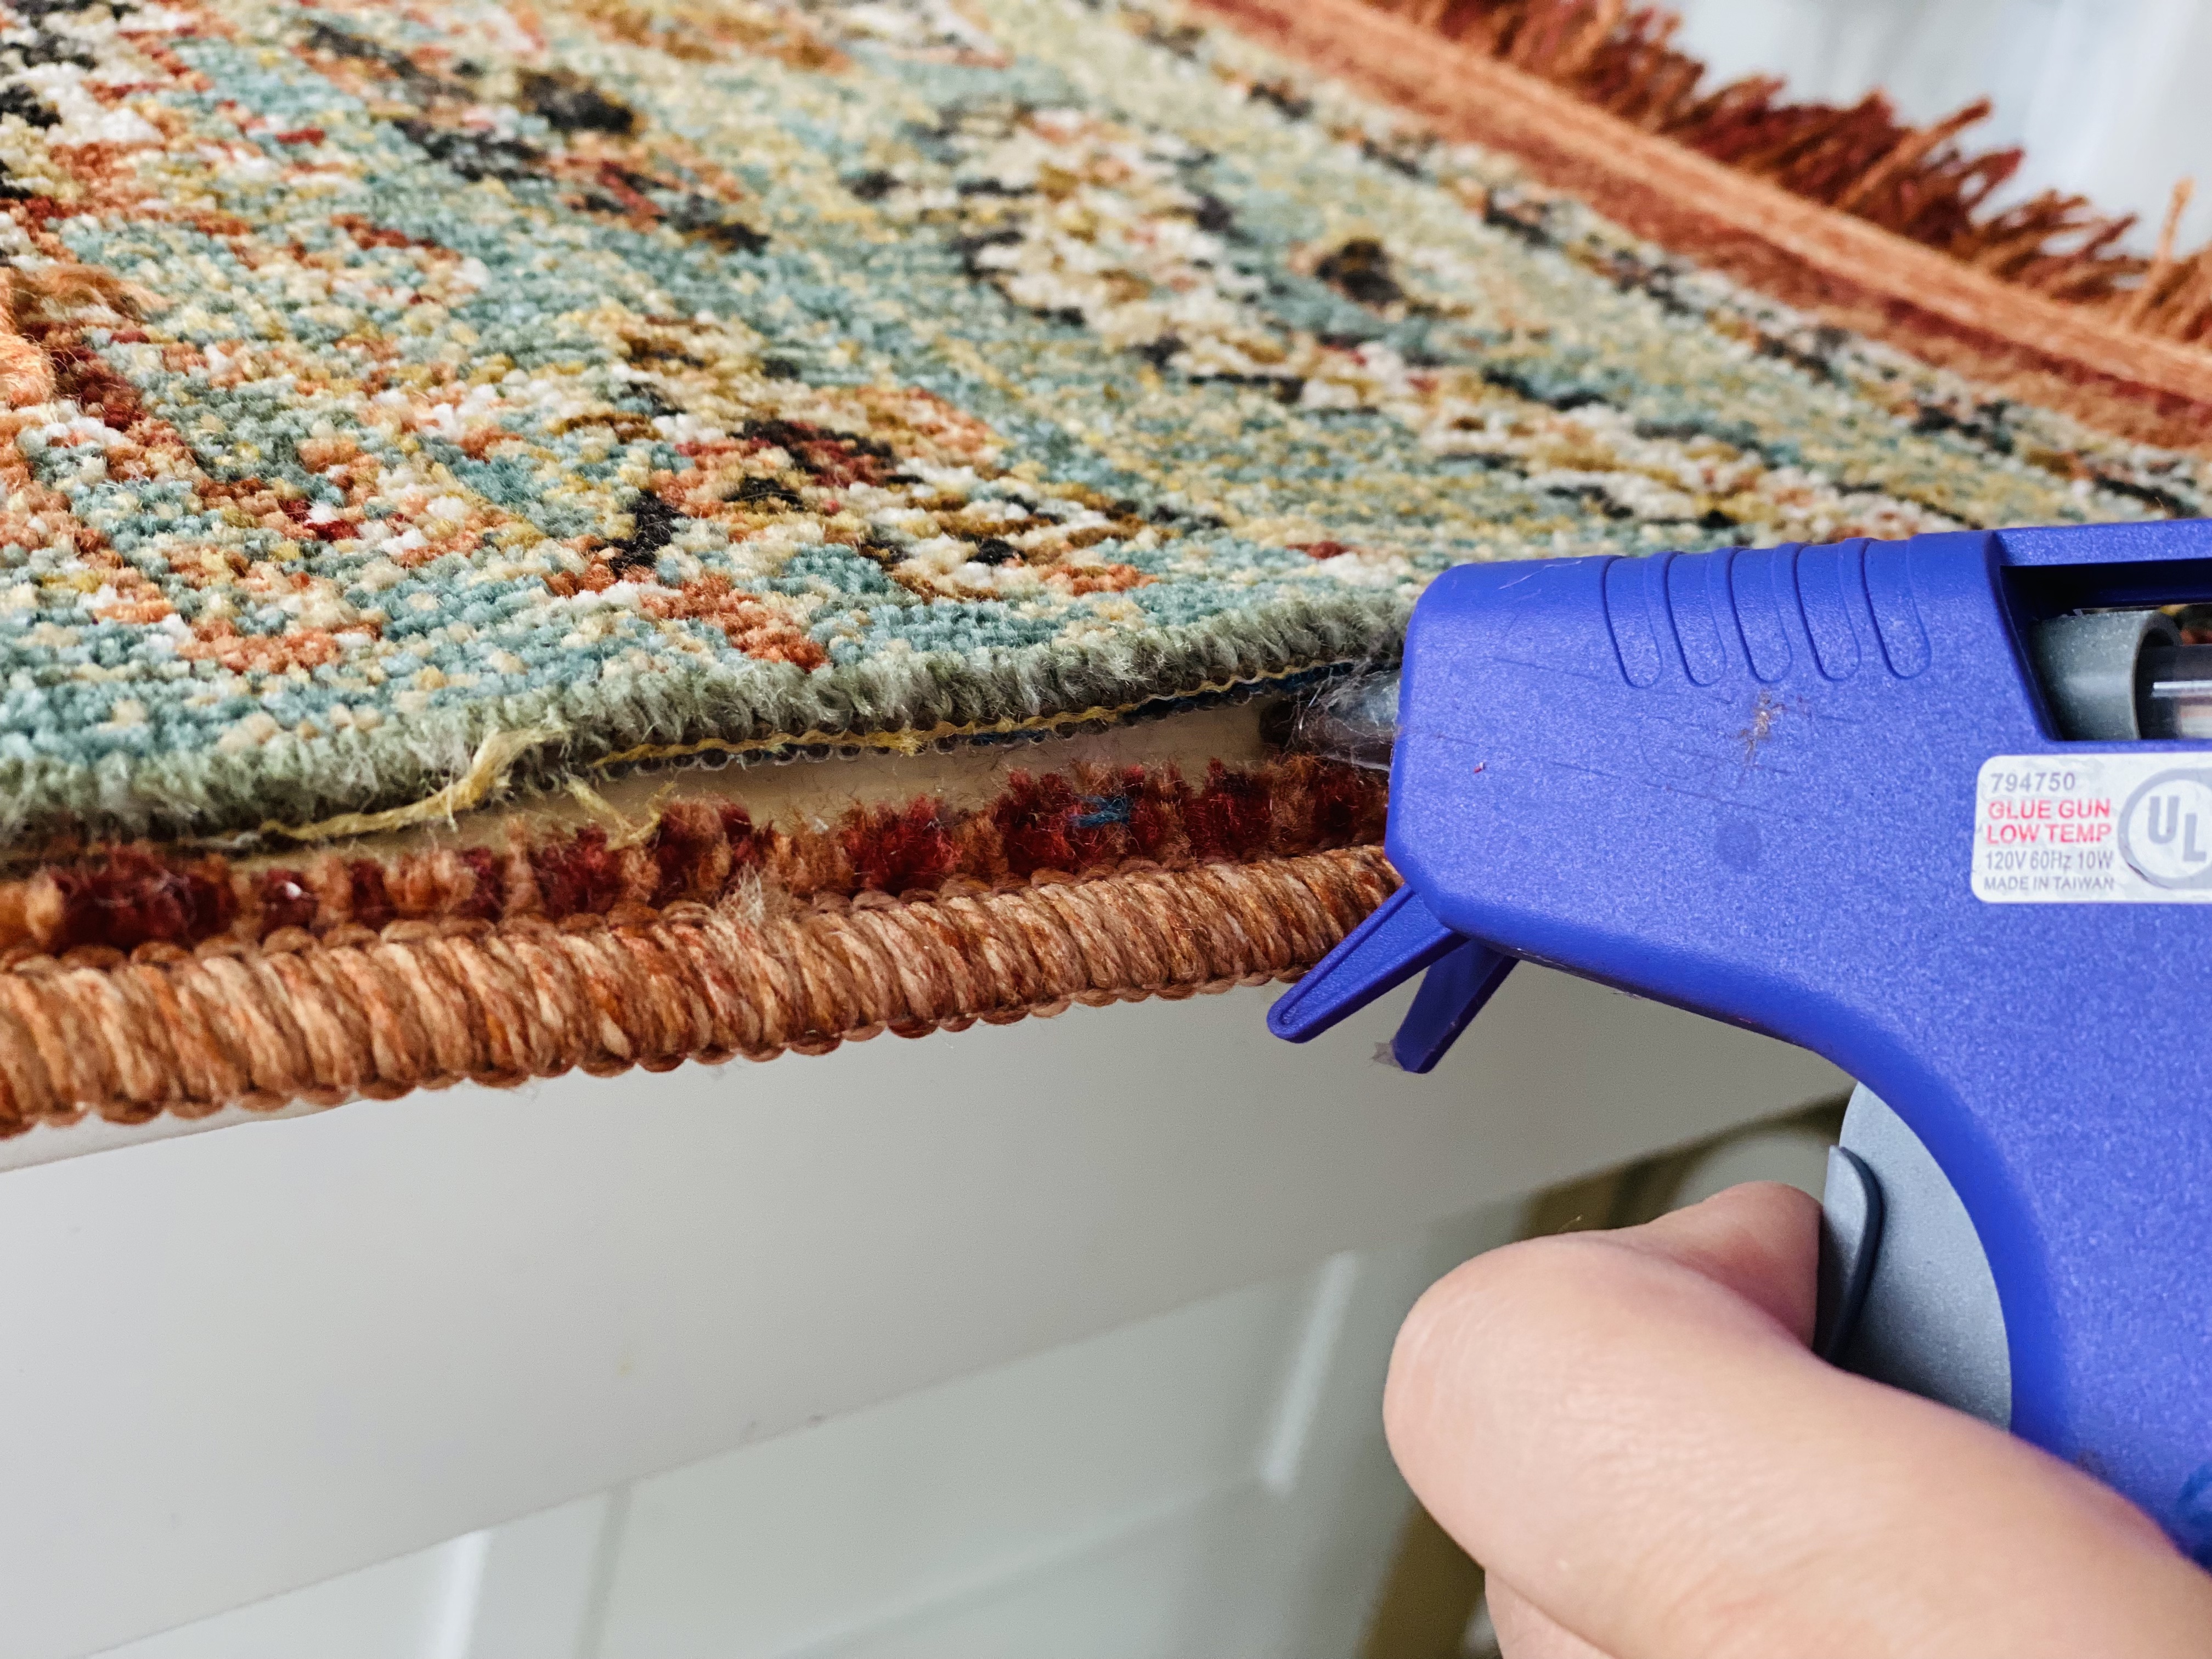
Remove the extra width you cut, and then line up the new edge with the edge binding. This part is easier done with the rug flipped over, wrong way up. Take the Duck Tape and tape the edge binding next to the new edge to hold them loosely together. Then flip the rug back over and squeeze the hot glue into the gap help together by the tape. This was easier done for me because I was working on my kitchen island and was able to let the edge binding kind of hang over the edge, thereby creating a better opening for me to get the hot glue in and then lifting the edge binding up to join the two edges together.
Now your rug should be done! You can trim away any existing fibers that are sticking out or hot glue strings or whatever. It’s not going to be perfect, but sometimes you have to accept a little bit of imperfection to get what you want. This worked great for me because it was a playhouse rug. I probably wouldn’t recommend doing this with a heavy traffic rug.
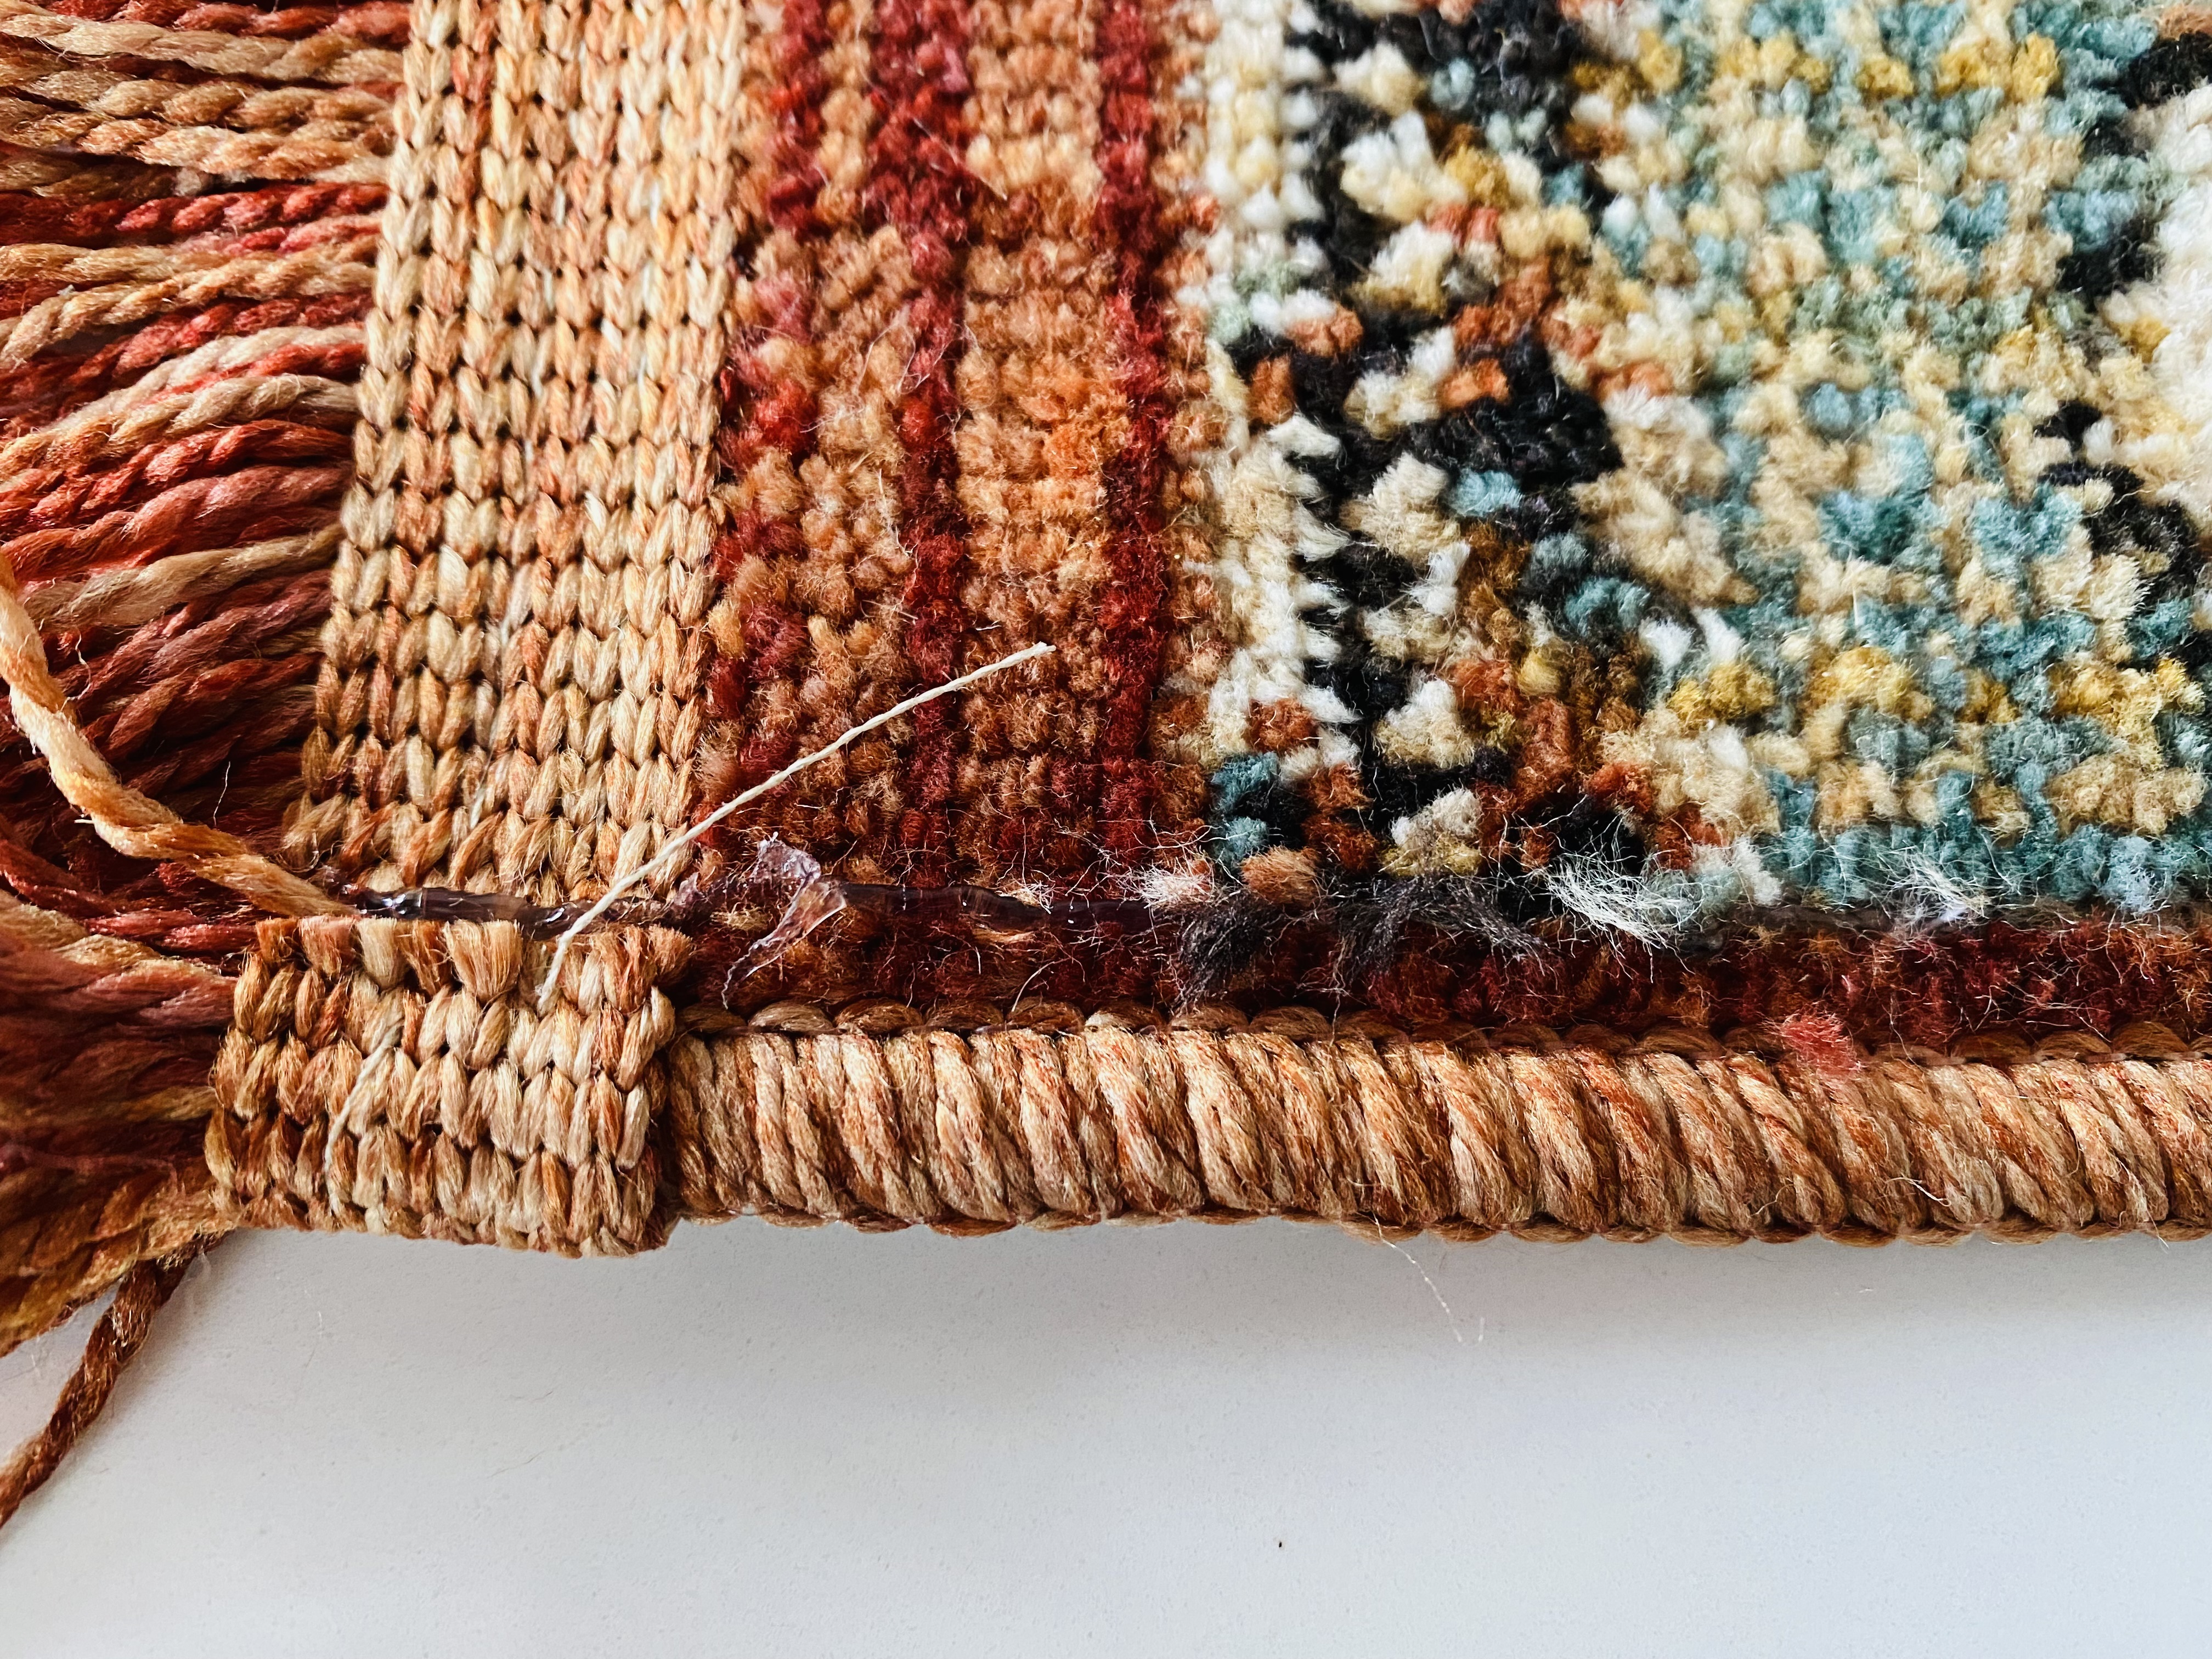
If there are any other little details you can hot glue back into place, you can do that also. Like this little piece that wraps around the outside was separate from the edge binding. These little details make it more seamless.
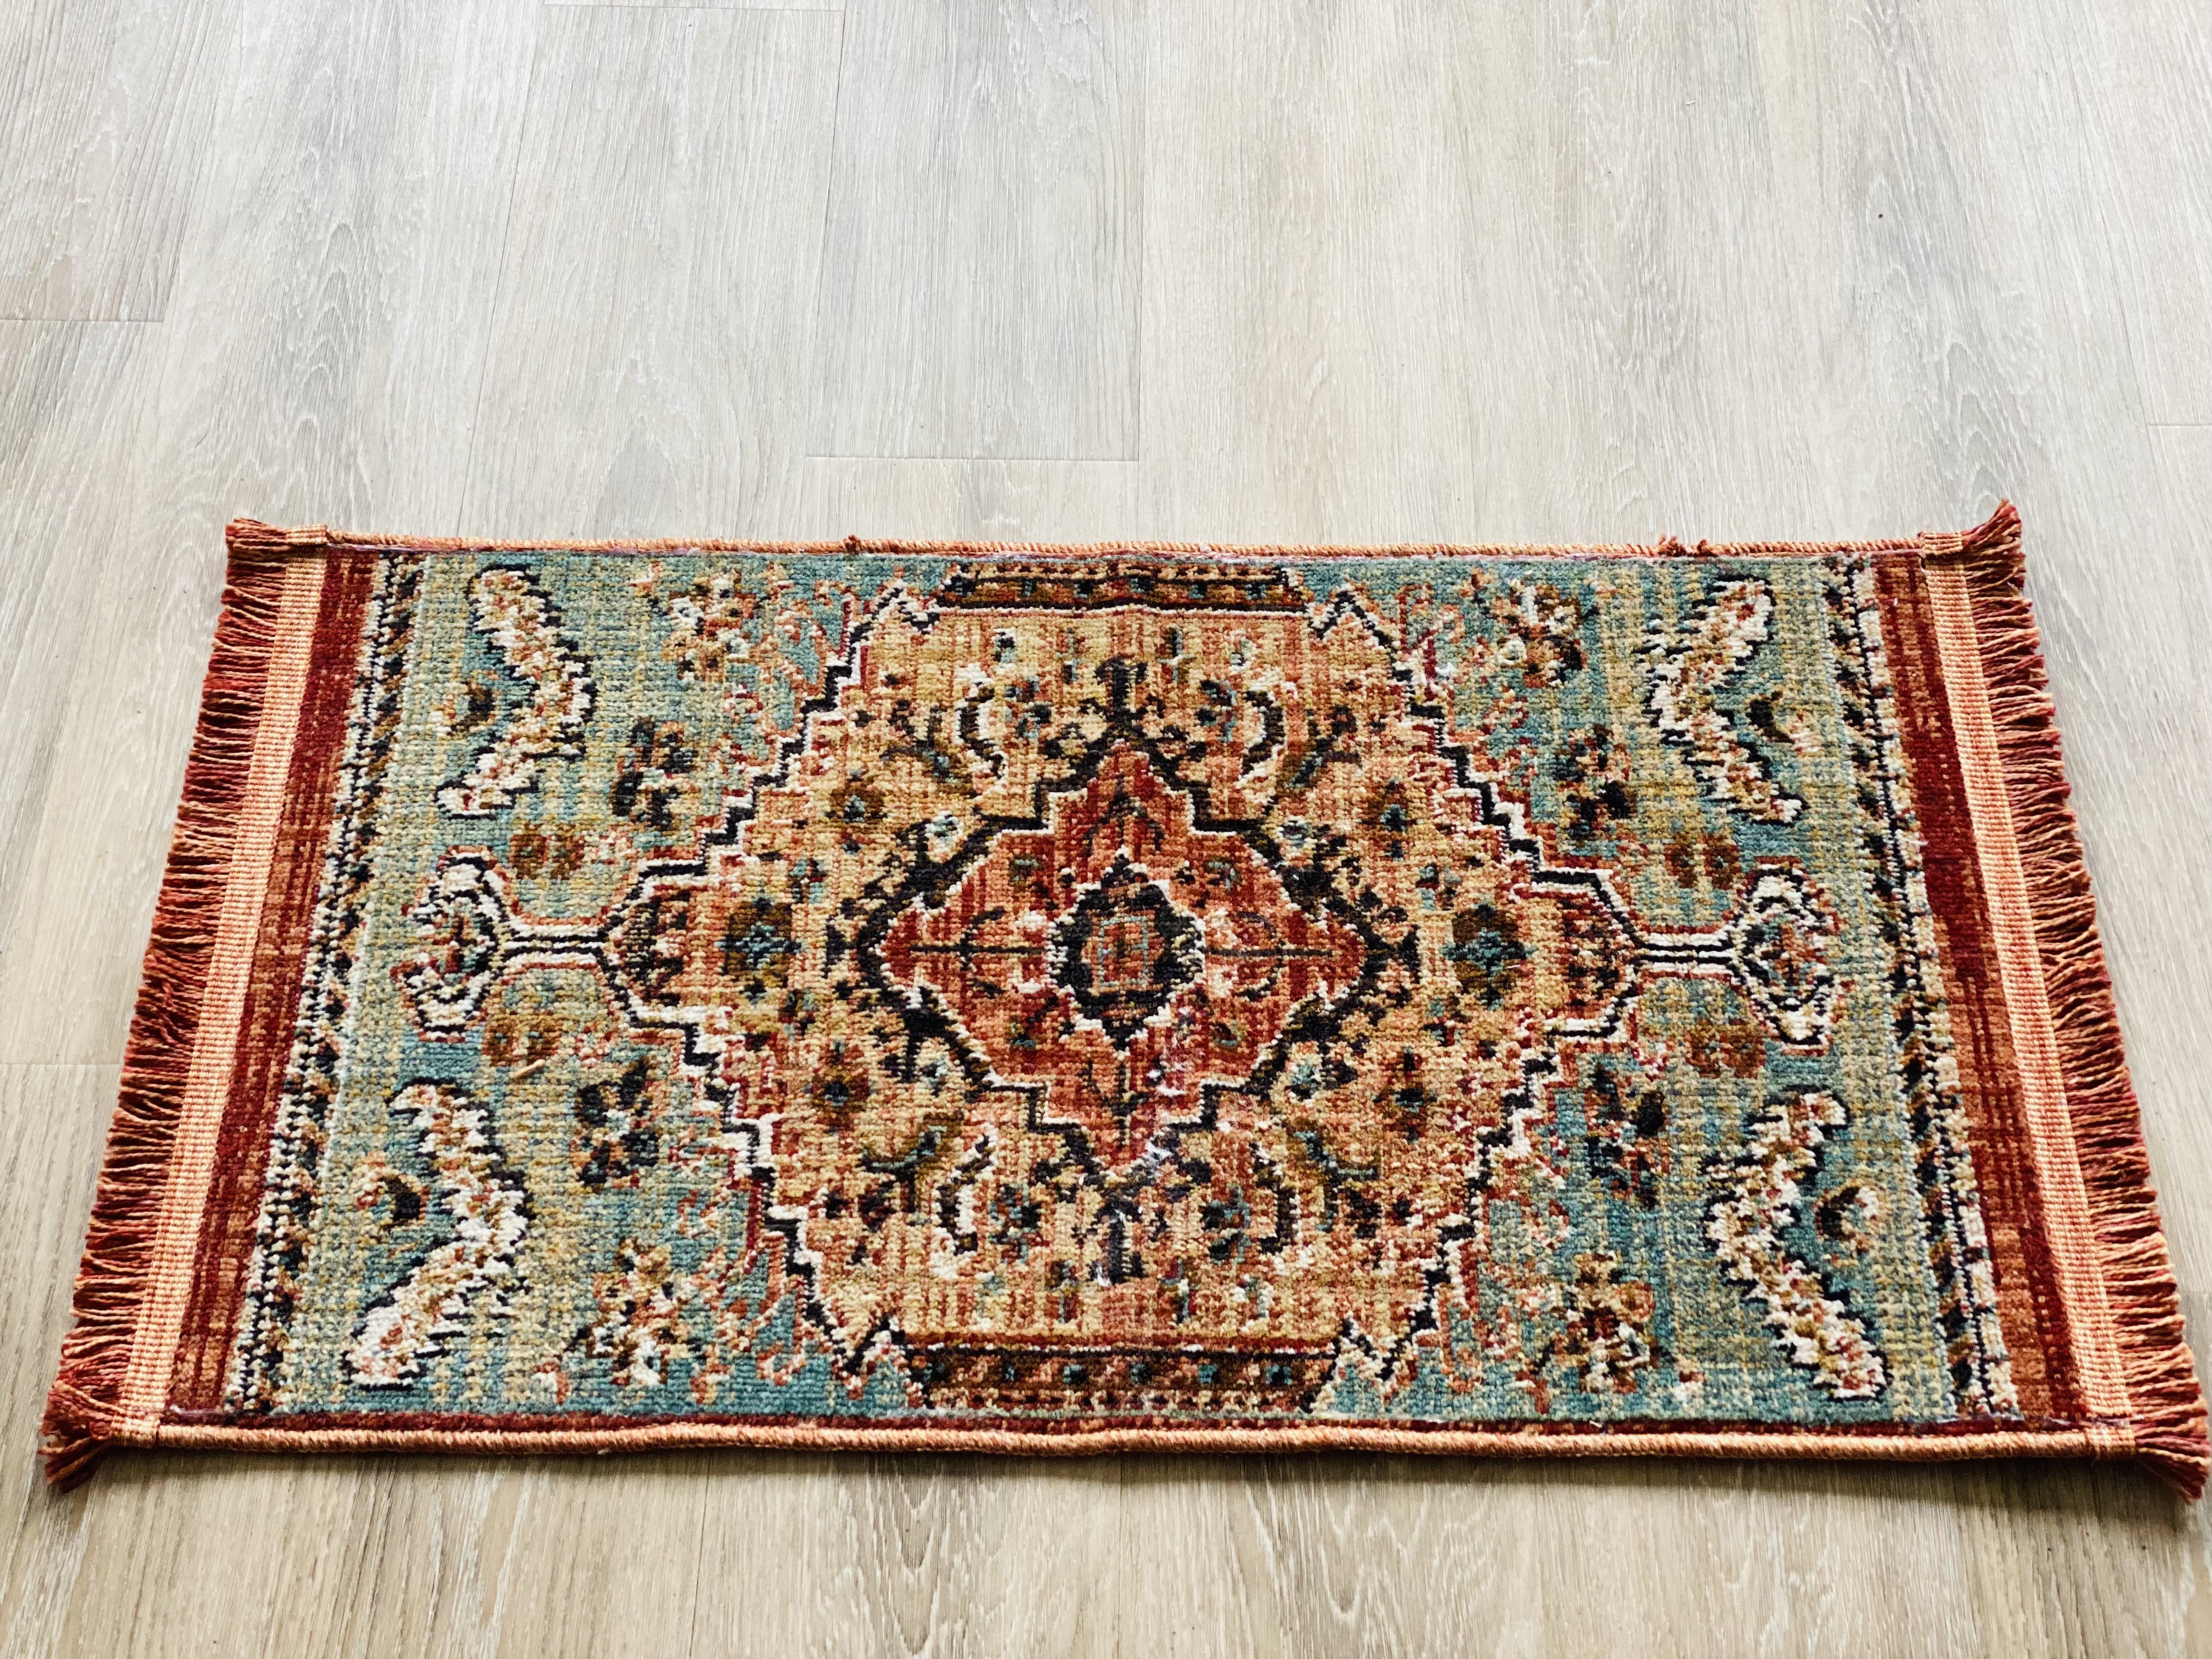
Here’s the finished rug! Obviously, this is not a close-up shot where, if you really looked, you might see some imperfections, but I think it turned out pretty great! And now it fits the exact width of my playhouse front room.
I will try to get a post done soon to share more of the playhouse.
It’s really hard on my heart to trim the new rug, but the last tip about sticking the edge. That brought the lost smile.
But, one must sure to handle it with accurate measurement.
Thanks for sharing wonderful post.
Very helpful. My cut edge will be hidden, but I might as well finish it. I wouldn’t have thought of this myself! Thanks!
Just did this today following your instructions. I was shocked at how easy this was and how good the newly cut rug looks. Not to mention no need to spend money on anything expensive. Thank you!!