DIY Doorway Trim
I recently gave my entry a makeover. I added some beautiful board and batten which you can find a tutorial for here. (It’s a little different in the tutorial, but it’s not hard to figure out how to adjust it.) But at the end of the board and batten is a large doorway that leads to the master suite. We wanted this to be trimmed out, so I planned it in with the board and batten project.
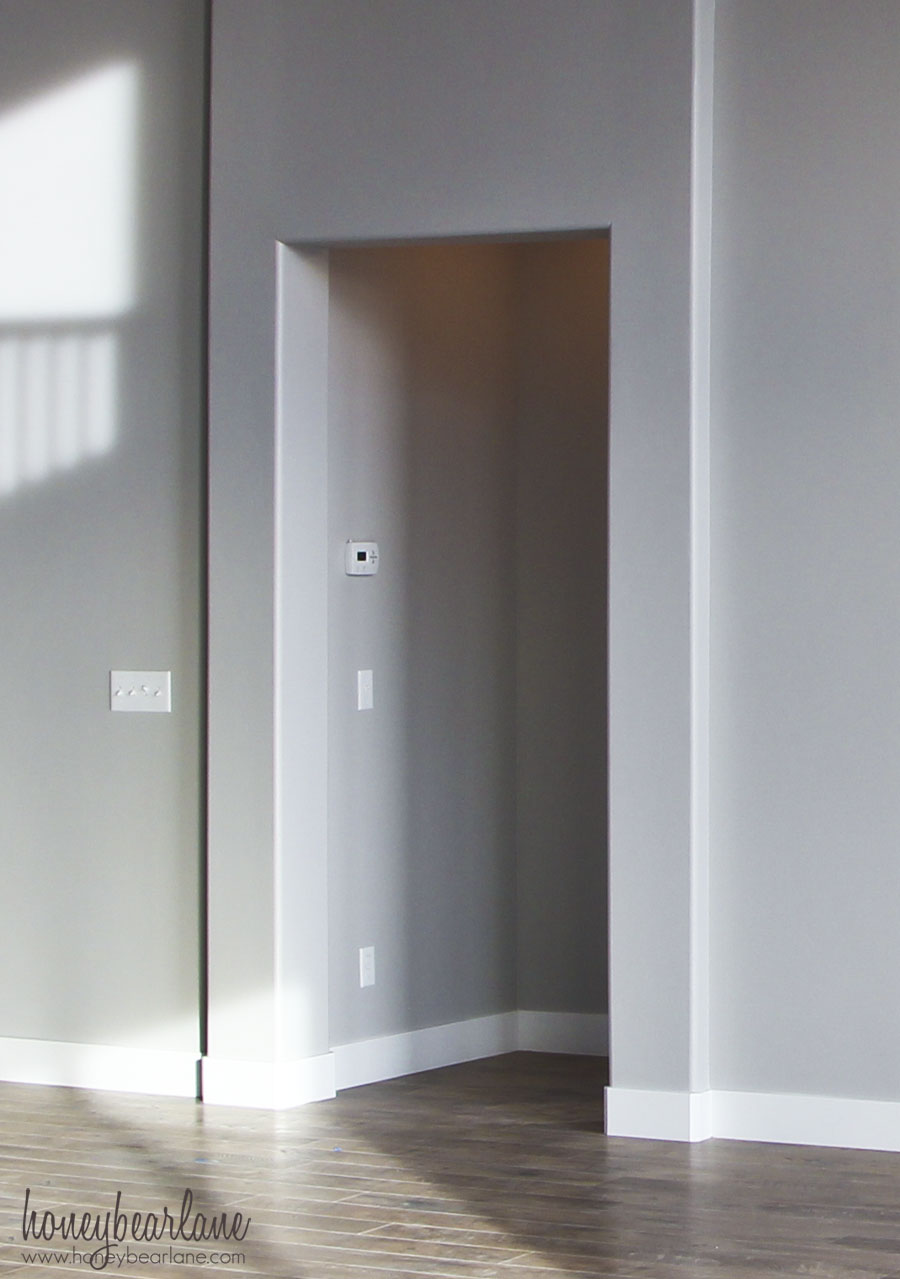
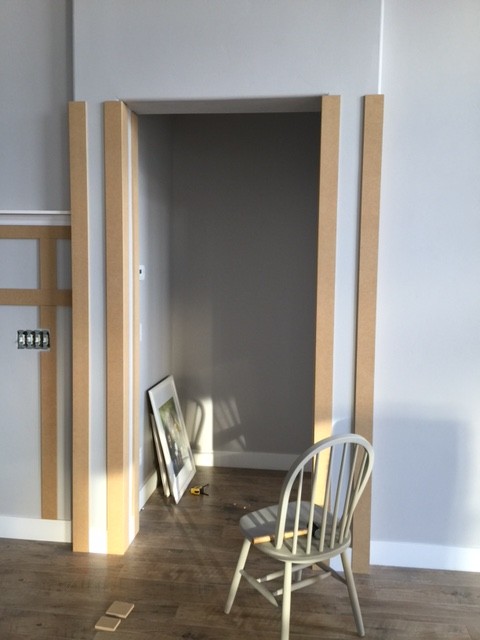
Here’s the before–you can see how boring it is.
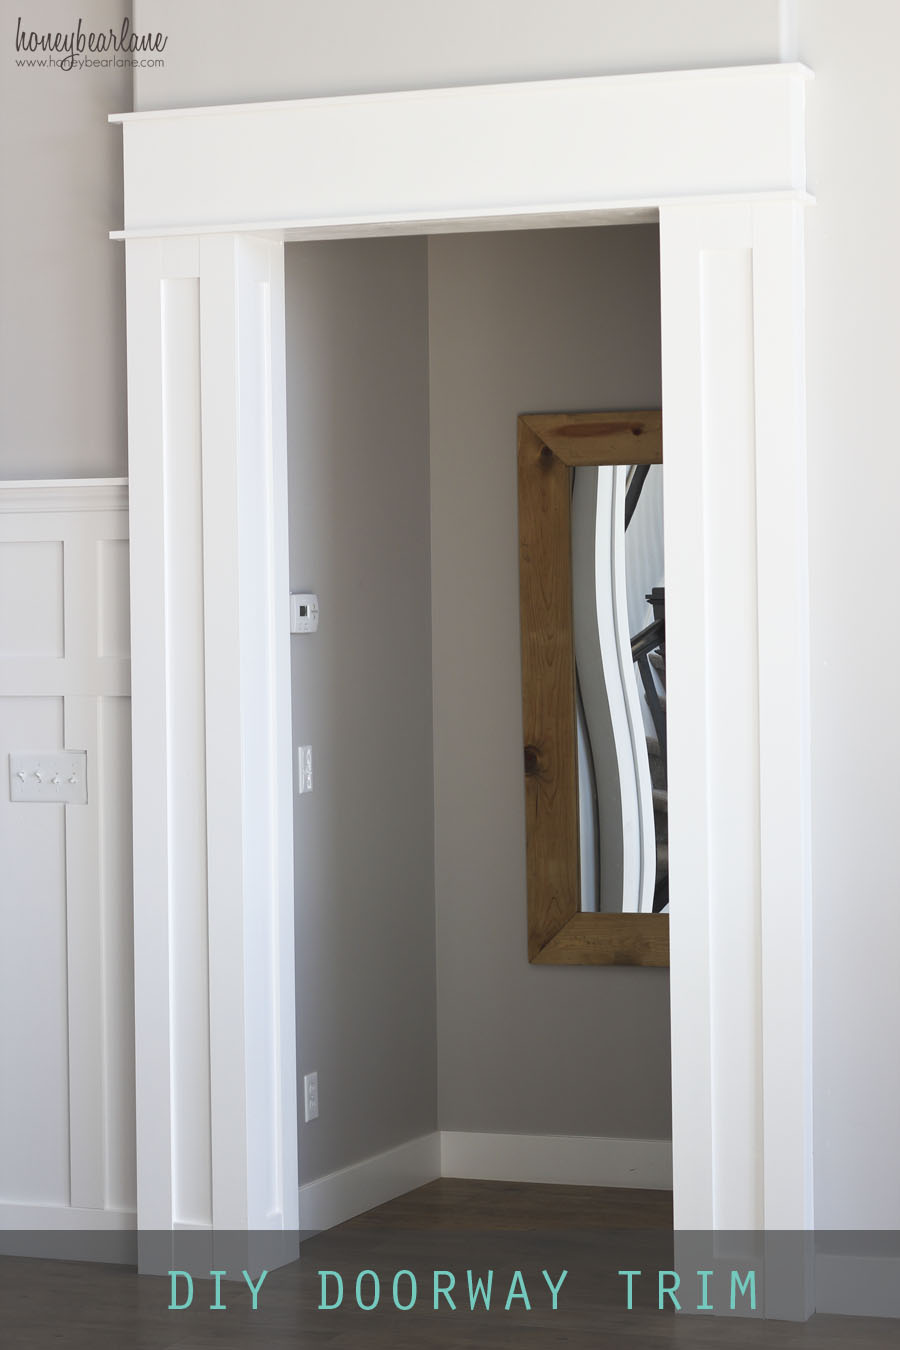
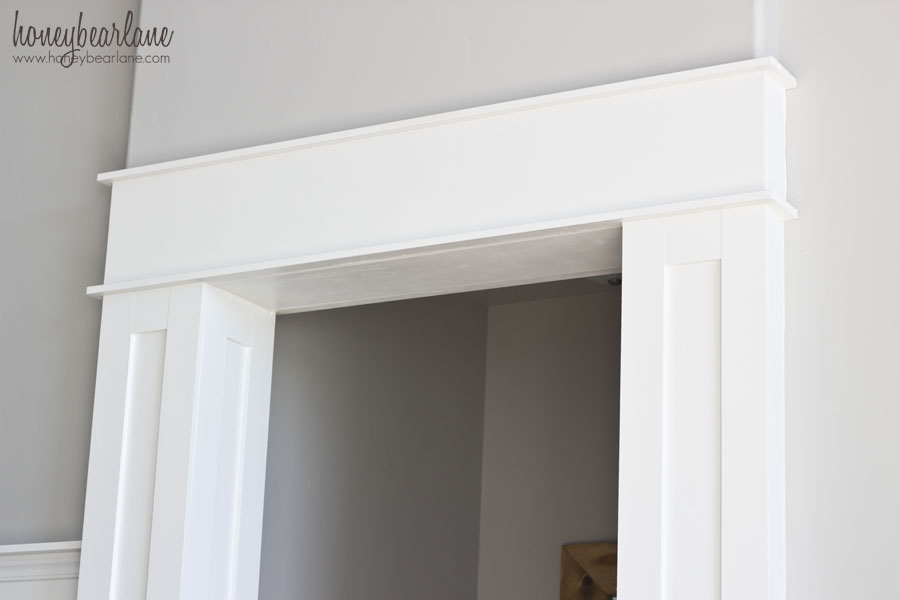
And the after! Gorgeous!

This project is impressive but not that much different than putting up board and batten.
DIY Doorway Trim
Supplies:
- 1 4×8′ board MDF 1/2″ thick, ripped to 3.5″x8′ pieces, except for one 10″x8′ piece
- 2 1×2 boards of pre primed MDF
- 2″ nails
- Nail gun and miter saw
- White primer and paint
- At least 2 tubes of caulk
- Nail filler
- Small crowbar and mallet for removing baseboards, possibly a Dremel
First I had to remove the baseboards. You can skip this step if your baseboards make a sharp corner. My baseboards were made to be rounded so they wouldn’t look good with the sharp corner I was planning with the trim. So I ripped them out. It’s pretty easy, albeit time consuming (like all this stuff is). To rip it out, use a razor blade to cut along where the baseboard meets the wall (this is where it’s caulked. If you skip this it will be harder to pull out and will probably rip your latex paint on the wall.) Then I get this handy crowbar and gently pound in the wedge side with a mallet.
Pull out the baseboard gently (don’t force anything) and pry different spots until it’s loose enough. You can also use the crowbar to remove the nails sticking out. Save the baseboards because we will be putting them back in one spot.
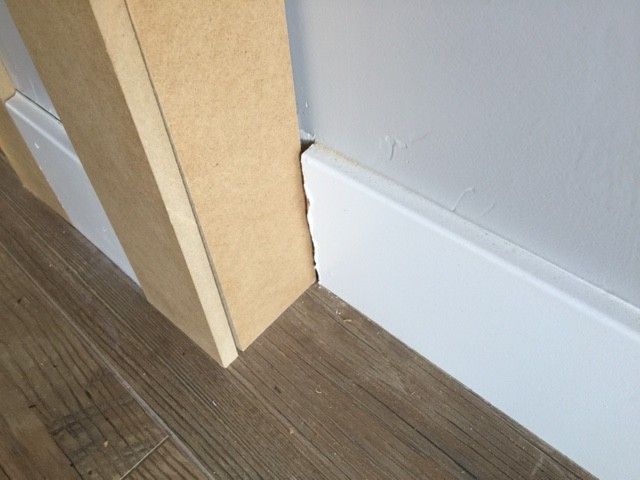
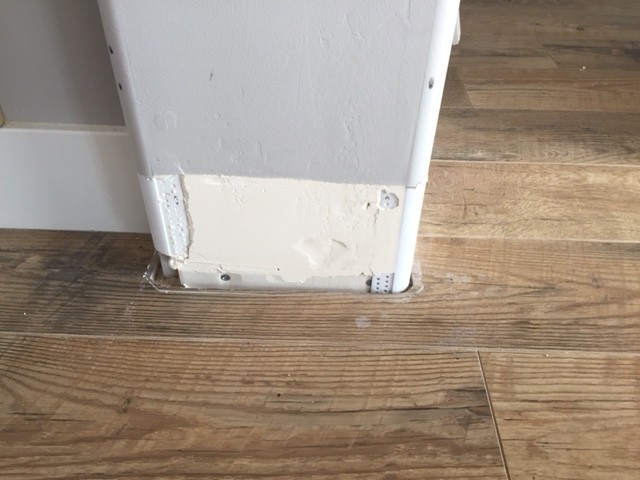
Also you might need to use a Dremel to cut the baseboard like did in the above picture. It’s really easy to do, the Dremel is probably the least intimidating saw. And just caulk that up to cover the ugly.
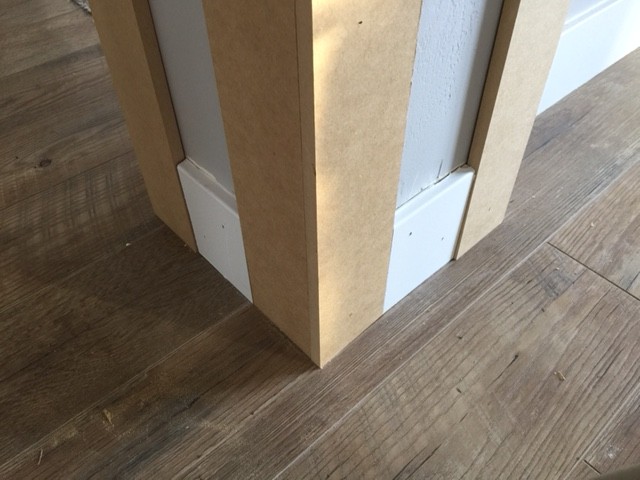
After that was done, I used 3.5″x8′ pieces of MDF (which were pre-ripped at Home Depot for me) in 1/2″ thickness and used these to make a little box around each corner of the doorway. I had to trim the length a little bit so the top of the boards were the same at the top of the doorway. My doorway sticks out so it was easy to create a column look.
***If your doorway is flush to the wall, you could build it out with something like a 2″ or 1″ but this will take more engineering. You would also want to add some 2×4’s to the studs to make the doorway stick out and then cover it up with trim. ***
It can get a little tricky because you will want the seams to be facing a direction they won’t be seen very much. If you have a table saw, you can also cut the edges on a 45 degree angle so you have a perfectly mitered box. But I don’t and I was okay with just hiding the seams. I wrapped the trim all the way around three sides, leaving a gap in the middle. It looks weird when it’s not painted but it looks normal once it is. I nailed all these in with my Ryobi Airstrike Brad Nailer and used 2″ nails in the studs. I marked the studs before starting.
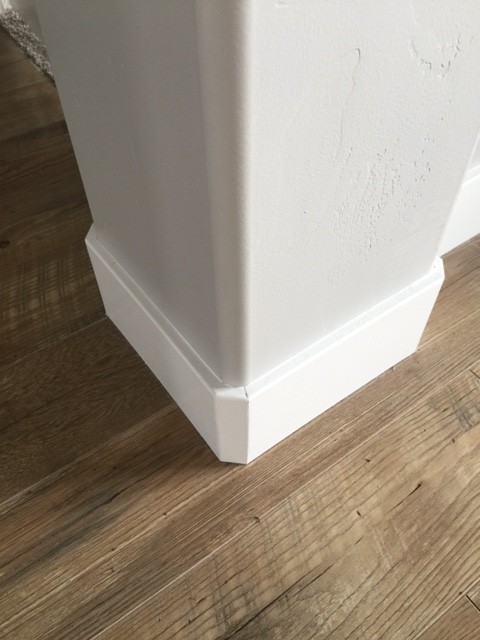
Take a piece of the baseboard you ripped out and hopefully it is in good condition so you can use it. Measure it to be the right width to fit in between the trimmed corners, to sit at the bottom of the space you left. Then cut another piece of the 3.5″ MDF to fit at the top space. I numbered each side and then numbered my pieces before I cut them because each space was slightly different.
The top piece, which I regret I forgot to take a picture of, is easy enough to make. When you are having the store rip your MDF, have them rip one piece at 10″ wide. Measure the width of your newly trimmed doorframe, from one side of the boxes to the other side. Cut your 10″ wide piece to this length. Then using your 1x2x8 pre-primed MDF trim boards, add 2″ to the measurement of your 10″ piece and cut two pieces. Nail these pieces together, sandwiching the 1x2s on either side of a 10″ board, leaving 1″ hanging on either side of the 10″ board. Then place this header piece on top of the doorframe and nail it into the pre-marked studs. I also cut little versions of these to wrap around the sides. And finally I made another one of these for the inner side of the doorframe, except I used a 5″ wide board instead of a 10″ because the space was smaller.
Now everything is in place! It’s time to get out your four tubes of caulk and put in your headphones and start caulking for the rest of your life. Maybe it just seemed to take forever because I was doing the board and batten at the same time. I also used nail hole filler to fill in all the nail holes. And I also sanded the rough edges of the MDF to be smooth. This helped with the seams blending in more.
Finally I taped up the sides and painted everything. Two coats of primer, two coats of latex paint. One thing I do is actually tape the sides before I caulk. I had some larger gaps to fill so I did it with caulk. Then I painted it with 4 coats of paint, so I had to use a razor blade to cut the tape off. In the spots that looked weird, I retaped it, recaulked it, and removed the tape immediately after before it dried and got a clean edge. This might be confusing, but it will make sense when you do it.
I love how my DIY doorway trim turned out. It really wasn’t that hard, just a lot of little details and things to figure out. I’m a little burned out of trim though and soooo much more to do in this house. I’d love to trim the windows next. Anyone have a spare $10,000 to give me so I can just get all these projects done? 🙂
What are you working on?
Love your DIY project! It looks beautiful! My husband and I just purchased a fixer upper home to live in for a while during renovations then we are going to rent it out. We have decking to do, fencing, I need to paint the bathroom, tile the bathroom floor, yeah the list goes on. lol. Whenever I feel like doing the bathroom project I’ll post pics. 😉 Love your blog though – have a blessed week! – Melinda –
Thank you and good luck with all your projects!
That looks so good! I can’tell wait until my wall looks like that.
Hi Heidi,
You home looks so lovely! Can I ask what you paint brand and color you used on your walls?
Thank you! It’s Sherwin-Williams Passive Gray.
I love the look! Can you tell me how much space is in between the sections from one another?
Thank you,
Cindy
It’s about 3.5-4″
Heidi, you did an amazing job of camouflaging the bullnose edges. I have those, too and am looking for ways to trim out doorways without removing the bullnose cornerbead. This is amazing and I am stealing your idea!
Thanks and good luck!
What do I do when I get to the end and the wall is just one size and I can’t put them that 10 inches apart like the rest of them
I love the look, you did a great job. I love the grey, do you mind sharing the color?
The gray wall color is Passive Gray by Sherwin Williams.
Hi Heidi, this looks great! May I ask how high the wainscot is and is your doorway 8feet ?
Hi
Looks great. What is the materials used for the wall. Especially the top piece.
Thank you
Hi
Looks great. What is the materials used for the wall. Especially the top piece holding the picture frame
Thank you
It’s MDF and preprimed MDF.