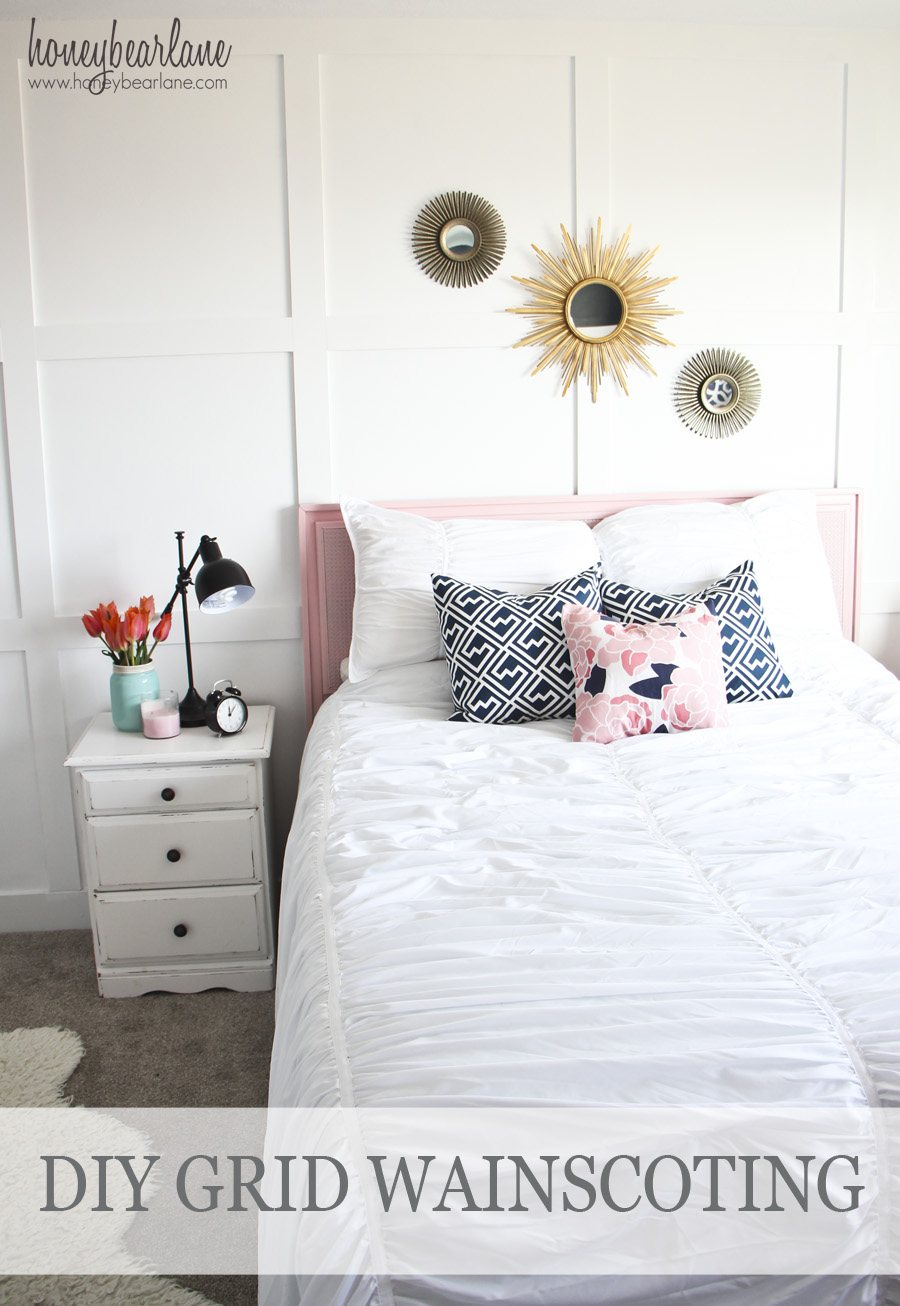
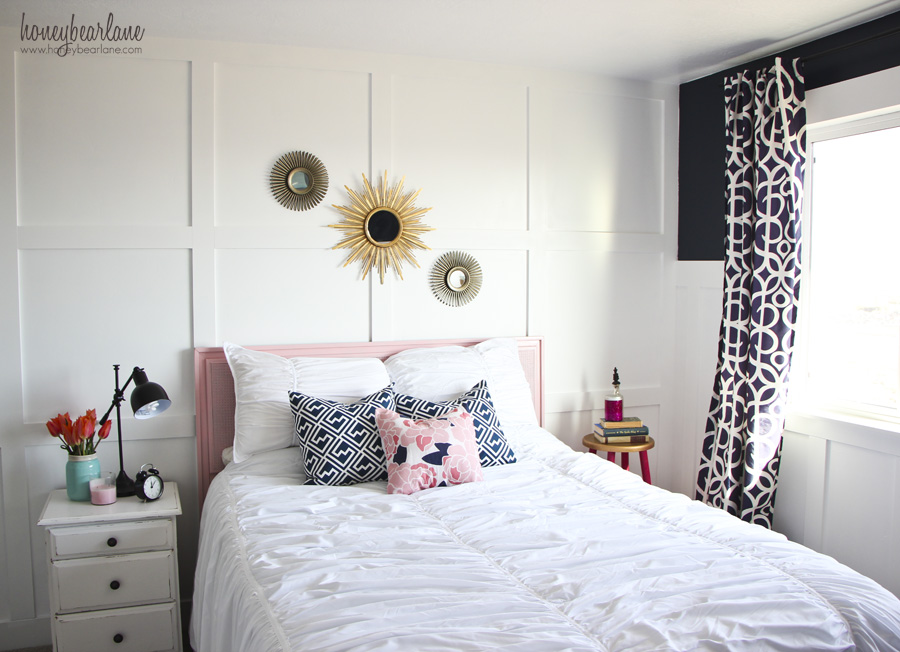
DIY Grid Wainscoting
I recently completed a huge, exhausting project–my guest room makeover. My husband thought it would be awesome if I did board and batten around all the walls except for having one wall be a feature wall with grid wainscoting. So in case you were wondering how to do it, here it is: How to make grid wainscoting.
I read several tutorials before I attempted this, but I ended up just doing it the way that worked the best for me. Whenever I do board and bat or wainscoting, I always just purchase 1/2″ MDF at Home Depot and have them rip it for me into 3.5″x8′ pieces. I also make sure I have 2″ brad nails on hand (for my nailgun) as well as plenty of caulk, nail filler, and paint. For this room I purchased a 5 gallon bucket of Valspar primer for $40. I use that for the majority of coverage and then just do a coat or two of the more expensive latex topcoat in satin.
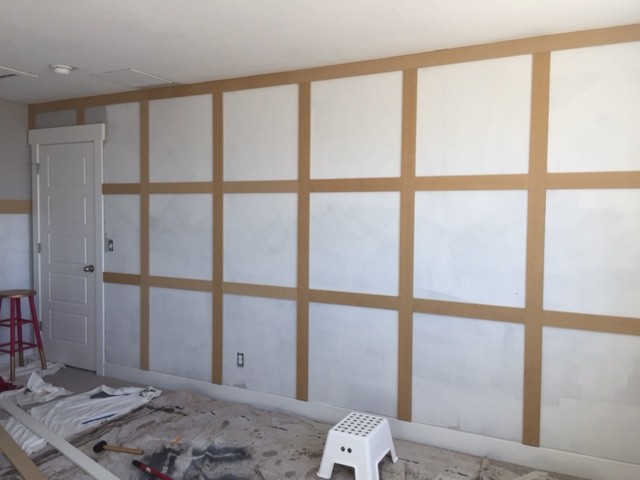
I started this out by calculating the size of the squares. I took the height of the room (ceiling to top of baseboard) and estimated the approximate number of horizontal boards I would need (just two in the middle plus one lining the ceiling.) Then I multiplied that by 3.5 (the width of each baton) and subtracted that from the true height of the wall. That gave me the height of the wall. I divided that number by 3.5 and got the height and width of each square.
The height was more important than the width since the door interrupts the wall, nobody will notice if there are full squares end to end, but they would probably notice if the bottom row of squares are more rectangular than the rest.
*Note: My baseboards have a flat Craftsman style appearance and work perfectly with my trim. But if your baseboard is detailed and curvy, you will either want to rip it out and replace it with a baton, or you could alternatively put a baton a few inches above your baseboard, which gives a more decorative, chunky molding appearance.
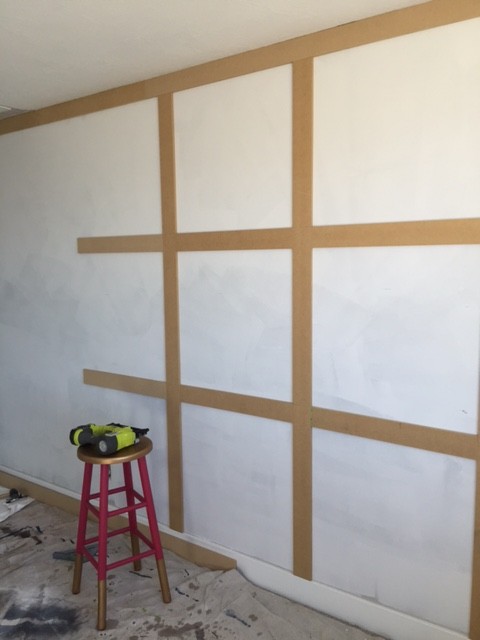
The first thing I did was outline the entire wall with batons: the ceiling and the side without a door. Something to watch out for is if you need more than one baton lining the ceiling (which you probably will). Sometimes the boards are not cut precisely at 3.5″ width which will be very noticeable when trying to connect two, end to end. Make sure you find two pieces that are the same width and place nails right at the seam so the seam is as invisible as possible.
After I had my basic outline, I cut two boards the width of the squares and nailed them on the wall in the right places (one on the upper third, one on the lower third), using a level to make sure they were level. That way I could place a vertical baton next to it, not have any gaps in seams and have the baton stay plumb the entire way up, which is tricky. I nailed everything in with my 2″ nails, trying to hit the pre-marked studs as often as I could. But I didn’t always hit it. But don’t worry…once the board is caulked and painted, it’s not going anywhere. Just note that if you are not nailing into studs–make sure that the wall doesn’t have plumbing or a lot of electrical or HVAC things running through it.
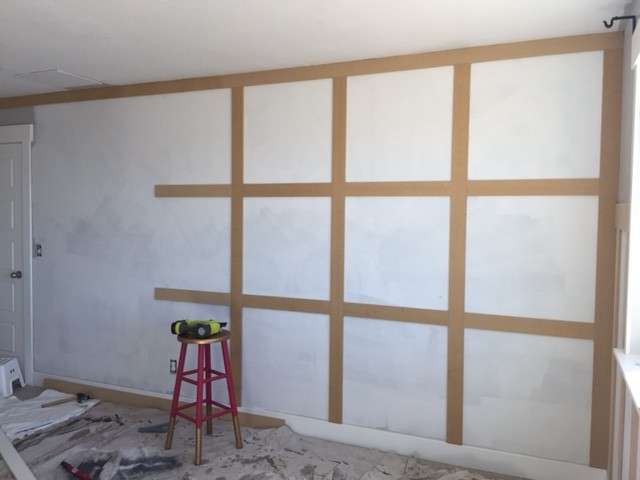
I continued this method of two horizontal, one vertical all the way across. I had to make some shorter cuts to get around the door, but that was about it. This doesn’t really end up being much trickier than the typical board and batten.
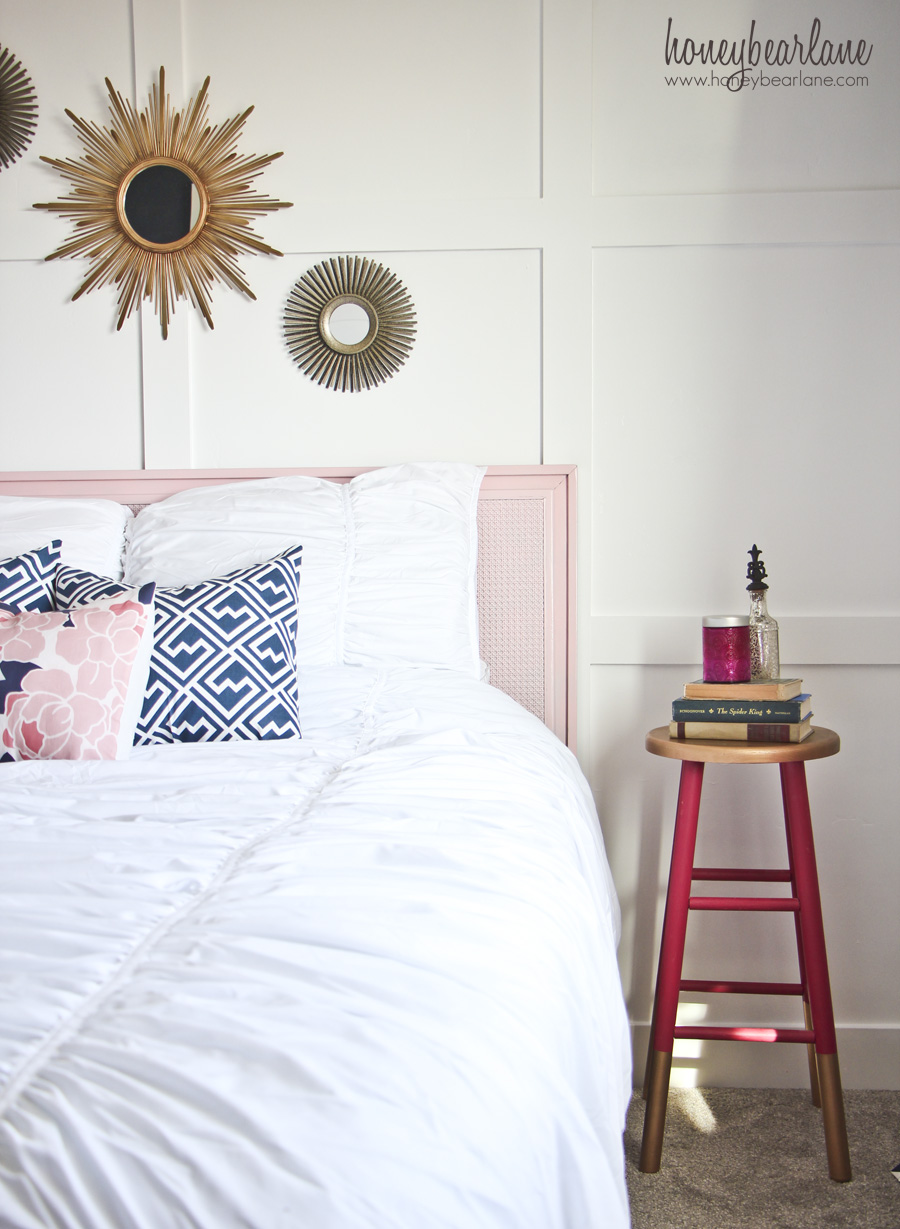
After I was done, I caulked and filled nail holes, which of course takes time. Then I painted with primer and topcoat. I used my paint sprayer a lot, but I found my sprayer worked great to the get the sides of the batons but not great for large blank areas. So I used a roller for those. Painting…I’m always and forever painting! But didn’t it turn out lovely?
That’s pretty much the gist of it. It wasn’t that hard–when I compare it to other projects I’ve done. This is totally doable, although maybe a tad more challenging than your typical board and batten.
If you want a tutorial for board and batten, check out mine! 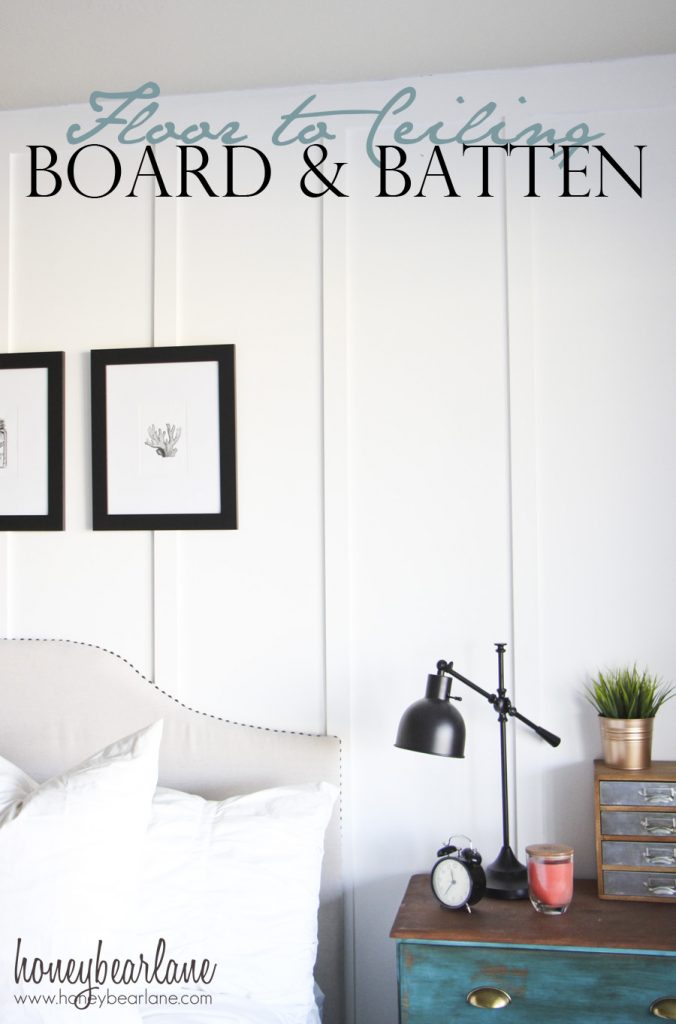 Board and Batten Tutorial
Really loved what you did to the room it lifts it from ordinary to beautiful,your hard work certainly paid off.Well done
After you have the MDF ripped do you have to sand it before putting it on the wall?
It is pretty rough on the sides so you can give it a light sanding so it looks more finished.