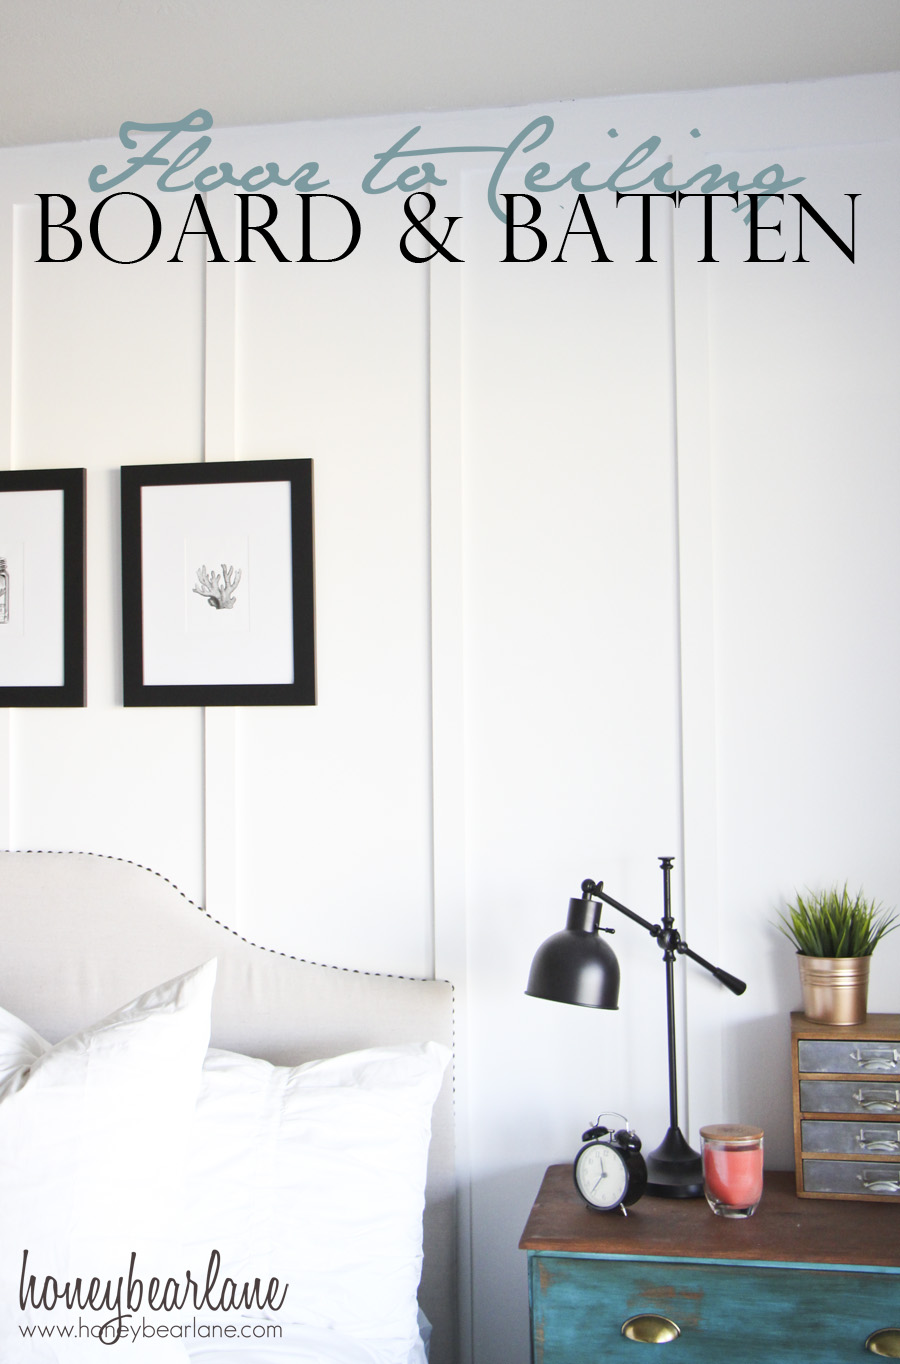
Floor to Ceiling Board and Batten Tutorial
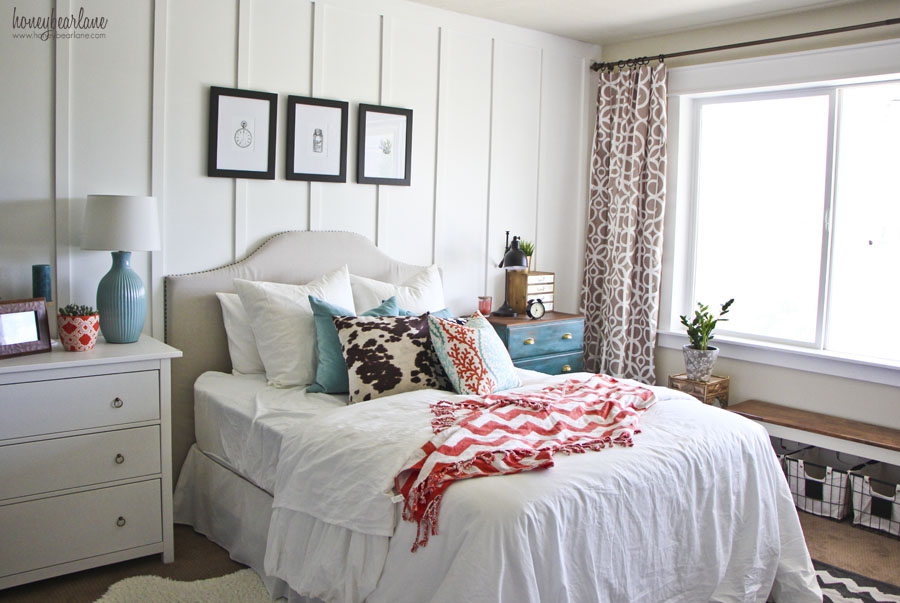
For my recent bedroom makeover, one of the biggest differences was the floor to ceiling board and batten. There are probably 1.5 million Board and Batten tutorials out there. But before I attempted it for the first time, I probably read 1.4 million of those tutorials. Everyone’s method is basically the same, but all slightly different. And everyone had little tips to share. So from my experience, I will share all my knowledge I gained.
First off: This is NOT a hard project. If you are new to power tools and DIY, don’t be intimidated by this and don’t make your husband do it. This IS something you can do by yourself. Honestly, the hardest part of this was the painting which just seemed to take forever.
Materials:
- 1 1/2″ 4×8 board of MDF ($35)
- 1 1/4″ Nail gun nails ($5)
- Ryobi Brad Nailer
- Nail Filler ($5)
- Caulk ($5)
- White Paint ($25)
- Painter’s Tape ($5)
- Optional: Jigsaw, Circular Saw
Total Cost: $80
If you have several items on hand, it will be cheaper!
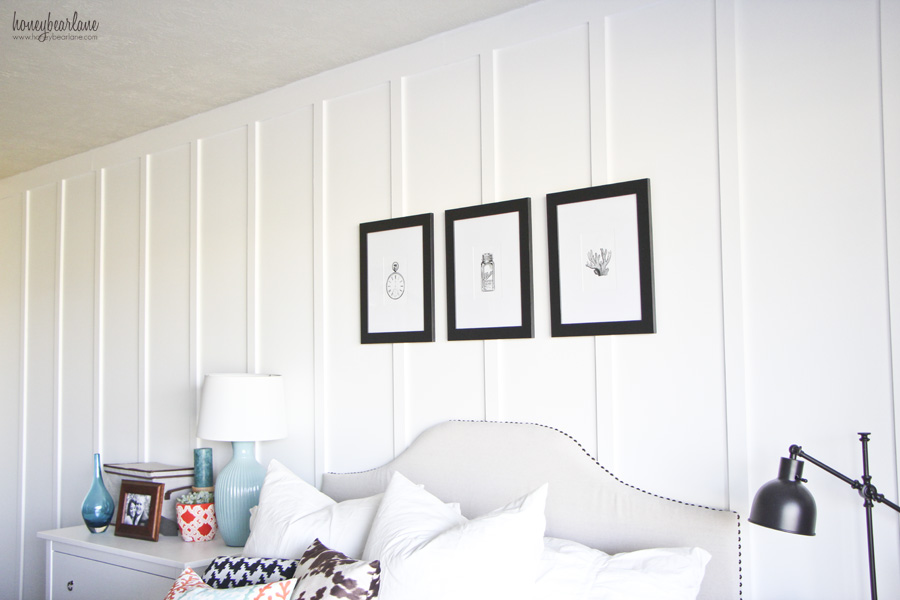
I love the look of board and batten, but I wanted this to be full floor-to-ceiling height for my bedroom makeover. I felt that if I had done a 3/4 height that is so popular it would detract from my bed as a focal point. And when you are designing a room, you want to only have one main focal point or else it gets very disjointed and people don’t know where to look. I also made my boards a little more narrow because it has more of a farmhouse style to it.
I did this entire 20 foot wall with 1 4×8 1/2″ piece of MDF. I chose this because MDF is very smooth and I wouldn’t have to worry about knots. And when you have Home Depot cut it for you, each board comes out nice and straight. I had Tony, the HD guy, cut 3 boards at 4″ wide and 16 boards at 2″ wide. He had to stop cutting when there was 12″ left because of HD’s safety rules. I knew I could rip the rest with my circular saw (albeit nervous.) This is not necessarily something that everyone would have to do though (I will explain why.)
Attaching the Board and Batten to the Wall
I used my trusty Ryobi Brad Nailer using 1 1/4″ nails. I decided to attach each board to a stud in the wall so I could avoid using Liquid Nails in case a future homeowner wanted to remove it. Studs are normally 16″ apart. And most measuring tapes have 16″ increments marked in red (did you know that?) So once I found the first couple of studs with a stud finder, I just went down the line and marked every 16″.
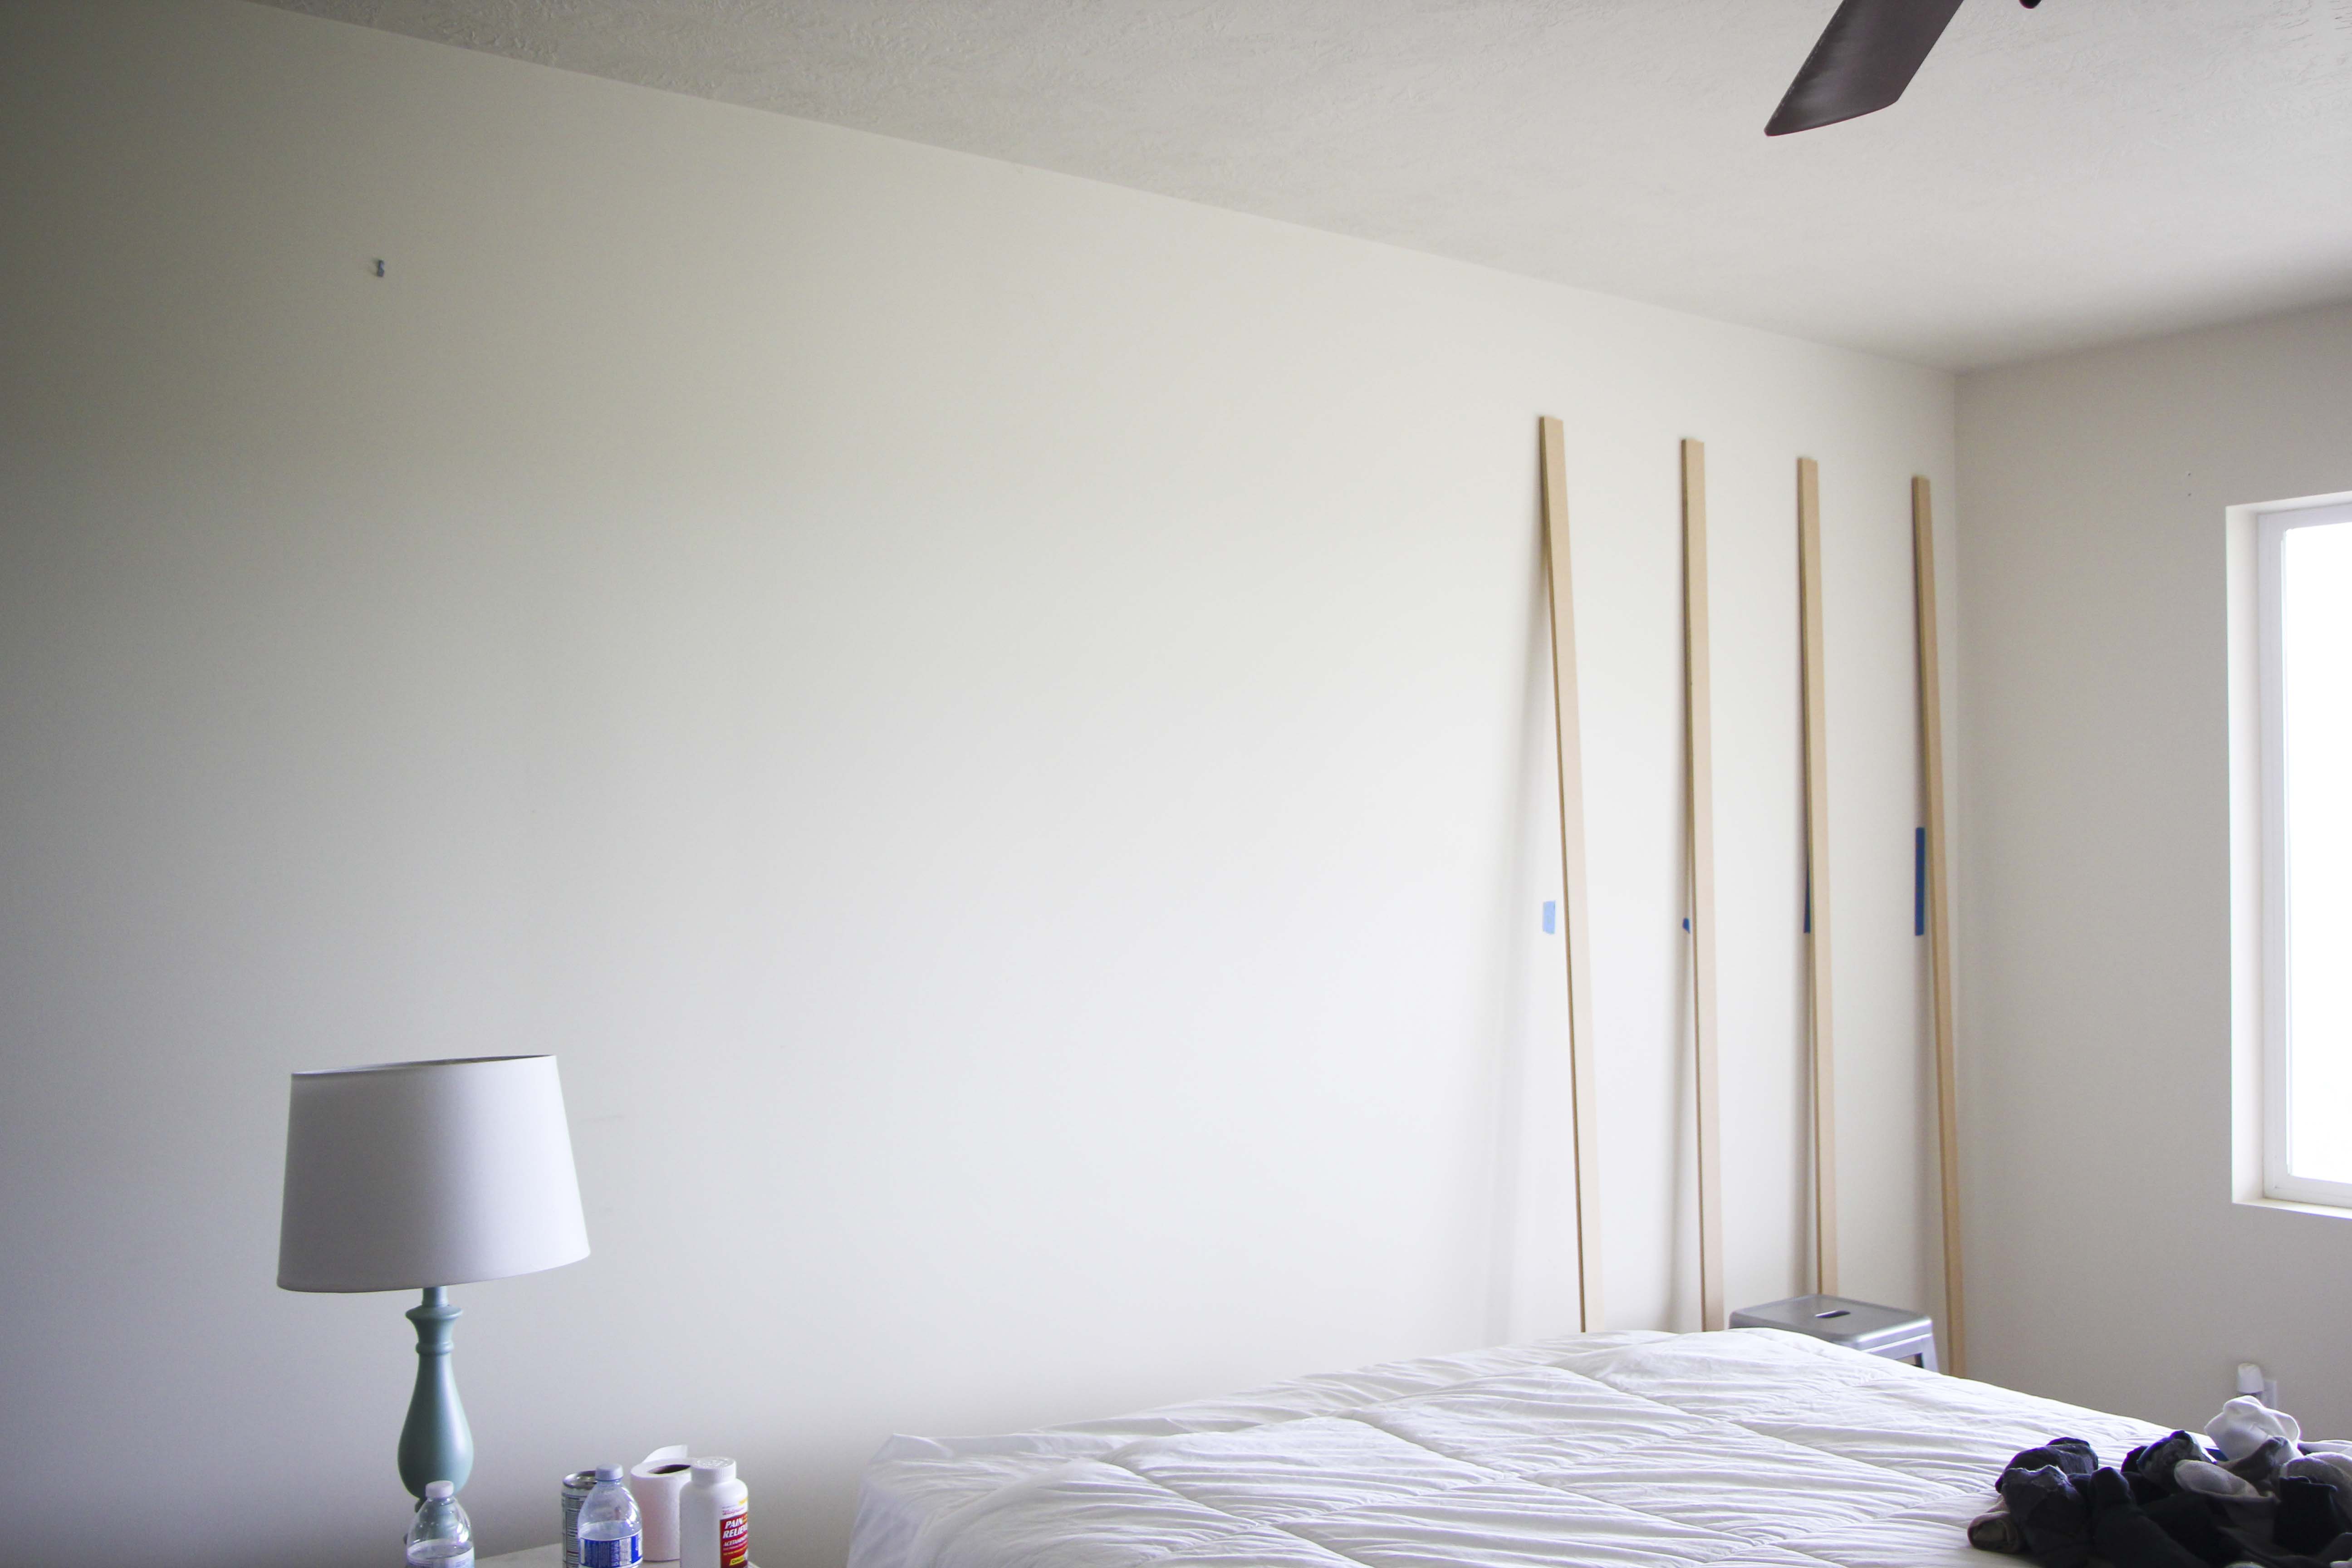
First I put up the 4″ wide boards next to the ceiling. Don’t worry about gaps, that’s what caulk is for. Nails go in where the studs are marked. Bam, bam, that’s it. The Ryobi Brad Nailer is super easy to use. Then I used a level to make sure my vertical boards were plumb (that means straight up and down.) The boards went in quickly, only took a couple of hours.

I had one outlet that I had to cut around. I just traced the area with a pencil and use my jigsaw to cut it out. It was easy.
Joining the Baseboards to the Batten
I have 9′ ceilings. So technically they are about 8.5′ high. Since Tony cut off 4″ from the end, each board ended up being 7′ 8″. Once I put up the 4″ trim at the top and the vertical board, I had a few inches of space between the bottom of the vertical board and the existing baseboard. I did this on purpose. The existing baseboard has a routered edge, so it’s not square. I considered bridging this gap with placing a quarter round at the bottom. Once it’s painted, it would look like fancy moulding. But the quarter round wasn’t as wide as the MDF I bought.

So I ended up taking that leftover 12″x8′ piece of MDF and cutting it into three 1″ x 8′ strips. This is trickier to due, since you have to rip the boards (‘rip’ is the term for a lengthwise cut), requiring me to follow a straight line for 8 feet. But doing this also helped me to conquer my fear of my circular saw (which I’d developed since for some reason I just couldn’t cut straight!) The reason YOU may not have to do this is because there are a variety of options you can do to make the baseboards line up with the bat. Some people just miter the ends of the bat so they taper inwards. Another option is to replace the baseboard with more MDF.
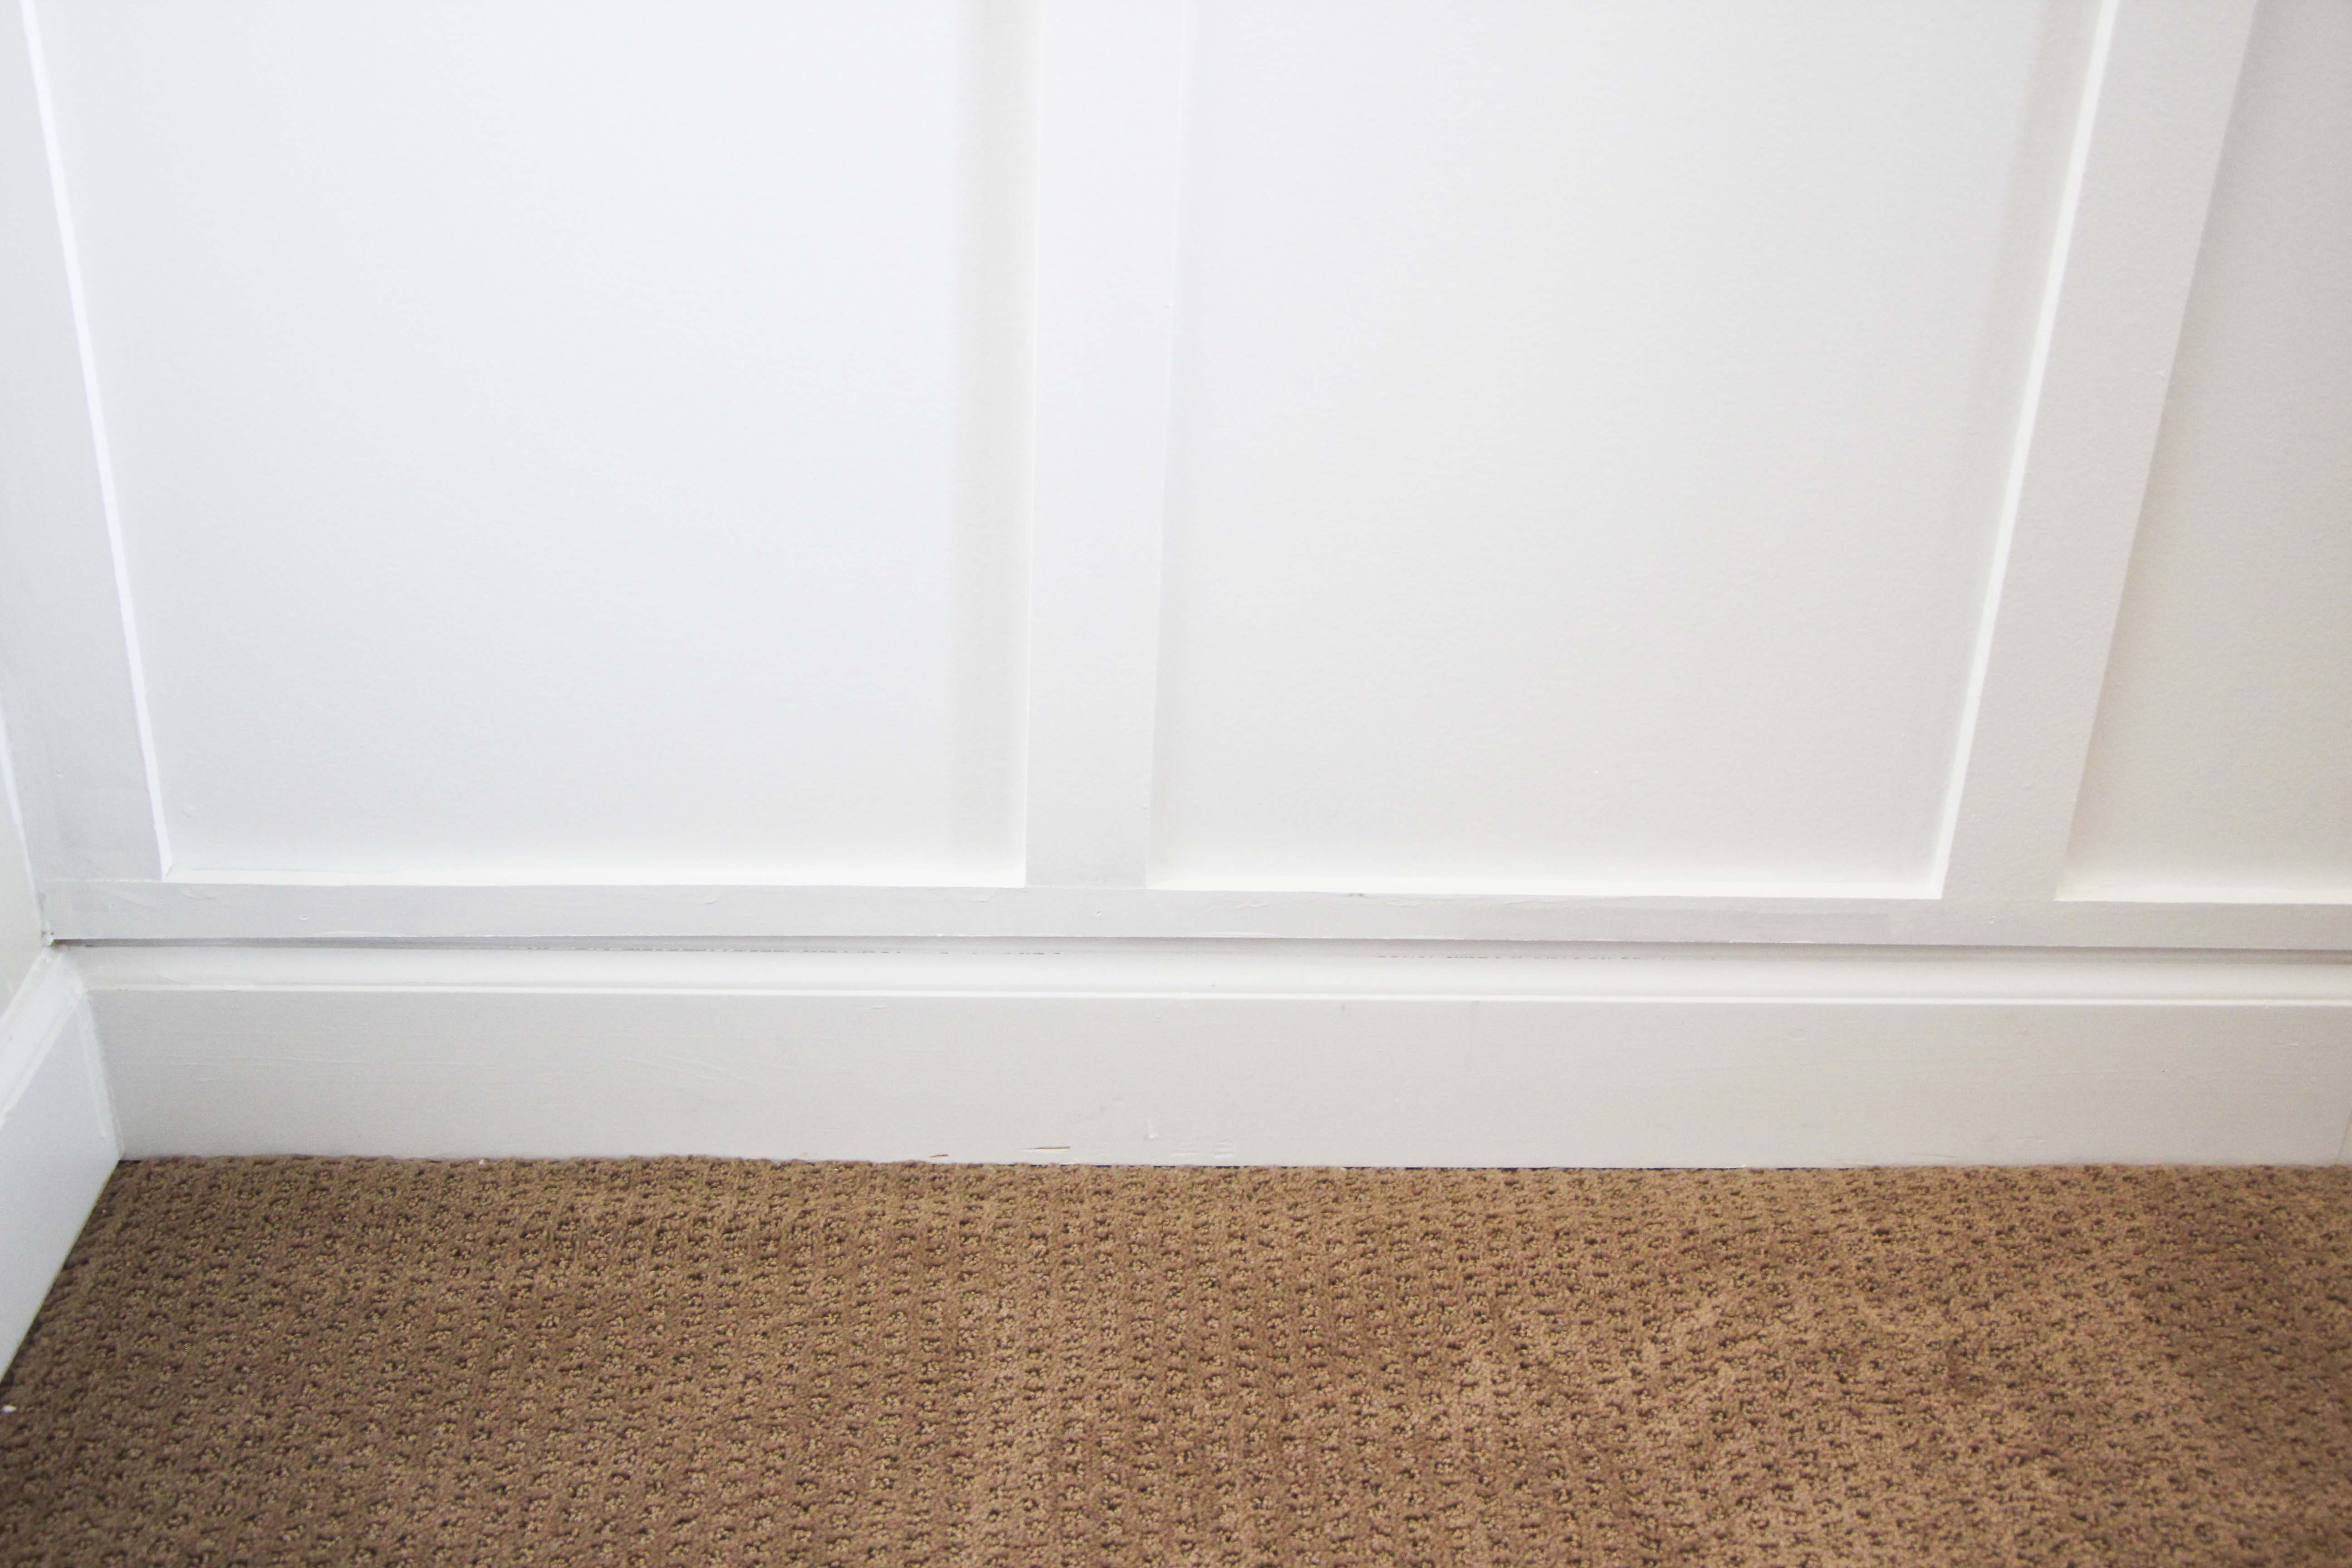
Once I nailed it in the wall, I was extremely happy that I chose to do it this way. I saved money by not having to buy more materials, and it turned out that the ceiling was a little warped and made the space in between the 1″ board and the baseboard be inconsistent. But you can only tell when the entire wall is exposed, which is probably never will be when furniture is in there. Walls and ceilings in rooms are rarely square and plumb so you have to take this into consideration and be flexible. Once it was painted, it looked gorgeous.
Caulking
The next step is caulking and filling nail holes. Here are some important tips when doing these two things. First off, NEVER fill nail holes with caulk. Caulk does not easily sand down so you will end up with little mounds of caulk on your nail holes. Just purchase nail filler putty at the store and do it that way.
Second, when caulking, if you are not planning on painting the ceiling or surrounding walls, put tape on FIRST. I wish I had taped off the ceiling before caulking because the caulk was white and the ceiling was beige. So the caulk smeared onto the ceiling and doesn’t look as crisp. If you tape first, then caulk, the caulk will still fill the cap but the tape will leave you with a crisp edge.
Painting the Board and Batten
I considered painting everything first and then hanging it up. And after doing it the alternative way, I think I might try painting everything first next time. I used my standard Behr basic white paint in Satin, which has always been great. It has a primer built in. But the MDF felt like it just drank the paint in, especially on the cut edges. I felt like I was painting for days. If painting beforehand, I could form an assembly line with a roller and give each piece of MDF an even coating. Then turn them all on their sides to paint the edges. Seems like that would just save a lot of time doing detail painting.
I also wish I had sanded down the edges a little better. You don’t have splinters sticking out, but it’s just not as smooth an edge as I’d like. Once I’d given the wall several coats of paint, I added a little more caulk here and there where there were gaps.
I don’t think I forgot anything I learned from this experience. It wasn’t really hard, but the painting was time consuming. It would have been nice to have help, mainly with the painting, but I am also proud I completed it 100% by myself.
To see more of this room, click here.
Thanks Heidi this is a wonderful tutorial. Love the look, totally changes the room.
Thanks Diana! I love it!
Your room looks so bright and welcoming. Great job and thanks for all the tips. I got a bunch of tools last summer, I’m looking forward to trying something like this!
Thanks! And totally go use those tools!
LOVE the board and batten! Looks great =)
Did you do only one wall of the room?
Yes for this space I only did one wall.
How long did the project take to complete?
Did you have to let the MDF acclimate?
Since it was just one wall, it didn’t take that long. The nailing up of the boards took a few hours and then painting took a day or two (because painting always takes forever lol). I did not let the MDF acclimate and it did fine. I’ve never let MDF acclimate. Or wood for that matter haha!
You go, girl! You did a great job! I’m proud of you.
I am curious as to how big your room is. I was telling my talented remodeling husband about the 16″ nailed to each stud you did and he said he didn’t think that would look good in the bedroom we are going to redo because it is a small room. Approx 12×12. I love the look of your room! Thanks for any help you can give me.
You don’t have to stick to the studs, it just helps make them stay better. However you can add some caulk to the back side for extra adhesion and with caulk and paint, it should stay just fine.