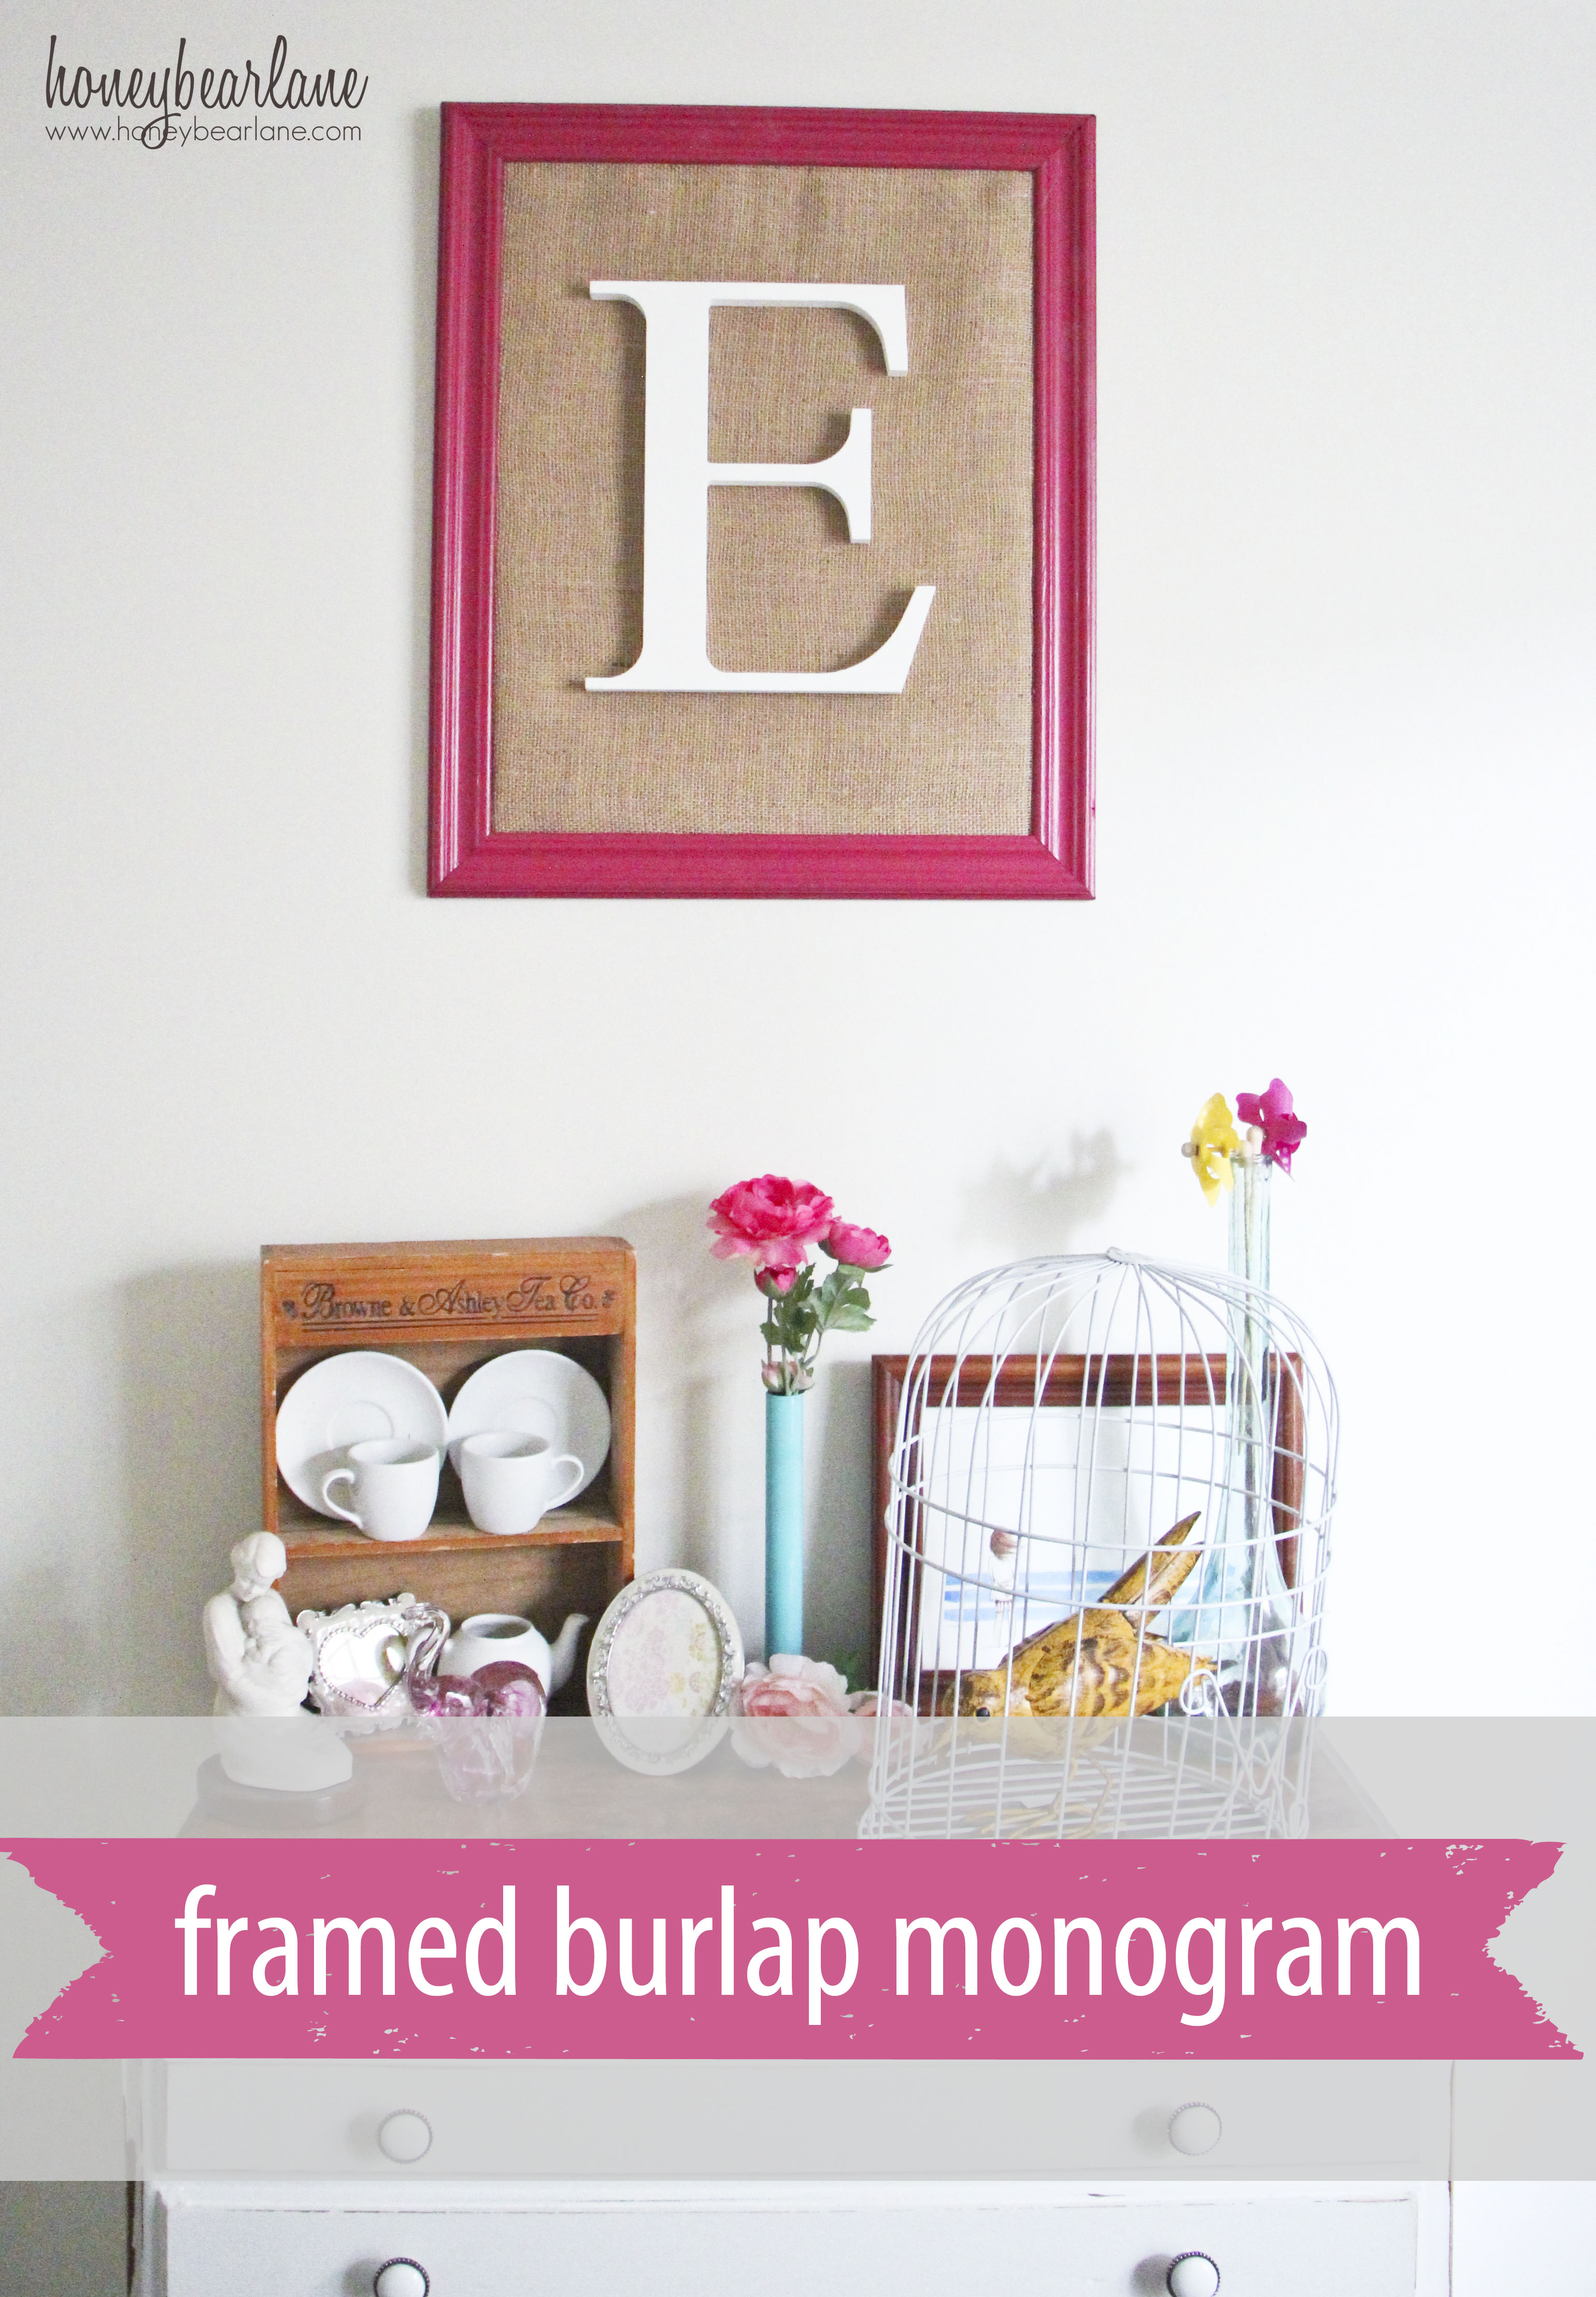
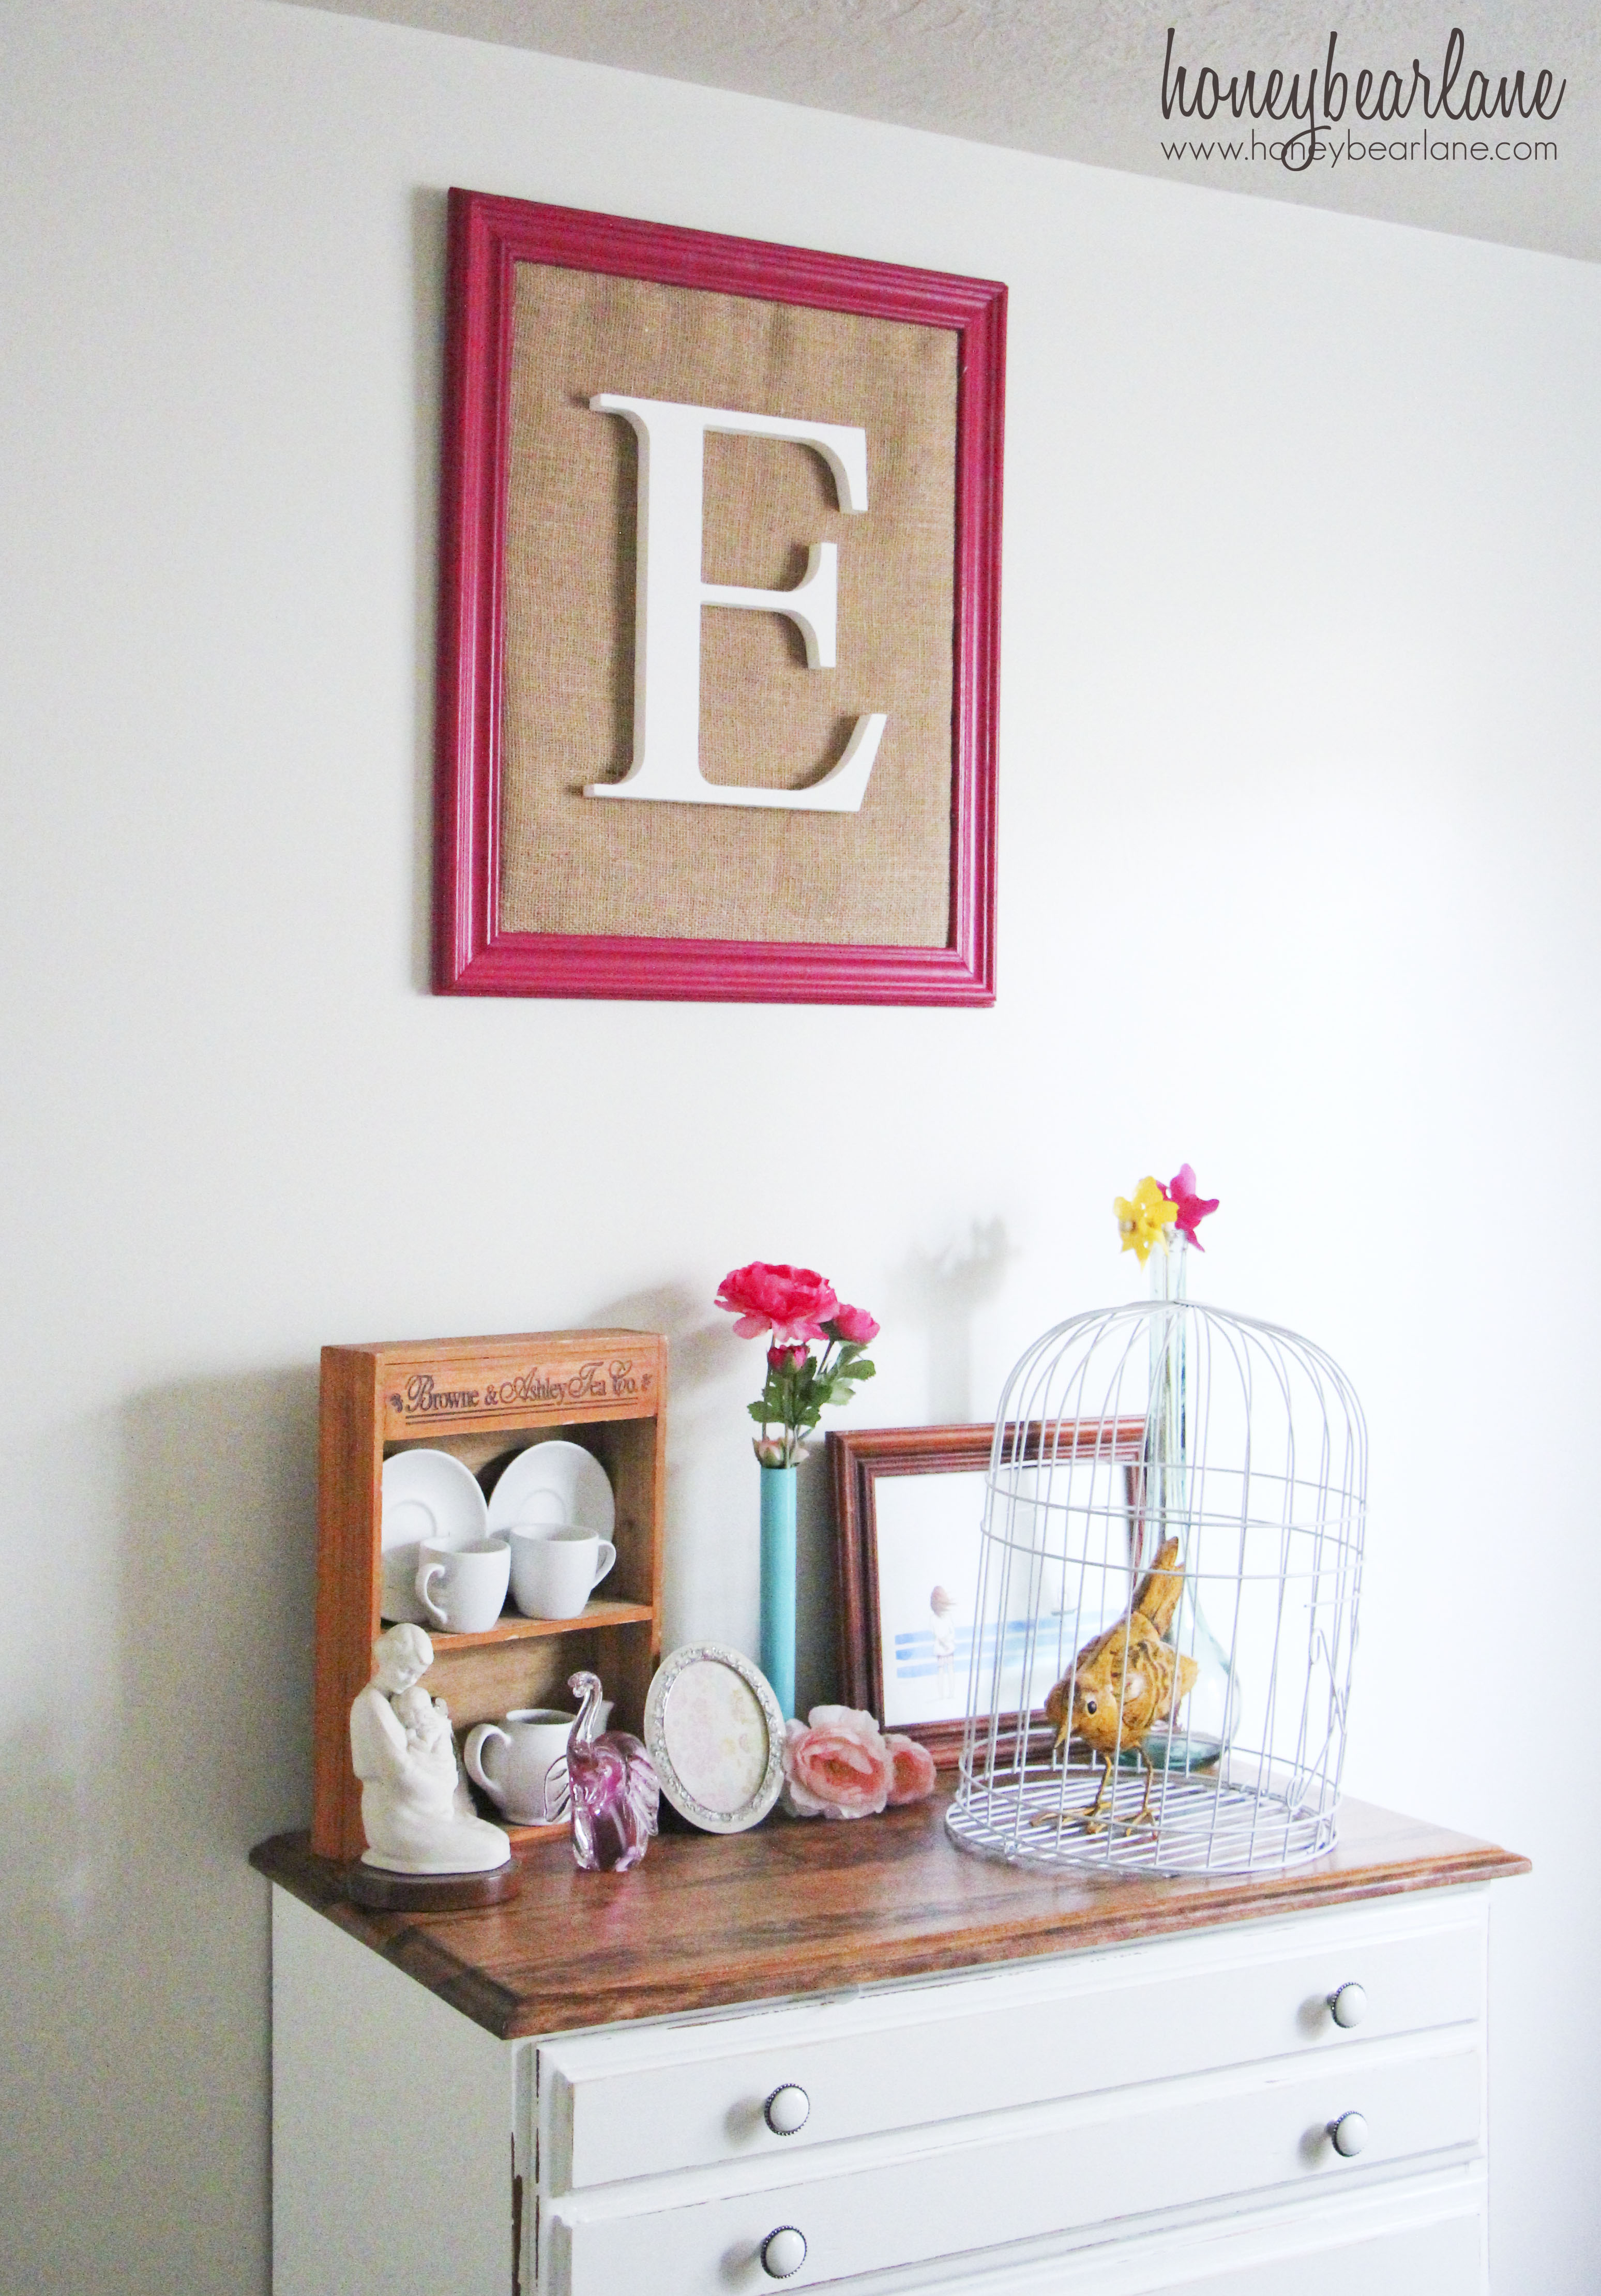
Framed Burlap Monogram
I’m in the very slow process of decorating my daughter’s room. It’s the nursery, I guess. But she’s over a year old…is it still a nursery? Anyway, I found these cute large wood letters at a local craft store and decided to do something with it–hence this Framed Burlap Monogram. The letter itself isn’t burlap, in case you can’t see that from the picture, its the matting. Or whatever. Anyway, I really love this whole look.
One of the themes or elements of my daughter’s room is Vintage. There are a lot of little vintage elements which I love and it’s been fun to put together. But I’m not gonna lie, I’m kind of having a hard time pulling it all together. It’s hard to find your own style and balance all the textures and things as well as make it look finished and cohesive. There’s one particular thing, which you will learn about later, that I really like but am not sure it works as well as I had hoped.
This tutorial is incredibly easy and something you could do in about a half hour. Here’s a list of materials you will need:
Frame (I painted mine a raspberry pink which I love.)
Burlap as big as the frame
Cardboard as big as the frame
Glue (hot glue!)
Staple Gun
Wood Monogram/Letter
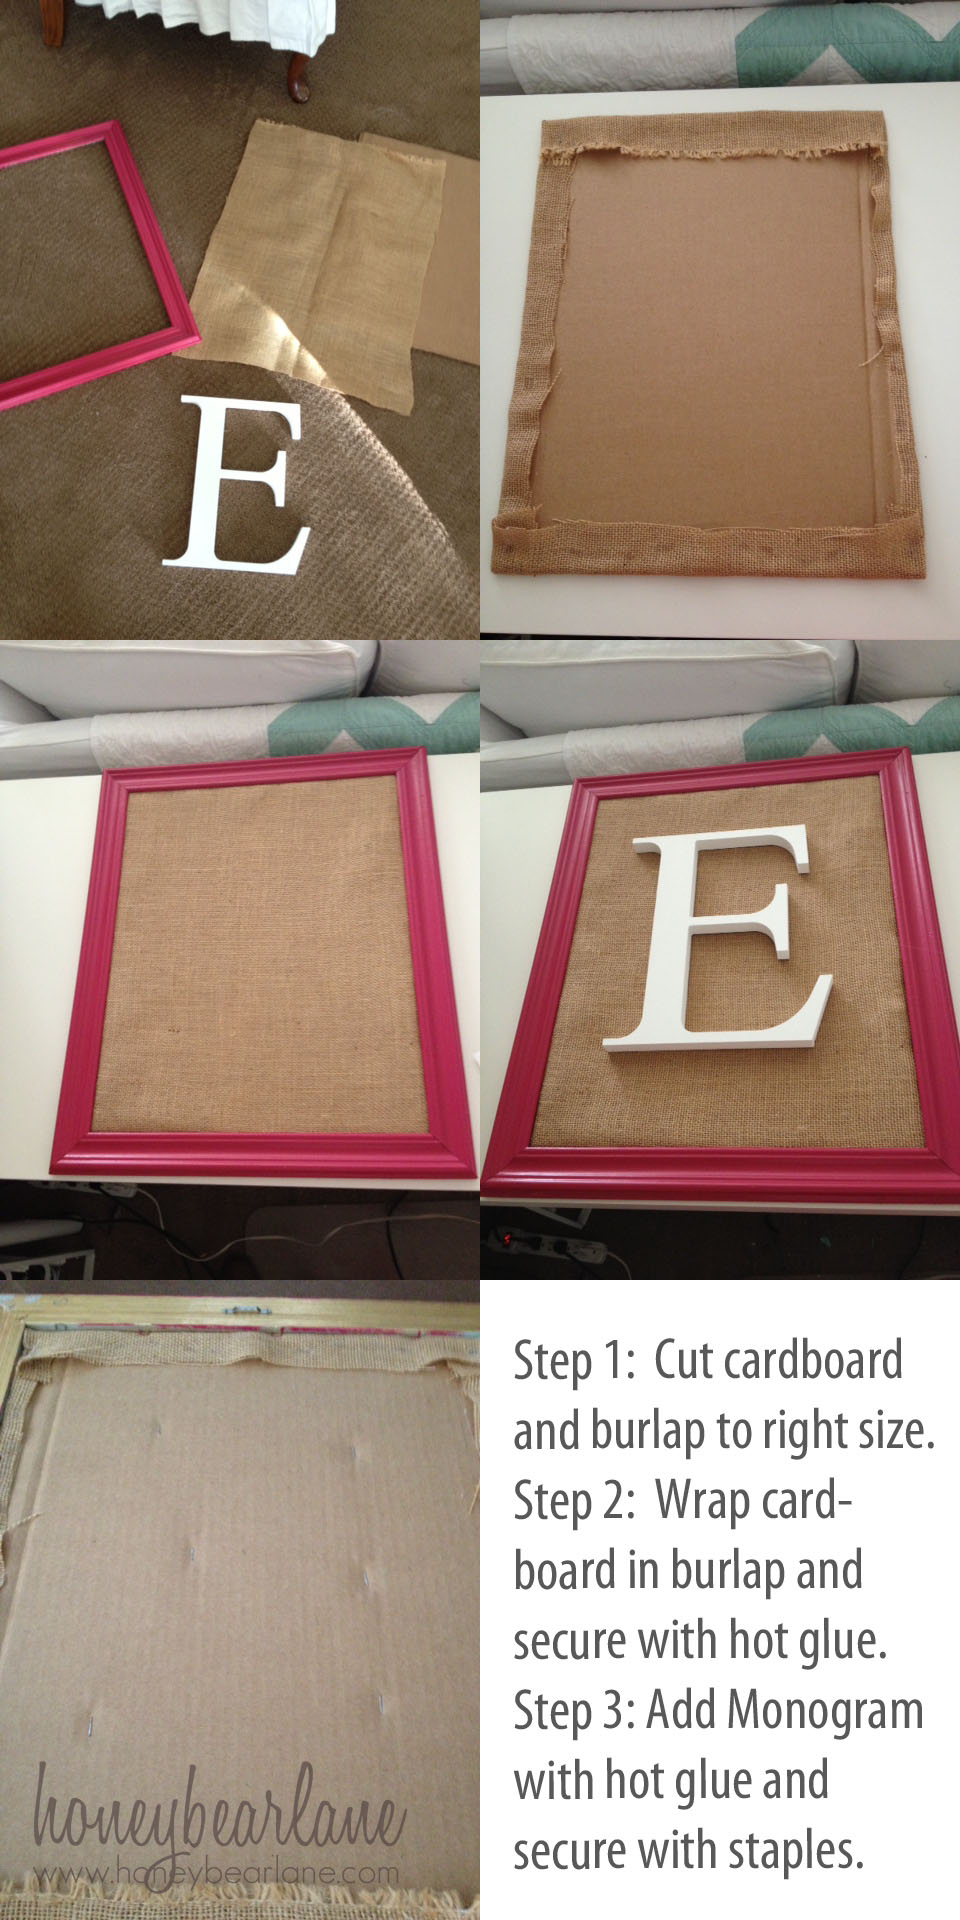
As per the picture’s instructions here is what you do:
Step 1: Cut the cardboard to fit the frame. Cut the burlap so it fits the cardboard with a nice generous allowance for foldover.
Step 2: Glue the burlap onto the cardboard. This can be tricky because burlap doesn’t like to lie flat and be taut. So I would recommend putting some smooth glue down on the front of the cardboard so it can be tighter. Wrap the burlap around the edges like a present and secure in place with glue.
Step 3: Add the Monogram and secure with hot glue. Then staple in from the back so that letter won’t go anywhere.
Easy Peasy.
This turned out so cute! I love the burlap backing. I’m in the slow process of decorating my daughter’s room too and it also has a lot of vintage in it. It’s been so hard to pull everything together. I think I’m going to end up with a “vintage funky” feel when it’s all finished. I can’t wait to see more elements of your daughter’s bedroom as it progresses. 🙂
Adorable!!
Heidi that is so cute thanks for sharing it. It gave me an idea!