How to Remove Carpet in 5 Simple Steps
So my big project for 2018 is my front room/craft room. I’m giving it a total overhaul which I will share with you in a future post. But I have some major DIYs to do first so I’ll be sharing what I learn along the way. It’s been awhile since I’ve done a home project and I just have to say…it feels SO good to be back at it! It’s so funny to me because most people dread home projects but I seriously feel like they give me a purpose during the day. When I wasn’t doing anything, all I would do during the day is clean up the house, feed kids meals, and do laundry. To me, it was just unfulfilling. I love having a big plan to be working on, even if it’s for just a few hours a day.
So step 1 of Project Front Room was to remove the carpet and put in the same laminate that I have going through the rest of the main floor. I’ve been asked TONS of times what my laminate is which I have detailed in this post but here it is again: Mannington Historic Oak in Ash. And for the record, it’s not the cheapest laminate. For just 150 square feet it cost me $550. But then again I’m not a super expert on the cost of flooring. Anyway, getting off topic. This post is about how to remove carpet.
So I’m a rookie at removing carpet but it turned out to be pretty dang simple. Here’s how to remove carpet in 5 simple steps:
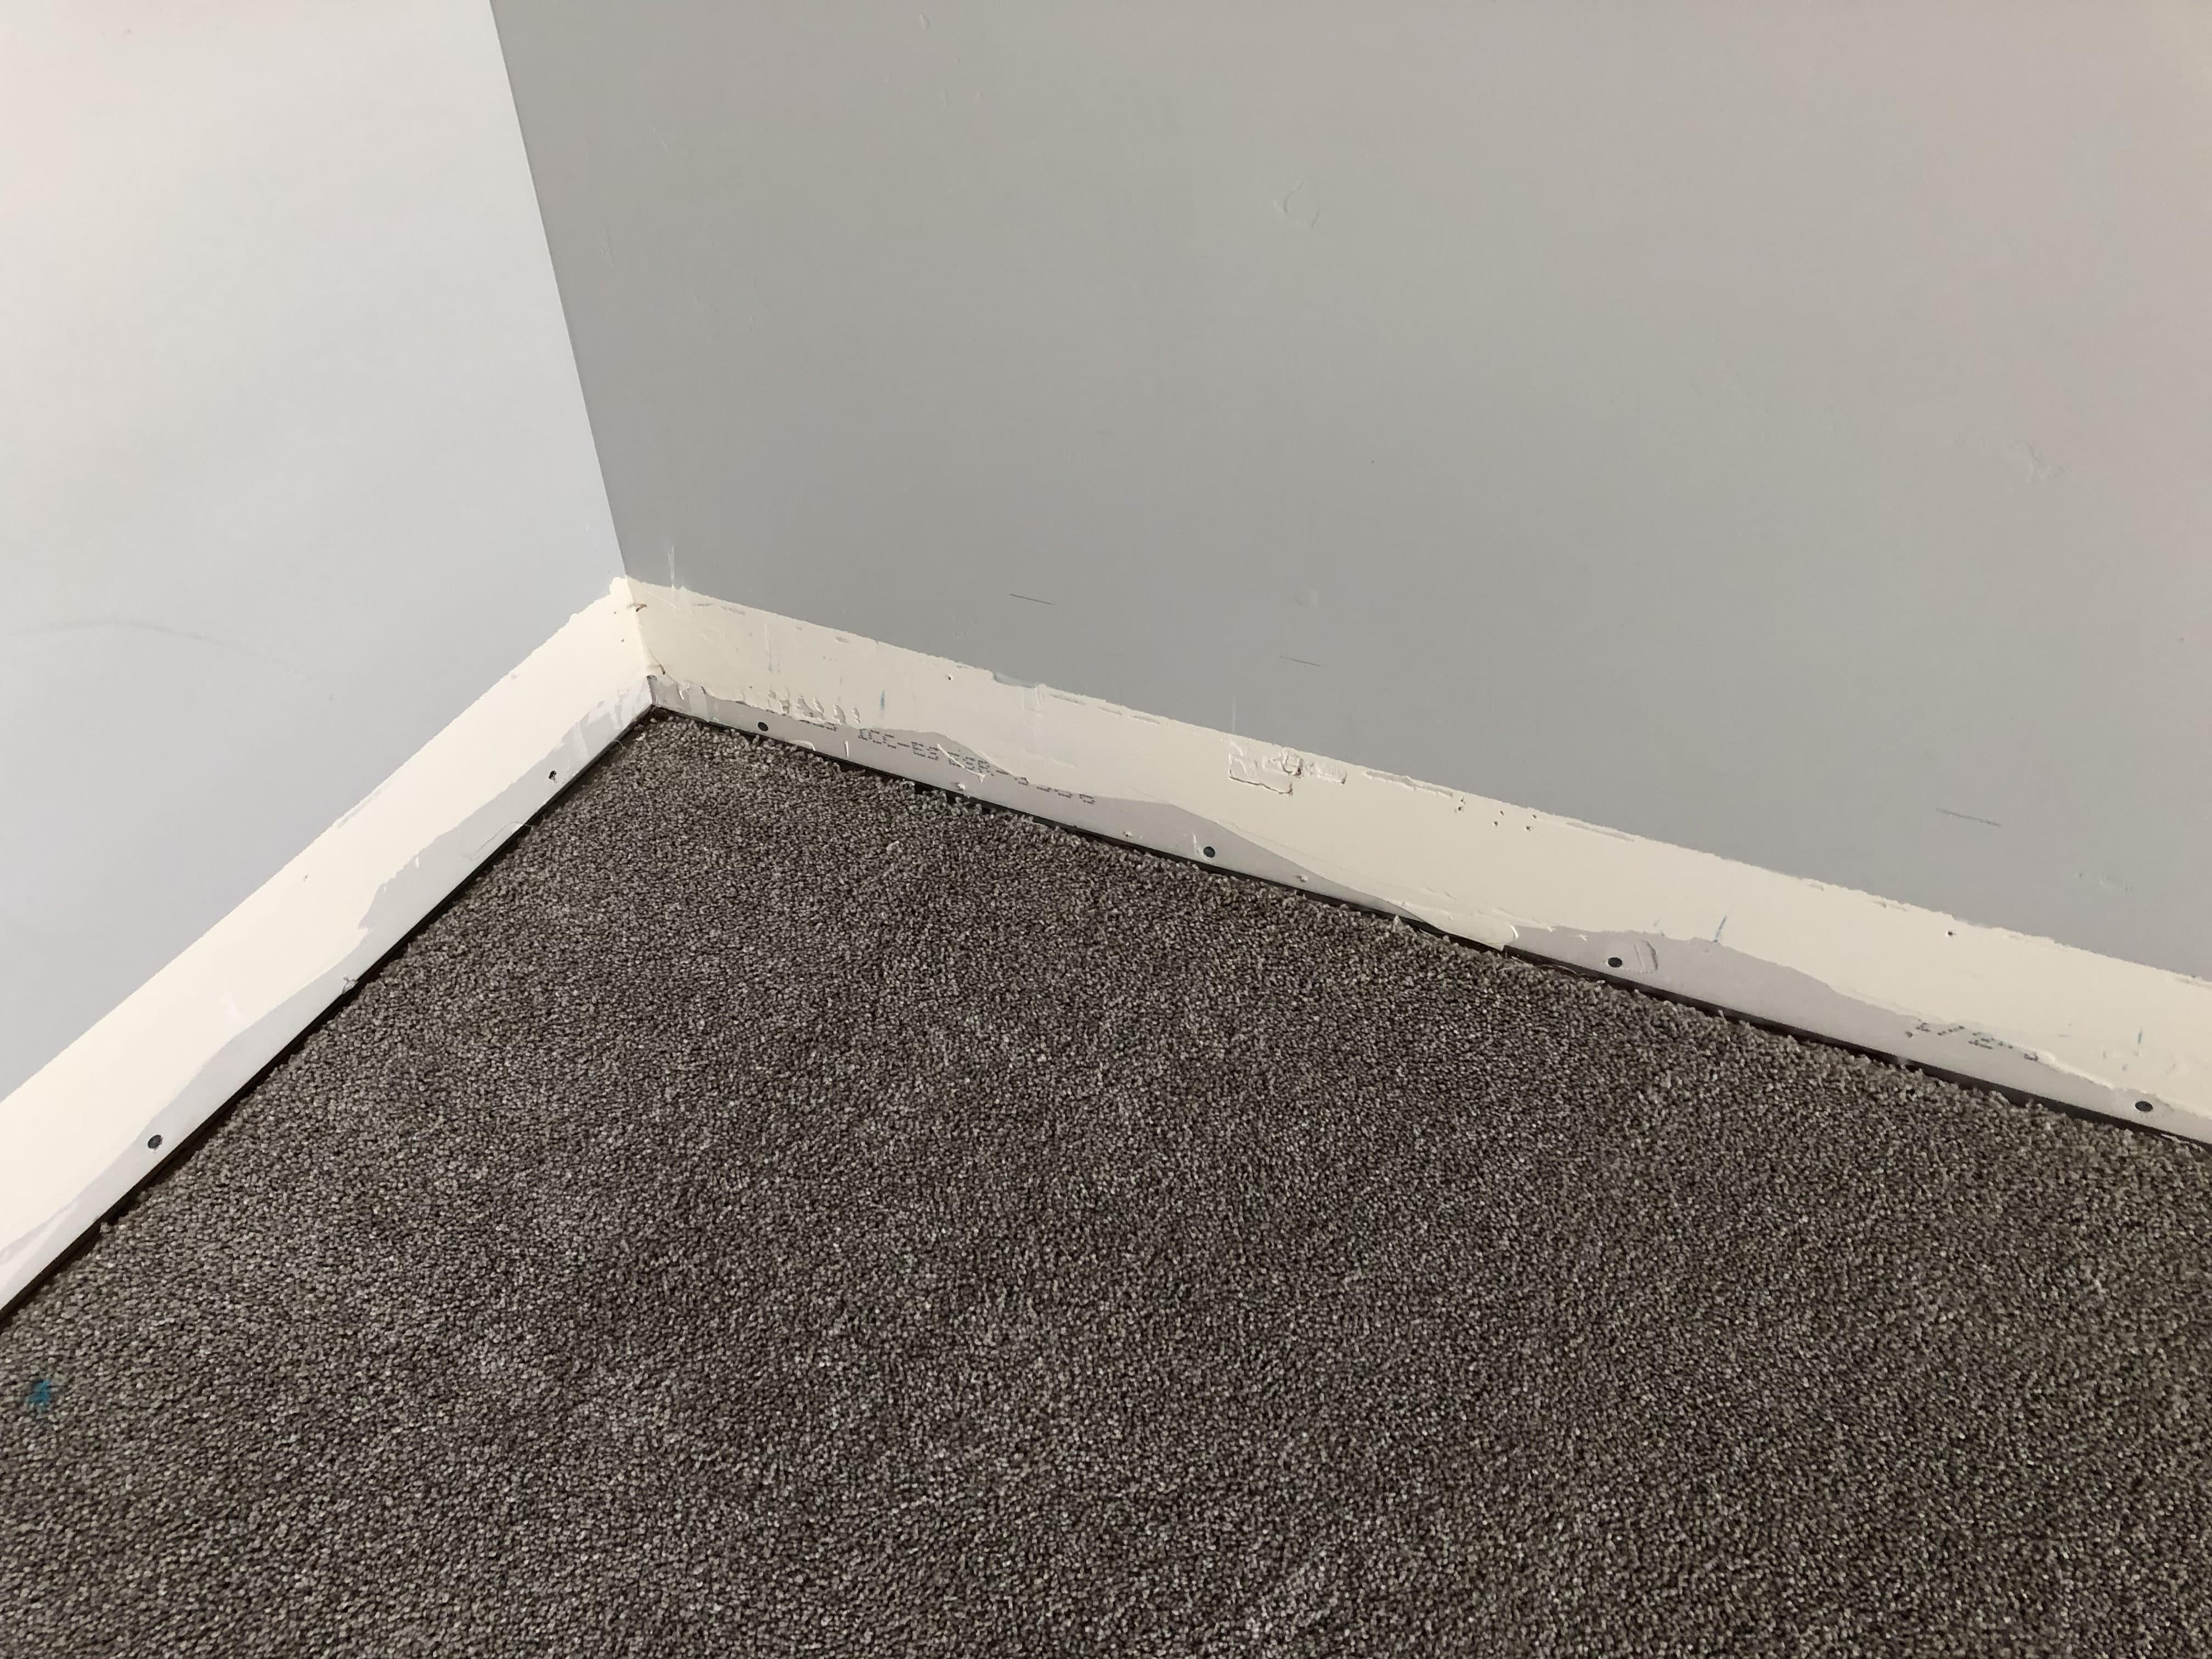
Step 1: Remove baseboards. I did this because I was installing laminate but I’m pretty sure there’s a way to do it without removing them. Maybe you could just remove one side, just so you can get a grip. But once I removed them, it lifted right up. To remove baseboards, I first cut the caulking with a razor blade, then used a crowbar to pry it off. I show you how to do it in more detail in this post.
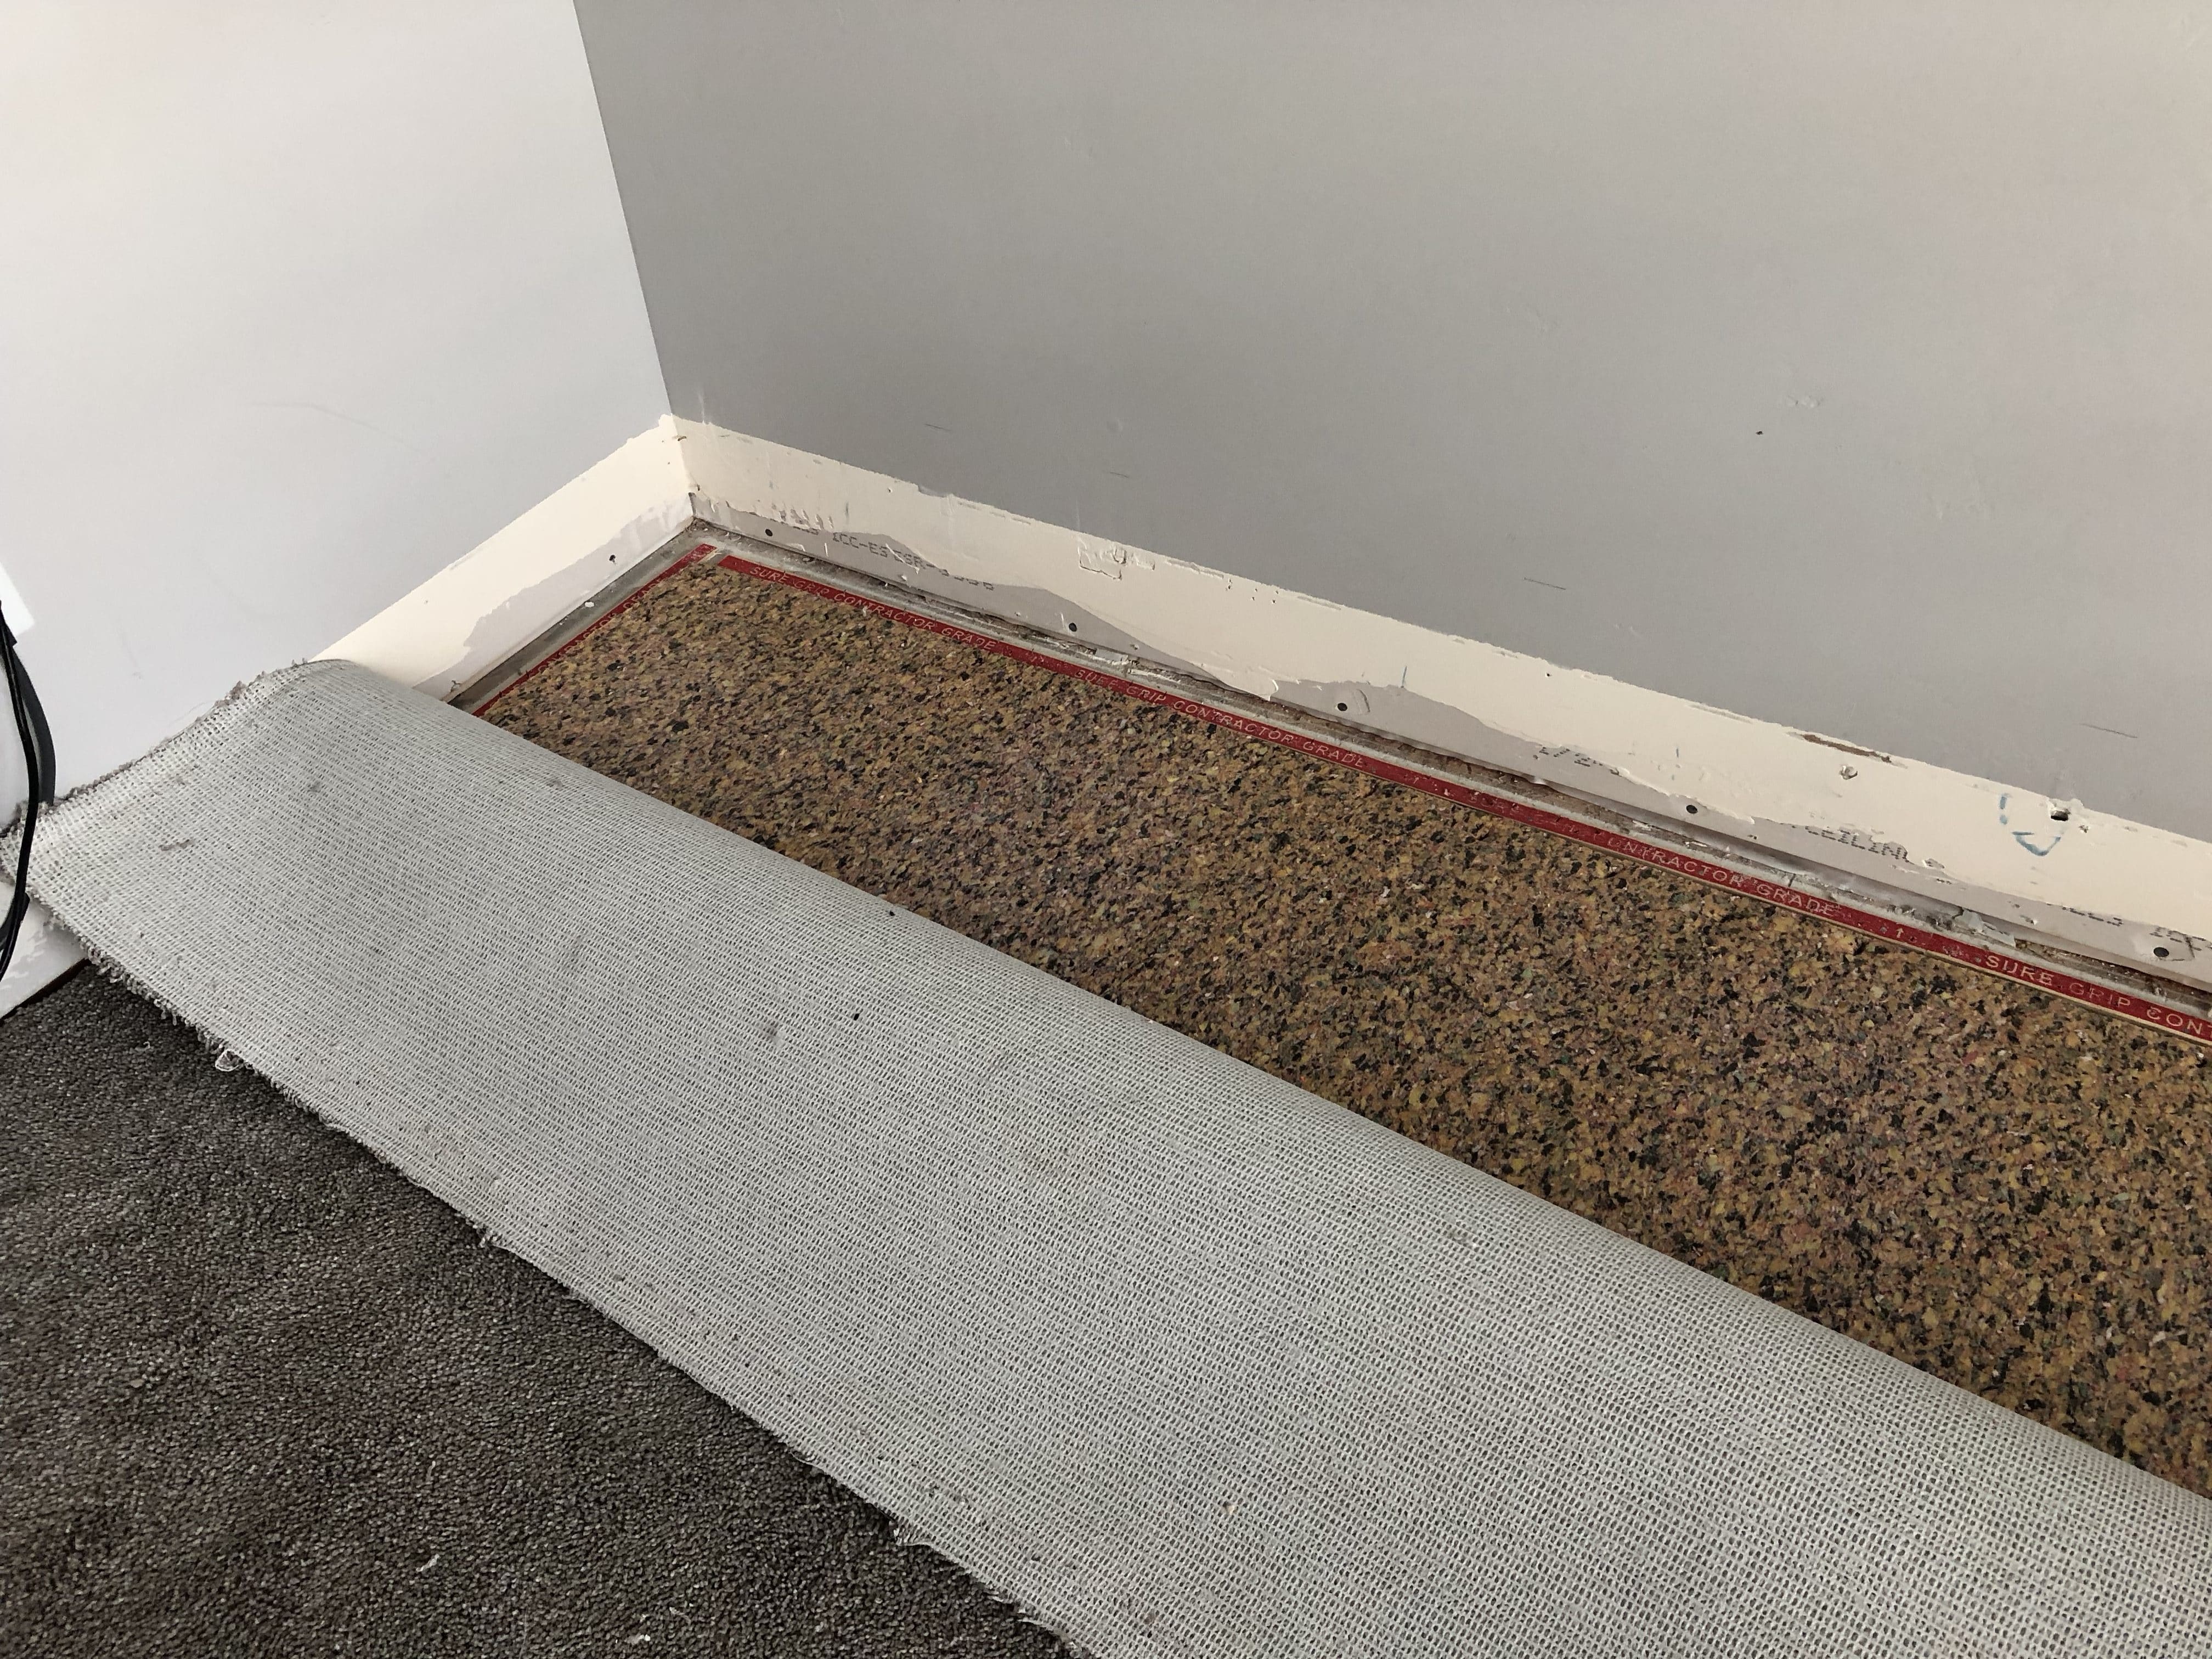
Step 2: Lift off carpeting. I lifted off the carpeting as simple as lifting a rug off a floor. Of course all the furniture was moved out of the room which makes this step WAY easier! I lifted it off the nail strips and rolled it up. Then we moved it to our unfinished basement to make it a little more cozy for my video game playing children.
Step 3: Remove carpet pad. The carpet pad is stapled down under the carpet. I just ripped it off the staples (carefully) and I actually also used it it under the carpet in the basement. This was also very simple.
Step 4: Pry off nail strips. I use the mallet and crowbar to pry up all the nail strips. This was kind of tedious and and loud but not too bad. Here’s a quick video of how to do it–Yes I filmed this with one hand and did the tutorial with the other. 🙂
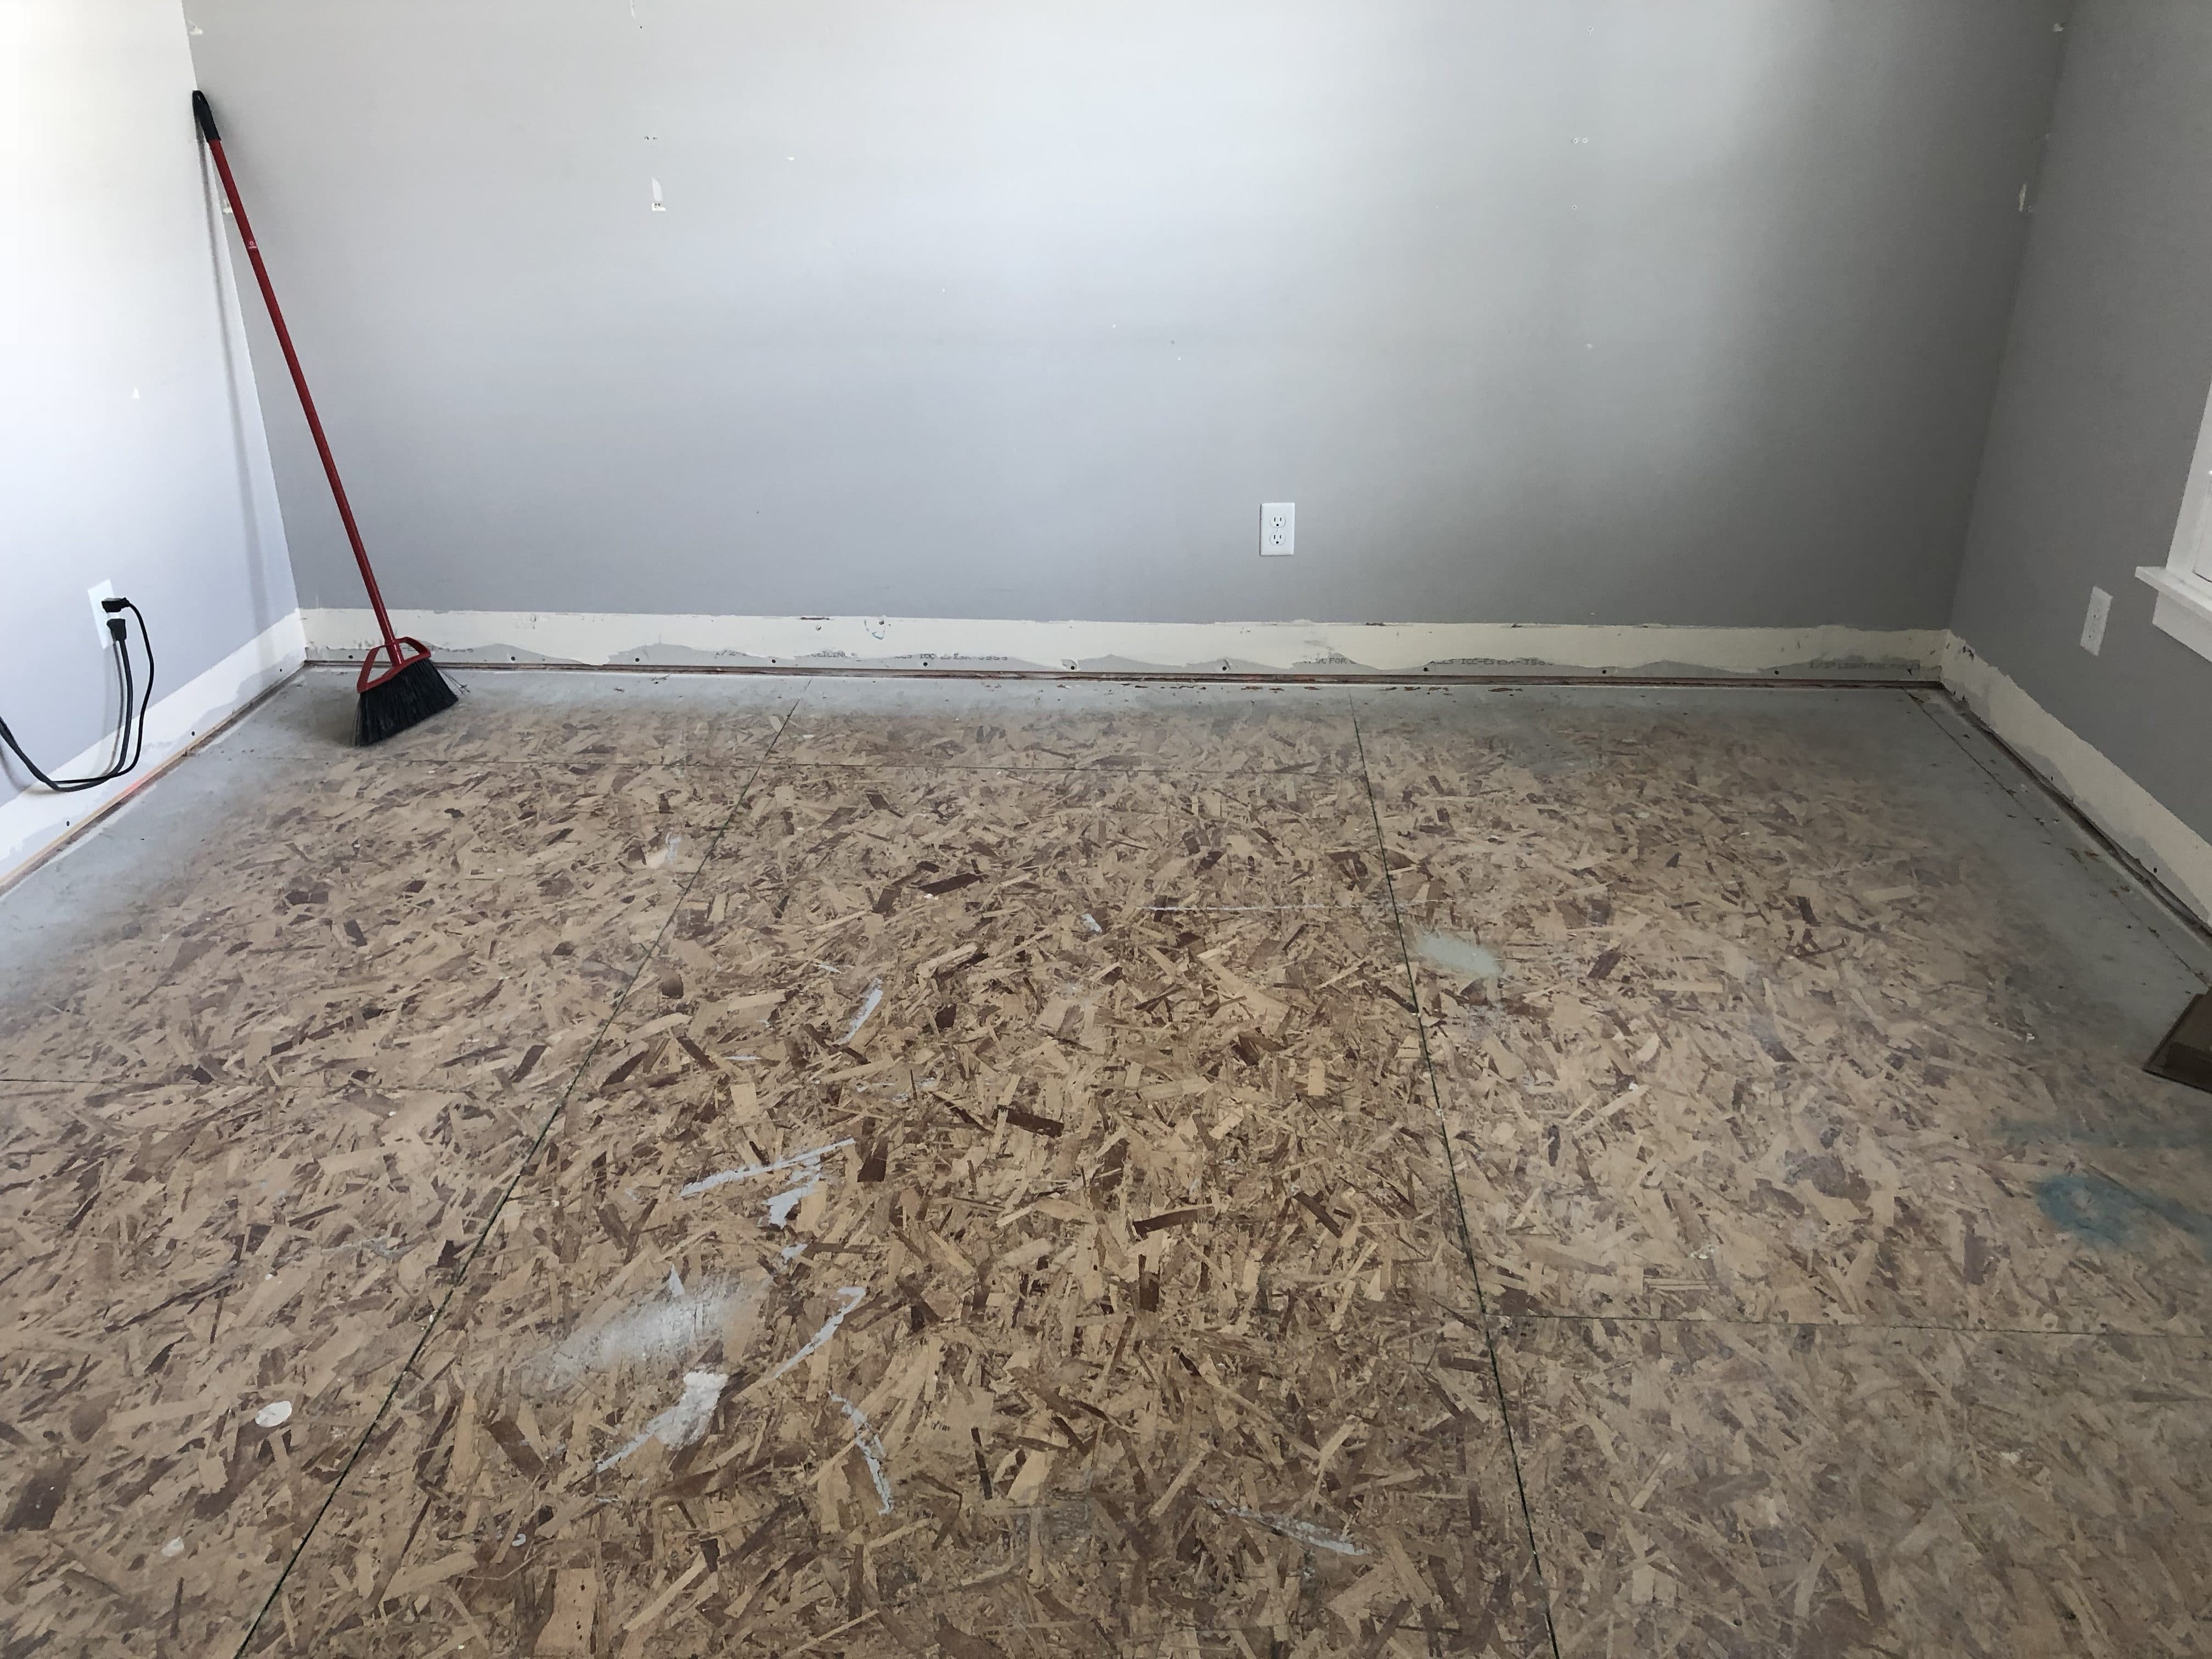
Overall, it can be intimidating to think about how to remove carpet, but it’s just a matter of simple steps that you have to break down. And now that I’ve laid the laminate down, I’m so glad I did this! It just makes the house seem so much more elegant. I’m not totally anti carpeting, but I just feel like it looks bad so quickly. The carpet in my front room was only 3 years old but my kids had already stained it in like three places. And part of my big plan is to build built-in cabinets and a desk and I want to do that on laminate instead of carpeting which would need to be replaced in like 5-10 years. I prefer hard flooring with a rug. Plus that way you can change up the rug when you want a new look for the room!
This is exactly what I was looking for, thanks for detailing it so well!
Great! Good luck!
Hi,
This is an AMAZING job. My husband and I are going to try to do something similar. Our first DIY project. What was the price range to do something like what you did?
You mean the built in desk? I don’t remember exactly but probably around $1500. I bought the cabinet doors which made the price go up.
That’s awesome guide that everyone can follow through and re-install them properly.