Chalky Finish Paint Organizer
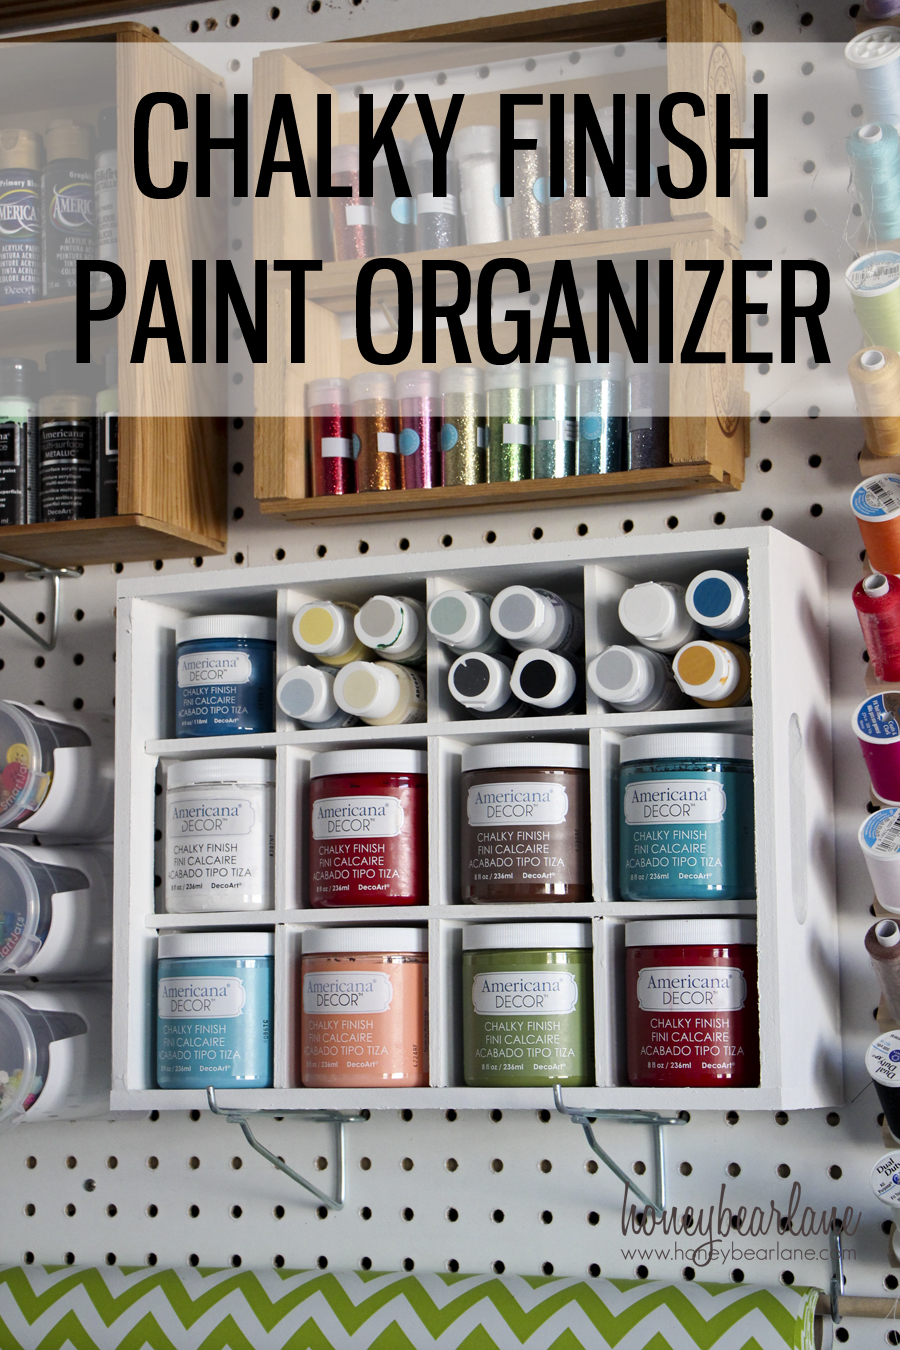
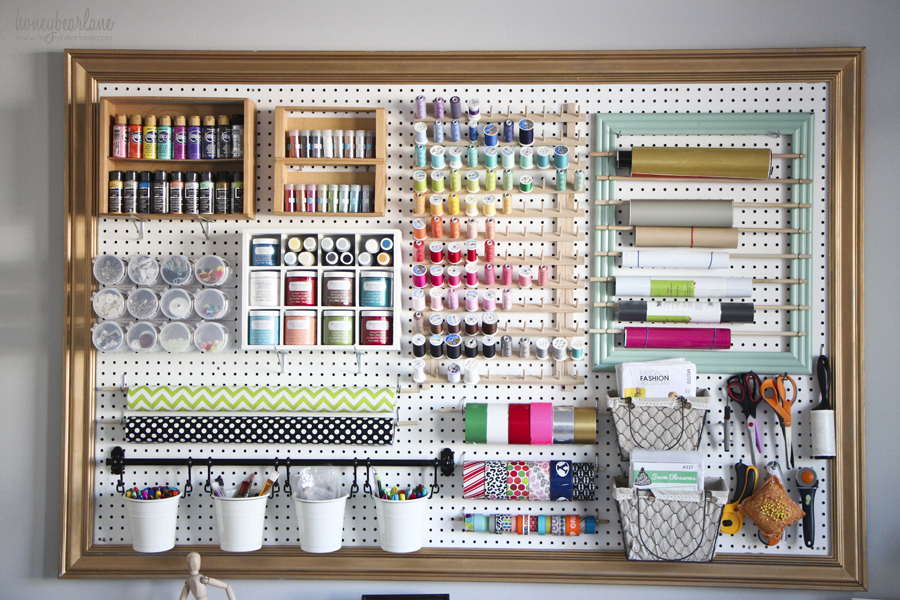
As you might know, I’m a big fan of the DecoArt Chalky Finish paints. I have a bunch of them now and they were getting disorganized. Since we finally got my craft pegboard up, I have changed things around a little bit. And I wanted to make a space for a Chalky Finish paint organizer.
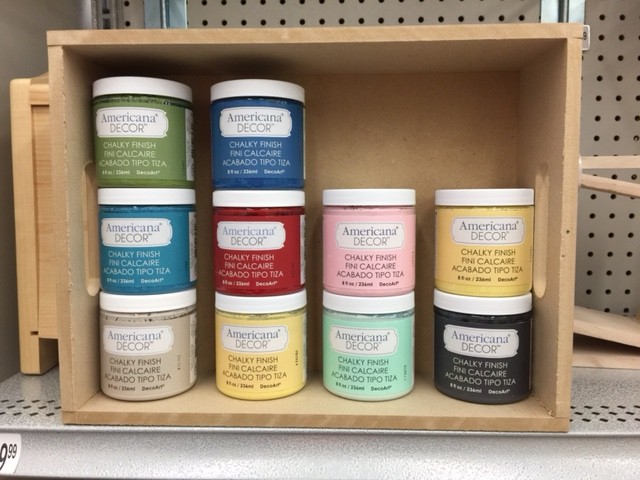
So first I had to make the Chalky Finish organizer. I wanted to do it out of materials I could easily purchase so if anyone else wanted to make them they could without having to use power tools. So I went to Michael’s and found this convenient little box made of MDF. Then I bought the Balsa boards which were located in the same aisle. I got three of them, even though I only used two. It’s always nice to have an extra board in case you mess up. However if you want to skip the individual compartment-making step, you can easily stack them up like you see here.
When I got home, I measured the length and width of the MDF box, from inside to inside. Then I used a Chalky finish pot as a guide to make incisions through half of the boards so they could slide together like a puzzle. It’s kind of hard to explain so I hope you get it based on the pictures. Always do your measurements yourself because no two boxes will be exactly the same.
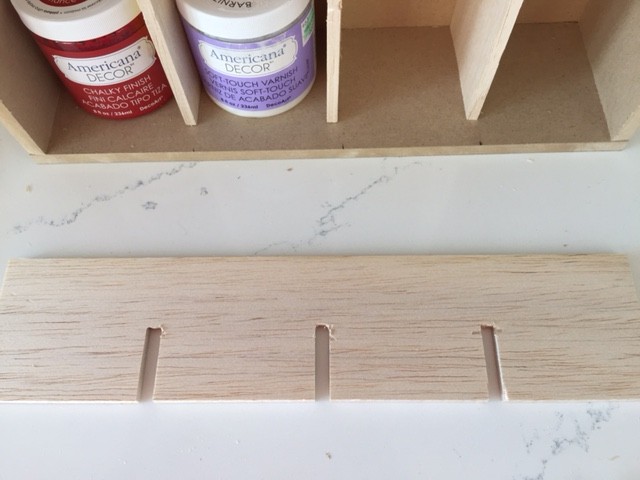
To make the cuts through this particular type of wood (Balsa), you can actually cut with scissors or a serrated knife if you don’t have a saw. It was, of course, easier and more precise with a saw but I just want to show you you don’t HAVE to have one to do this project. You could also just cut them apart completely and super glue them in place.
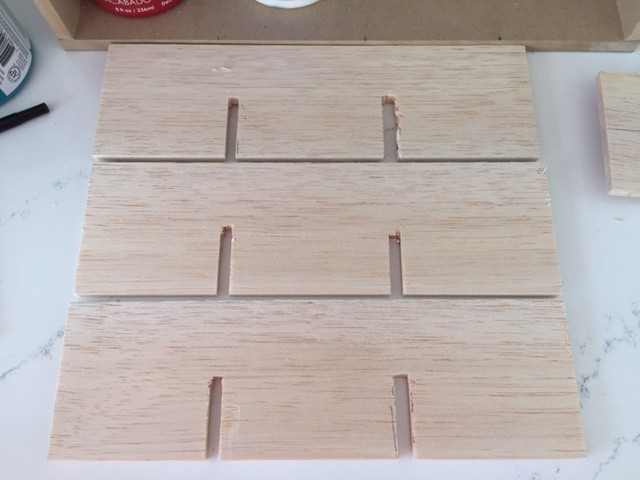
FYI!! Balsa wood is weird–it’s almost like foam board. And it also breaks fairly easily so be careful. I didn’t really like it that much and it was kind of expensive for what you got so if you DO have a saw, just skip this wood and get 1/4″ thick MDF or wood boards. It will be more durable and less hassle and expense (if you can find them on their own.)
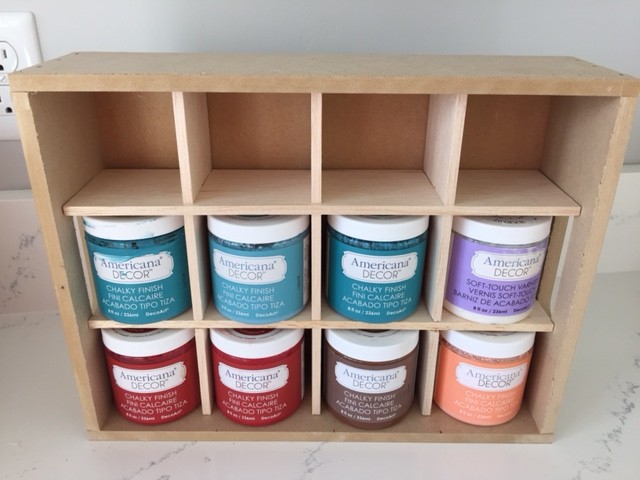
It was a little tricky to get the measurements exact, and I actually didn’t. The top row ended up being about 1/4″ too small to hold a Chalky Finish 8 oz pot but it holds the 4 oz pots just great and I stored my smaller 2 oz ones in there as well. But if you do your measurements just perfectly, you should be able to do three rows of 8 oz Chalky Finish pots.
And of course then I painted it in DecoArt Chalky Finish Everlasting (white.) I had to do quite a bit of rearranging on my board to find the right spot for it, but I like where it is now. And now I have one of my most used products right in plain sight where I can easily access them.
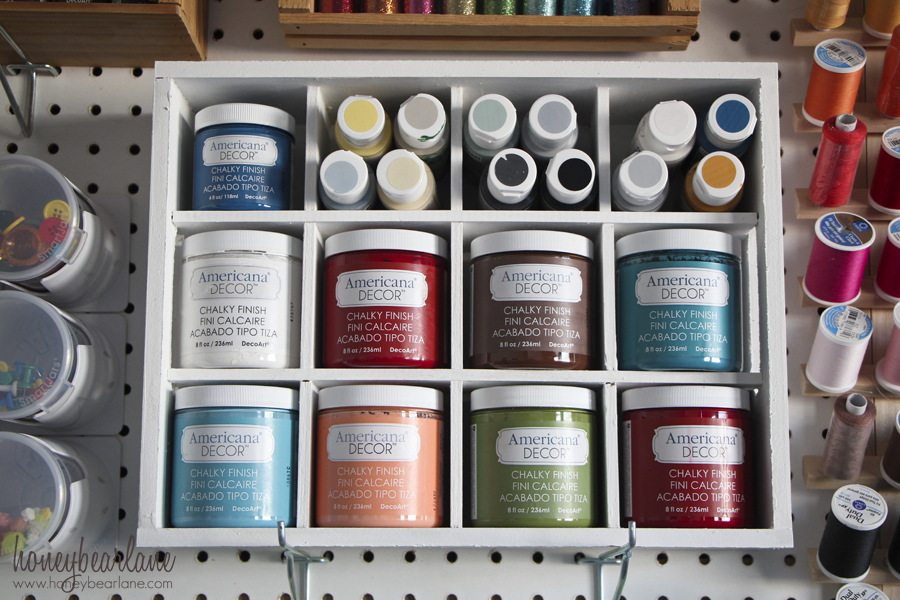
Sigh…don’t you just love this pegboard? Get the full tutorial here.
I am part of the DecoArt Blogger Team and this post was sponsored by DecoArt; all opinions are my own.
Where did you get the thread organizer? And the Pegboard? How much did it set you back? I have a very limited budget ($25.00 a month) and I am wondering if you could take a look at my setup as I have described as follows and see if maybe you can think of some options I might not be using for organizing my Craft Supplies.
The reason I am asking is that I am trying to renovate my multi-purpose Livingroom/Computer Room/ Craft Room. My problem being that I have one whole wall taken out of commission due to the fact that in this tiny apt. they cut a gigantic opening between the Kitchen and Livingroom. I only have 1 1/2 walls I can work with for storage.
There is only one Patio door and the front door for natural light (ie. No Windows at all) so I know that task lighting is very key. I got myself a table sized Ott light and a Black Desk Lamp. The area between the front door and the Patio door is out of commission as well due to the awkward placement of the A/C. Both of our computer desks take up one whole wall, hence, makes that wall out of commission as well.
I have a bookcase with multiple bins (most the same color with cute circle tags I made from round stickers from the @Dollartree) against the one wall I can use. Beside the bookcase, I have one small white wire shelf and one large white wire shelf by the front door, then a little telephone table on the other side of the bookcase. I am using a small rolling computer desk as my Crafting Desk that I am going to repaint and firm up, I was using a meeting sized table which I loved, but it was just too big for in here.
Then in the bedroom I am using two shoe shelves on the bottom and a 15 hole cubby unit on top where I keep my yarn. I have three shelves I am painting to go above that that I want to place my big Red Vine Licorice containers on.
My Bedroom Closet is packed with three sets of shelves {not all mine, some shelves hold hubby’s computers parts and pieces). I think I have been blessed with too many clothes, but they all have been freely given to me so I am truly blessed. I got a second rod for hanging clothes that I wear most often and the least often worn dresses on the rod in the back of the closet. I just set my 4 drawer chest in the closet due to the happy gain of a Chaise Lounge.
I have a basket and one fabric bin for some of my current yarn projects I am doing.
I also have one very cluttered shelf set with current sewing projects I am w-a-a-a-a-ay behind on due to Chronic Illnesses that have been flaring up badly and also from ending up in the hospital a time or three.
I really love the Framed Pegboard being painted a favorite color. Did you use an actual frame or just molding pieces? I was thinking I could replace all my multiple three drawer bins with it.
I am trying to figure out the best way to store my Scrapbooking Papers.
I found another post somewhere that talked about using Comics Backing Cardboard to wrap the fabric around and pinning with rustproof pins and I am thinking of putting them in a drawer in my Chest in the closet.
Thanks for your time and attention to this. I am looking forward to hearing from you.
Masquerading Crafter
Karen M. Roth
If you click on the link within the post, it will take you straight to the Pegboard post. I have a couple posts on it and you can study it. It’s a great help for craft organization but if you are really that limited on space I would recommend two things: 1) see if you could get some type of floor to ceiling shelving unit. Utilize every inch of space you have. Get a table and put drawers under it. And for things that you don’t use that much and take up lots of space (for me that would things like quilt batting) put them elsewhere in storage. Only keep the things you use regularly in your craft room. And 2) edit your stuff. Go through everything you have and determine whether or not you really need it or will use it. I just cut these large grommets off some curtains and I was about to save them when I thought seriously–will I ever use these? I don’t really love the look of grommet curtains. And if I really desperately need some in the future, I will purchase them at that point instead of taking up valuable space in my craft storage for probably 20 years. You have to get real! Good luck!
I really need to make a peg board like this. Thanks for the inspiration! I love the idea for the Deco Art Paints too!
Thanks! It is seriously so wonderful.