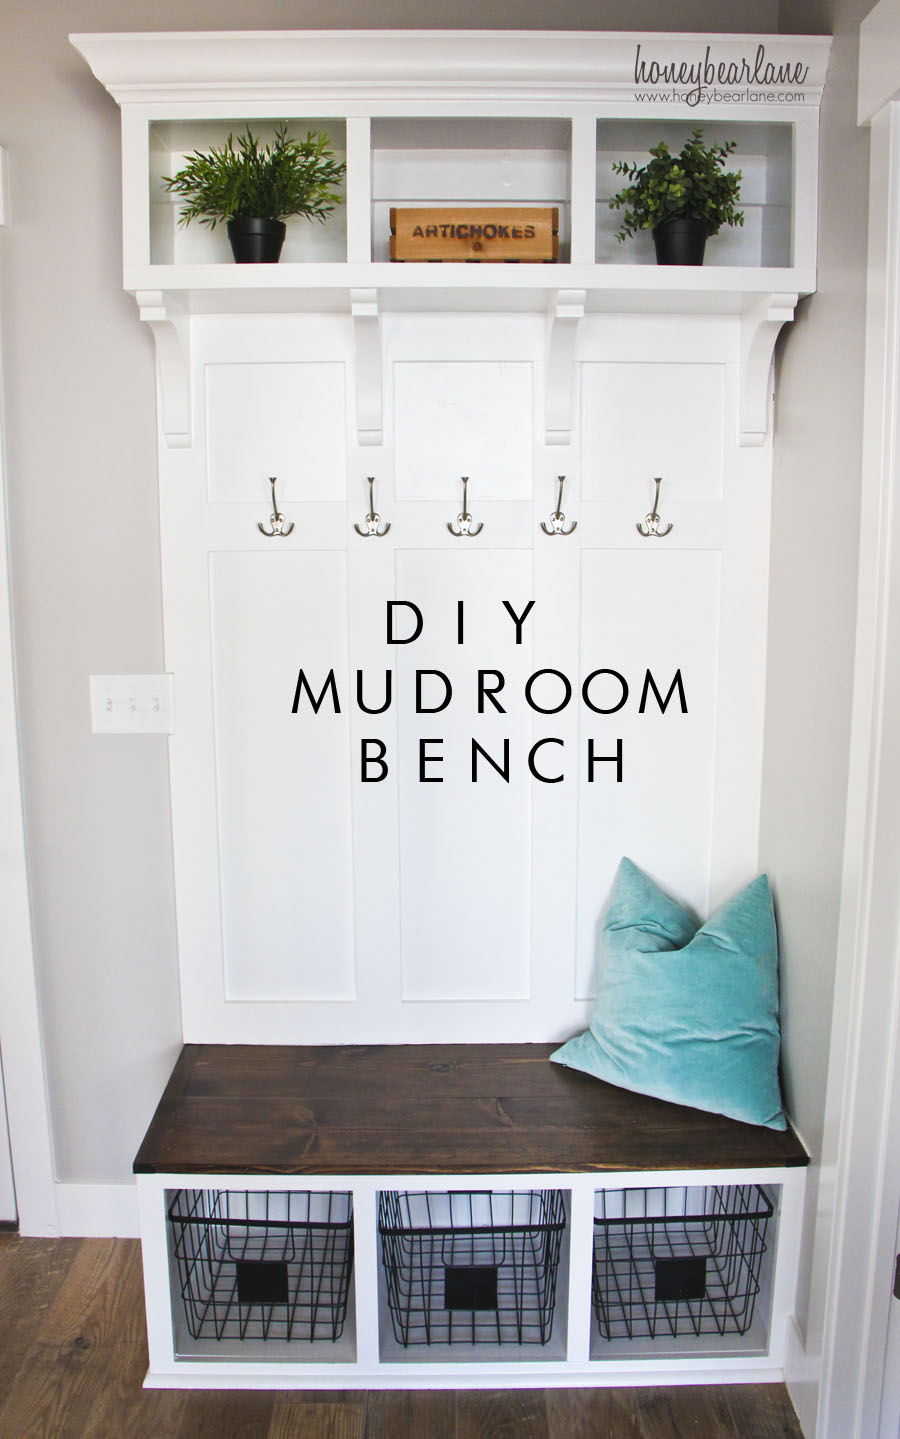
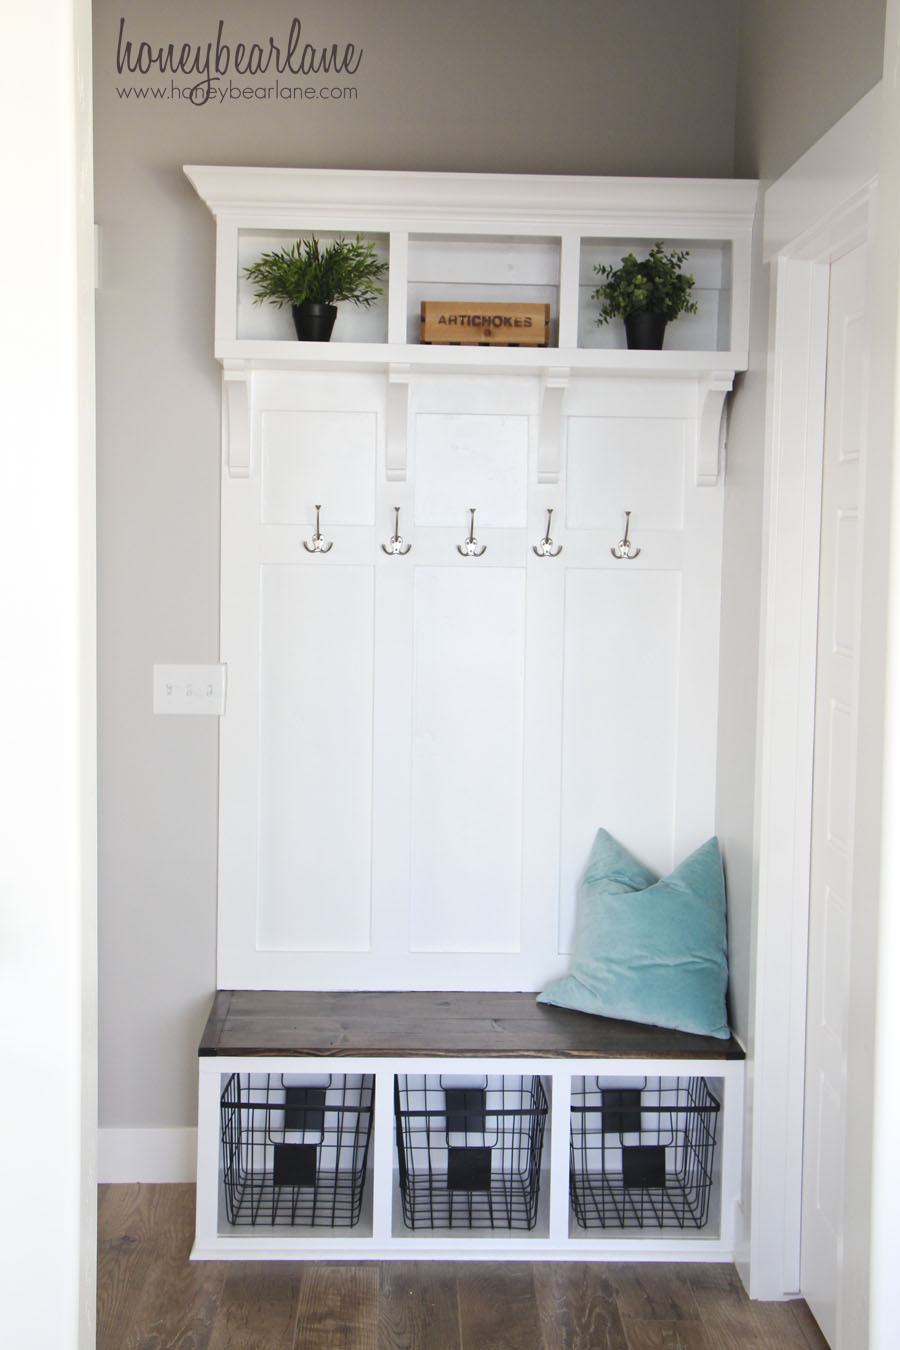
DIY Mudroom Bench Part 2
So it’s time to talk about the top part of my DIY Mudroom Bench. This part was actually pretty easy and painting was the longest part (isn’t it always?) But once you get past the first part of the actual bench, this part will seem easy.
All the supplies you will need were listed in my DIY Mudroom Bench Part 1 post.
So first I laid a piece of 3.5×48″ MDF across the bottom and then trimmed it to be the same length as the bench. I actually cut two of these, one for the bottom and one for the top. I put some caulking on the back and then used 1 1/4″ nails in my nailer to shoot about 4-5 nails in each piece, laid out like in this picture. Seriously, board and batten is the easiest thing ever once you’ve done it. 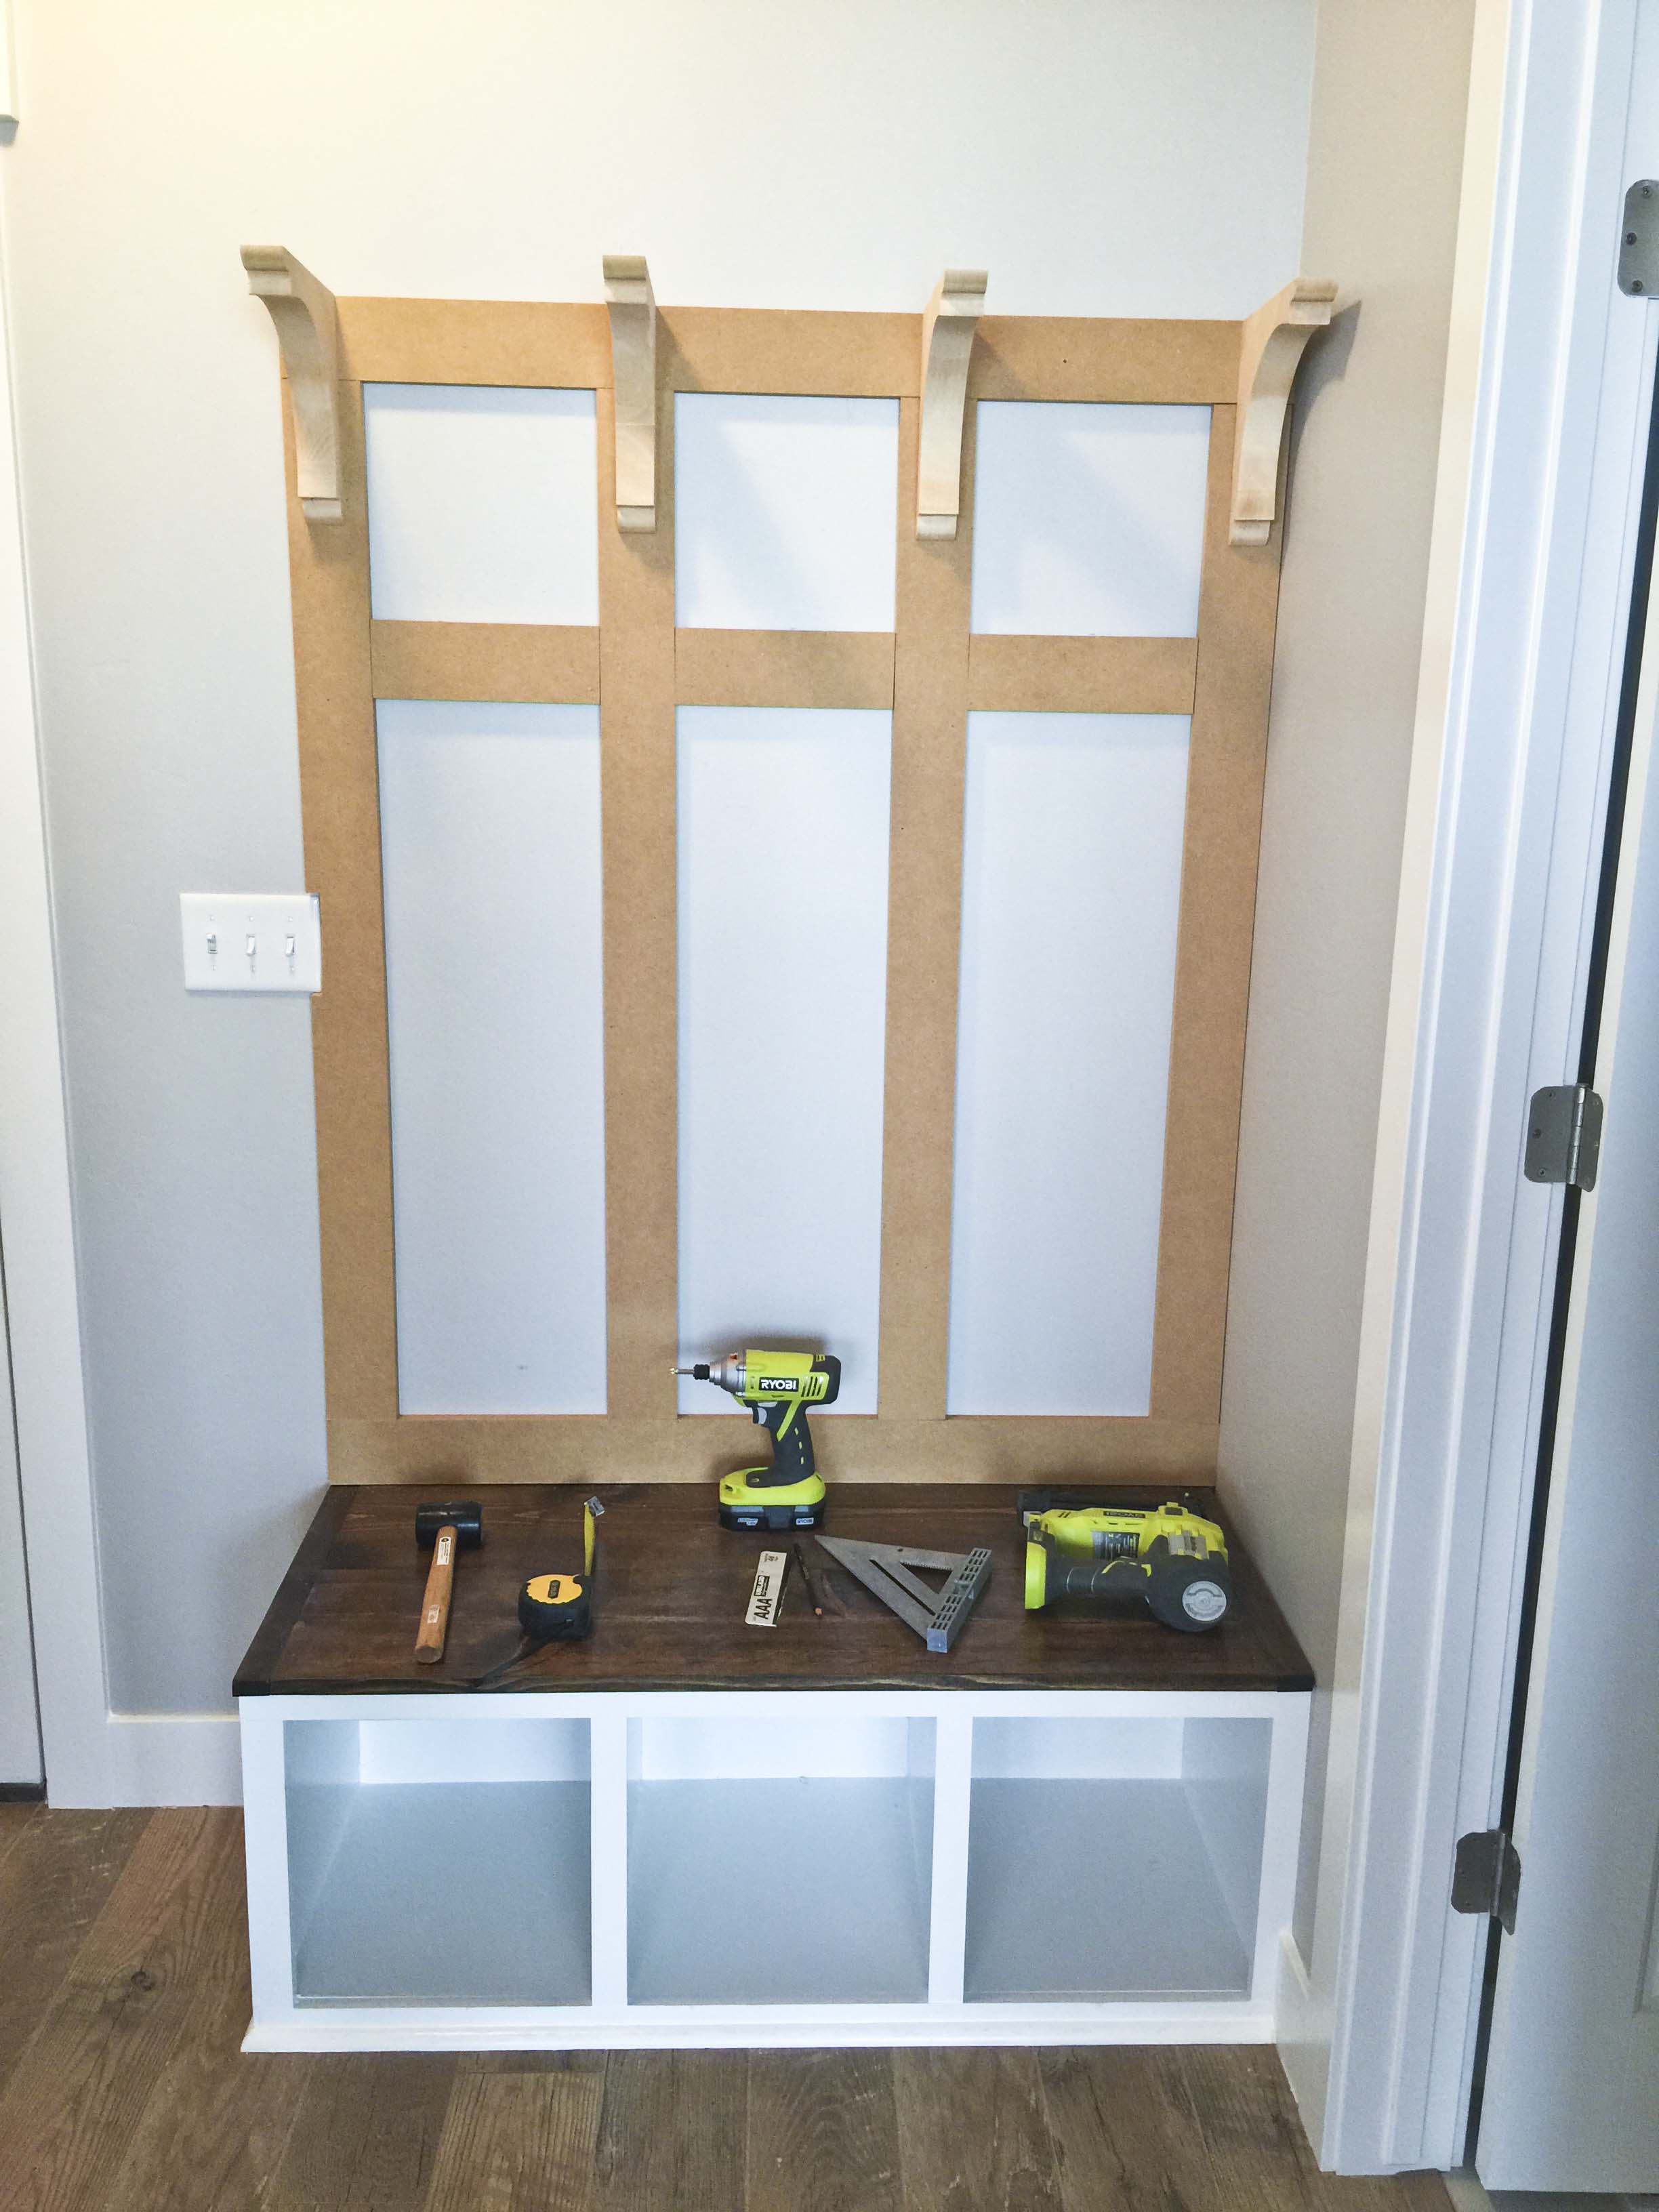
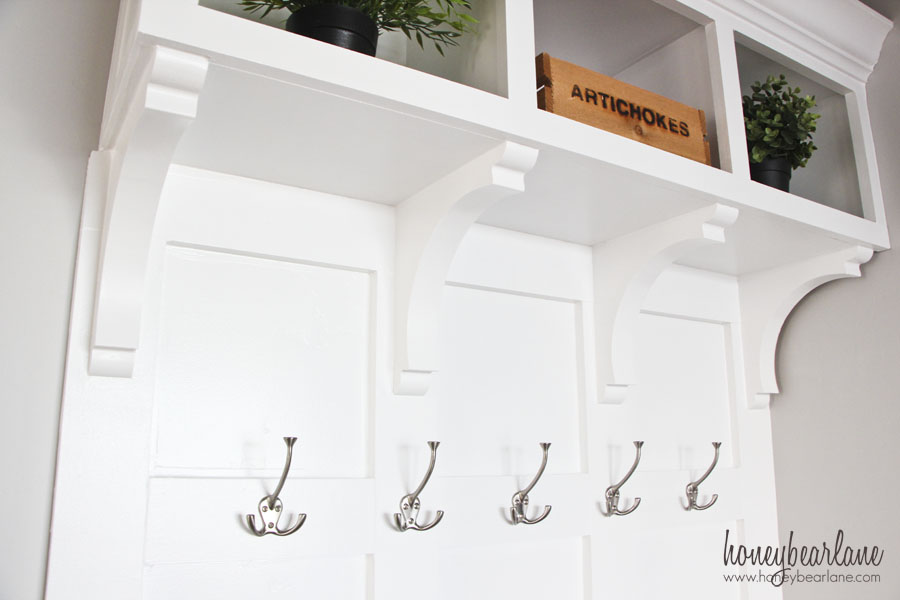
The next part was the corbels. This was tricky because they are hung by little screw hangers on the back. I had to be very precise in my measurements to make sure the top of the corbels was at the top of the board and batten. I measured it and then put two screws in the top center of each batten. But here’s a little tip: use a rubber mallet to bang the corbels in place. It’s hard to get the corbels on but using the mallet, it will just glide them right in place and leave them nice and tight.

Finally you need to build a top cabinet. Built it exactly like the bottom bench but with only one set of braces on the back. And I made the bench about 7″ less deep and 5″ less tall. This went a lot faster because I could use my miter saw instead of the circular + clamps + Ripcut. Anyway, then using a buddy or being He-Man like I was (ha!) lift it onto the top of the corbels and B&B. Push it over to wall and screw it in the studs. Then add the face frame and lattice.
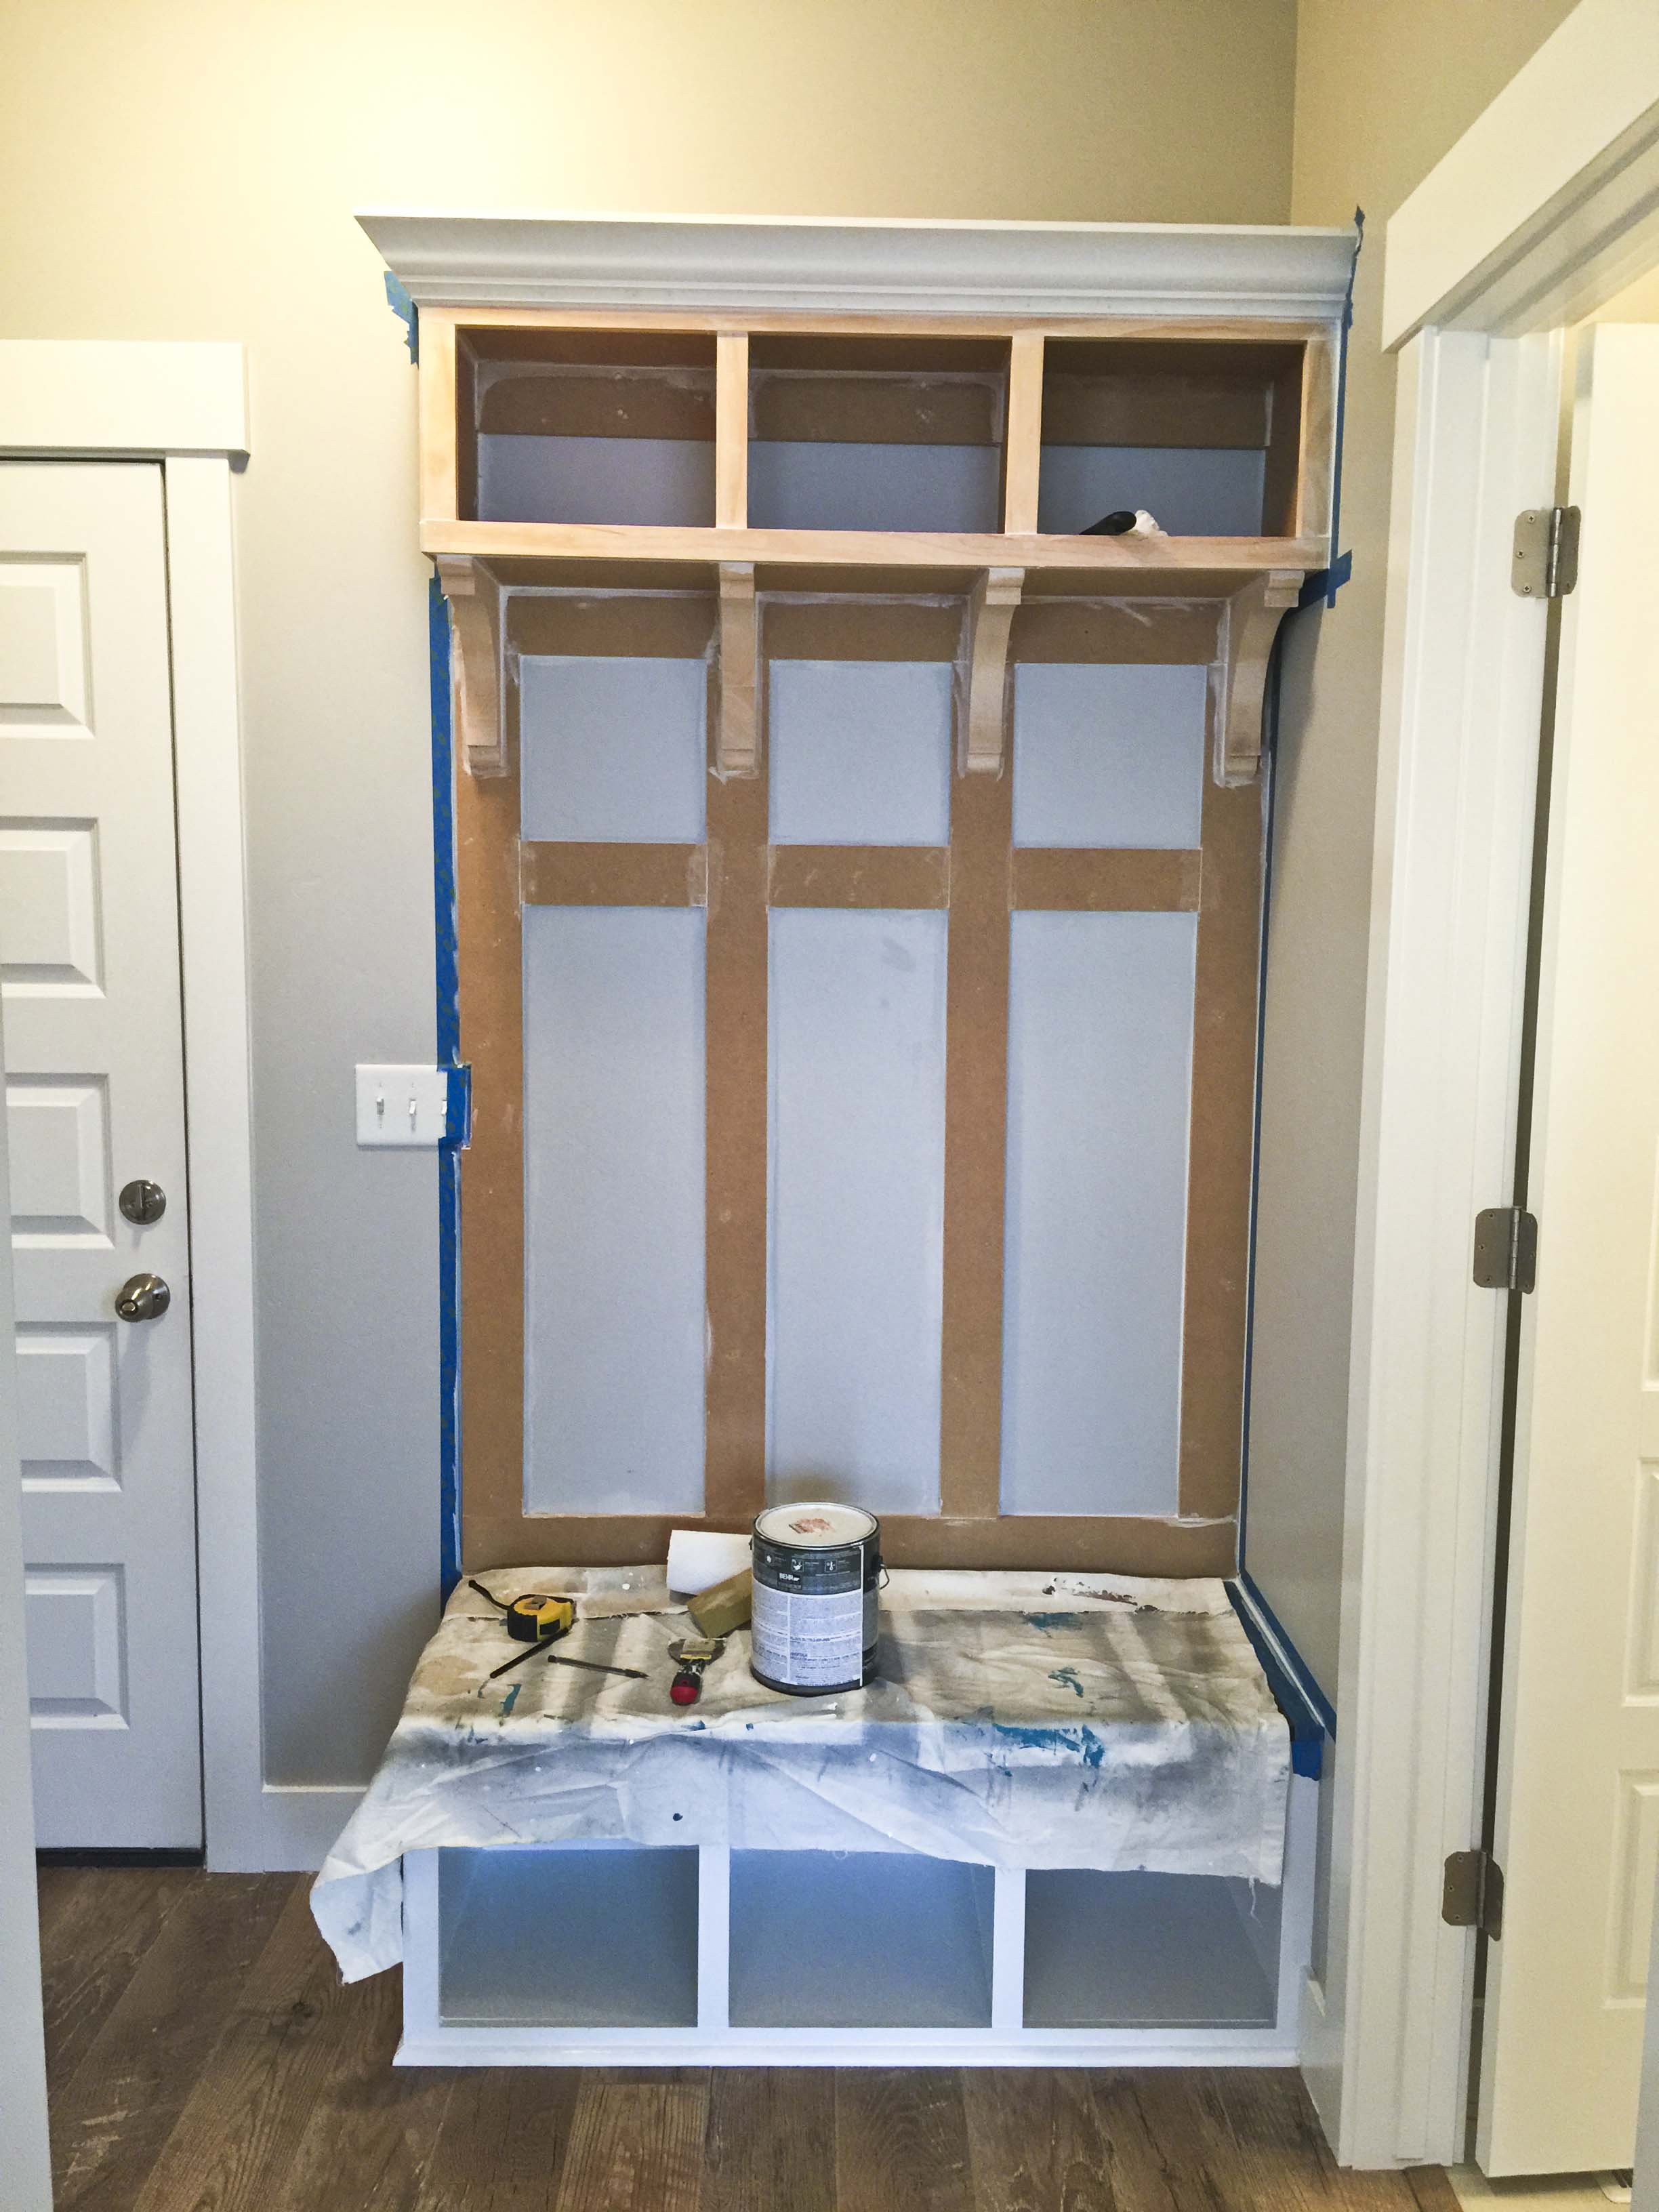
I was tempted to just be done at this point but I knew it needed that final touch–crown molding. I am not wild about crown molding and the angles and whatnot, plus I really didn’t want to go back to the store again. But I did and I’m so glad because it looks so much more finished with it. Please watch this tutorial on cutting crown molding because it will save you hours of frustration.
Painting Secrets
Finally fill all the nail holes and caulk the edges. A little secret for perfect caulk lines-put painter’s tape down before caulking anything that will be joining with another painted surface (like the wall). Caulk and use your finger to swipe it down, then remove the tape. Otherwise you can just caulk a thin line and use your finger to swipe it down but make sure no ridges are left behind because those are hard to sand down later and will be noticeable.
Paint the rest of the unit–Again I did three coats of primer and then 2-3 coats of latex paint. Also another tip when removing painter’s tape after latex paint has dried, use a razor blade along the edge of the tape and you will get a perfect line when taking off the tape instead of tiny little pieces of ripped tape that you will want to slit your throat with.
Once it’s all dry, go ahead and screw in the hooks! And you are done with your most amazing DIY Mudroom Bench. And then you can show everyone, including your contractor, and brag about how awesome you are and that he shouldn’t think you are crazy for wanting to rip out the mantel he put in your brand new house because look at what you just built.
And finally if you just skimmed this post, don’t miss my post DIY Mudroom Bench Part 1!
This post has inspired me to update my bench. Curious where you got the blue pillow. I love the touch of color and size of the pillow.
Thank you!
Dusti
Thanks! The pillow is from IKEA actually. Good luck!
I’m actually going to attempt this! We are building a house, and I told the contractor that I have a mudroom bench that I will be building, so don’t put the trim in until I build my thing.
Lol. So here’s hoping I get it right and they don’t think I’m a crazy person!
Do it! It was a great experience for me as a builder, it really took me to the next level!
Can you show me where the lattice is used? If possible can you give a link from home depot to purchase the lattice?
Awesome build btw.
Thanks!!!
The lattice is used only on the very side of the top and bottom ‘boxes.’ You can find lattice in the trim section of home depot.
Awesome looking!!! Where did you get your hooks?
Thank you! I just got them at Home Depot.
how wide is your bench?
Hi would you mind telling me the dimensions of this i absolutely love it!
Do you have a PDF of this?
Sorry, I don’t.
I LOVE this! But an a bit confused on what the purpose of the lattice is. Lattice like people put around their porches?
Lattice is just the thin wood, about 1/4″ thick and only 1.5″ wide. It’s what I use to trim around the outside to give it a prettier look.
Love it! What color gray is the wall?
Thanks! It’s Sherwin Williams Passive Gray
Approxamatly how many hours did this take you? I have been asked to build this for somebody and I want to give them an accurate quote.
Hmm…good question. I think all together including shopping for the materials and painting, about 10-12 hours. Painting always takes the longest. If you have a paint gun it could decrease the time quite a bit.
Hi there. I am new at all this DIY stuff and to be honest a bit scared to start something like this knowing I may end up quitting because of the lack of experience. So I thought I’d ask you some quick questions before I get started and wast my money. We are a one income home so every penny counts! LOL! Anyway, we are currently renting a brand new home, our move was so quick for work we had not time to buy and close. So what I make needs to be able to go with me when we do move into our own home. I have a space in my garage or in my entry way that could be used for my “mud room” and would love to make your plans. Is it possible to make this without directly nailing the board or the tic tac toe looking part into the wall itself. Could I actually put those huge boards you see builders use to put on the sides of the houses, the boarding up part of the home once they have done the framework. As you can see I don’t even have the jargon down to a science! Sorry! Was wondering if that type of boarding can be used, or something to that effect, and if so how would I attach it to the bench in your plans? If this is too much I understand, I just was wanting to somehow make it so its moveable or at least not directly into the owners walls as they will most likely want me to take things out and leave house at it was to begin with. Thank you so very much! I wish I had your skill level and creativity, you are pretty amazing with your design style and building skills! Blessings!
Sorry for the typos…I think I need to make myself a bit more clear. If used a board to attach the tic tac toe looking part to instead of attaching the tic tac toe part into a wall, could this then be attached to the bench in your plans? If so how could I attach it? Would I need some kind of support mechanism in the back? It would sit up against the wall in my garage or the wall in my entry way. Or maybe I could just make the bench part and then use a piece of reclaimed wood as the panel to be nailed into the wall (Im thinking just the one piece of wood would be less to take out than if i put all the paneling in your beautiful plans?) Thank you!
Yes I totally understand. What I would do is create a ‘faux wall’ with 3/4″ MDF board and mount everything to that. The you can screw that board to the wall/studs. I am a little leary of doing the top without the corbels being screwed into studs so I would add sides to the top boxes that go all the way down so it’s more of a ‘locker’ effect. Does that make sense?
Do you happen to have dimensions of your cuts? I am looking to build this and would like mine to turn out as nice as yours! As far as the corbels, are they installed into studs or only the board and batten? I’m assuming the top rests on the board and batten, corbels and then top gets screwed into the studs through the back brace which is the main source of Support?
Thank you!
Hi! Could you put how many of each 17,10, and 3.5 cuts you did on each board of mdf? Thank you!
Hi there, Super excited about this post as this is exactly what I would like to build… Your bench tutorial seems to be missing asn I was just wondering what type of wood you used to make it. Please get back to me as I am so excited to get going!
Thanks
Great job on your bench. A little tip: you can move the switch plate very easily so you do not have to cut into your bench!
Good to know, thanks!
Very nice project and very well done!
I’m projecting to do mine starting from your project, but as I never worked before with MDF, I would like to know 2 things:
– did you use 2 panels for the bottom of the top cabinet because it could be to flexible or there is another reason?
– was the bench stable or was it skewing and moving before you fixed it to the wall?
Thank you
Best Regards
I used 2 panels for the bottom of the cabinet because I was following someone else’s tutorial and that’s what she did. But it achieved the height I needed to trim it out later. And it’s much more sturdy. The bench is very stable because of the cleats at the back of each compartment.
What a great project! It looks great and is such a useful piece I think many will find helpful!
could you send me the exact measurements that you used for the mud room. my daughter what’s one just like yours. you did a great job on yours.
my email address is: 3d_Mar_Div@myfairpoint.net
my name is Harold from a little town in Maine. Thank you very much for your help.
have you sent the measurements already. If so that you.
Hi I’ve used your plan and my bench doesn’t look too bad 😀. Where did you get your corbels?
Oh great! I just bought them from Home Depot!
I cannot find part one with the supplies list. I found the link but it just brings me back to part 2.
Do you have a link for part 1? It just takes you back to part 2?
Can i please ask where you got the hooks from? They are so unique.
The hooks? They are pretty standard brushed nickel hooks from Home Depot.