Easy Thanksgiving Centerpiece
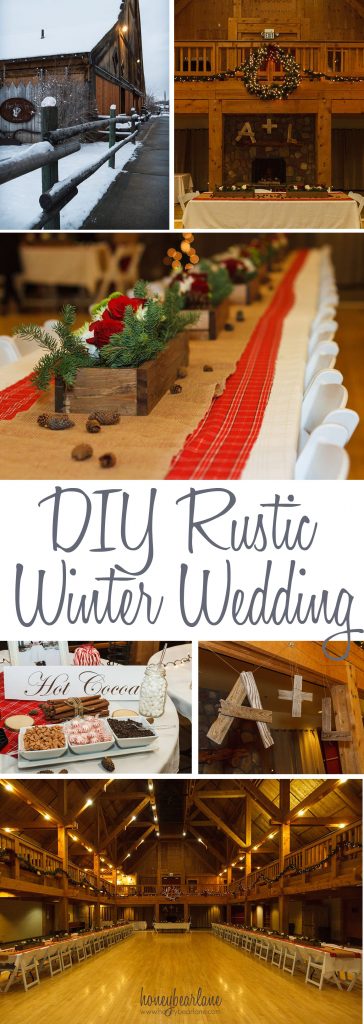
Last December, I helped plan and execute my sister’s wedding. It was so cute, very rustic and wintery but whimsical. I built 22 wooden boxes for the centerpieces and every since I’ve been trying to give them away. Well last week, they came in very handy when we had an unexpected funeral to help with and I was asked to take care of the centerpieces for the luncheon. And now I’m so glad I didn’t give them all away! This centerpiece idea is my go-to idea for any event. You can use one or two boxes for your own tables at Thanksgiving or build a bunch more for a larger event and then have them forever after.
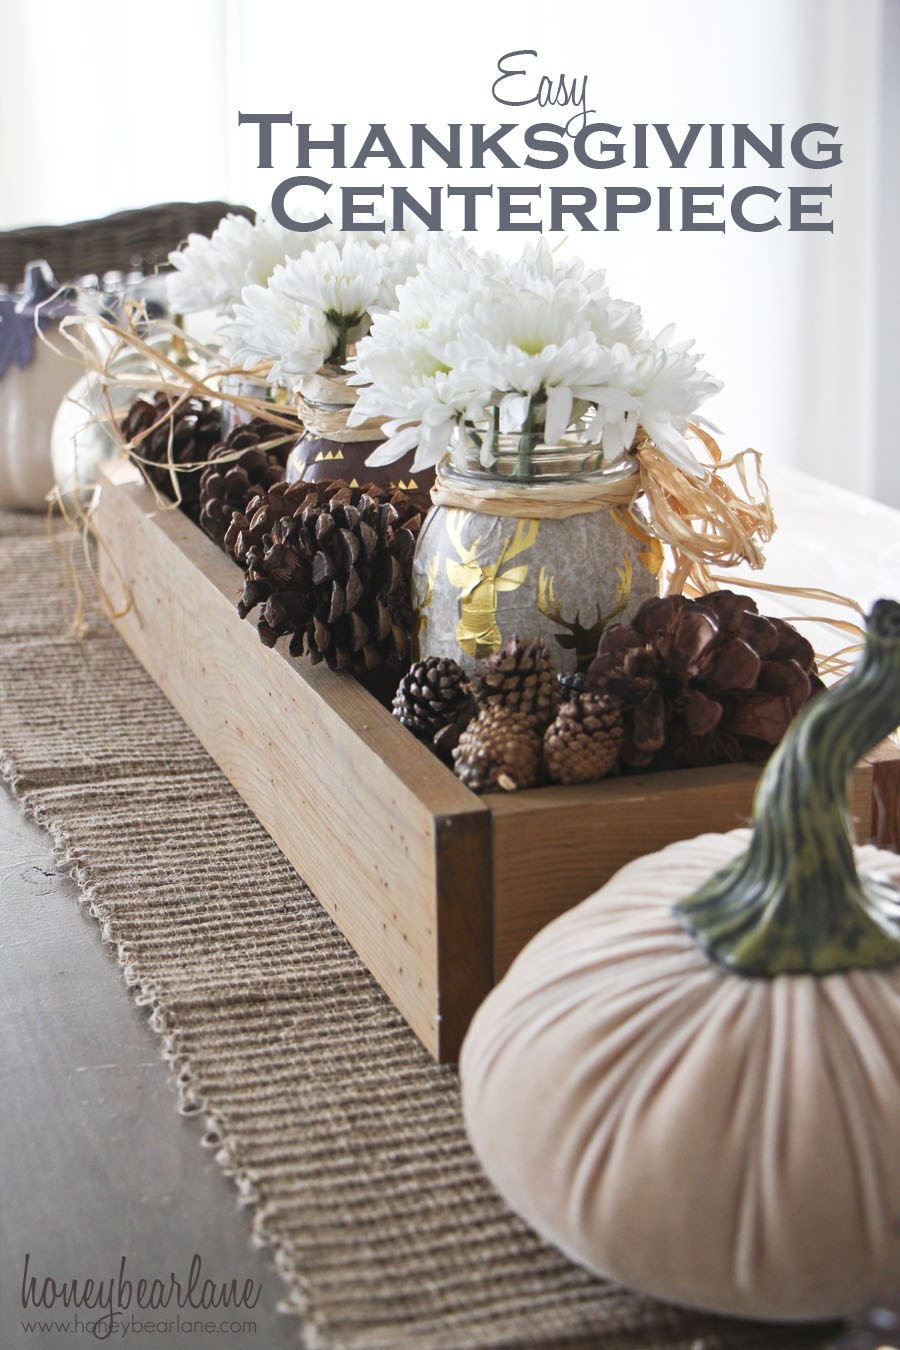
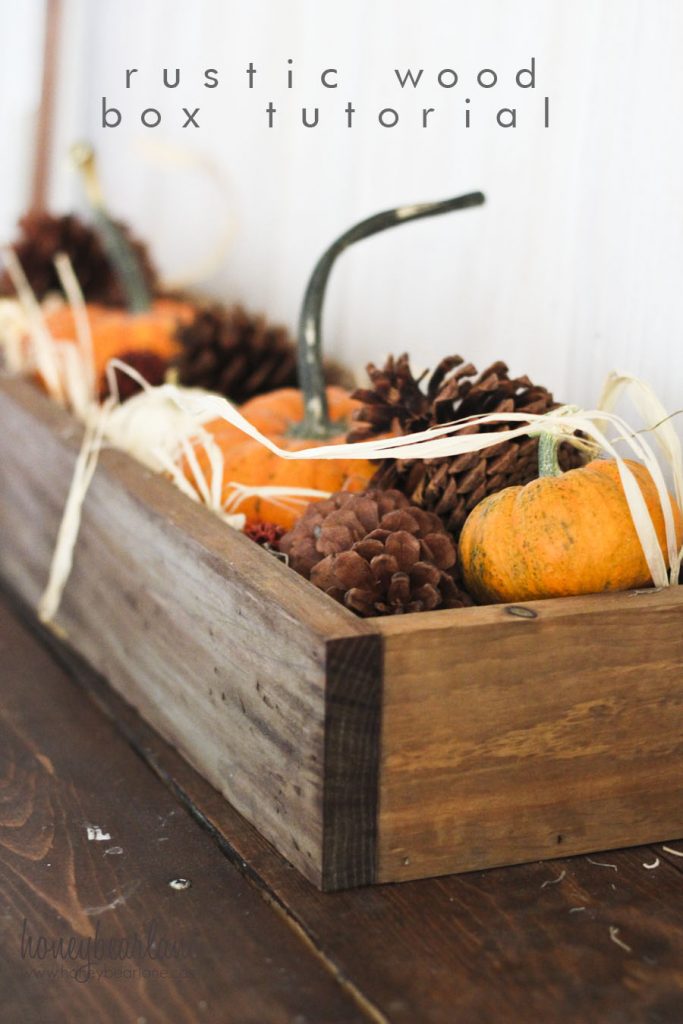
It starts with the wooden box. Here’s a great tutorial and these are very easy to make. I tried a variety of ways to finish them, but if I were to do it again, I would probably do my weathered wood method. This wood box is 2 feet long.
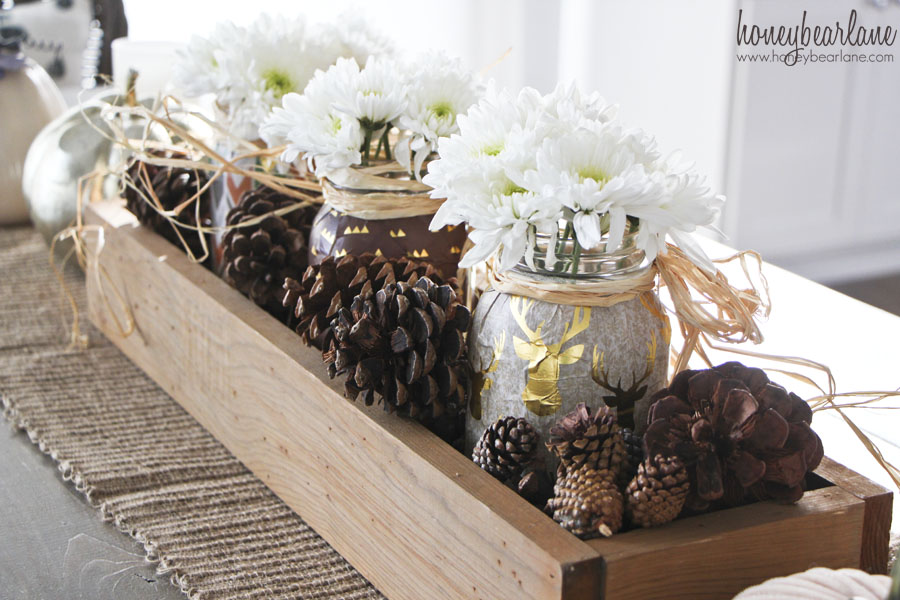
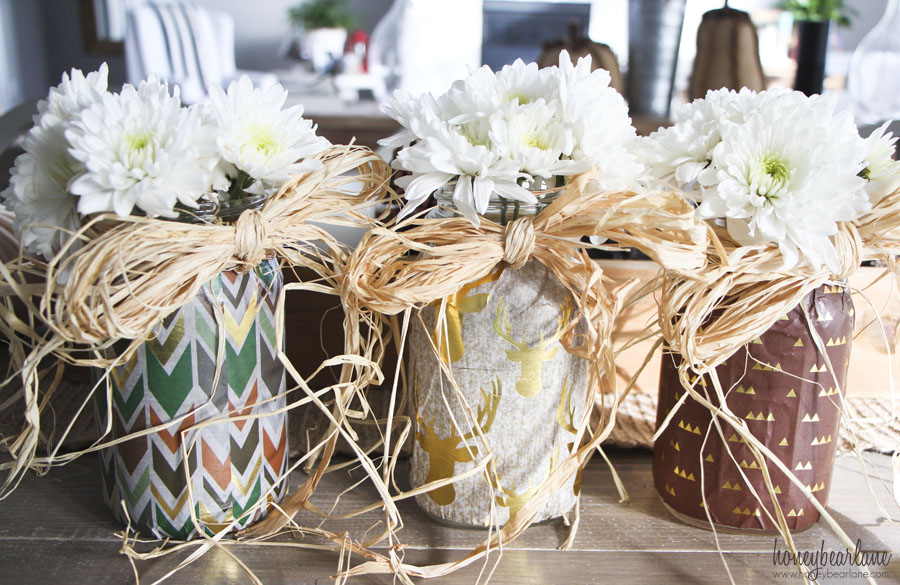
Next is some mason jars. For most of my events, I used smaller jars–jelly jars are the perfect size to sit low in the box. But for my Thanksgiving centerpiece, I wanted to make more of a statement. I used larger jars and decoupaged some really cute paper onto the jars for pattern.
Here’s a quick How to:
Supplies
- Mason jars
- Decoupage paper: Gold Stag collection by DecoArt
- Decoupage medium
- Paint brush
- Paper cutter
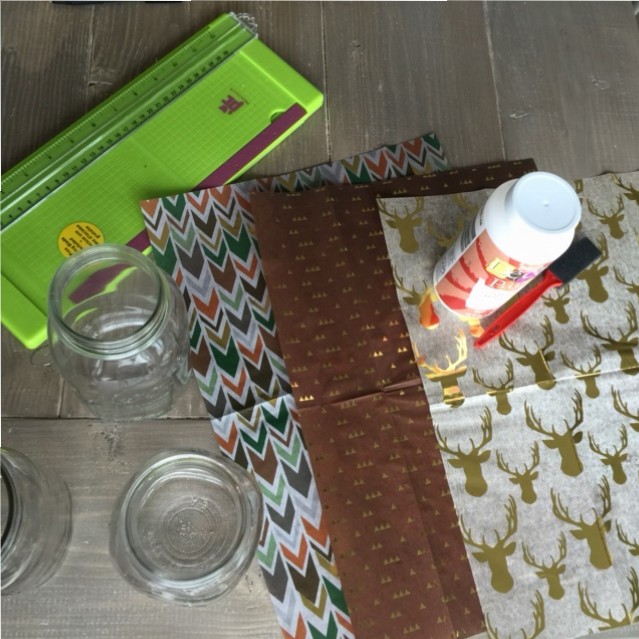
Make sure your jars are clean and dry. Cut the paper to the right size using a paper cutter to ensure accuracy. Dry fit the paper around the jar also to make sure it wraps around the entire thing. This paper was the perfect length for the jars.
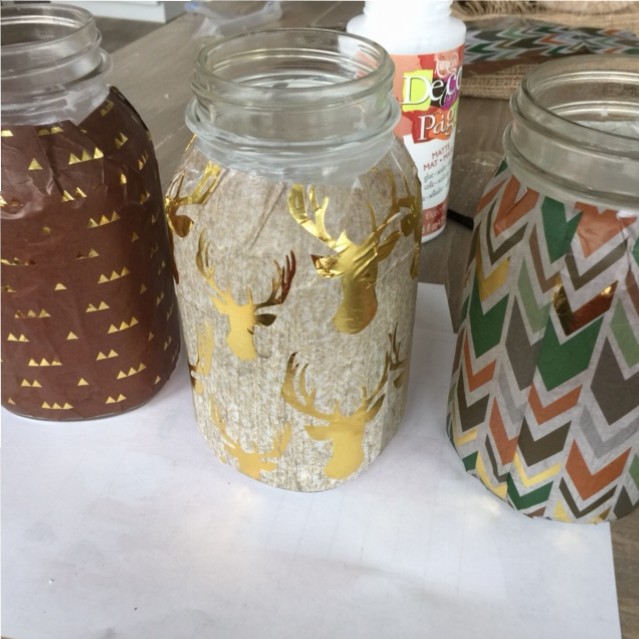
Then you paint some decoupage glue onto the jar, and wrap the paper around, pressing it firmly down and creasing the paper where you have to to make it snug to the shape of the jar. Then paint more decoupage on top of the paper. Let each layer dry and do at least two layers, preferably three or four. Then you can sand down the creases and the paper will fit the jar smoothly.
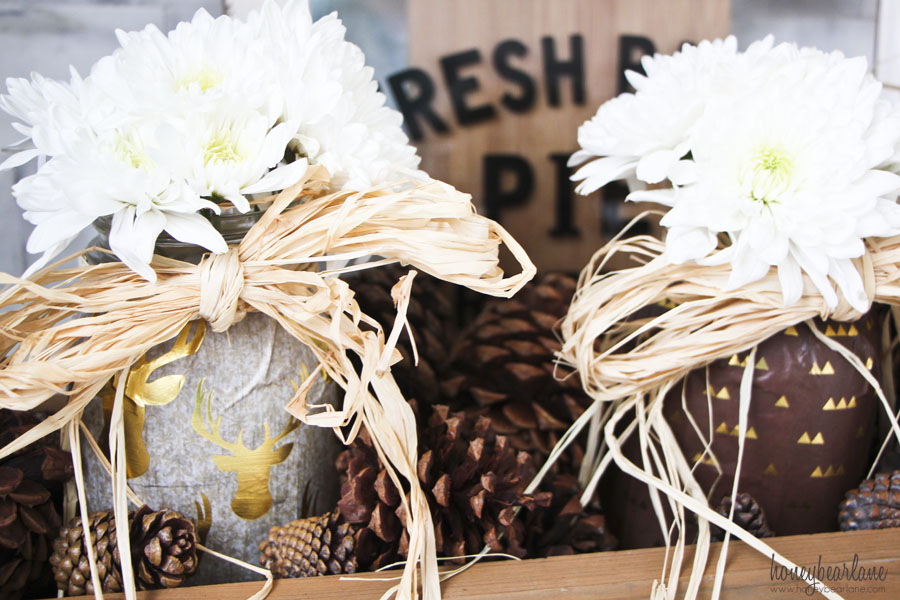
Finally, I wrapped some raffia around the top and tied it in a bow. I added some cute white daisies (you could do real or fake here) and I’m basically done!
To make it a real centerpiece, now I place the jars in the wood box and fill in the gaps with pine cones. For the wedding and funeral, I filled in the gaps with pine stems (I’ve done both real and fake and while the real is nicer looking, the fake does great as well–I just cut a pine garland in half.) But I always use pine cones to help. You could also use pumpkin gourds, acorns, feathers, corn, etc. There are tons of filler ideas but pinecones are nearly free and do a great job!
If you liked this post, don’t miss these!

Easy Thanksgiving Centerpiece Ideas
I love this!! I am a huge fan of decorations that I can change around/change out parts to fit the different holidays and seasons…and the wooden box is perfect for that! (I don’t know why I didn’t think of that sooner…) And I’ve never thought to decoupage jars before. Genius! Thank you!! I’ve been searching for a new centerpiece idea, and this is perfect! You are awesome!!!
Thanks Holly! The wood box is super versatile!
That is a very creative way to decorate the Thanksgiving table.
What size is the box- the length?
It’s 24 inches.
This centerpiece is just beautiful!