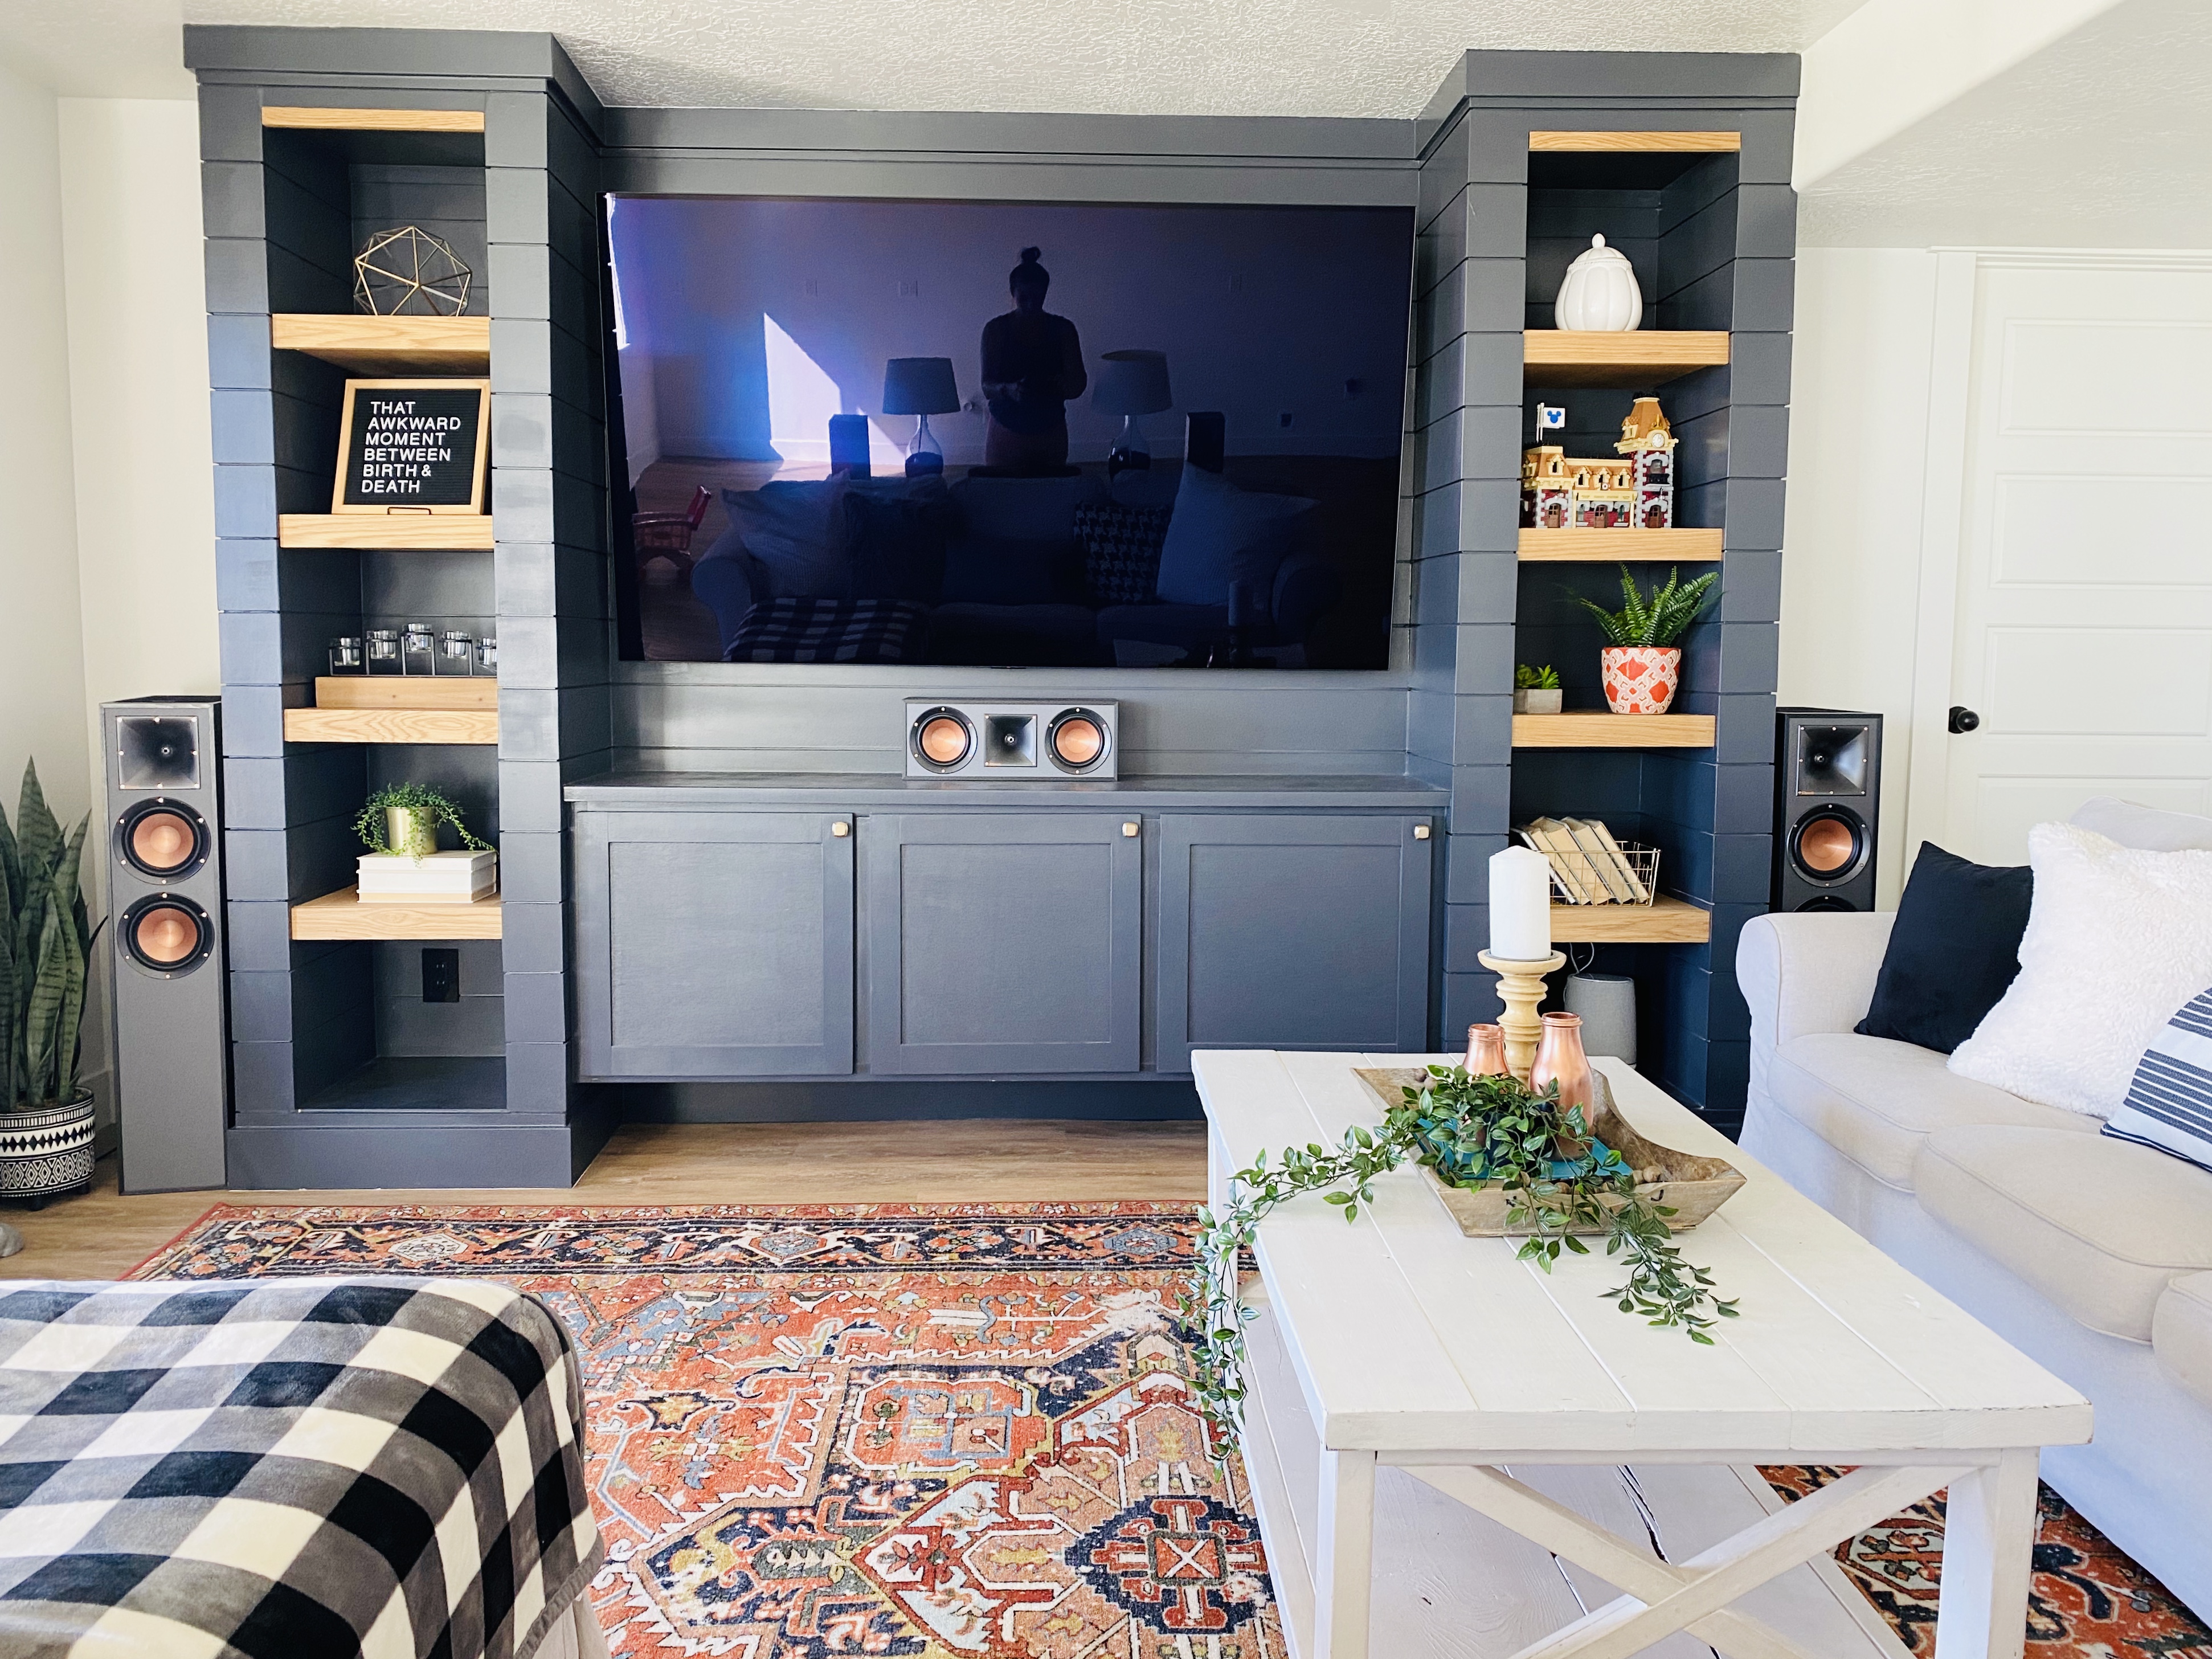
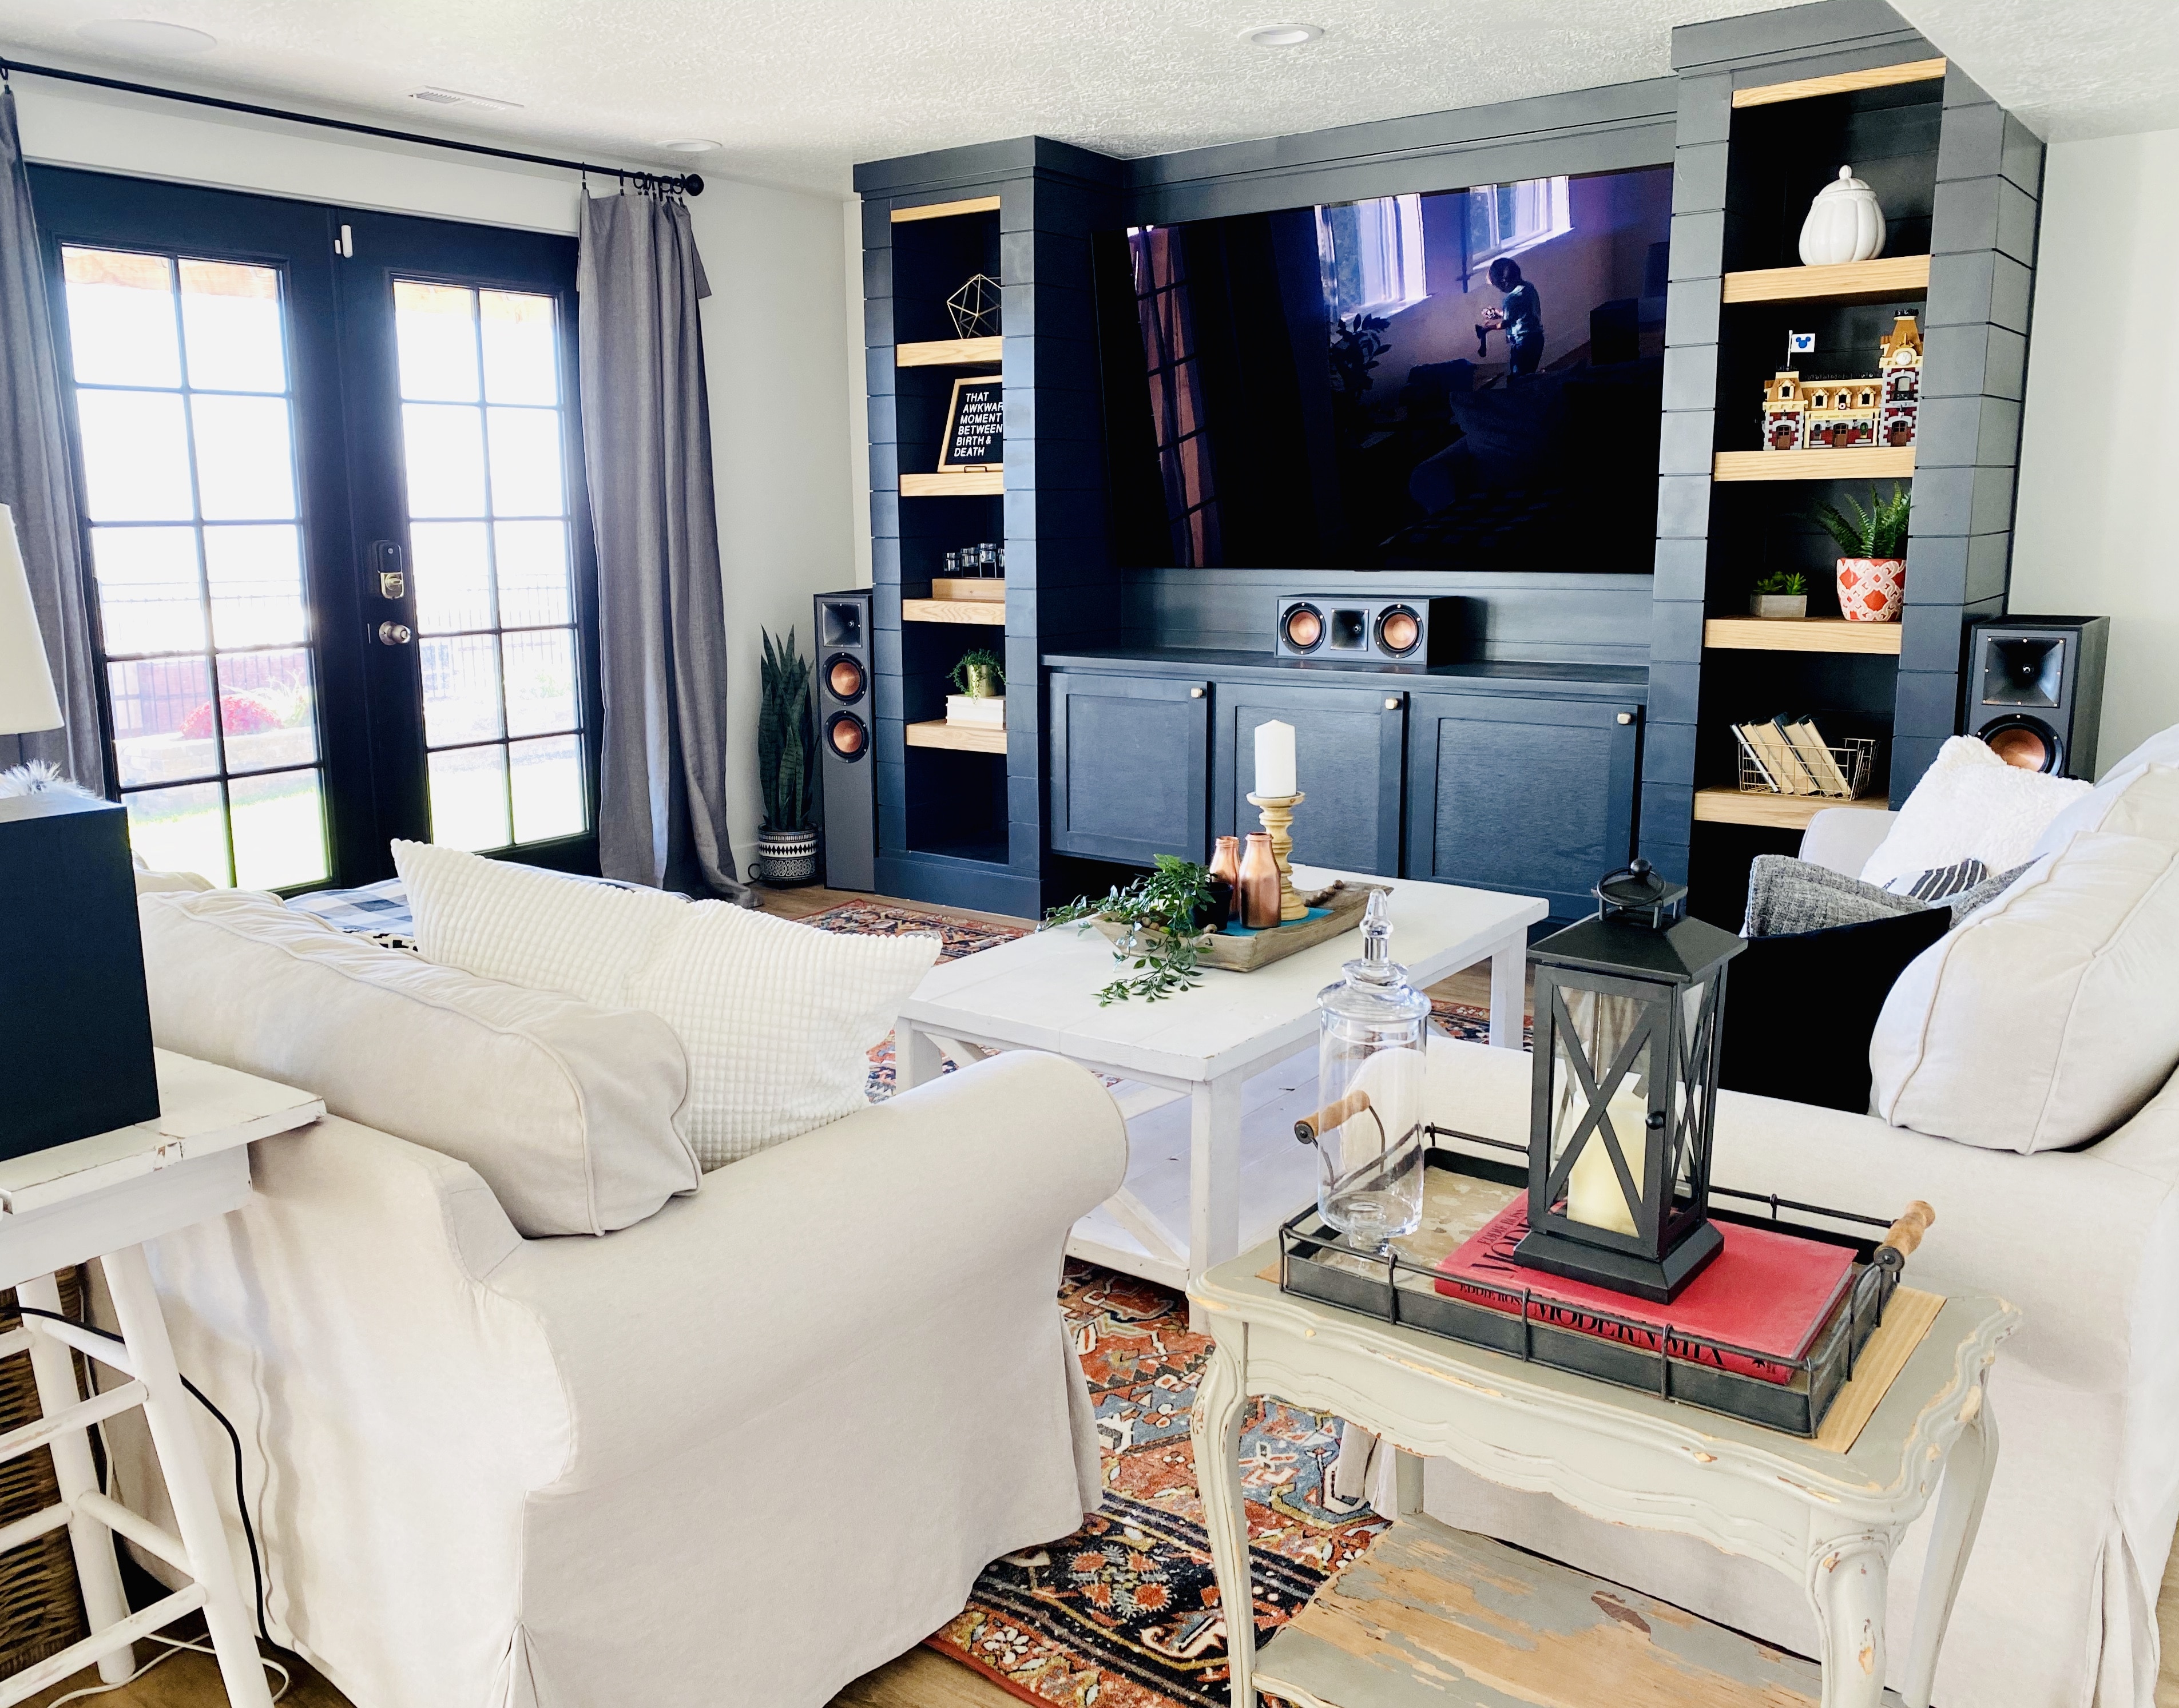
DIY Shiplap BuiltIns with Free Plans
I recently revealed my finished basement living room, complete with my DIY shiplap builtins. These are pretty popular right now but I couldn’t find plans anywhere, so I made my own to share. They might be a little on the small side, so obviously you will want to make your own adjustments.
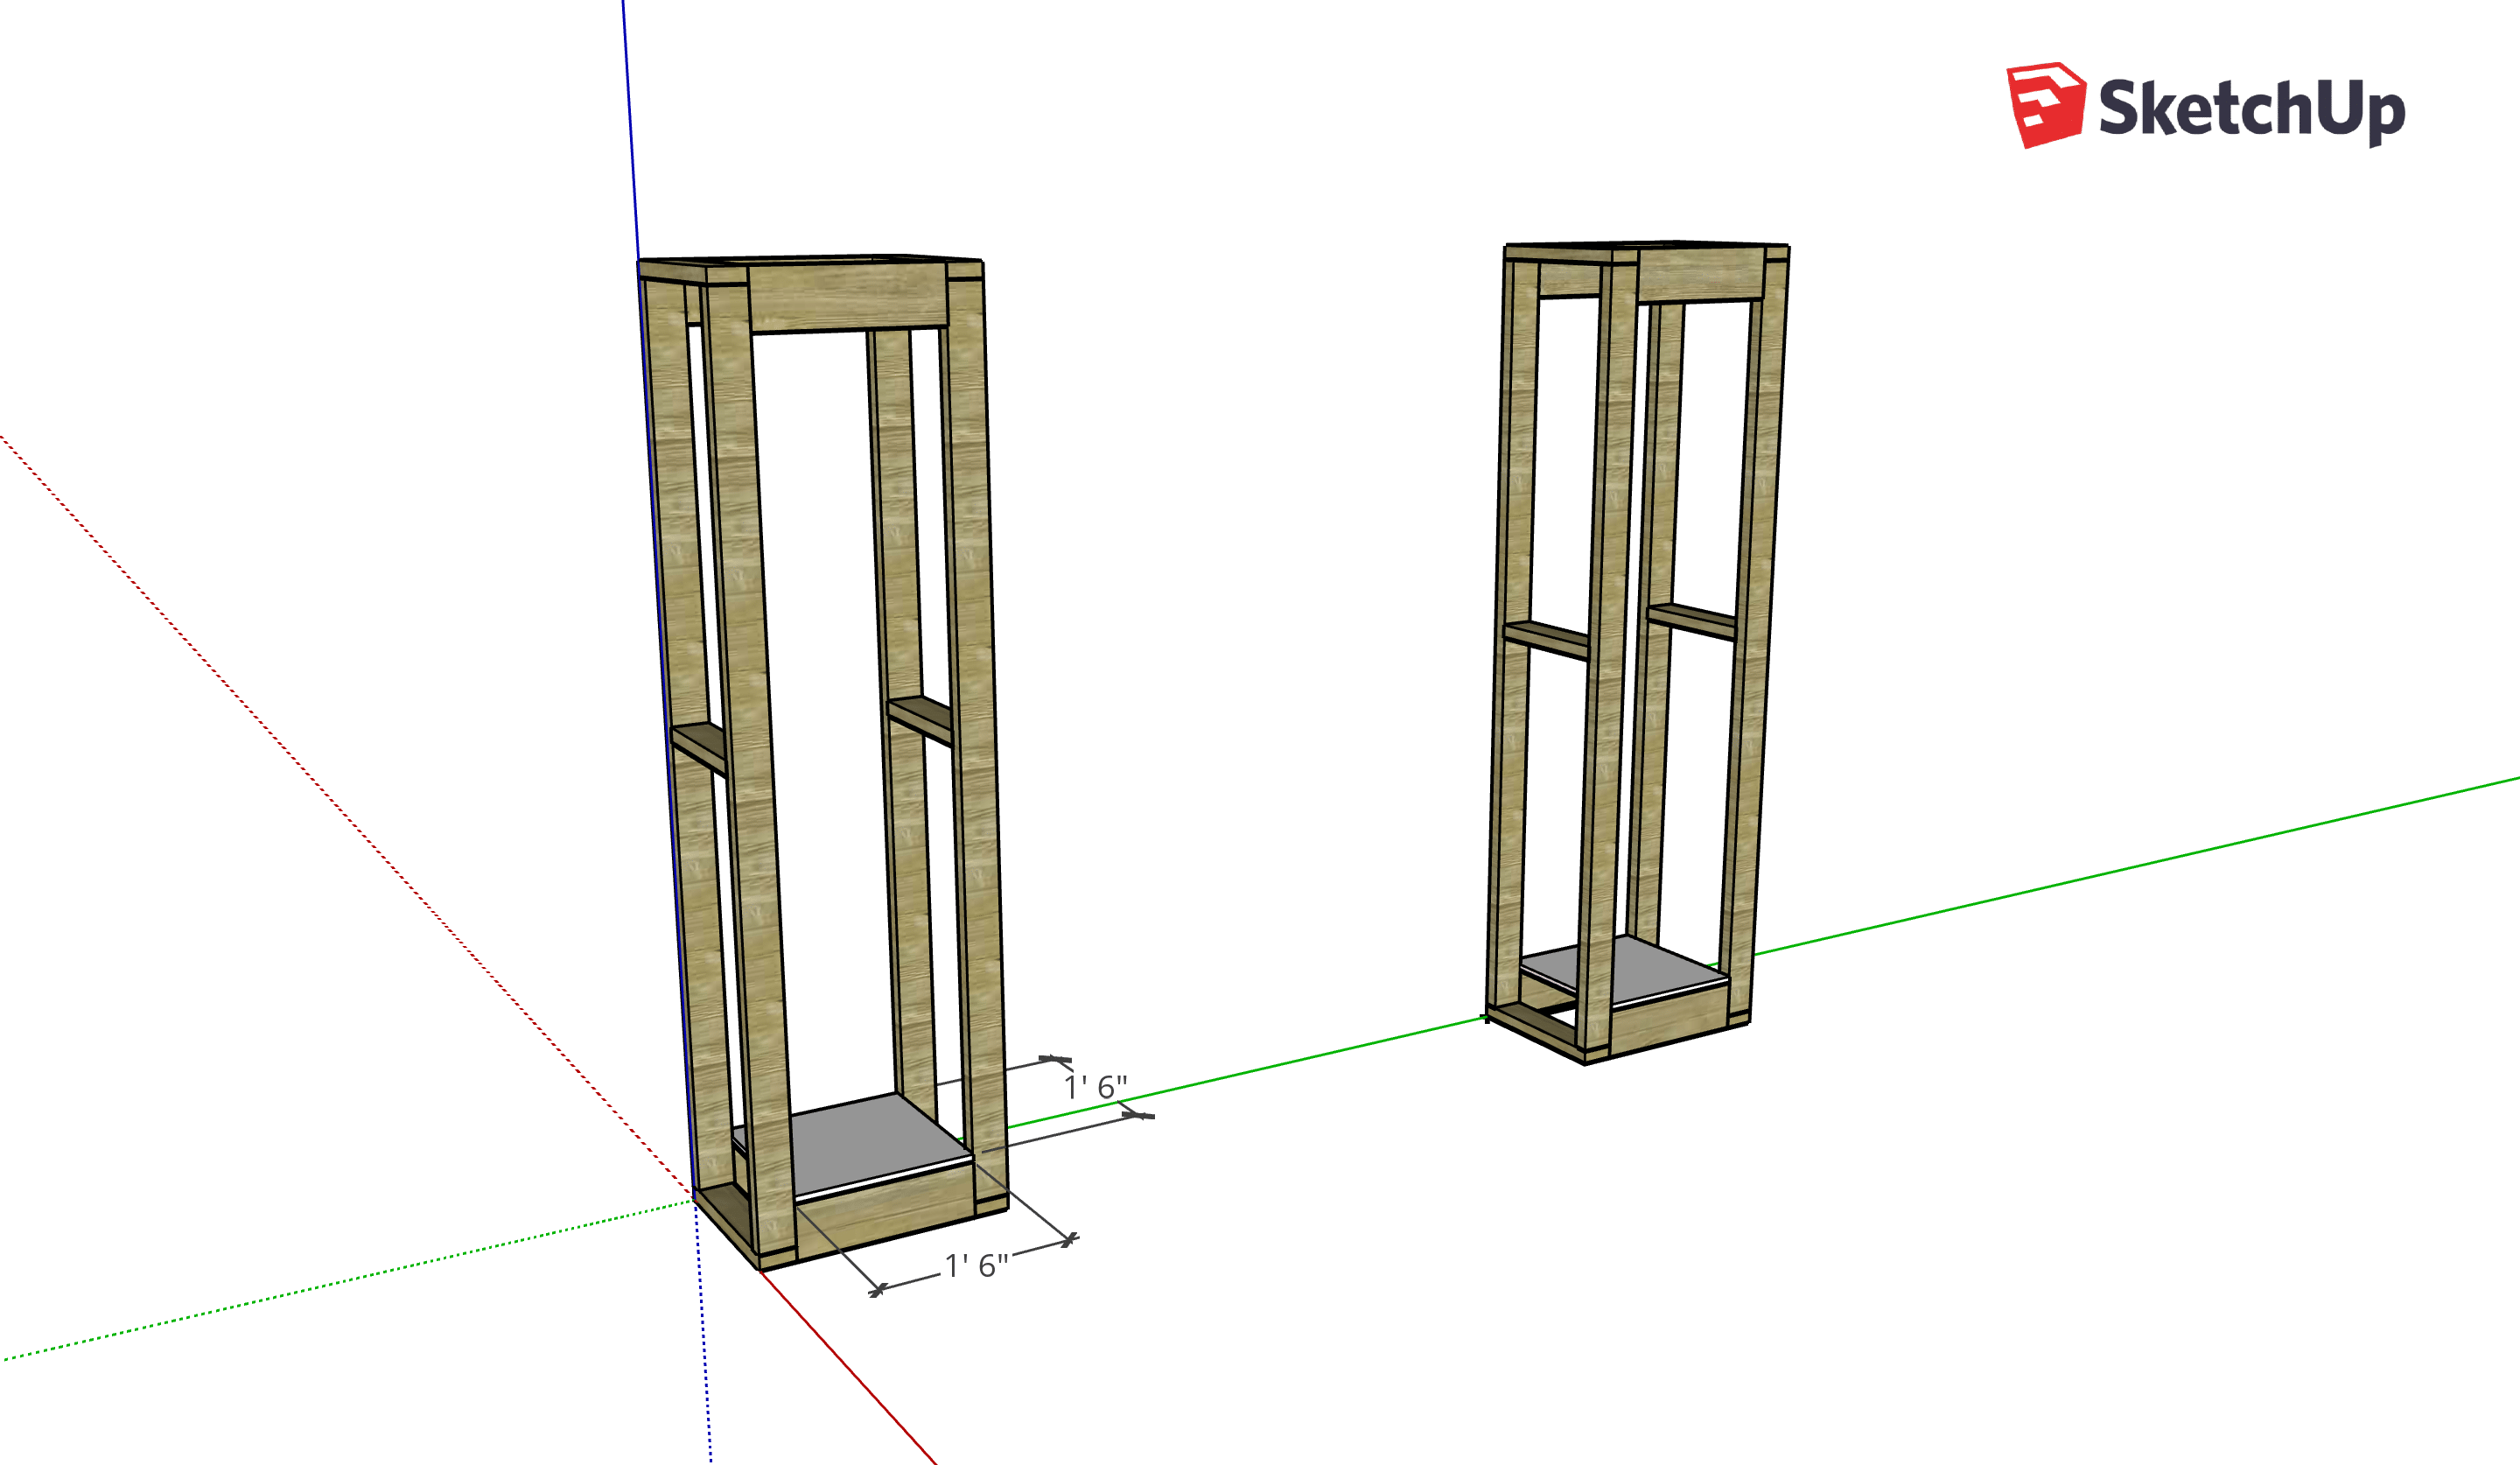
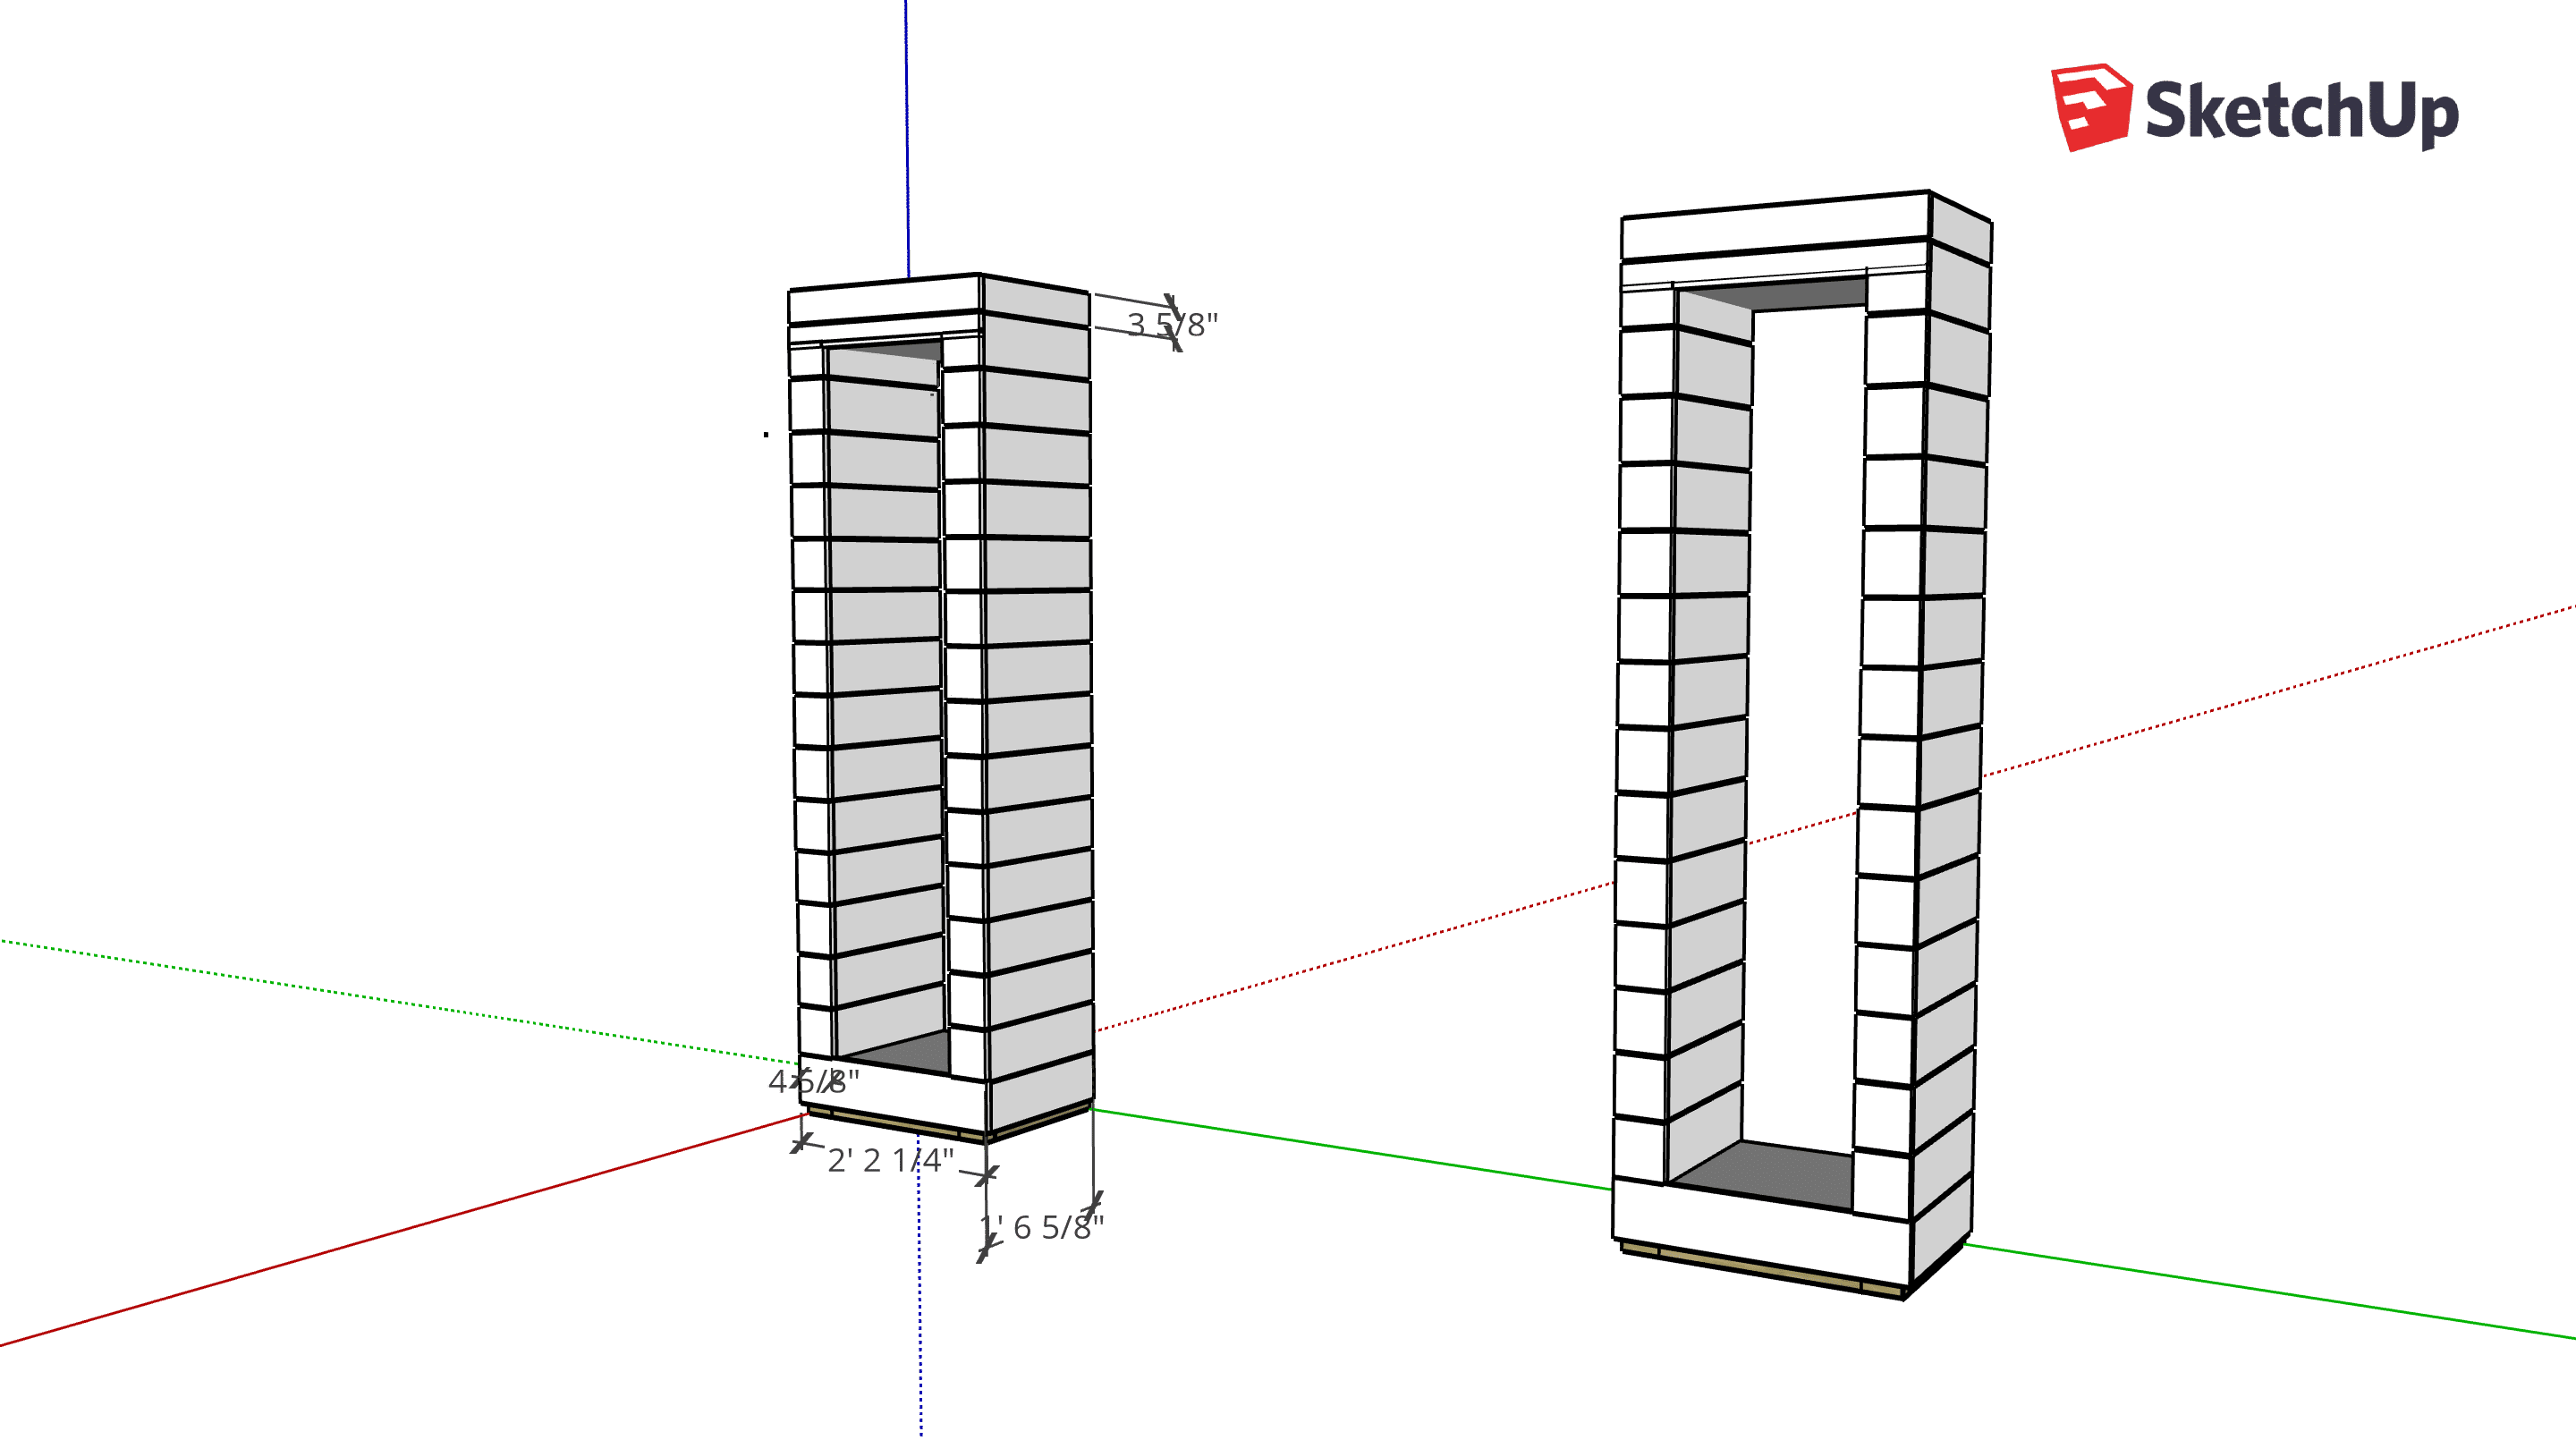
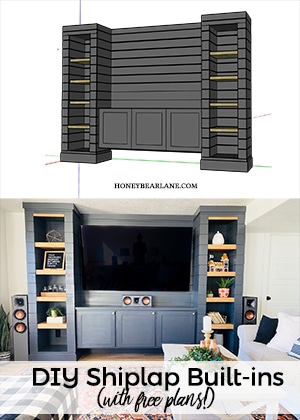
I drafted up the plans in Sketchup. When I draft plans for a build, I build it in the program exactly as I would in real life. This way I can get the measurements and see any flaws in the plan. I’m definitely not the best at this program so there are some weird looking lines here and there but I’m working on my skills.
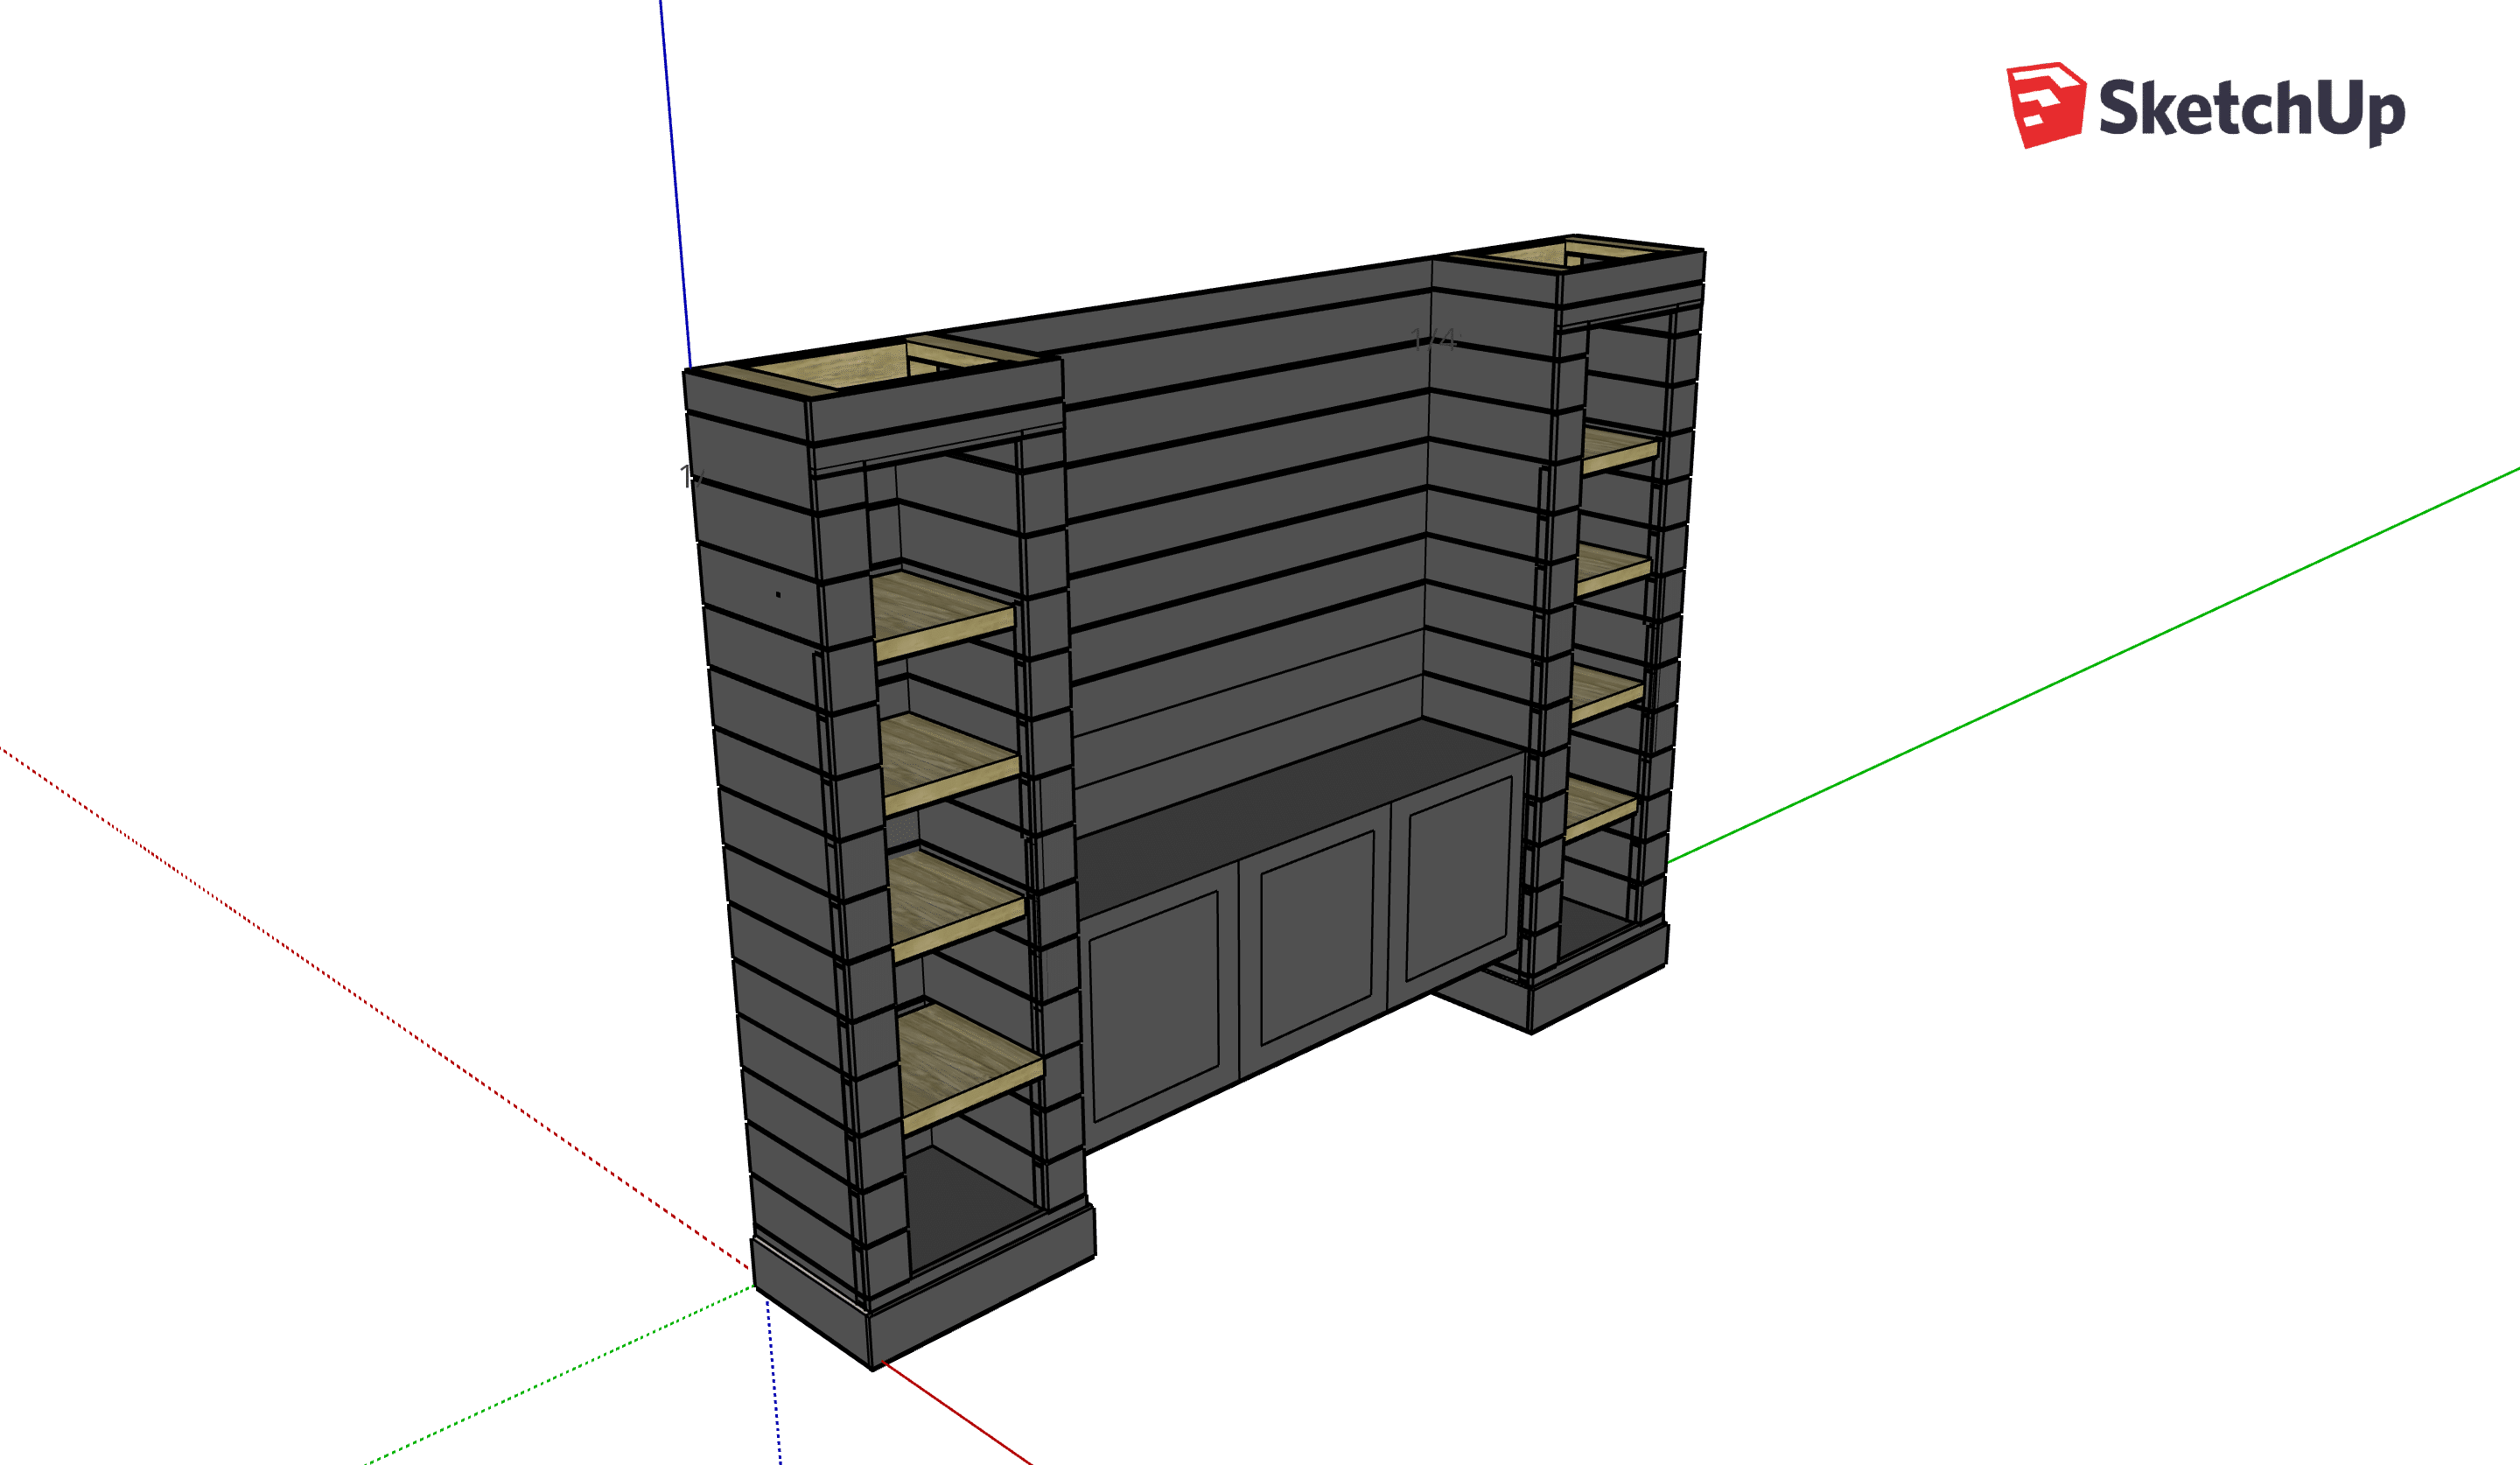
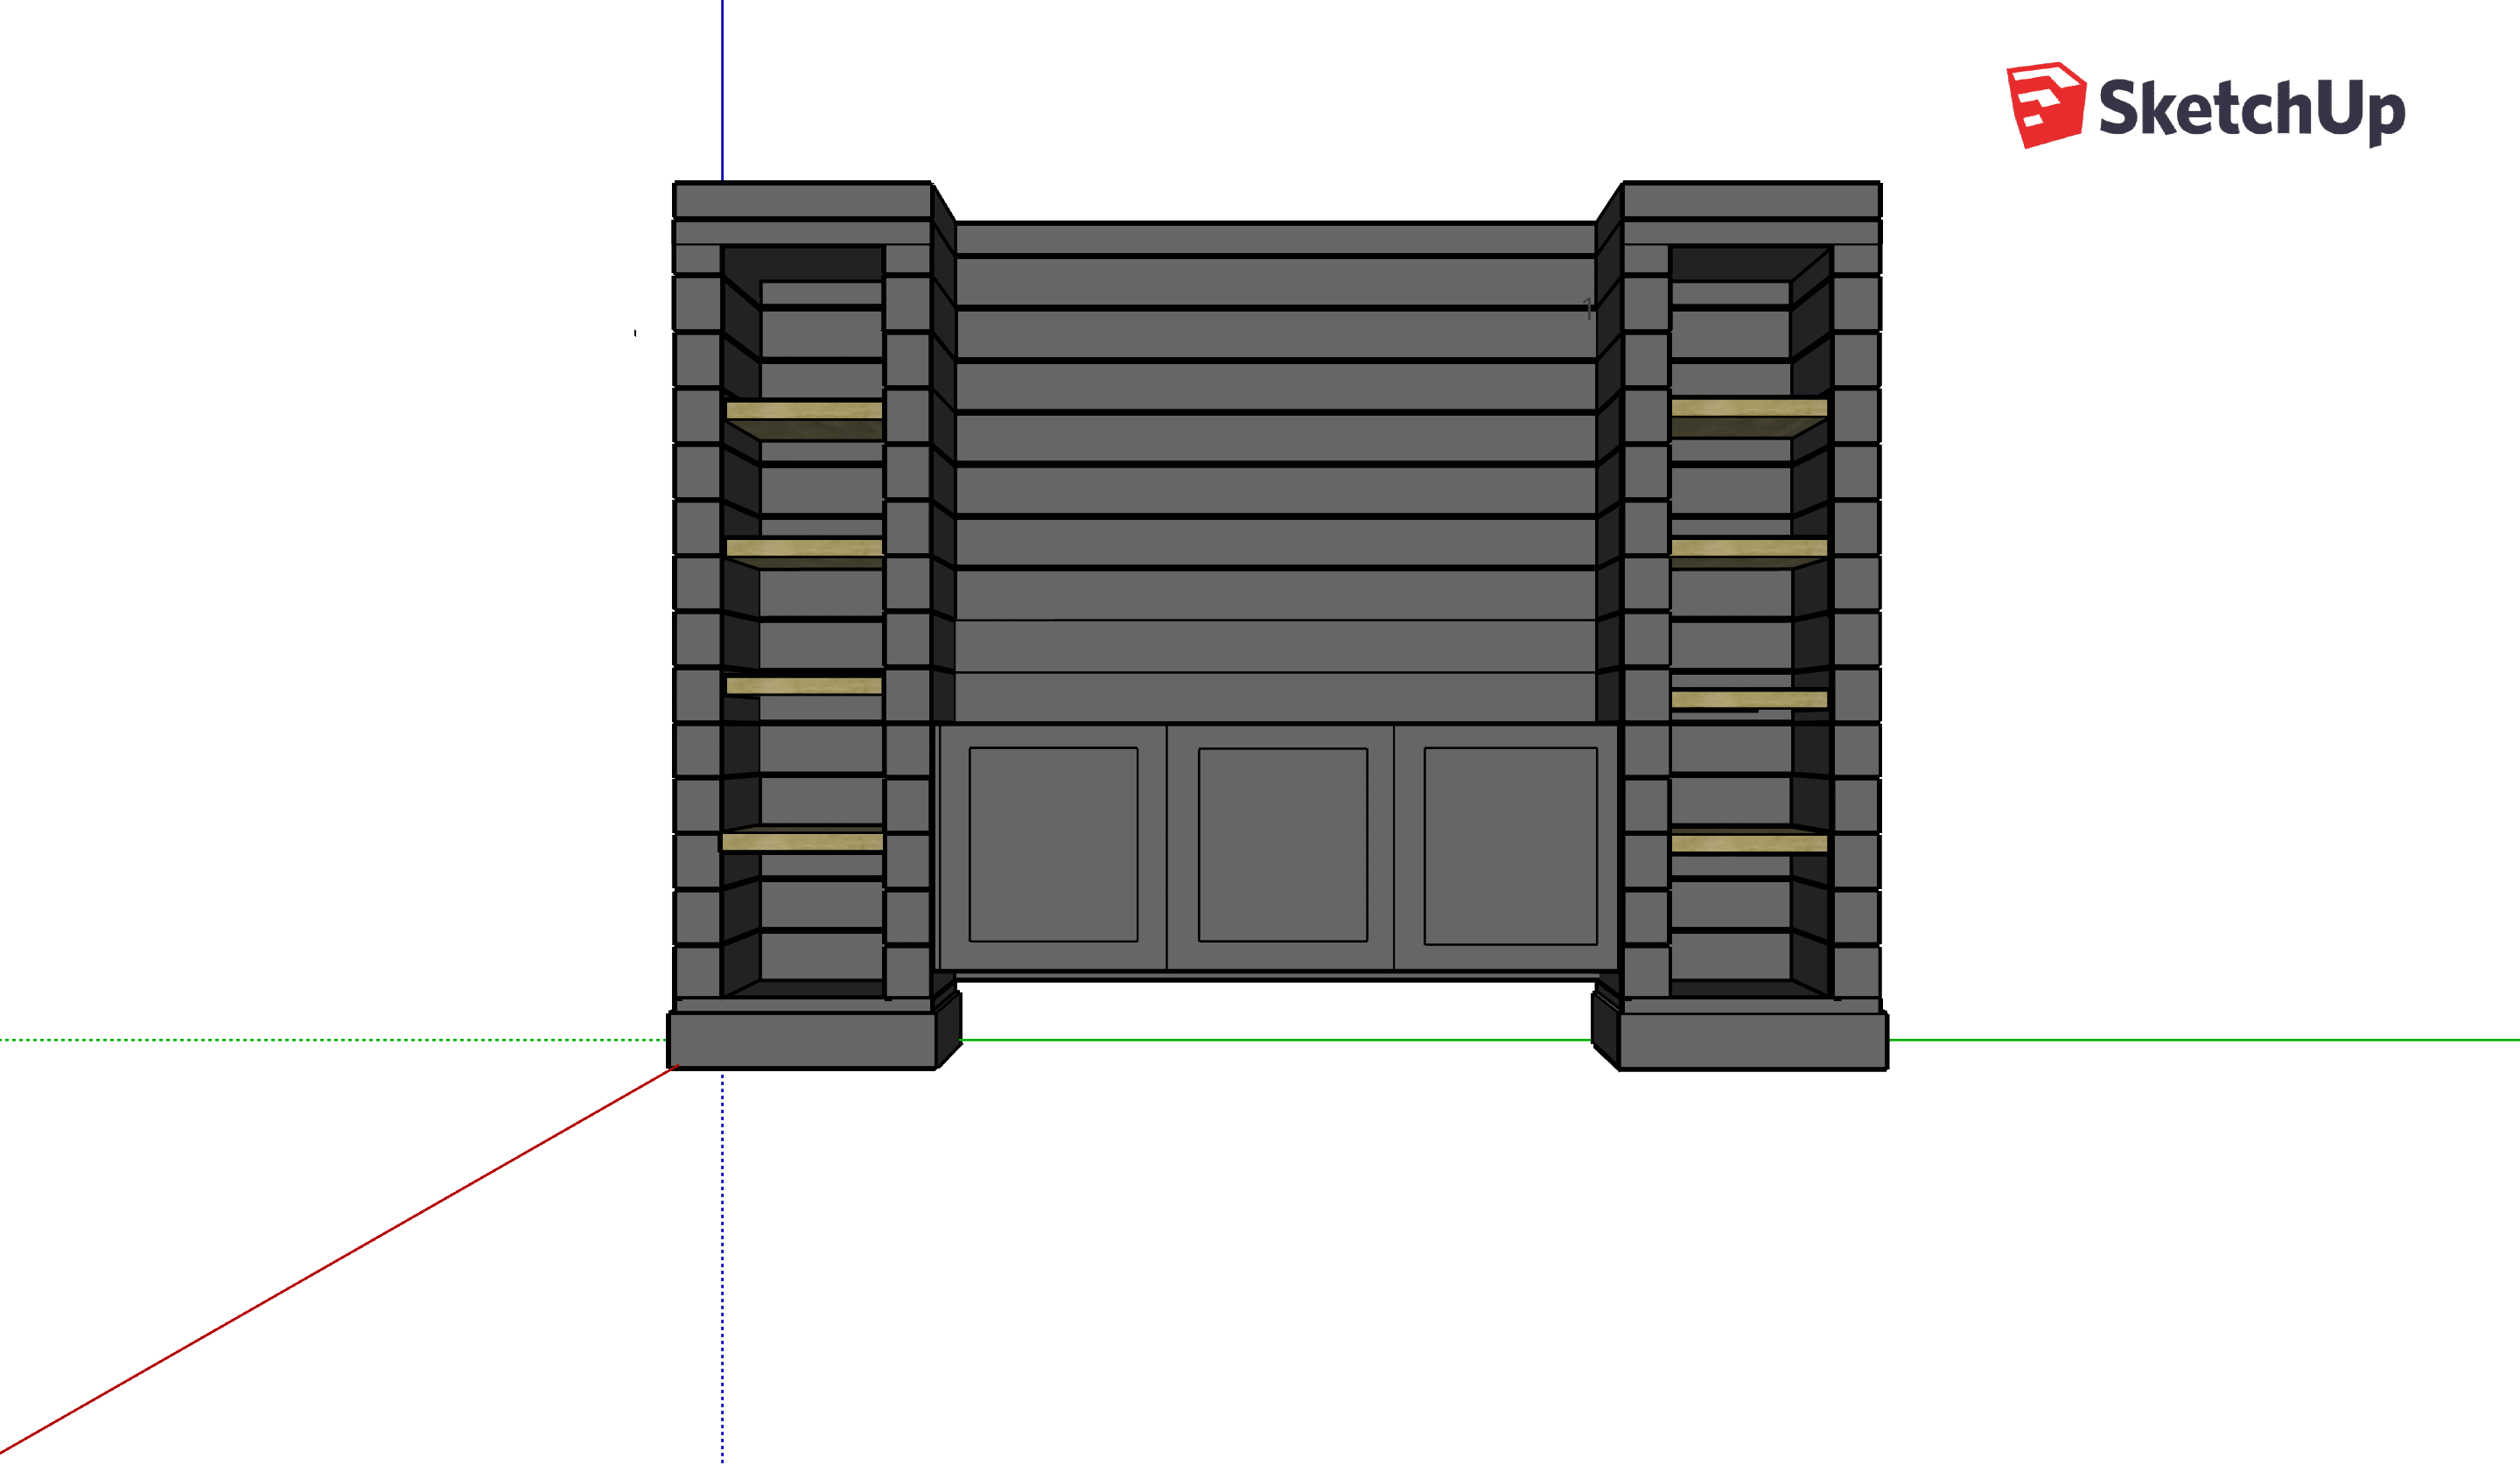
These shiplap builtins ended up being 9 ft wide and about 7.5 ft tall. Each tower is about 26″ wide (including shiplap) with the shelves inside being 18″ wide and 16″ deep. The center cabinetry is 72″ wide, 24″ tall, 7″ off the ground, and 16″ deep. Obviously you can adjust your measurements accordingly. This is the plan I used for my basement family room.
Supply List for Shiplap Builtins
- (9) 2x4x8
- (2) 2x6x8
- About 60 6″ wide Shiplap planks, 8 ft (I can’t remember exactly how many I used so keep your receipt!)
- (2) 18×18 piece of 3/4″ MDF or melamine
- (2) 18×18 piece of 1/4″ plywood
- 1 1 /4″ nails for nail gun
- 2.5″ wood screws
For cabinet: 3/4″ cabinet grade plywood, and (faceframe) 3/4″ 1×2 poplar and 3/4″ 1×3 poplar (pine works fine too)
Skeleton Cut list:
2x4s
- 8 @ 87″
- 8 @ 18″
- 4 @ 15″
2x6s
- 8 @ 18″
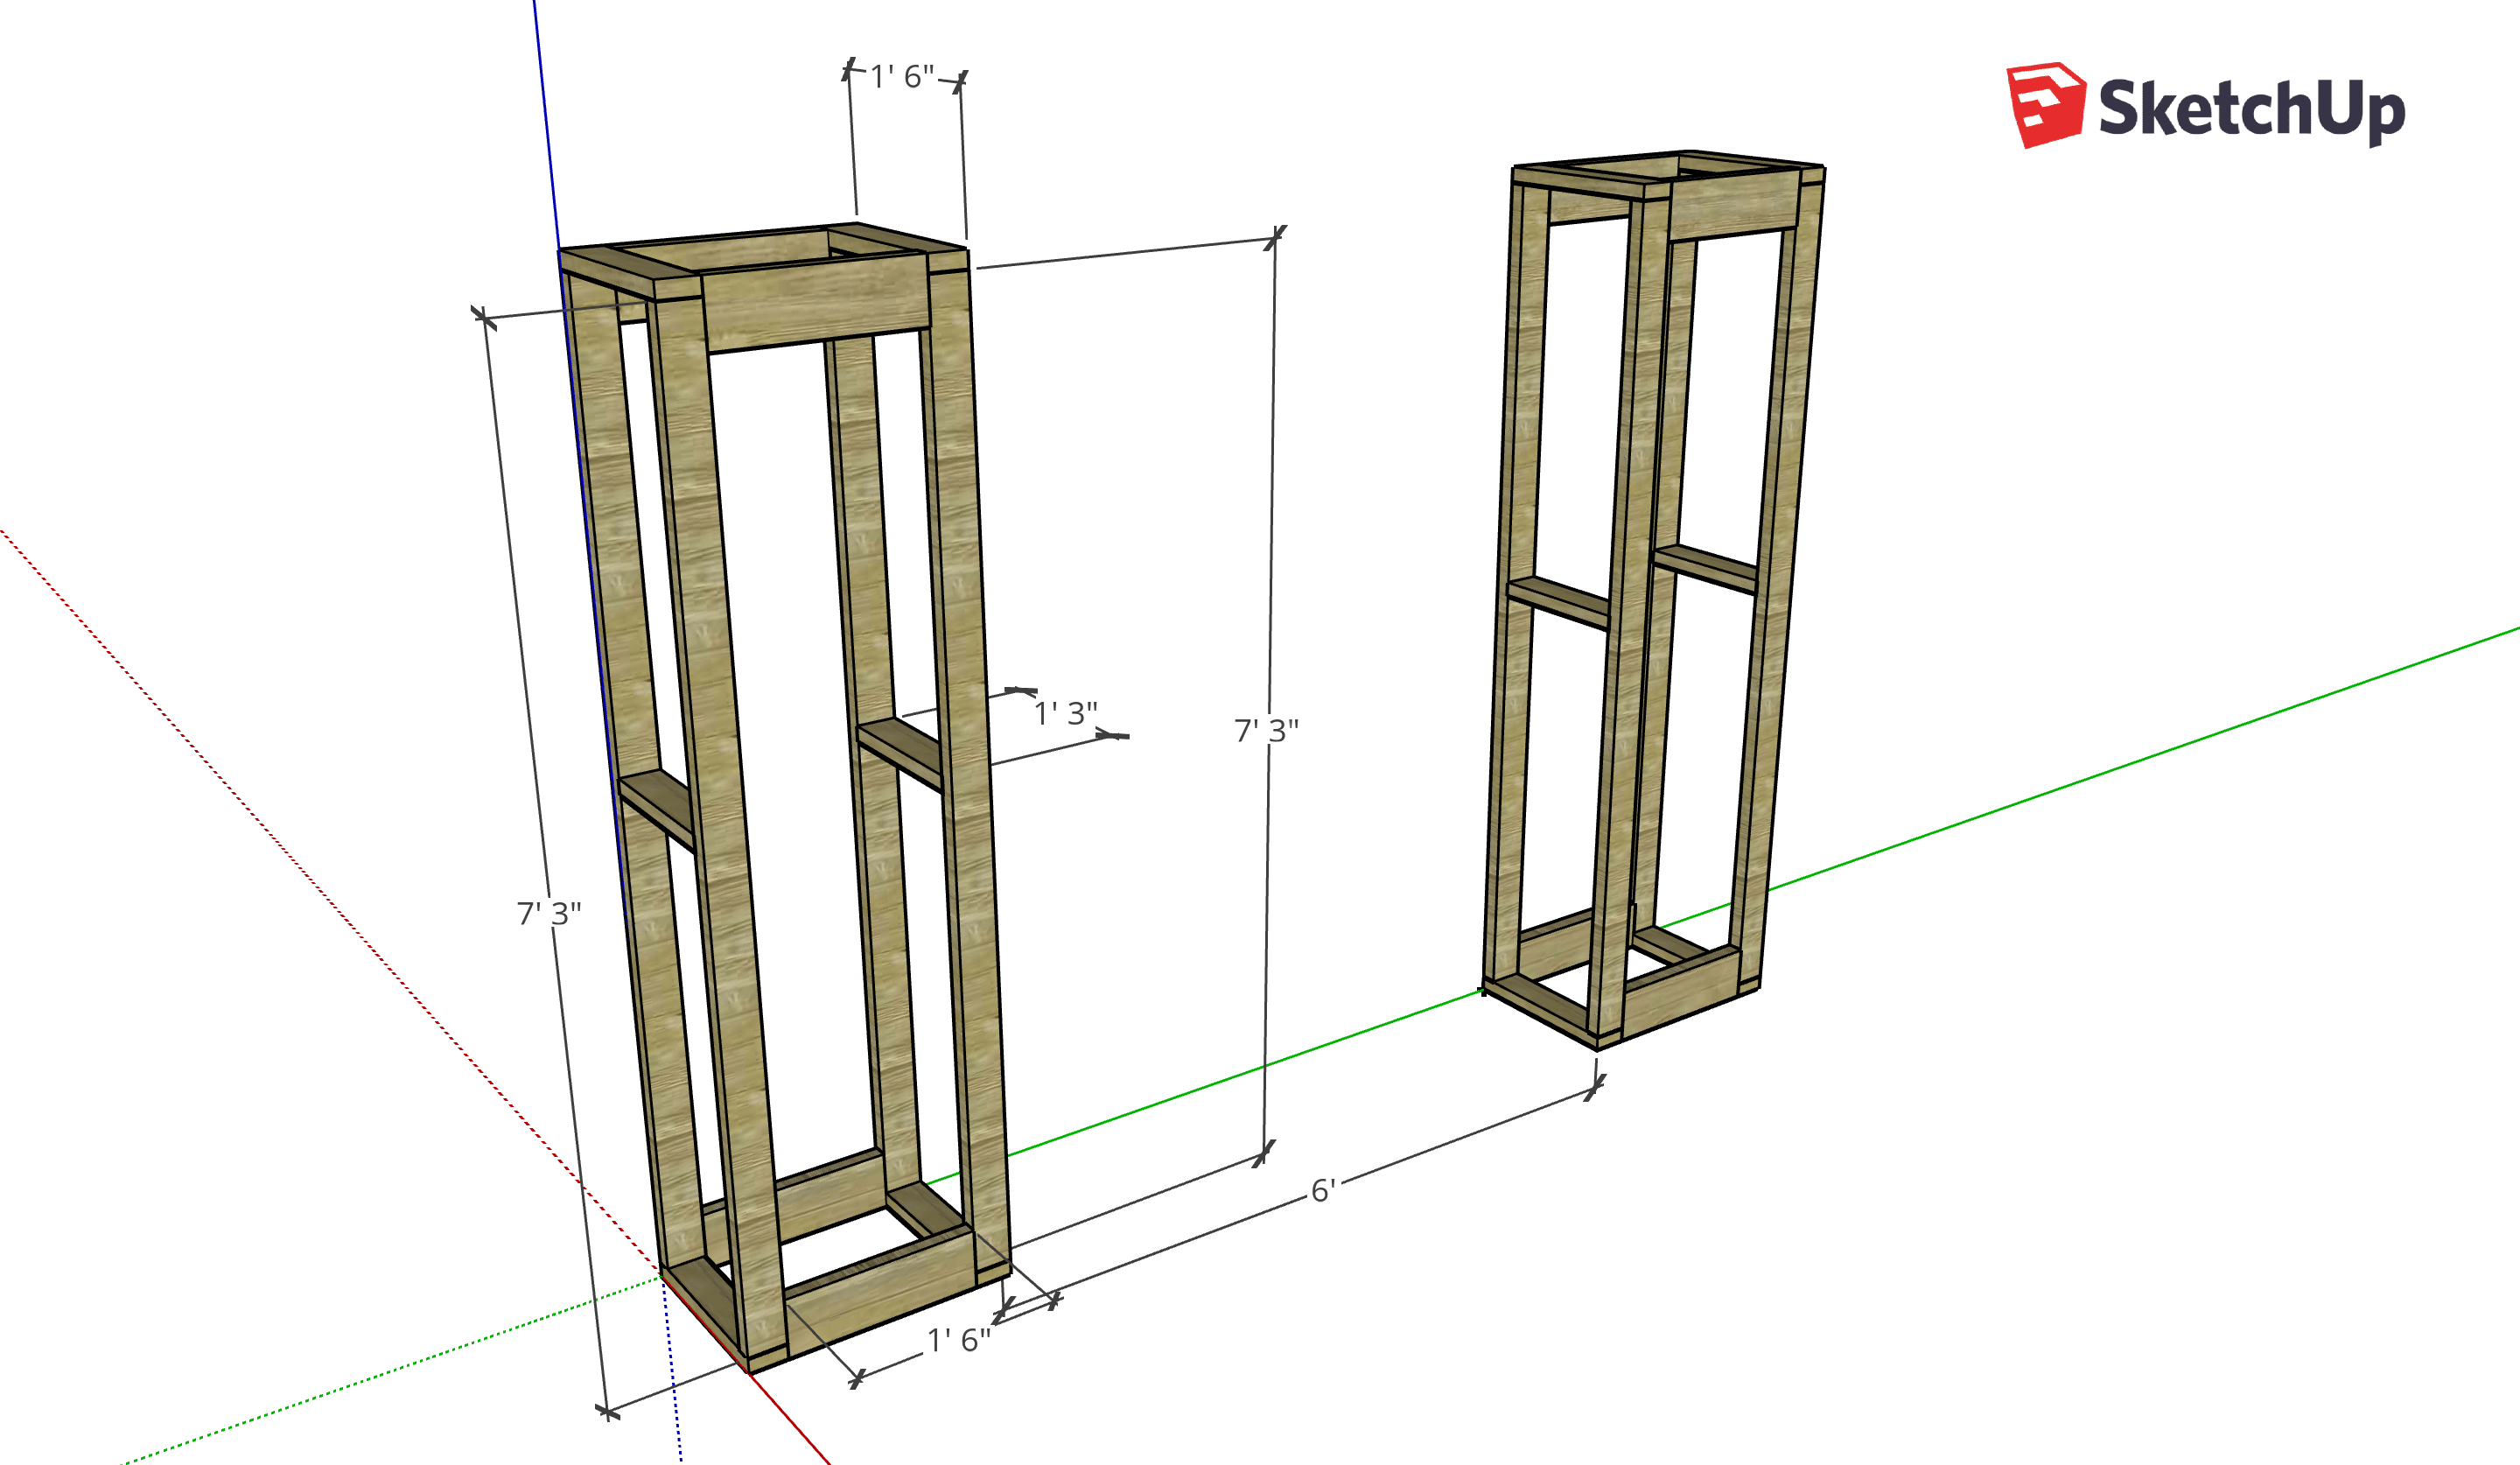
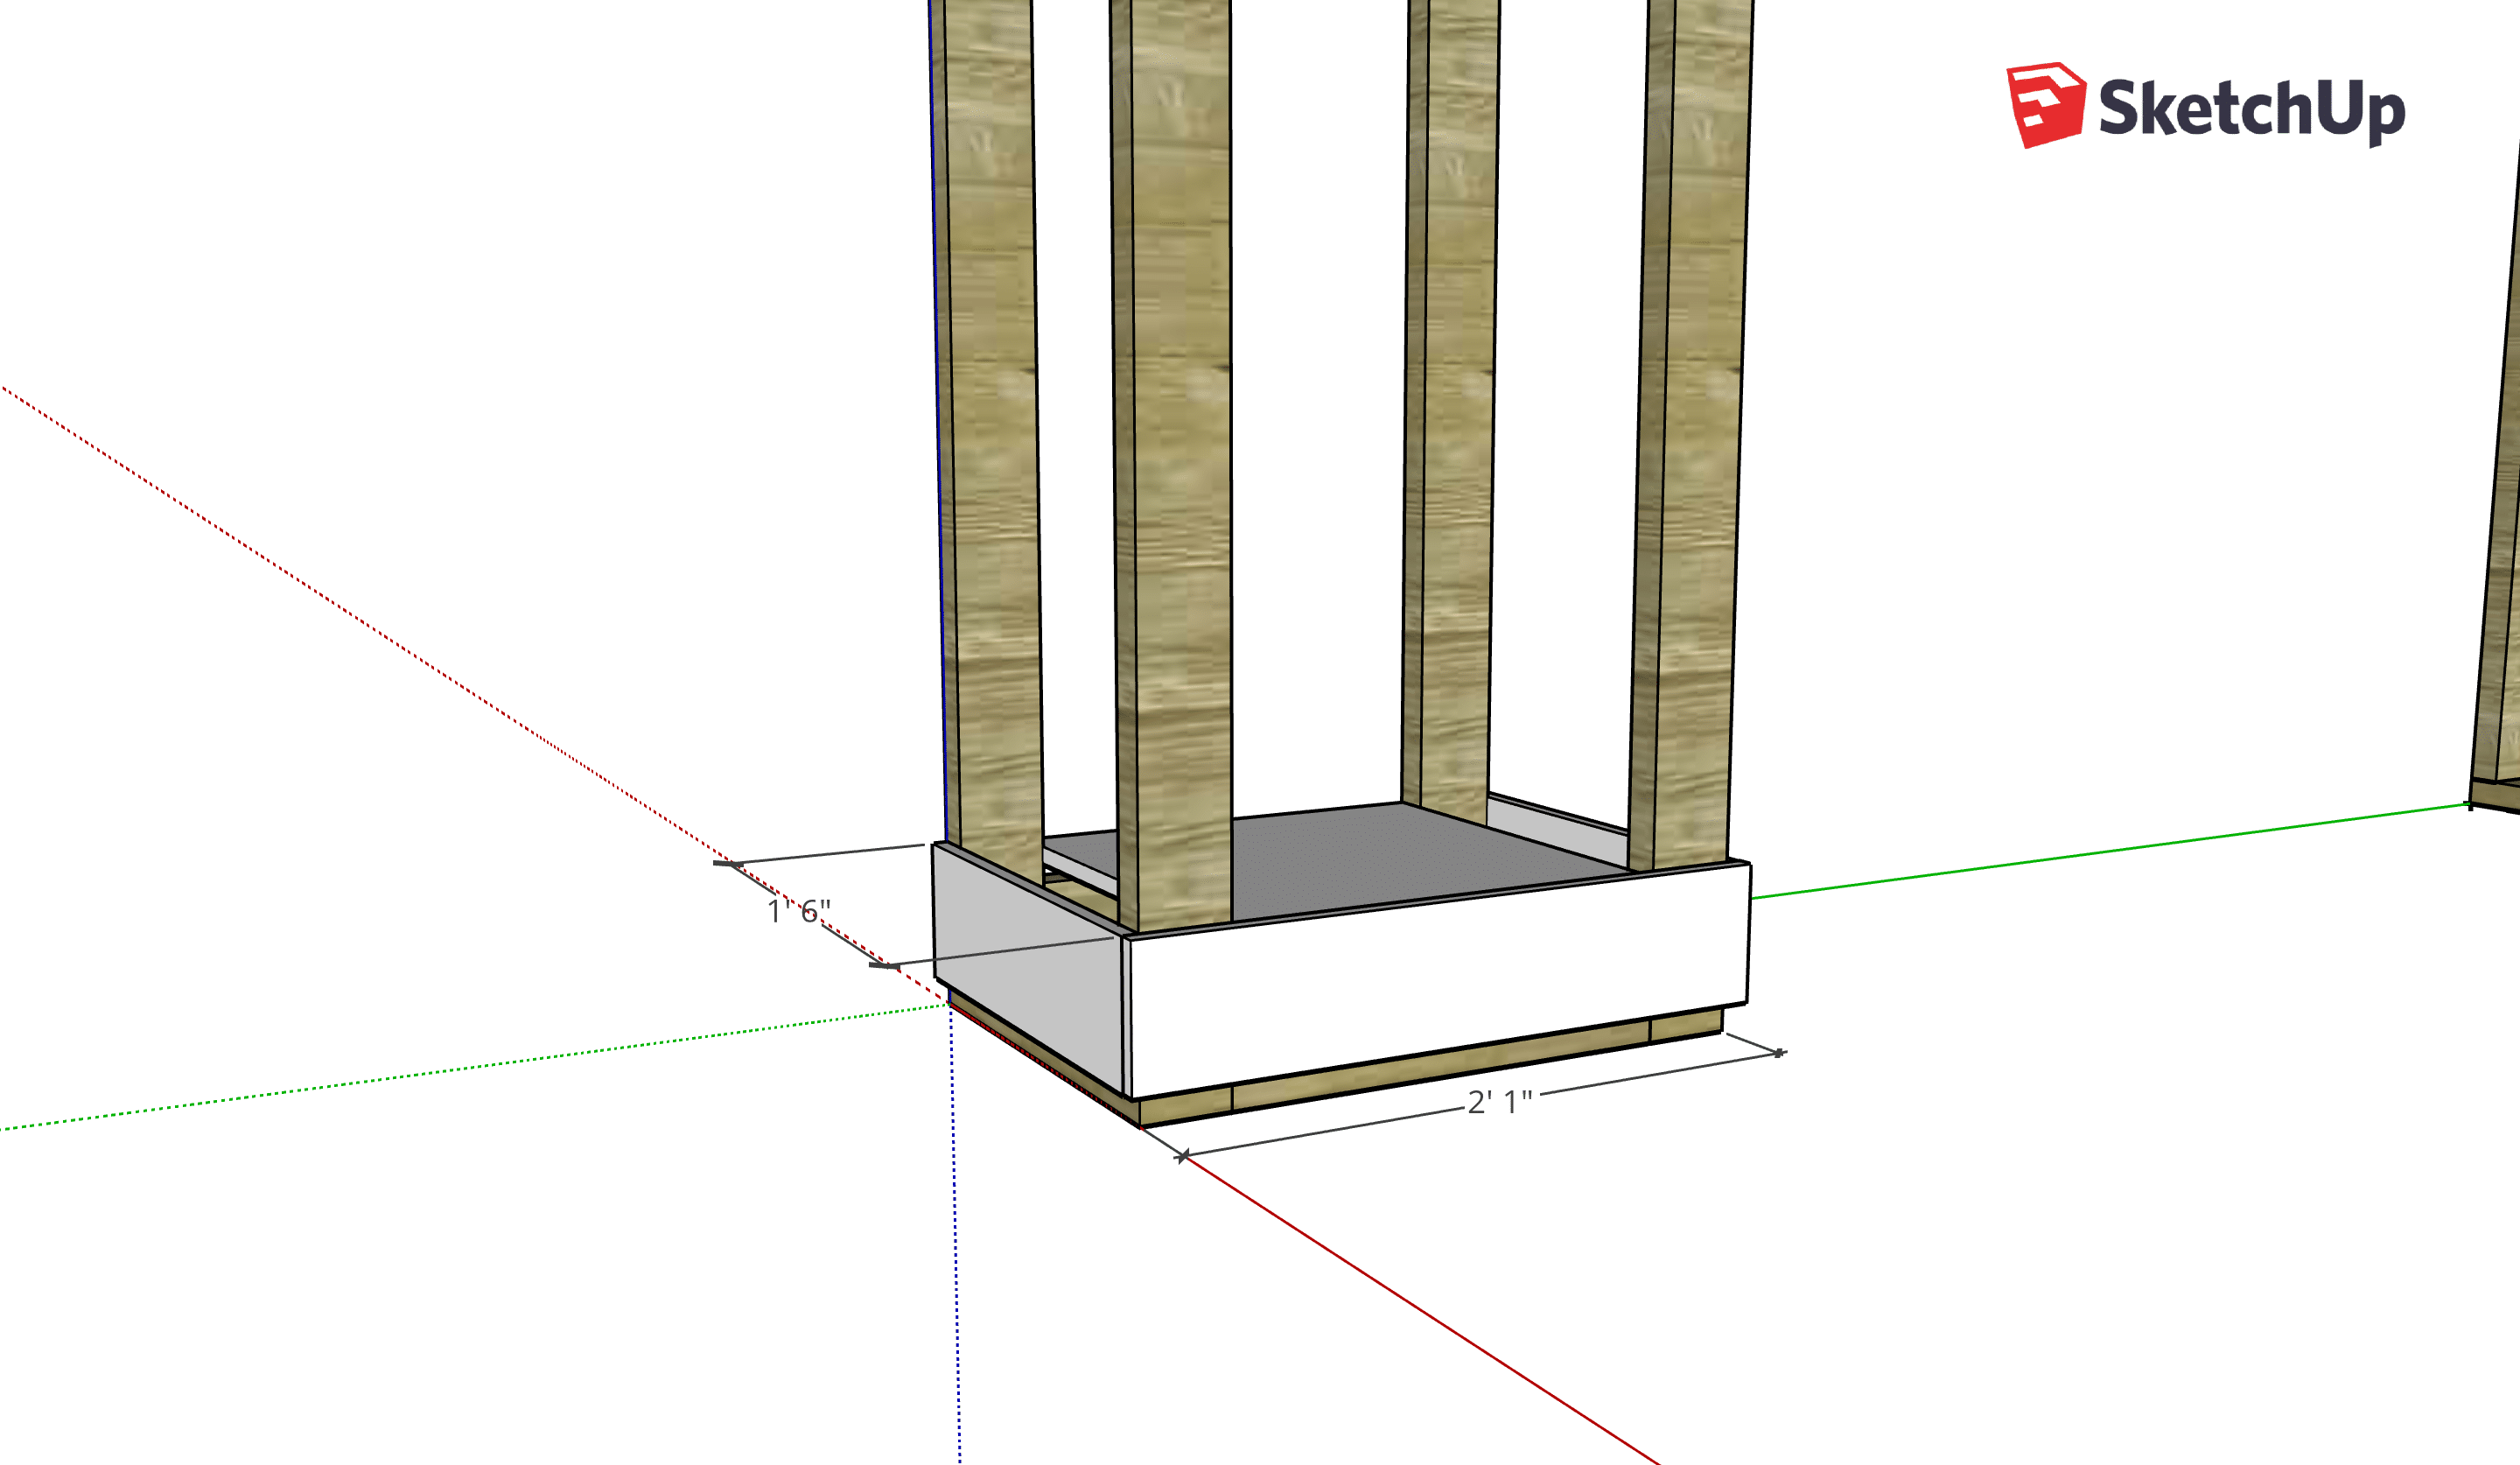
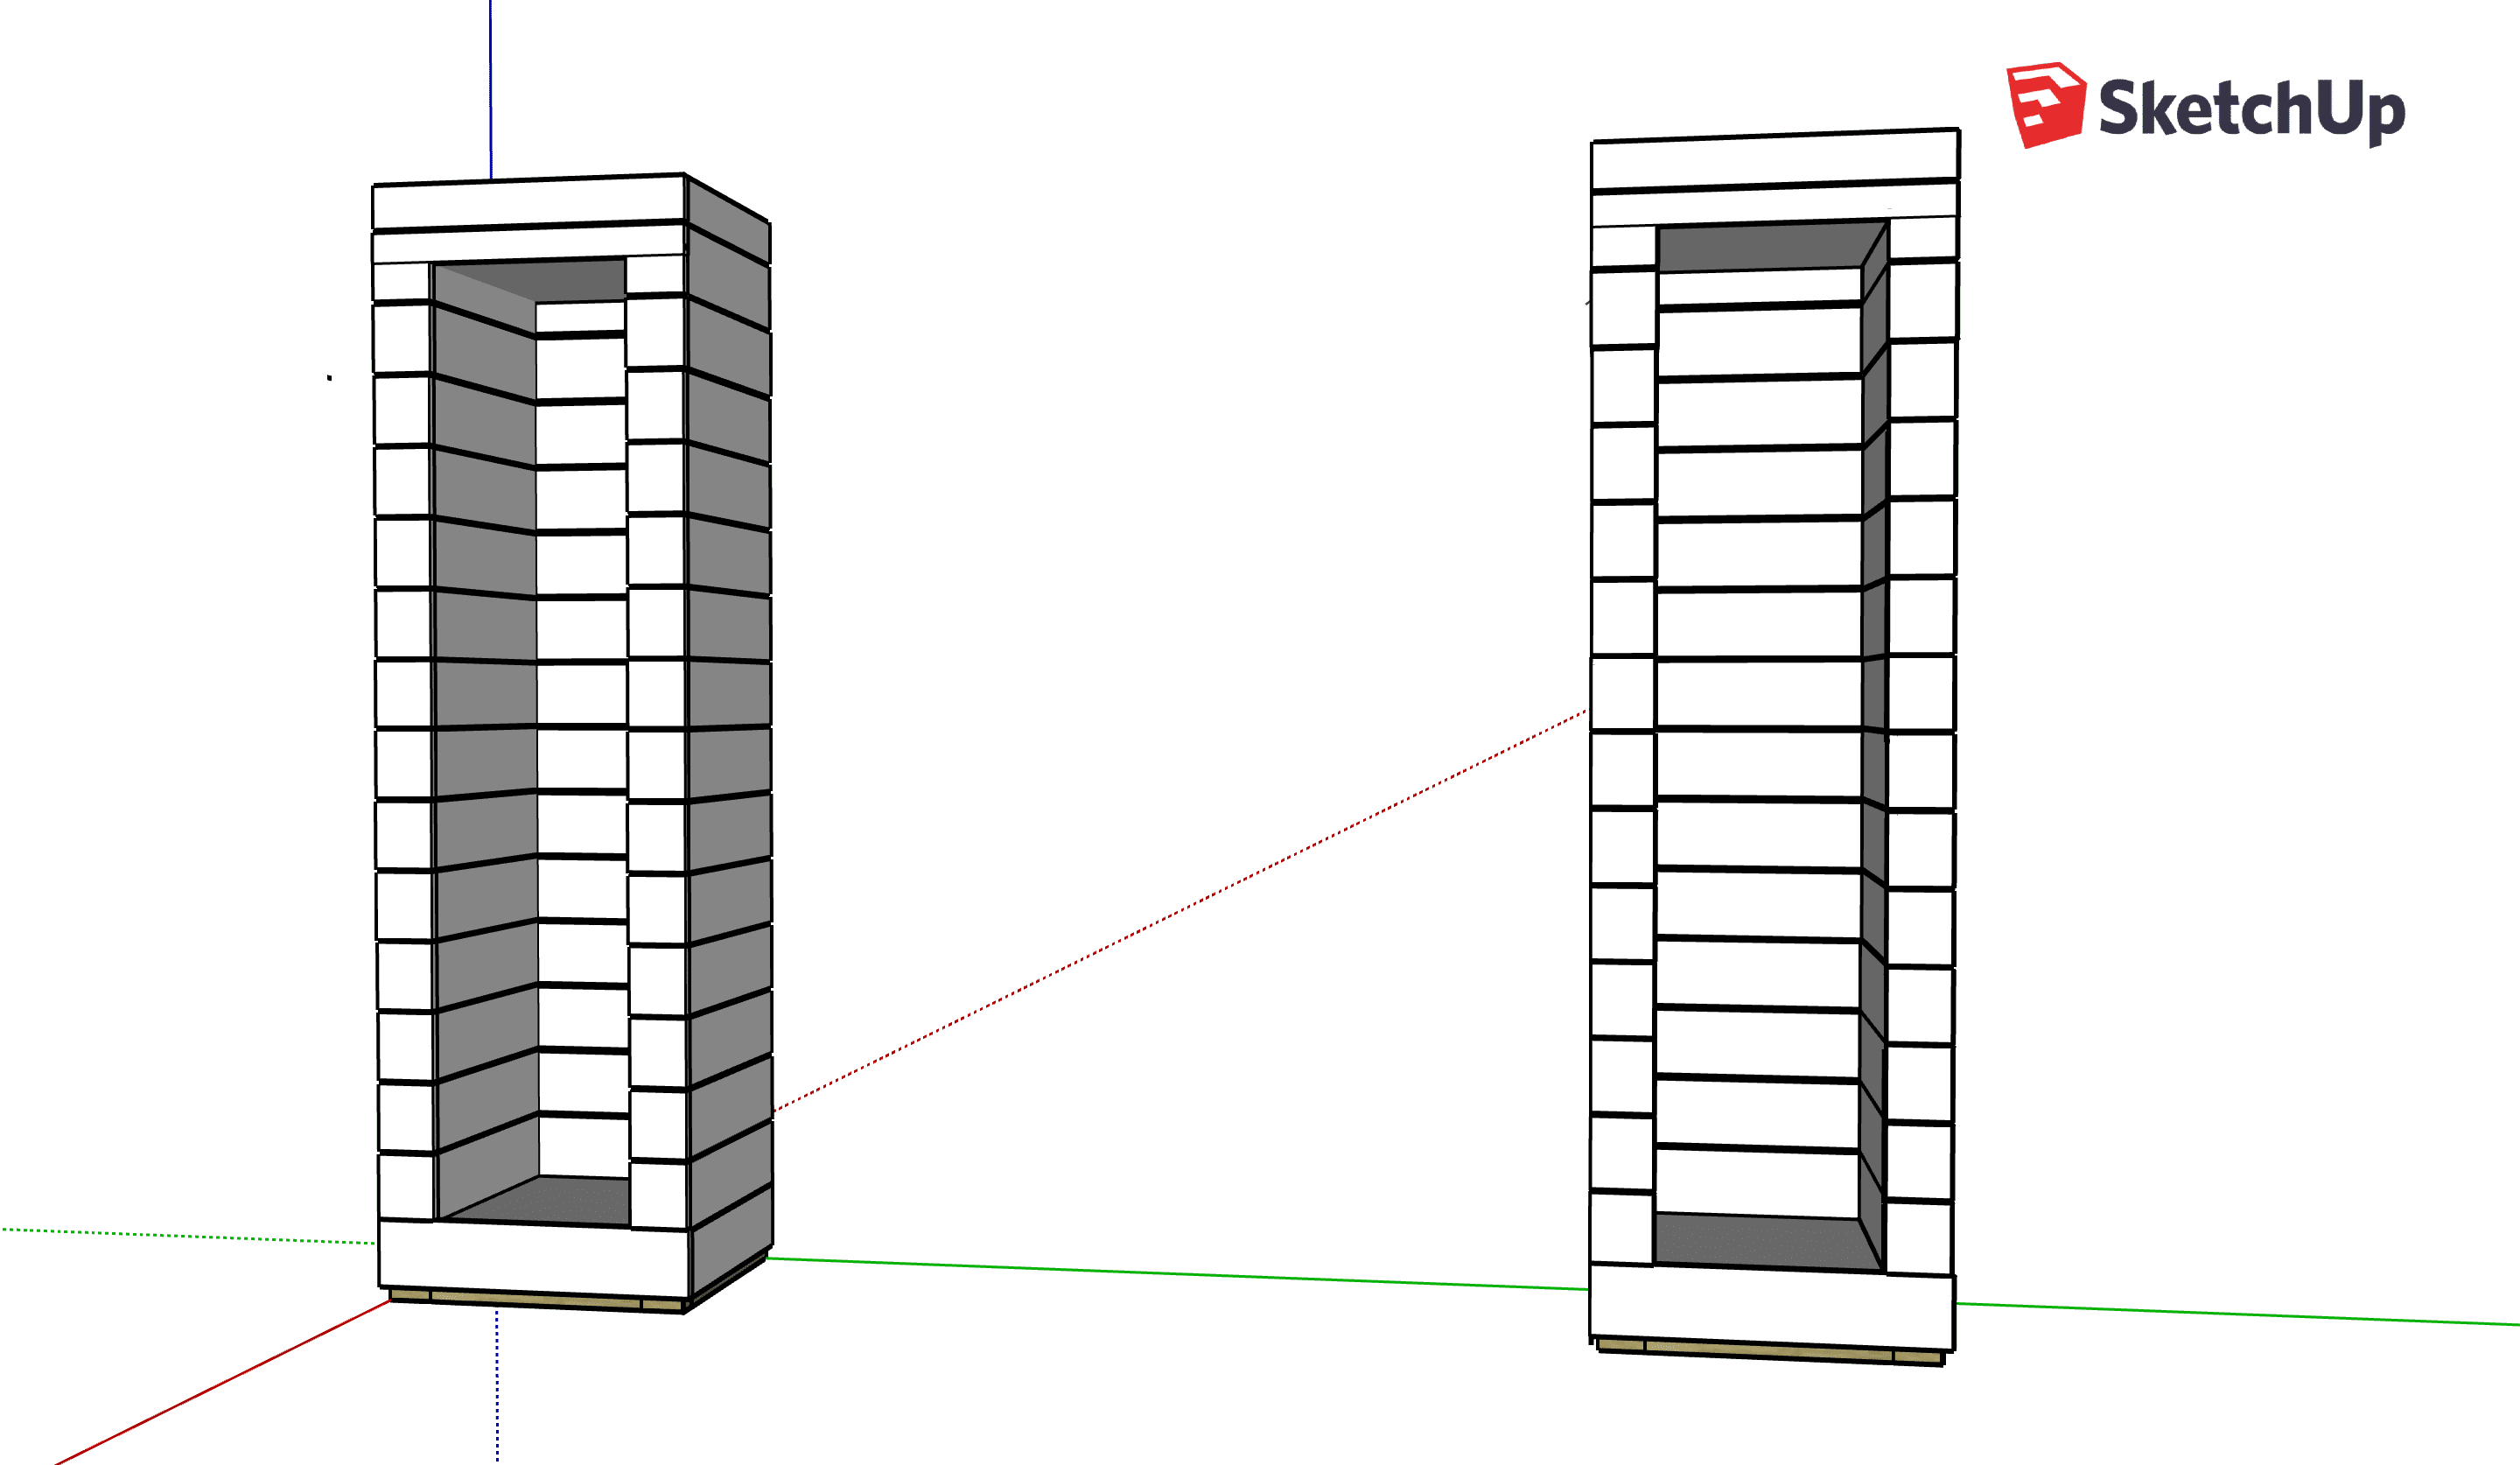
First I built two skeletons for the towers. It is a simple structure of 2×4’s, with 2x6s connecting the sides together at the bottom and top (using pocket holes.) Screw these towers into studs in the wall to secure them. I left 72″ in between and actually used a board cut to 72″ to ensure the width stayed in place. You’ll use that board later as a cleat for the cabinet to rest on.
After the towers are in place, cut an 18×18″ board (3/4″ MDF or plywood) and nail it into the top of the 2x6s on the bottom. Nail a 1/4″ thick piece of plywood to the top 2x6s (underneath.)
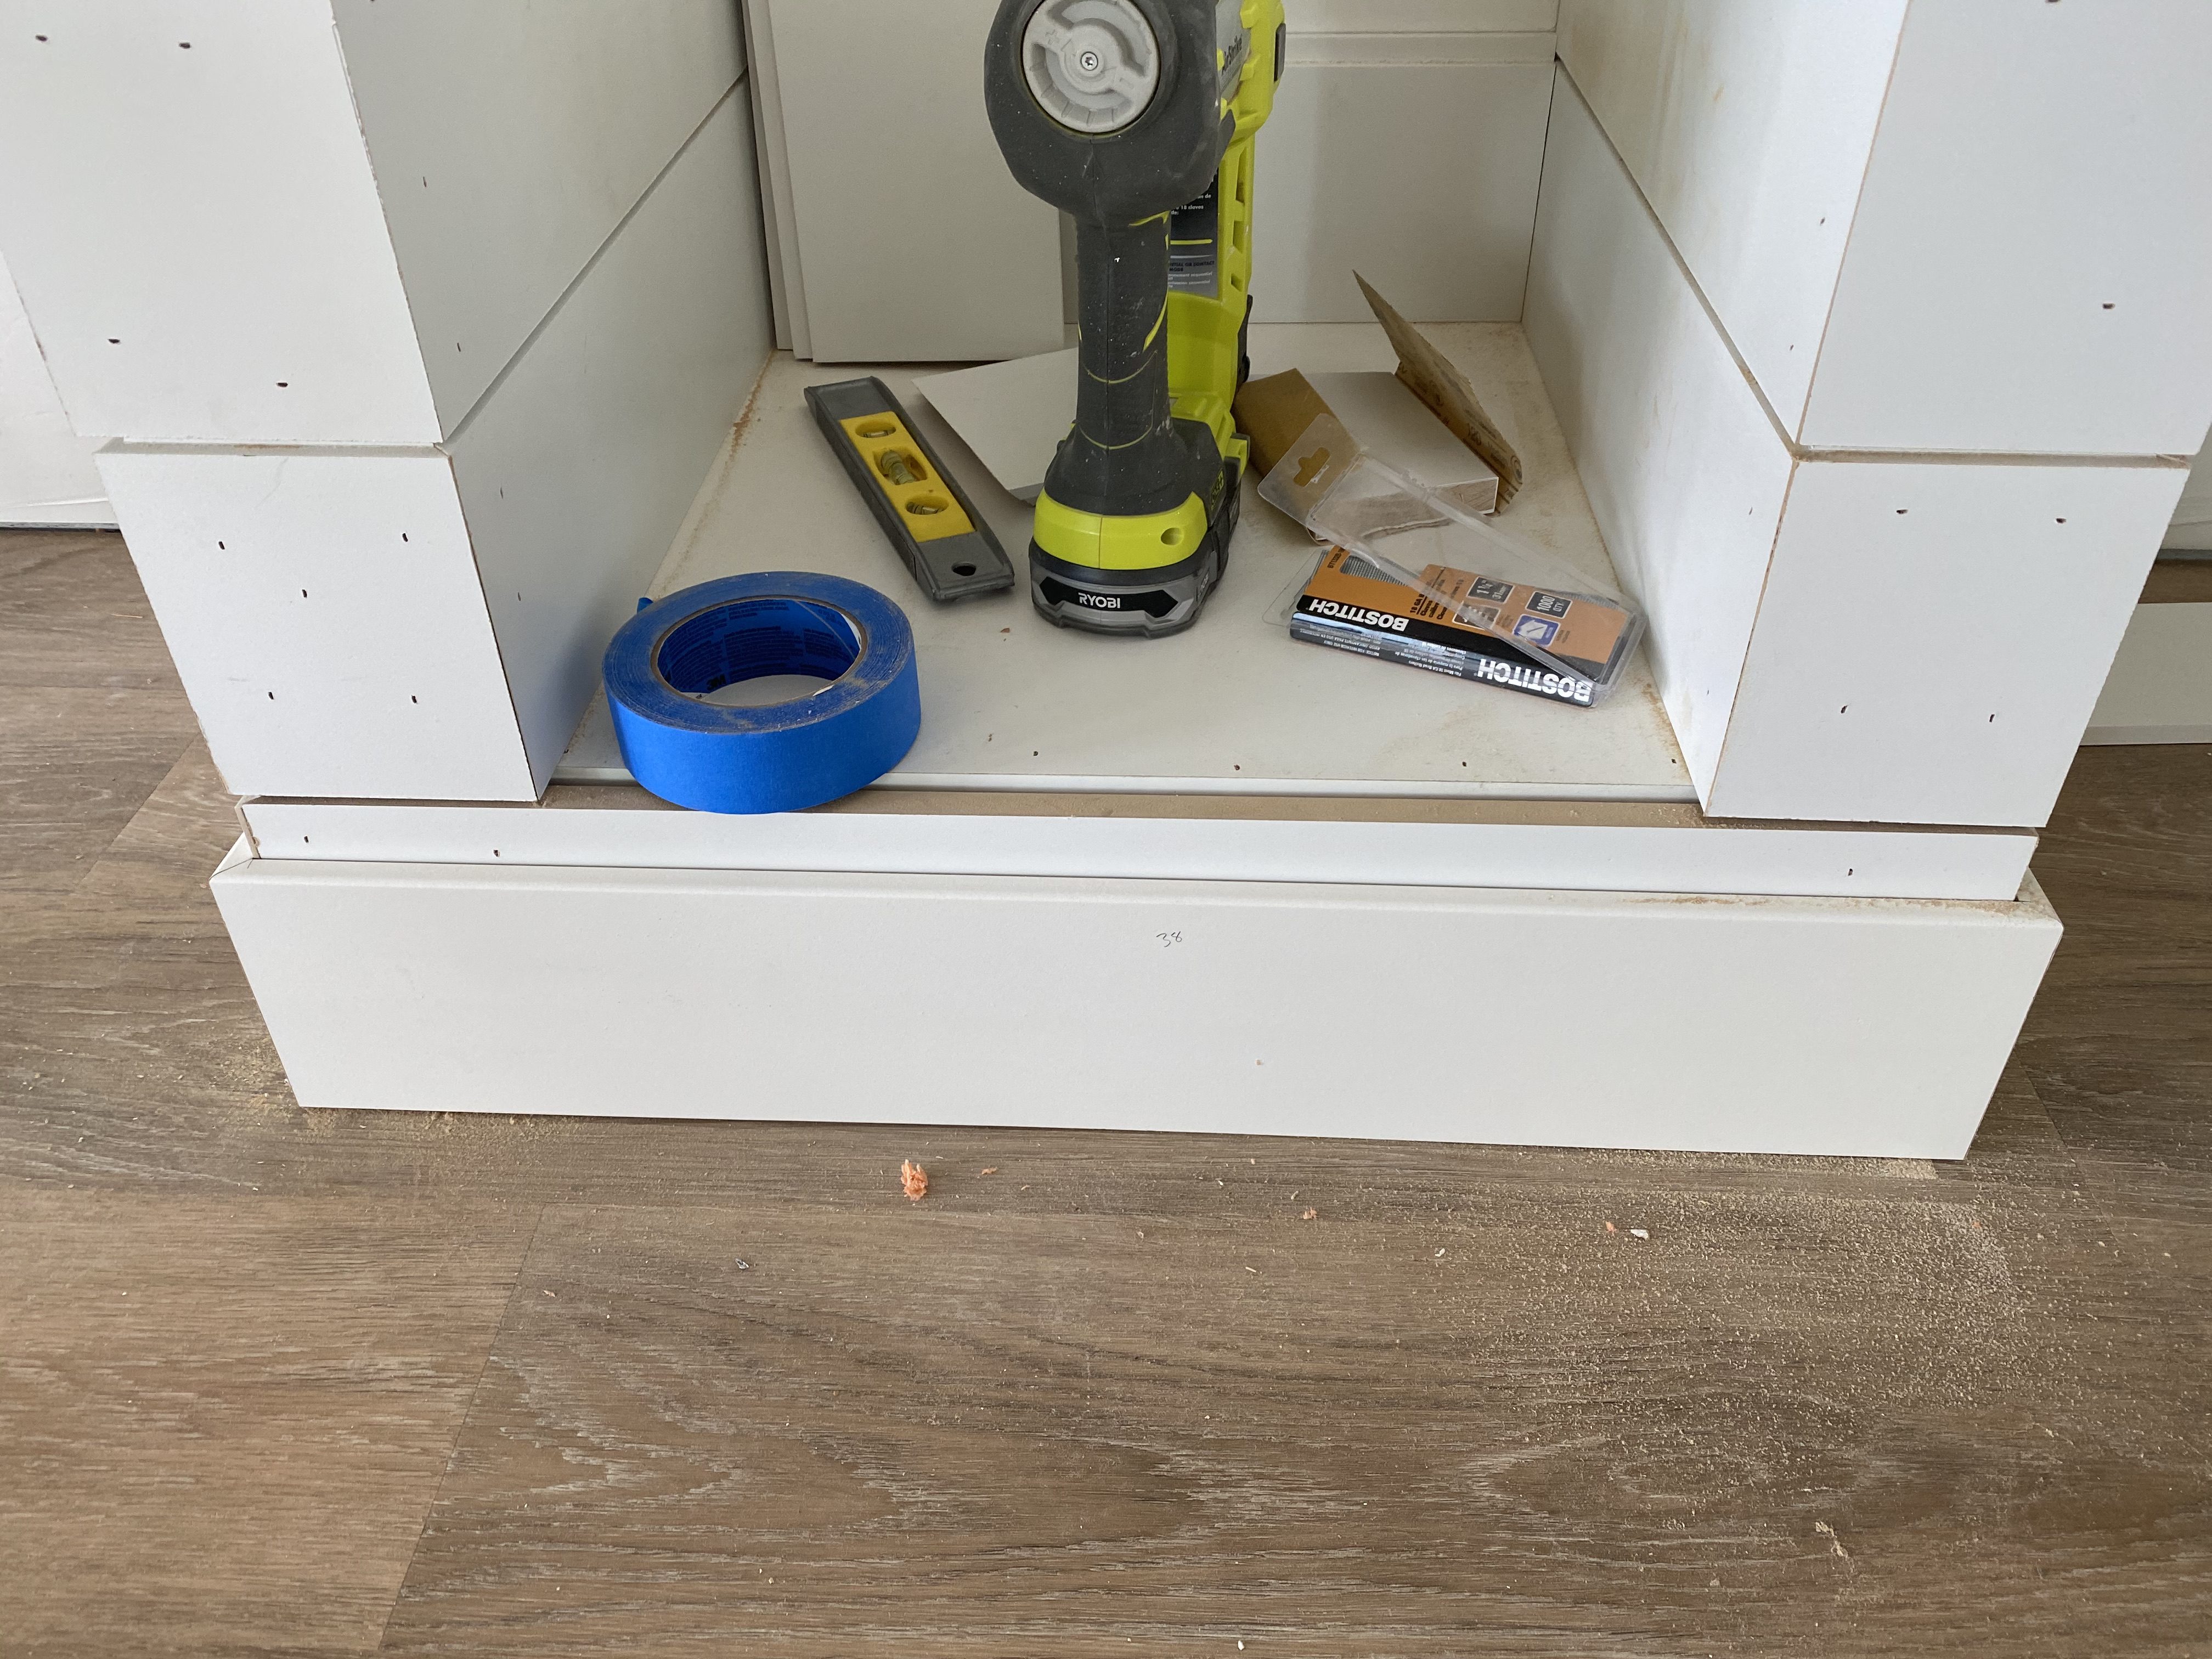
Starting on the Shiplap Wrap
This is by far the longest and hardest part of the build. These corners are not mitered in the plans because I didn’t want to bother figuring out how to show that but they have to be mitered if you are using real shiplap. The miters make this project a bit more advanced, especially certain spots. However, here’s a great tip for helping match up the joints, given to me by the carpenter who worked on our basement: Use hot glue to join the pieces together first, before you put them up to be nailed into place. Unfortunately I didn’t learn this tip until I was almost done but it definitely helped a ton!

I ended up cutting the sides to approximately 18 5/8th or 18 7/8ths inch, which includes the mitered corner. Take your own measurements though before you cut up all your shiplap. The front should be about 4 11/16ths inch with two mitered corners. It’s a lot of cutting! I cut all my shiplap using the bevel on my miter saw. Don’t stress too much if you don’t have perfect miters, sandpaper and caulk can help smooth out mistakes.
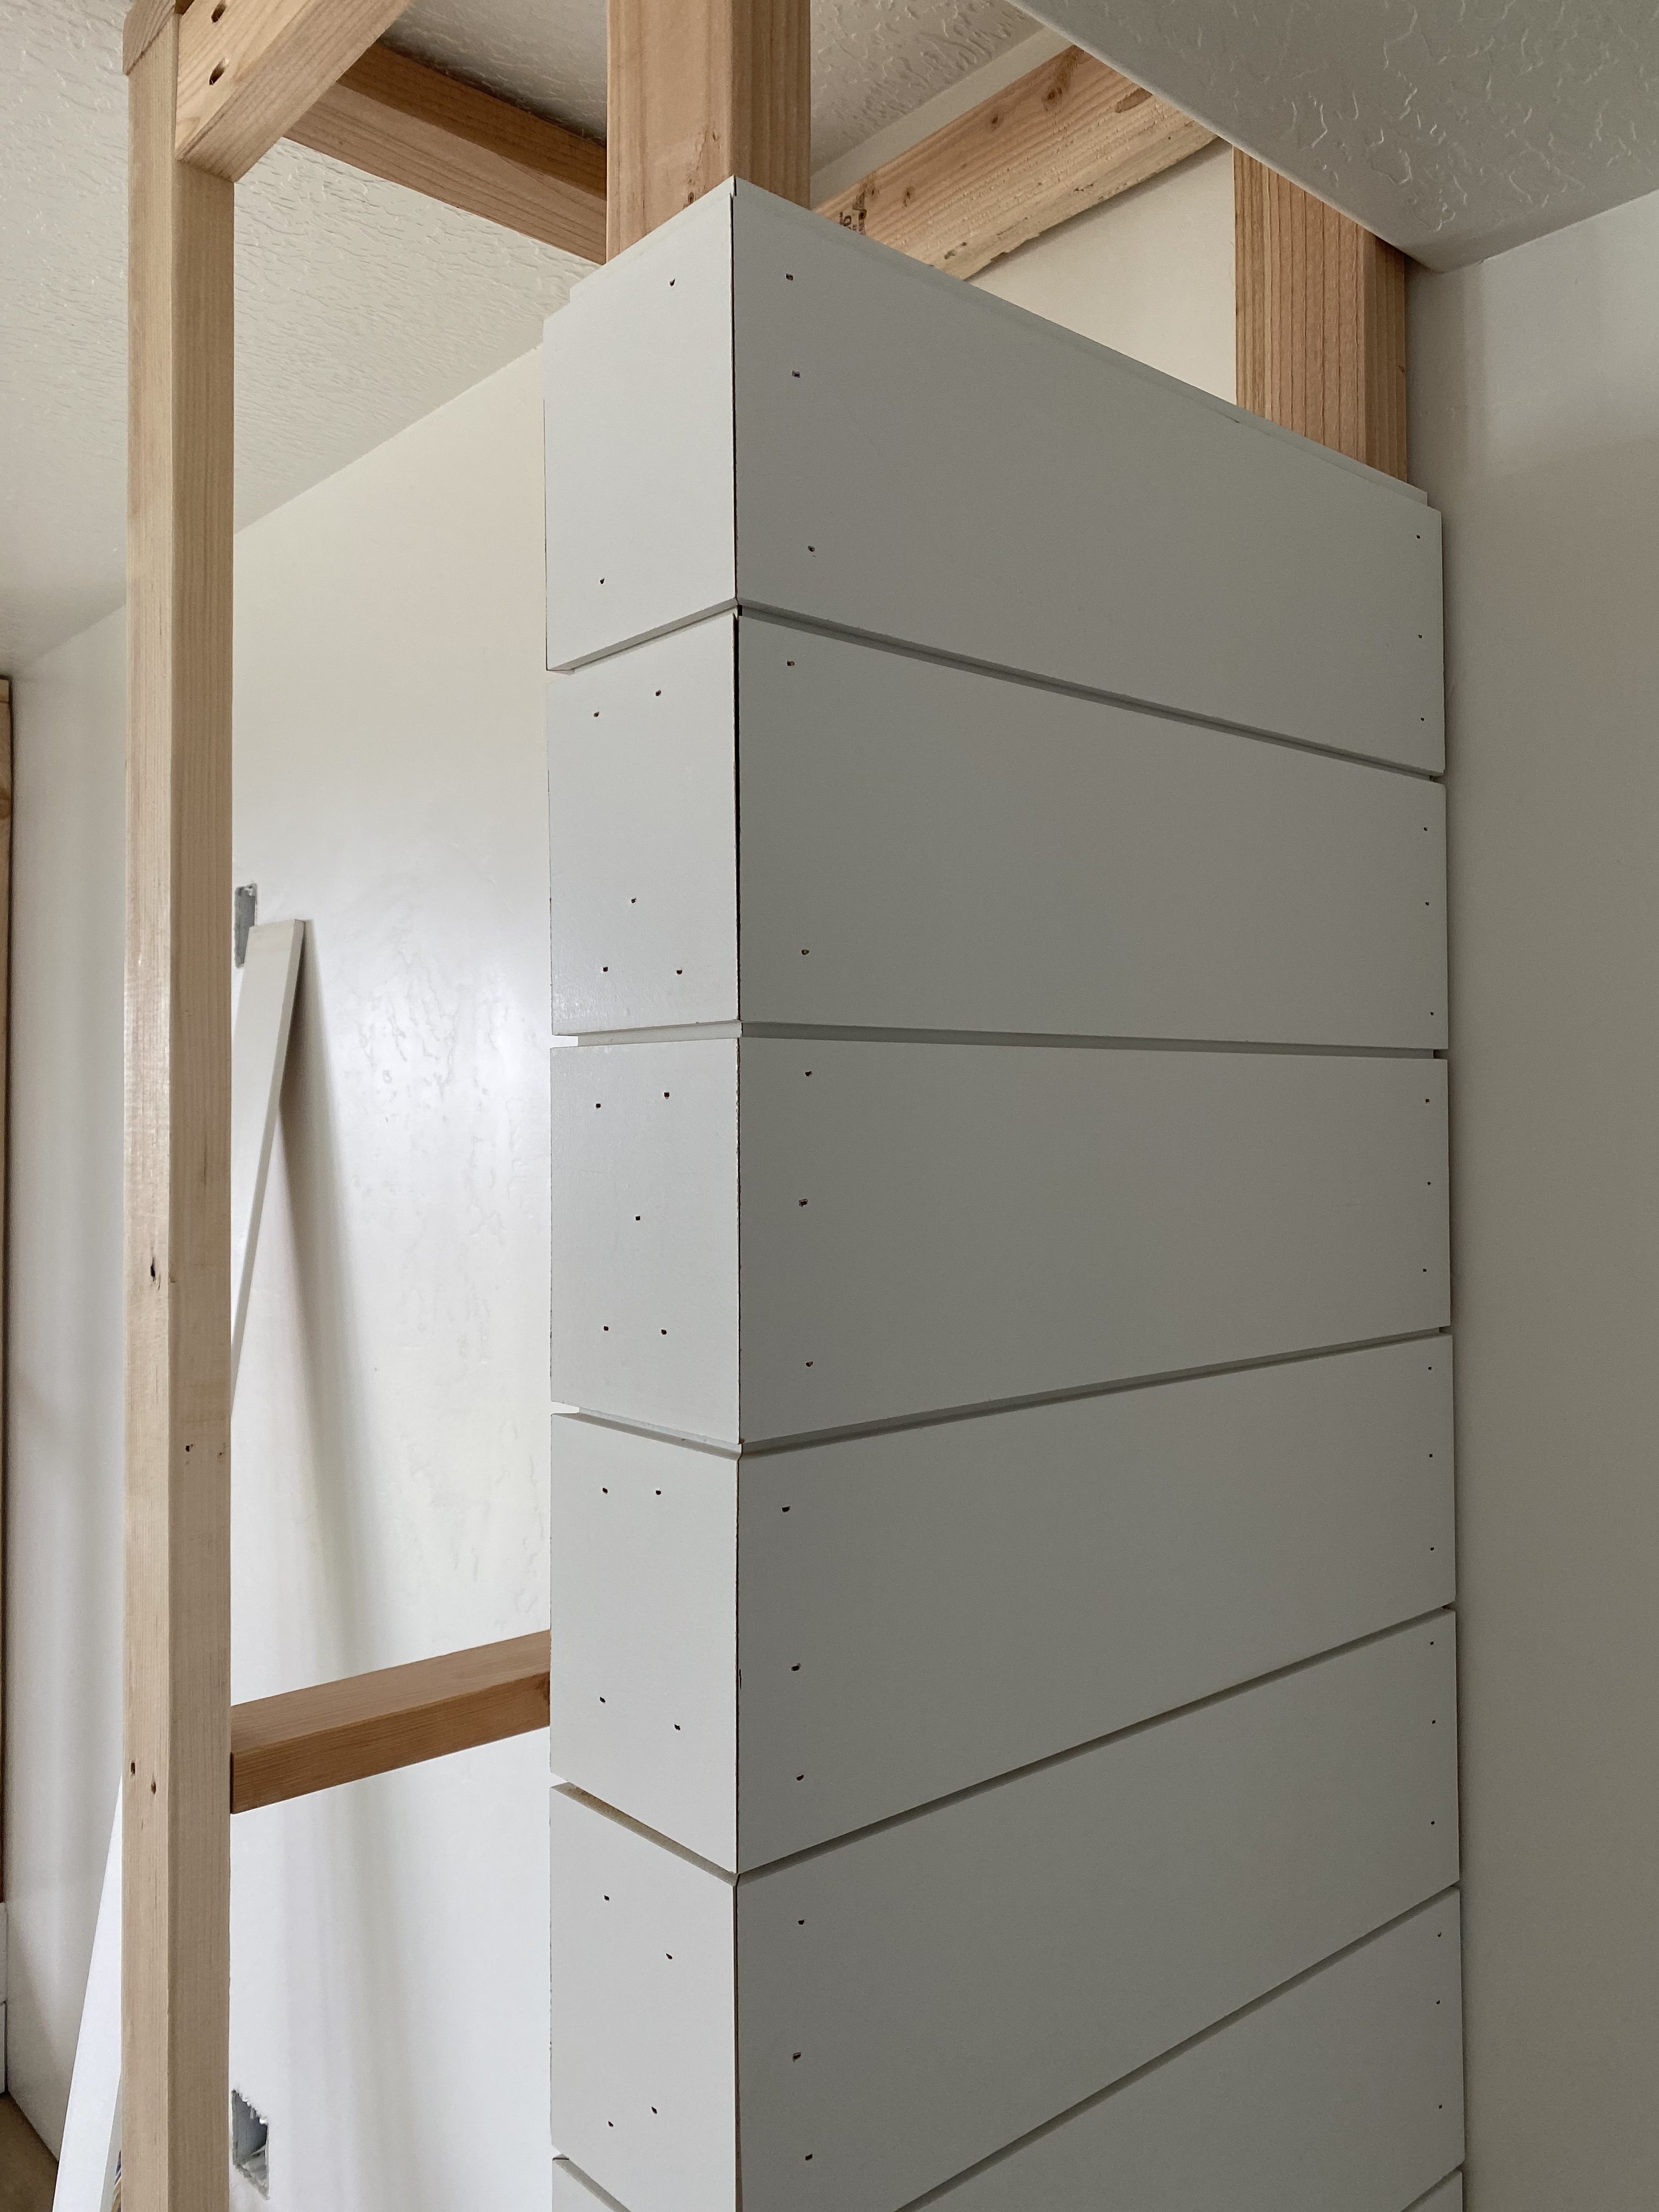
Wrap shiplap around the outer and inner walls of each tower and then do the back side. The backs don’t have to be mitered-yay!
Building the Floating Cabinet
Next up is the cabinet. I built one large cabinet with center dividers. The size of the cabinet carcass is 72″ wide, 15″ deep, and 23″ tall. There are no dividers in this picture but they would be placed approximately 24″ and 48″ in.
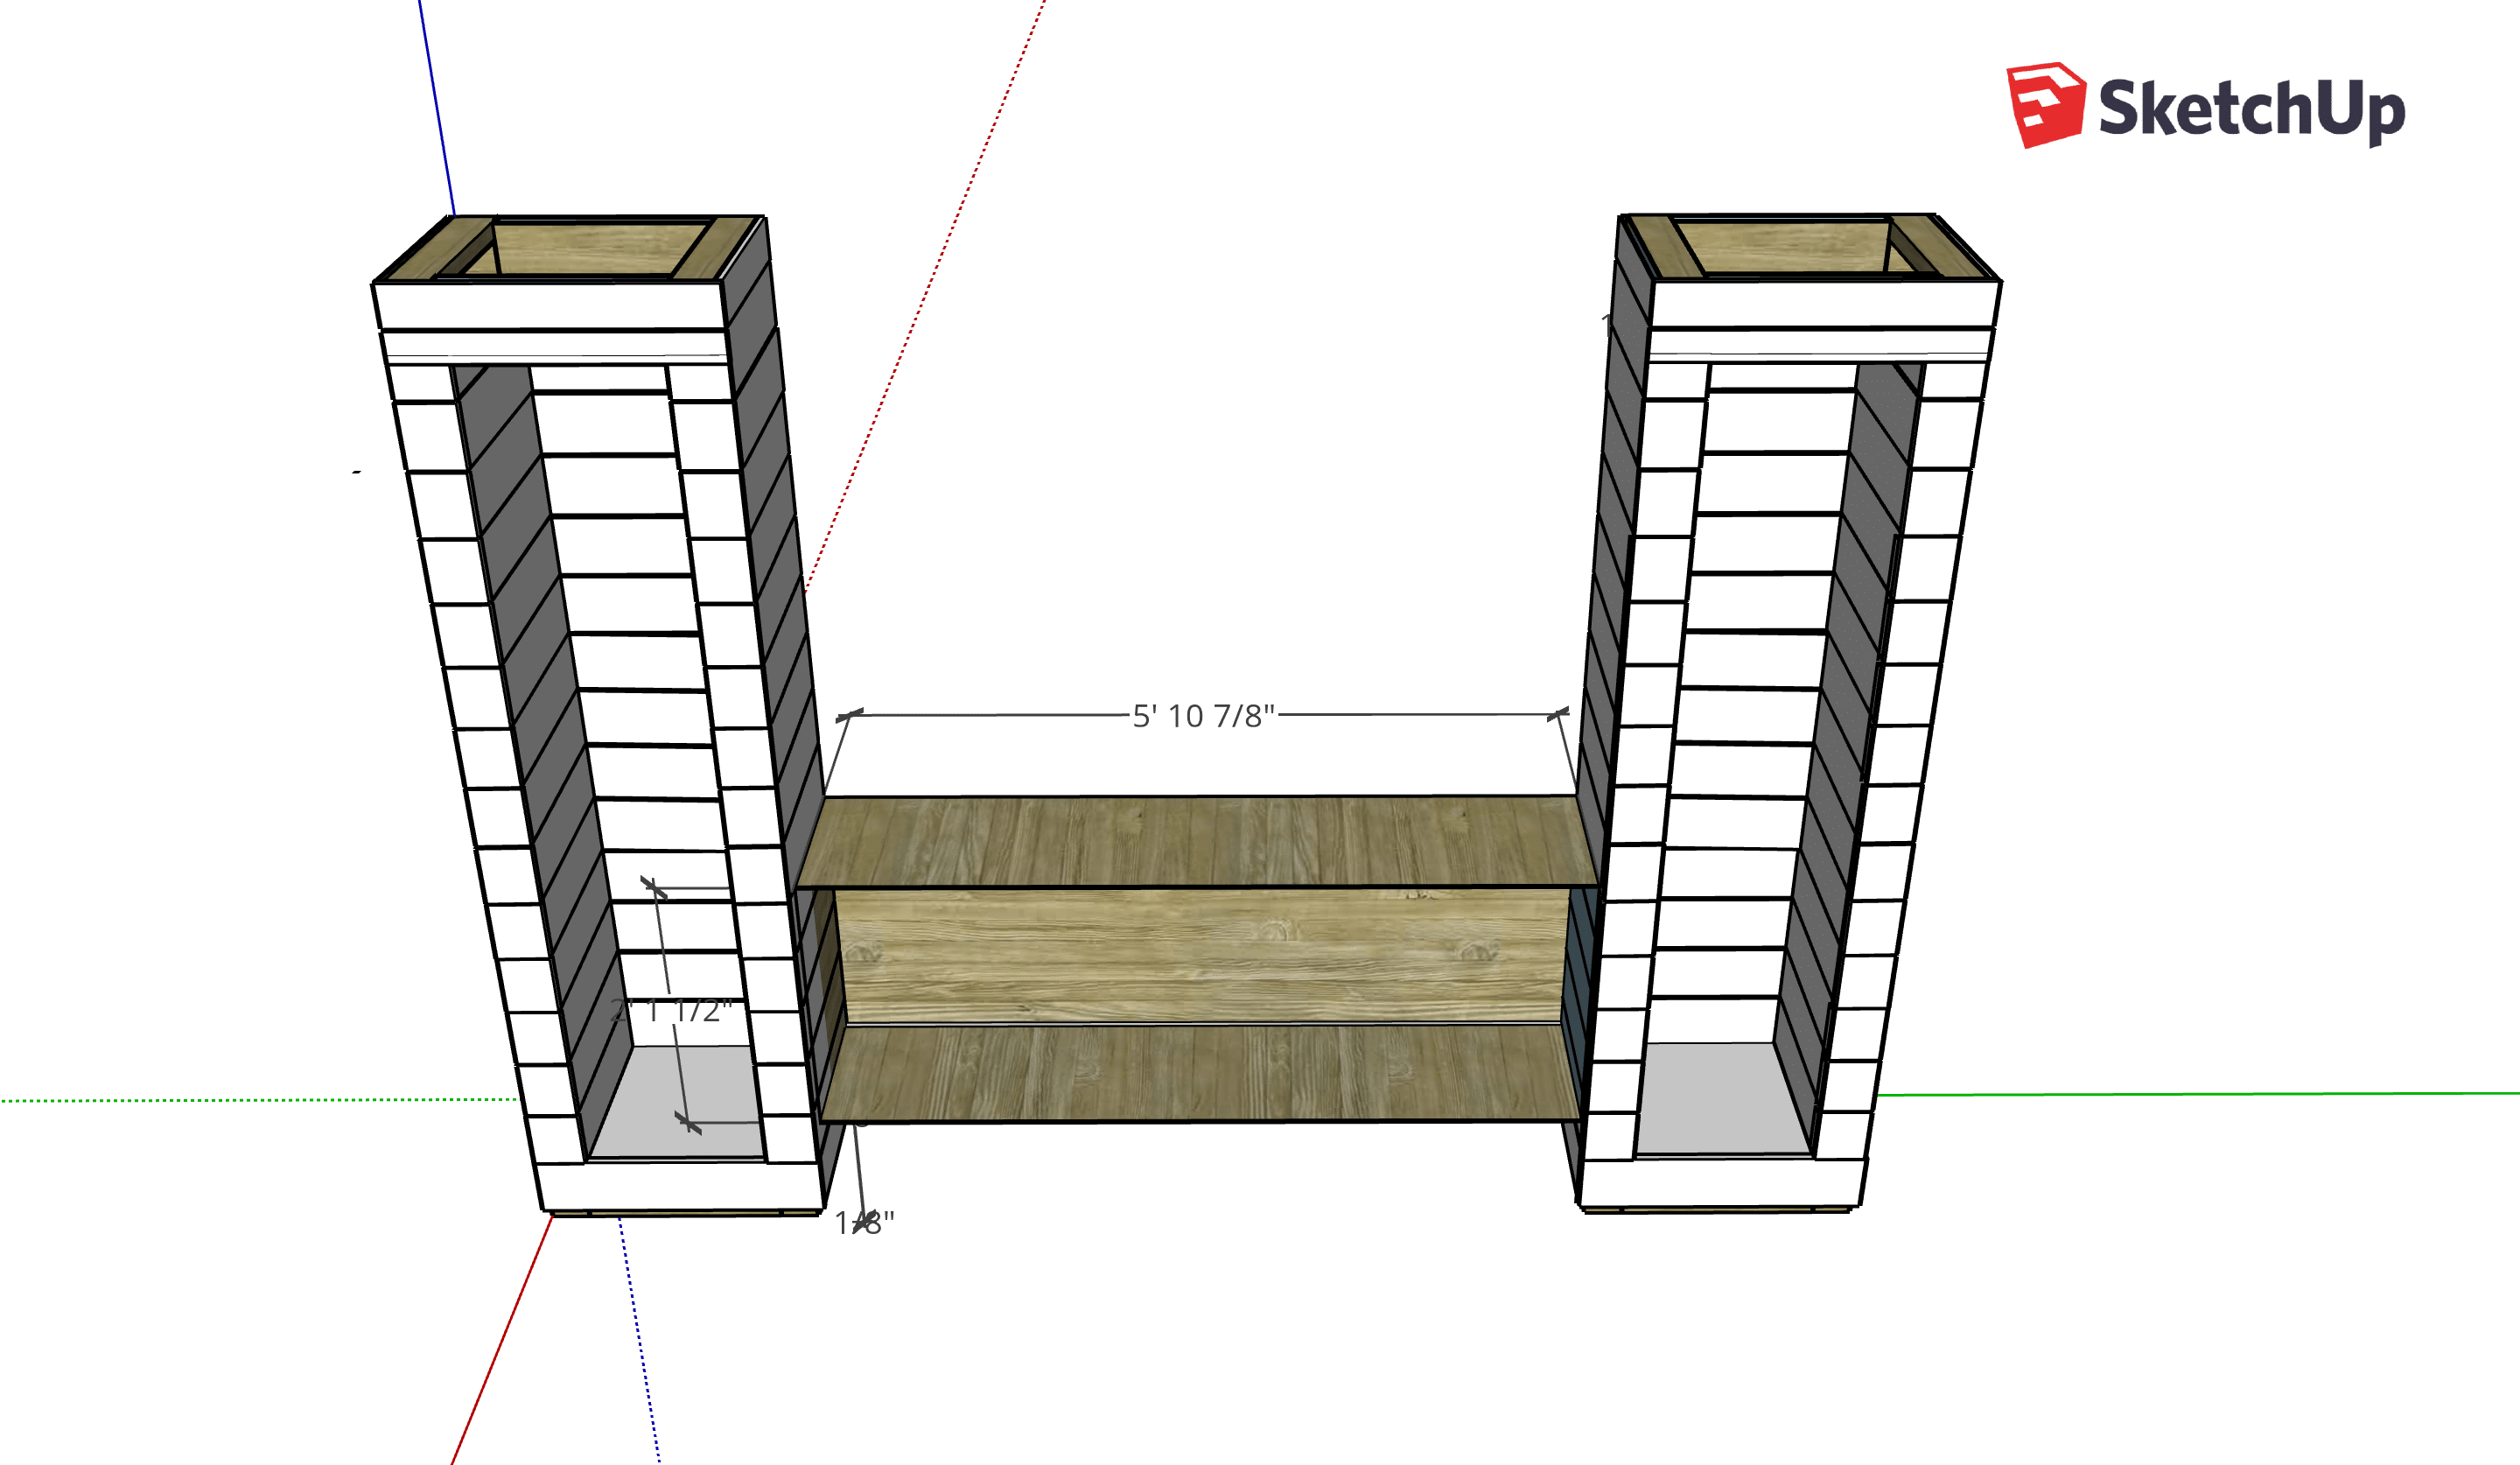
Remember that board you had back in the beginning? Screw it on the wall in between the towers (you will probably have to trim it a little to account for the extra width from the shiplap.) Screw it into studs, it will give your cabinet a little extra support. Hang the cabinet on top of this cleat, then screw the back stretcher pieces of the cabinet into the wall studs. That shouldn’t be going anywhere.
*You might notice the measurements for my cabinet differ a little from what my text says. You could do it either way, but I changed it because I wanted there to be enough space for a 75″ television.

After the cabinet carcass is in place, you will want to add a the dividers and faceframe. I made them as equal in size as I could and screwed the dividers in from the top and bottom so you wouldn’t be able to see an holes. Then I cut a slightly deeper piece of nice oak plywood and put it on top of the cabinet. I used doorstop trim on the edge of this piece of plywood to finish it. I built the doors later and you can see how I build doors in this post.
I apologize for not giving the best instructions for the cabinet…this was a long involved project so I think I got impatient at the end. For more details on building cabinets, read my post about my family room built ins.
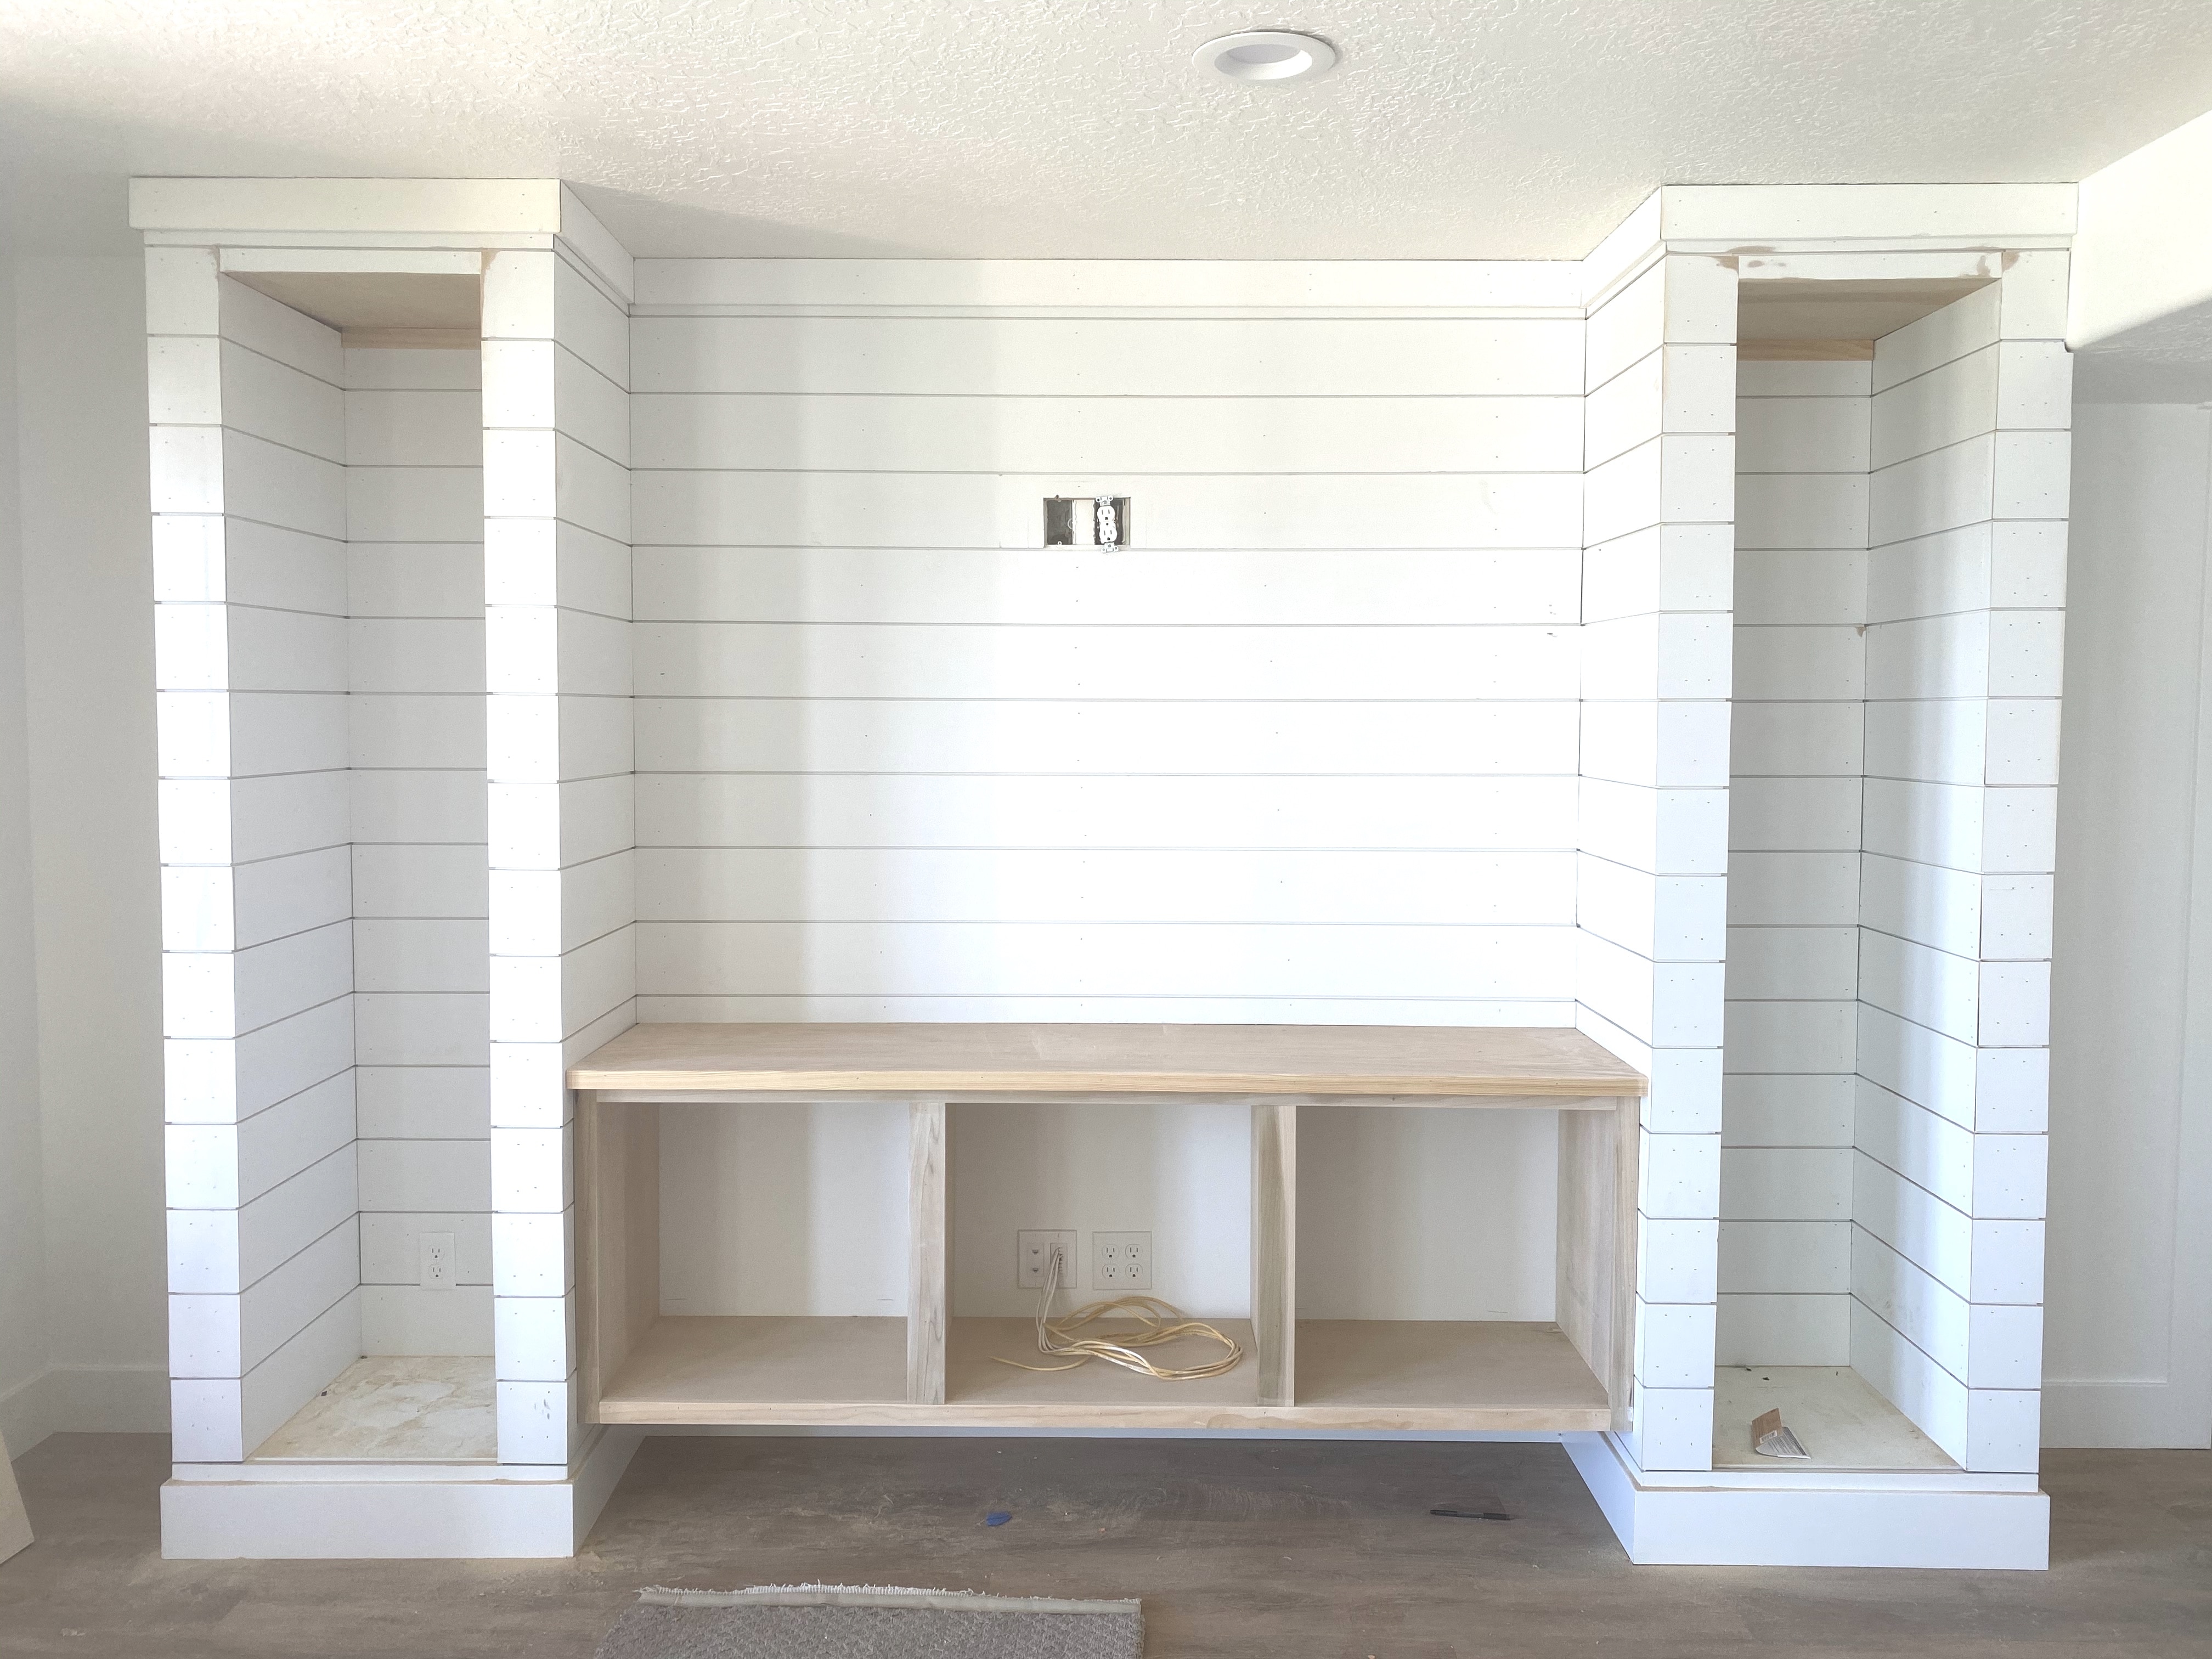
Finishing Up the Shiplap Builtins: Paint and Floating Shelves
Almost done with these shiplap builtins! I cut shiplap pieces the same width as the remaining space above the cabinet on the wall and nailed it into studs. It is important to get your shiplap to match up in the lines if you can. I also used a jigsaw to cut spaces for the outlets. When doing outlets with shiplap, you’ll need to get new, longer machine screws (1.5″) for the outlet so it can rest flush against the shiplap.
After you’ve caulked and filled approximately one billion nail holes, you can paint! I recommend painting this with a sprayer, the more professional grade, the better. I used my Graco Magnum X5 sprayer (which is a good option for a mid-grade paint sprayer and relatively un-intimidating.) I painted these in the same color as my office built-ins: Benjamin Moore Cheating Heart. It’s definitely a dark gray and not black, so it’s not quite as stark as black. We painted the French doors in Sherwin Williams Tricorn Black for reference.
For the floating shelves, I built them out of white oak 1/4″ plywood and 3/4″ white oak 1x4s. I first made a basic frame from 1x2s (I recommend doing this from 2x2s–the 1x2s split a lot) and then screwed them into the sides. I bought the white oak plywood from a specialty wood store in Salt Lake (MacBeath Hardwoods).
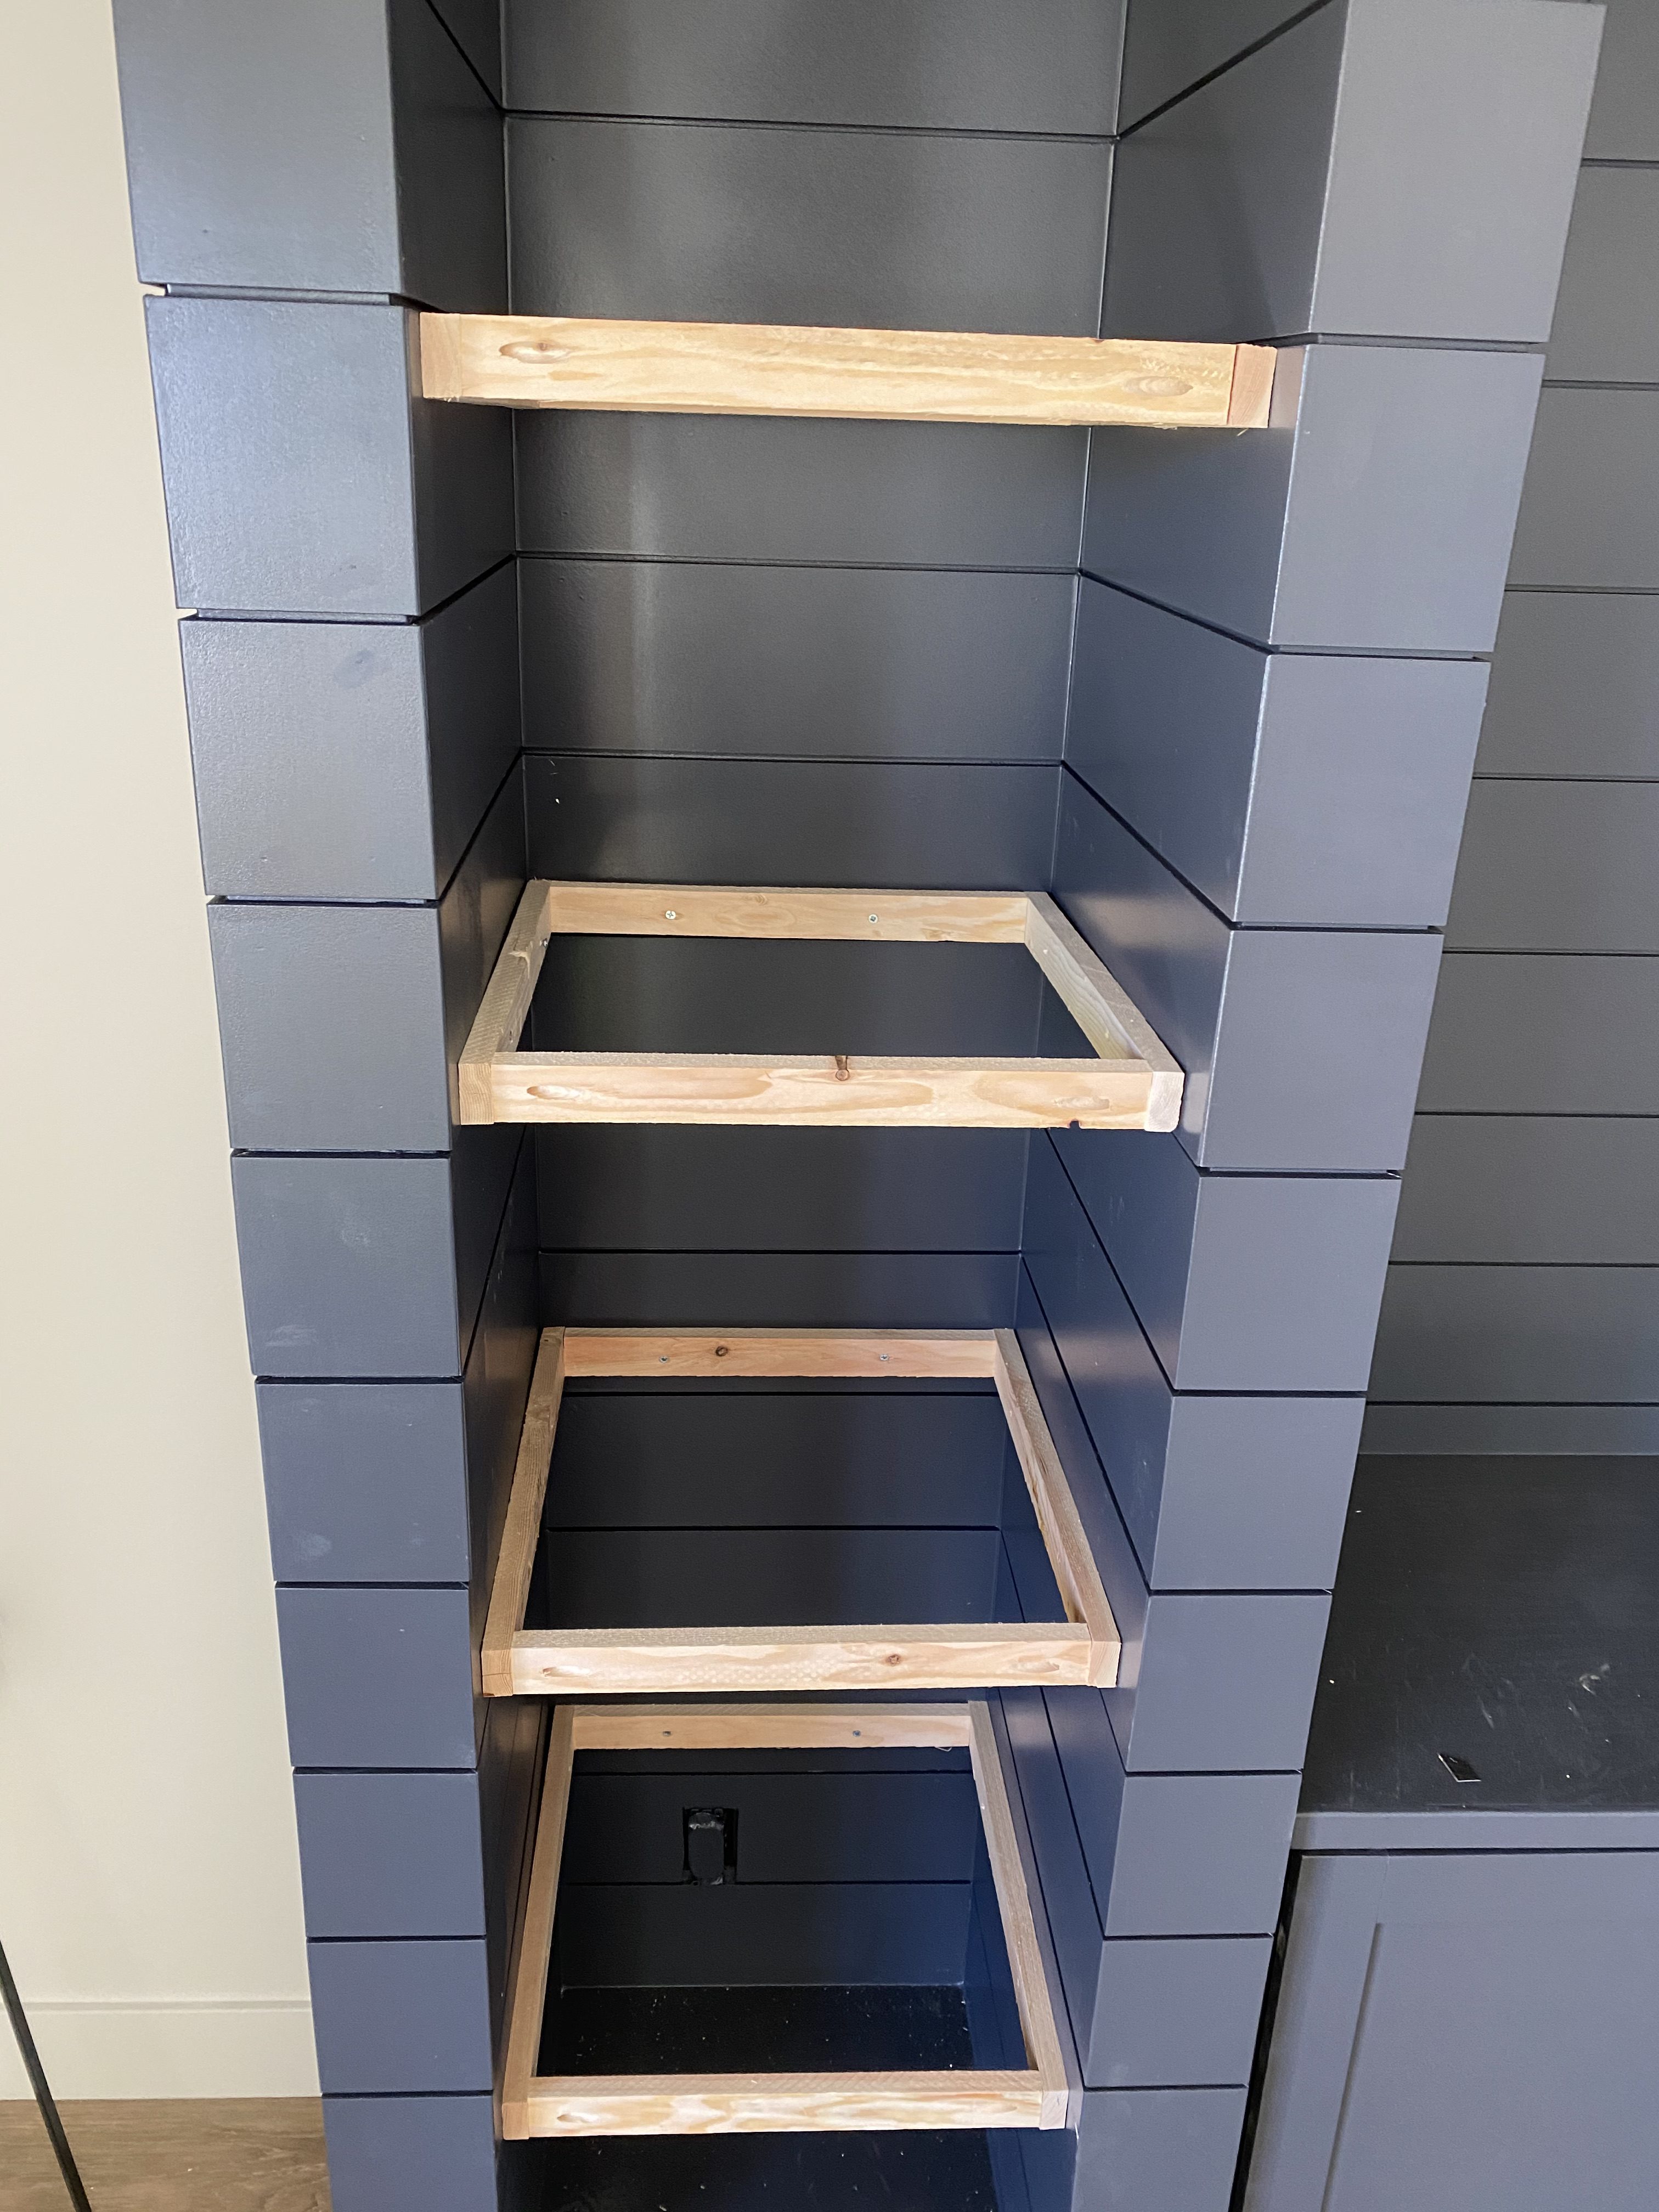
After the frames were in place, I cut the plywood to size and nailed it to the top and bottom. Then I nailed on the front, leaving about 3/4″ of an overhang since we were doing light strips under the shelves. If you’re not doing this, you could just do a 2″ white oak iron-on veneer on the front which would make the shelves look like one solid slab. I left them the natural color they are and sealed them with a satin wipe-on poly.
*One note about doing light strips: If you know from the beginning you are doing lights under the shelves, skip the center support 2×4 in the first step (or turn it so its narrower.) This makes it so when you are fishing the cord down inside the walls of the built-in your cord can get by the center support. We didn’t do this so I ended up having to remove a piece of shiplap so I could drill a huge hole through the center support and then put the shiplap back and refinish it. Huge headache. Read this post all about doing lights.
The last step was hanging the doors! My favorite hinges are Euro 1/2″ overlay hinges from Home Depot. I’ve tried several other kinds and these ones are the easiest to hang and adjust. They give you quite a bit of leeway to get things just right. I use the Kreg hinge jig to drill the holes and I use the Kreg hardware jig to attach knobs.
Whew! Did you make it through? Are you running away screaming or thinking you’ll just hire someone?! Ha! Yes it was a long and involved project because of all the shiplap. The carpenter at my house who was working at the same time as me told me he did a project like this a month or so ago and they actually drywalled the 2×4 frames first. Not exactly sure why but it seems like unnecessary effort and expense. Plus it takes up more room. However I love the look of the shiplap builtins and in my opinion, builtins are always worth the effort. It seems to make a house look so much more finished.
Here’s a few of the tools and products I used on this project (affiliate links):
Don’t forget to pin this project for later!
One Comment