How to Make a Couch Slipcover Part 1
Making your own couch slipcover is a great way to update an old couch, change the color, or be able to wash out marks made. I made these couch slipcovers in white duck canvas, which is definitely a little harder to keep clean. I have since personally switched to beige slipcovers and they seem much easier to keep looking nice.
I did it! It was a little rough going in the end but I powered through and finished. What a conquest!
Do you remember my original couch?

It actually doesn’t look half bad in this picture…but believe me, the material was terribly worn and the dirt was just ground in. I might have revitalized it if I’d paid someone to come clean it professionally, but I was really tired of the red. It is very limited in my decorating.
So I decided to get a slipcover. But after looking around a lot on the internet, the most affordable one for me was still kind of expensive and not really what I wanted. And after I made my wing chair slipcover, I knew I could make one for my couch.
I wanted white canvas. I debated white for a VERY long time and still decided in the end that yes white will be a little more maintenance, but I can always bleach stains out of it and I really wanted white! And after having a white rug, I thought “Well a couch slipcover has to be easier to keep clean than a rug!”
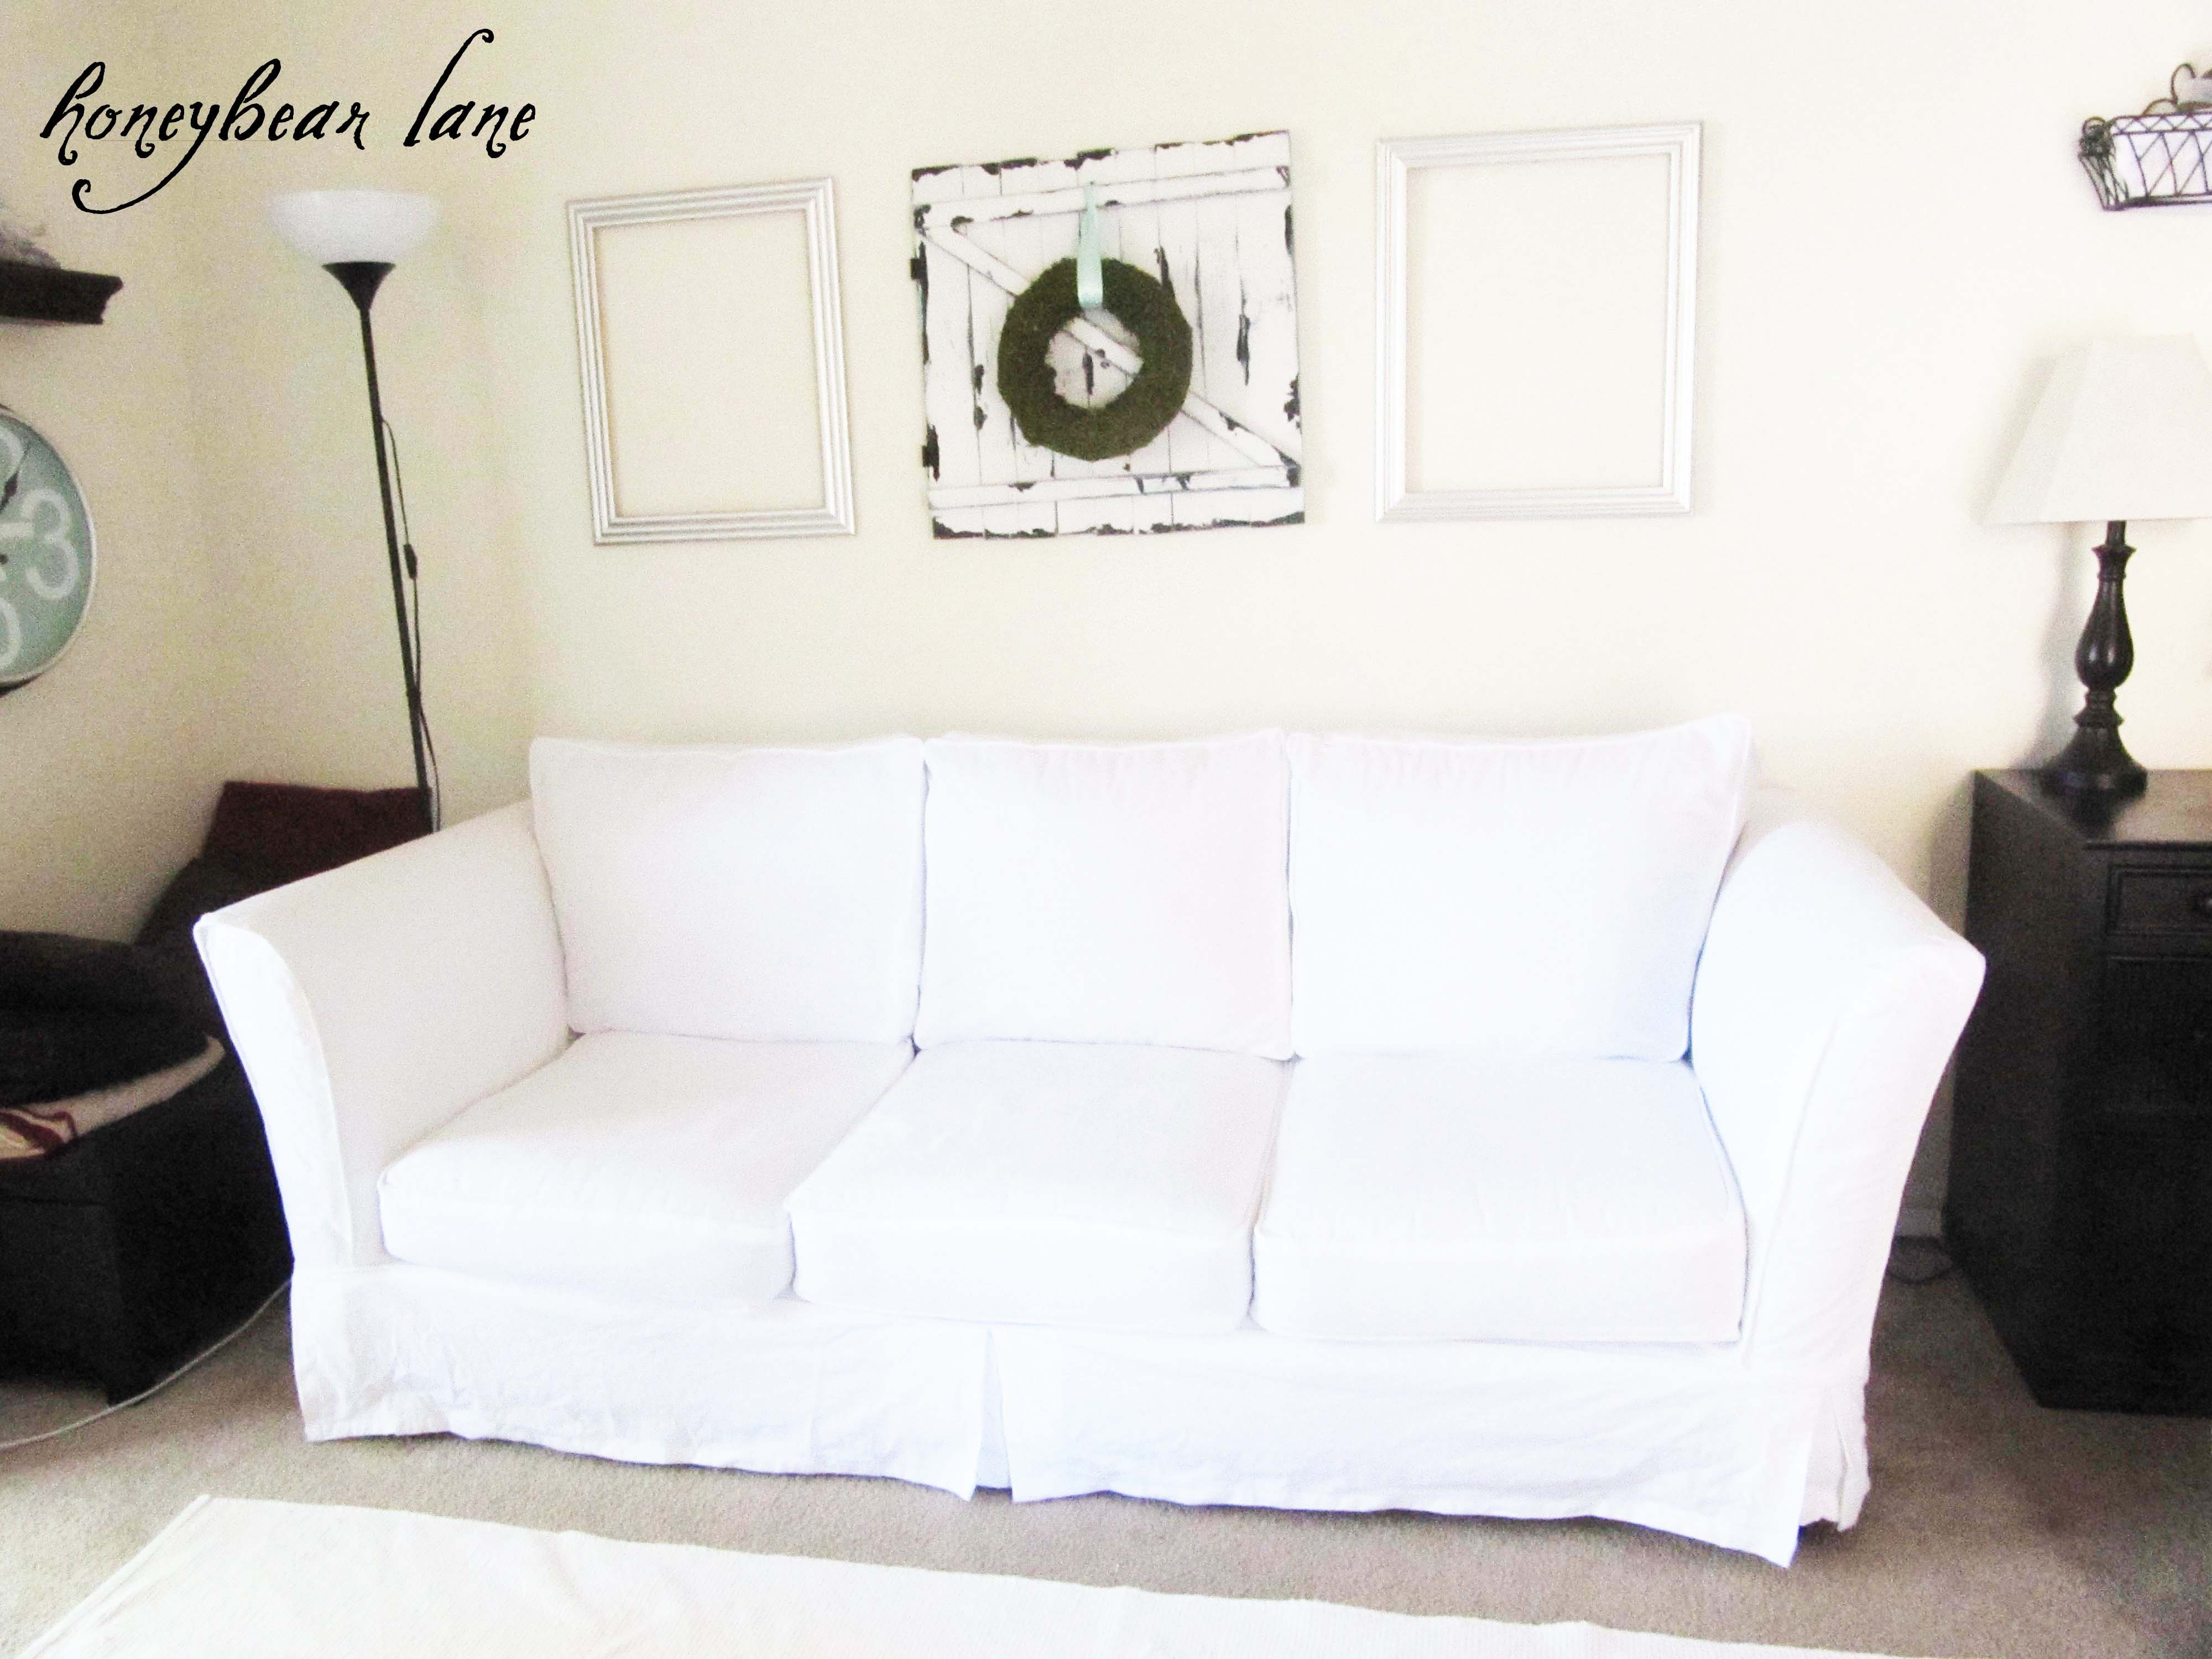
The thing that finally sold me on the white slipcover was the idea from The Inspired Room of using quilts on top of your couch. This really opened up my eyes to the possibilities of “dressing up” your couch with quilts! Now I’m planning on making lots more quilts for my couch, especially for all my favorite holidays. I made this zig zag quilt for the standard every day one.
So I saved up some money and bought my fabric. I got 10 oz white cotton canvas which you can find at Fabric Wholesale Direct. I consulted their upholstering guide to figure out how many yards to buy. I knew that I was going to make individual cushion covers for both the seats and the back rests so I added some more yards. I bought 22 yards. And I got too much. I think I still have like 3-5 or more yards left over. But that will be handy if something gets ruined and I can make matching throw pillows!
Supplies:
(Affiliate links, see my disclosure here)
- 20-22 yards 10 oz. white cotton canvas from Fabricwholesaledirect.com
- Upholstery zippers
- Piping cord
- Pins
- Seam ripper
- Fabric Pen
- Safety Pins
Cushion Covers
For my couch slipcover, I started with all the cushion covers first. I knew it would be the most straightforward and would ease me into the project. I cut out very large pieces of fabric and pre-washed them (which was a pain but the fabric shrunk quite a bit in the wash!) I did not want to make a custom fit slipcover and then wash it and have it not fit at all…which it wouldn’t have. It was terribly wrinkled so I had to iron a lot of it which was very time consuming.
The first thing I did was tear the cushion backs off the back of the couch, since they were sewn on. I just got my seam ripper and went to town. This is how it looked:

Pretty scary right? I had to sew some white felt onto the back of the back cushions to keep all that stuffing in. I sewed it by hand so it took some time. Then I also hand sewed the brown thingy back onto the couch back.

(I haven’t sewn it yet in this picture.)
After doing all that, I sewed the couch cushion covers.
To see the tutorial on how to make the piping click here
To see the tutorial on how to make the cushion covers click here
Slipcover Body (Front)
The next step after the cushions was to cover the rest of the couch.

First I cut huge pieces the length and approximate width of the couch and kind of rested it on the couch, putting a few pins in the top to keep the fabric from sliding down. Then I draped another large piece over the arm rest, although I didn’t pin that piece to the large couch piece. I did the arms separately first.

To make the arm fronts, I took two large long rectangle pieces and pushed a few pins in to hold the piece up as I traced the shape around with a fabric pen. After tracing, I cut them out (two layered pieces of fabric so I could get two identical arm fronts) with about a 1″ buffer outside the pen to allow for the seam allowance and piping. Then I sewed on the piping and made sure to sew the piping on opposite directions (you don’t want your arms to be facing the same direction.)
After I sewed the piping on, I turned them right side facing the couch and pinned them to the arm pieces…it really was pretty simple. Just make sure that you pin everything inside out.
After doing the arms, I pinned the arms to the main couch piece. To get a better idea of where exactly to sew, I traced a line with my fabric pen. This always helps me so much since my edges are always really jagged and uneven (until I trim them later.) I then sewed those together.


Slipcover Body (Back)
To do the back side, I used safety pins to hold up the large piece of fabric so I could cut it to the approximate size and then I repinned it (with regular pins) more accurately and sewed the back on. Actually really easy!


Starting to come along! Next post will be the bottom skirt part and the velcro on the back. And the finished result!!!

Click here to see Part 2 and the Slipcover Reveal!! You might also want to see How to Make Cushion Covers and my Wing Chair Slipcover!
SaveSave
So great! I’m kicking myself over here for not drawing a line with a pen like you did. That makes so much more sense!!
hey, we have that same red couch in our basement – – – want to come recover mine?!?! 🙂
Oh my goodness, I’m so excited to see it finished!
I am jealous of your skilz u rock girl!
amazing!
I am so inspired!! I think I can make a slipcover for my chair and couch now. Thanks so much for all of the great ideas. Did you make your piping by sewing a piece of thread into a strip of your fabric? I saw that idea somewhere in “blogland” and it worked perfectly for a bottom hem on a dress I made for my daughter. You are so talented!
Sydney
I meant to say “by sewing a piece of yarn” rather than thread. Sorry about that!
Thanks! This link will show you how I made piping: http://www.honeybearlane.com/2011/05/how-to-make-piping.html I bought the natural piping from the fabric store…I’m not sure that yarn would be thick enough for me. But it could be very cute on other things!
Thanks for the tutorial! So the red original fabric doesn’t show through? It don’t look like it from the pics.
Or did you take off the red fabric with a seam ripper?
I didn’t remove the red upholstery first…the fabric was thick enough to not show anything underneath.
That extra fabric will definitely come in handy. Having made natural duck slipcovers for a couple of chairs, between my two grown boys, hordes of their friends and two black dogs, the covers got to the point where even bleach didn’t help get rid of stains and dirt. Next time I make slipcovers I will make 2 sets of cushion covers because they get the most wear.
This is so informative. Thank you now I need to get off my butt and start looking for the fabric.
Thank you for the tutorial. Maybe I can do this after all?
For sure! It’s really not too hard, just time and labor intense.
I have reuhpolsered lots of furniture but just don’t have the nerve to make a slip cover. It is crazy. I did not know there was a pattern. Maybe it is just because my sofa and love seat have a ruffle around the bottom and attached pillows on each end. Makes me very afraid to start.
goodgolly that’s amazing! I mean you make a sort of intimidating project look totally do-able!
Just another idea…the wonderful Kimmy and Ash over at GEM did a supercool cushion for their white love seat. http://greeneyed.com/2011/06/diy-cushion-cover/ Perfect with the quilt to protect a white sofa.
Cheers!
How heavy were the 22 yds of fabric? I was wondering because I have to walk to the post office and back with my two boys. (I live overseas on a base).
Hi!
I am going to feature you on my Totally Inspired Tuesday segment this week! I just bought a couch for $35 since I just moved from AZ to New York and I’m on a tight budget! I have been dying for a white couch and I’m so excited/nervous to get to work on it!
Thanks for sharing and you did an AMAZING job!
Wow, this is gonna be a huge help! I have a forest green love seat that’s also really limiting my decor choices. It’ll be nice to have something more neutral!
Simply brilliant. I bought two slip cover books and none made it this easy.
Wow, thanks! What a great compliment. 🙂
I NEED you to guest post at LMM! NEED! did i mention you have the BEST taste?!
Thank you for an excellent tutorial! I love your site and am now following. Have a great week!
This is SOOOOO inspiring. I think I’m going to put my brave pants on and give it a try. Our couch wasn’t cheap, is very comfy but I hate the color!!!! Thanks you so much!
I love the way you just ripped out the cushions- way to go!! Fear has NO place in the worls up upholstery, hahaha.I so agree you just have to go for it!! The only way to learn! Now I am popping over for the reveal- I am verrrry curious !! Found you through Bromelaid by the way .
Bea
I don’t even own a sewing machine but will borrow one to do this amazing and inspiring . I just have one question, how many seperate pieces did you end up with? My concern is my couch has very big round arms and wondering how to make it look tapered from looking at the couch from a sideview.
I don’t have big round arms on my couch so I didn’t have to do that separate piece, but if you look at my wingchair slipcover I did cut a separate little piece to go under the arm so that it would be more tapered. Good luck!
I just wanted to thank you so very much. The last and only time I made a slipcover I was 8 months pregnant with my first daughter and had my mother standing right by my side, saying “It’s ok, just cut, it’s ok”…I would still be standing there not daring to cut. My daughter is now 26 1/2 and my mother has been gone for 10 years (still hurts).
Anyway, I had 20 yards of fabric that I got for another project that I decided against and a red couch that is very comfy but red! After searching online for tutorials for making slipcovers that were either vague or way too involved with making patterns and mock-ups with muslin, I stumbled upon your tutorial…jackpot!…clear, not fussy directions…gave me the “yeah, I can do that!” that I needed. I am not finished with it, but I just had to tell you how grateful I am you took the time to share this tutorial.
That’s great to hear Anna! Thanks for sharing this comment with me. 🙂
I was going to reupholster, but this will be much easier. I found a tiny couch on the curb next to our daycare. The cushions are in great shape, but the fabric has been shreaded! =)
good luck!
How did you like working with the 10 oz. weight? Someone suggested to me that it might be to heavy/stiff for me to use for my sofa when I get around to making mine.
Hi Heidi! I just wanted to thank you for this! I finished my couch slipcover over the weekend- it only took me ten months! LOL. Anyway, your tutorial was very helpful to me and I credited you on my blog post.
I just found this tutorial. I have almost the same red couch…so sick of the red. I just wondered with your kids, has this fabric held up? does it wash well? are you still happy you did it in white? I love white furniture, but the reality of what the white looks like in my tiny house with 4 rowdy kids sometimes disappoints me. Just thought I would ask for an update on the fabric and how much you love the slipcover now.
I should definitely post about this! Look for it soon. But I’ll just say this for now: I do NOT regret it for one second. I still love my white couch.
I just came across this and I want you to know that I think you are amazing. lol Seriously. I can’t put a hem in a skirt so this blows my mind. I saw the end result and WOW. Really wonderful.
Oh thanks Lesley!! That made my day.
Just wanted to say thank you for posting this tutorial. I have almost completed my slipcover and it has been a breeze to do with your instructions. I did not use duckcloth or even white fabric but a dark brown (4 kids) and used white chalk to mark my lines where it needs sewing. I hope you don’t mind but I pinned your instructions on Pinterest.
Awesome! So glad it went well. And Thanks for pinning!
I wish I had the sewing skills to even begin attempting this. But I can’t sew to save myself. Great post though. I’ve just picked myself up a Couch Cover and have been drooling over the options there are available here. I can’t believe I could have a couch cover for every week of the year. I love changing the look of my living room with just a simple couch cover to cover my shabby old couch.
Love your blog, keep up the great content.
Cheers,
Julie
is piping necessary or can i leave it out?
You can leave it out.
excellent, this was my next question…. piping can be a nogo! woot!
Just discovered this and love it!! I’m in the process of purchasing the fabric and realized I have no idea how many yards I would need for the piping. I decided to go with drop clothe from home depot for the whole slip cover and a more fancy fabric for the pillows and piping. This is for a couch similar in size to the one you have displayed and a love seat. How many yards would you suggest to purchase for the pipping and pillow fabric?
Thanks you!
Amy
Hi! I know you made your slipcover pretty much forever ago (it’s fantastic, by the way!), but I was wondering if you ended up reattaching the back cushions to the couch somehow, or if you just left them loose? Does that make sense? I want to use your tutorial to cover my sectional. Thanks! 🙂
No, I didn’t reattach them since I made slipcovers for each cushion. They sit up just fine on the couch though.
This looks so great!
the makeover is great! thanks for sharing your tips, I think my couch could benefit from this, too!
Thanks! Good luck with trying yours!
For all of you experienced slip cover makers out there – how long would a project like this take to complete?!?! I have limited time and need to cover a sofa, a love seat and a terrible chair from the 50s that is round! THe sofa and the loveseat I am comfortable with but I am just curious – retangualr, no frills…. what sort of time frame would be a good estimate from start to finish?
That’s a lot of ambitious projects–if you are not experienced I would allow yourself several months to complete.
I haven’t sewed in awhile, but I’m really going to try this. It seems easy the way you explained it. I can’t afford a new couch so this will be the closest thing to it. Wish me luck. Thank you for your instructions
What a great job. Hard to believe it’s your first one. It’s gorgeous! Was looking around to find some DIY slipcover ideas and came across yours. I’m so impressed. I just have to do it myself. Yours is the best tutorial I’ve seen yet. Thanks for being so precise.
ohh my gosh thank you so much this tutorial maybe I can do this as actually pretty nervous my boyfriend really wants a white couches from Pottery Barn but since we both travel so much and got a new puppy I don’t think it’s worth investing 4000 dollars right now…butmaking this I really don’t understand the piping part do you sew it on while the fabric is inside out??? Any help would be great.. Thank u…. Nanceebing123@gmail.com
There is a tutorial on piping I believe…you sew right sides together and line up the raw edges.
Great tutorial! I tried it with a really cheap material to practice and it came out pretty well. I’m going to buy a better quality fabric and try it again. Thanks!
THANK YOU thank you…i never knew you could slipcover sofa with attached cushions. I admire your BRAVERY. THanks so much for sharing the tut.
Thanks! You can do anything if you decide to FINISH it, haha!
Just where did you actually pick up the concepts to post ““How to Make a Couch
Slipcover Part 1 – HoneyBear Lane”? Many thanks -Bart
I’m wondering what kind of fabric you used? I’m looking for a low cot way of doing this, but that much fabric would be so expensive that I may as well buy covers.
Custom covers cost upwards of $300 and anything less, IMO, will be a pain to keep looking nice (with all the constant tucking). But if you want to go really cheap, I used old bedsheets to make a slipcover for my wingchair! But you could probably buy some nice duck fabric for a couch cover for less than $100.
Hey Heidi! I absolutely love this and am so thankful to find this website of yours 🙂 As a college student, this saves us lots of money seeing as we can just buy a used couch and make this ourselves. I was wondering if it was possible to do all this with fabric glue instead of a sewing machine? Please let me know!!
oh and also bed sheets instead of fabric hahah
oh and also bed sheets instead of fabric hahah
I’m going to have to say no if it’s a couch that gets used a lot. The fabric glue will not hold up to multiple washings and people sitting down all the time. But you might be able to get away with it if it’s on a couch that is more ‘decorative’ or used less. And yes, you can use bed sheets! I used bed sheets to slipcover my wing chair which was maroon and the color doesn’t show through.
okay… i haave a red sofa. it was a spur of the moment buy when what I WANTED was the white slip covered sofa from ikea… never settle. never ever settle. *sigh*
So i too am plagued by a red sofa that i despise and as it is less than a year old my sweet husband is not so sweet as to let me buy a new one. *sigh* Soooo..
Slipcovers it is.
does the red show thru the 10oz canvas??? that’s my question. I don’t want to see the red thru it. (I’m also leaning toward making a second set and dying the canvas a nice mid tone grey, much like the ikea grey, but i also want a set of white so that i have a summer set and a winter set of slip covers…. )
Nope, the red doesn’t show through at all! Good luck!
I have a fabric stapler that I use in making drapery. It would work great to use instead of pins! There is no pain or blood shed. This will enable you to get a great fit. There is a staple puller that is excellent for pulling out the staples when finished or as needed. A paper stapler will not work as well as most paper stapler pullers. The staples are made for the fabric and not blunt cut like the ones for paper. Buying one of these will change your life. By the way…. you CAN use this stapler on paper too! You can order from Rowley Company.co. Happy Sewing!
That’s a great idea!
Omg I was so excited to find this tutorial! Ive always wanted a white couch but with a 1 year old running around I never dreamed it would be possible. Is there anyway to make this cover without ripping off the back cushions?
Thanks so much for this tutorial! I just finished my first slipcover but had no idea where to start until I saw this tutorial. Very helpful!
Thank you for this! My husband and I are young-ish newly weds living on his budget while I’m in school. We bought our 1962 home along with the old furniture! (The previous owner was put in a nursing home). I am trying to put together ideas on creating our “dream home” with what we have rather than buying new. I’ve had my eye on the Ikea Ektorp sofa for a while since it’s at such a great price until taking a good look at my couch and love seat thinking, “The shape on this is good! I could just make a slipcover!” That lead to a Google search and Google lead me here. You have no idea how much you have blessed me with this tutorial! Thank you, thank you, thank you!!
You can do it for sure! I actually own the IKEA ektorp also and I love it. I will probably only buy the ikea slipcovered couches from now on because they are comfortable, inexpensive, hold up well, and the slipcovers are readily available and affordable.
When u measured for the fabric, how much extra did you add on?
I am a fabricator who owns a business making slipcovers.for years I removed semi attached cushions
The way you did. May I suggest you use scissors and cut them off through the back side of the cushion.
This way, the sofa back remains intact. Damage to the cushion cover bottom doesn’t matter because you are covering it anew. Saves time and labor!!
Gretchen Decorator Slipcovers. Or Gretchen custom slipcovers
We just bought leather couch and loveseat, with recliners on ends of both, bought several diff. kinds of covers, none work. We have 2 dogs, they stay locked in the washroom when we have to leave, I don’t know how to make covers that will stay on so my dogs can come back inside.
Recliners are very difficult to make a slipcover for…so I don’t have a lot of advice. Sorry!
Thank you so kuch for showing this. I am going to cover a chair designed like your sofa and I have the courage and instruction now to do it! Thanks!
I just bought a couch for $10 at a garage sale and I’m super excited to make a slipcover for it now! Thank you so much for clear and easy directions! This single mom of five needs all the help I can get. 🙂
I would love to know, how much slipping your slip cover does. Do you have to straighten it daily? Weekly?
Hardly any, but it turned out a little tight.
I too have a red sofa and I absolutely love it, except its red!! the cushions on the back are simply overstuffed pillows and I bought dropcloths instead of spending all that money on fabric. I’ve probably read this post 100 times and after a few months of just thinking I finally preshunk the canvas this morning and will begin at least cutting and pinning tomorrow. I’m terrified! I’ve only made a few outfits for my daughter from patterns and have never done anything on this scale and def never anything without a pattern! Wanted to let you know that you have the BEST tutorial by far online! The only reason I bought the sofa is bc I had see your tutorial beforehand, and it instilled some confidence in myself! Still not sure about the zipper though. I think I would be more comfortable doing an envelope cover, but I doubt that would even work for the bottom cushions, because. they are “box” shaped. Thanks again for this!
The zipper is really not hard–go for it! If you’re nervous, just practice on scraps first. Good luck!
Your chair slipcover look really great. I think I am going to do that to my couch in stead of getting rid of it thanks for this idea.
I see your page needs some fresh content. Writing manually is time consuming,
but there is solution for this hard task. Just search for; Miftolo’s tools rewriter
I believe it is about 11 feet long.
Thanks for sharing the way to make the slipcover, it is convenient.
I just bought the same fabric.. I wanted to know is it fairly soft?
It was reasonably soft, but still somewhat stiff.
If one were very lazy, would it work to just put the new fabric over the old? Instead of ripping the old off first??
I didn’t rip the fabric off my couch, I just sewed a slipcover to put it right on top.
Heidi, I came across your tutorial on Pinterest and after worrying over it for about 5 years I think I’m ready to try my hand at making my own loveseat slipcover. I however can’t see any of the rest of your Part 1 post with any directions for some reason? I can see Part 2 and the cushion tutorial. Would you be willing to send Part 1 to me? I appreciate it so much!
~ Miranda Smith
I am looking to slipcover an antique couch until I can afford to reupholster (and I figure out how to get my kids to stay off it). But I don’t see the actual tutorial. Just the header, a picture of the couch, and some advertisements, then comments. Is it possible to send me a link to the tutorial or a copy?
Thank you for your time!
I’m sorry, I just fixed the issue so hopefully you can see the entire tutorial now!
Just came across this tutorial. I’m super excited to get started on my sofa and love seat. I have been hesitant because my sofa looks much like yours in that the top pillows are sewn to the frame of the couch. I can’t see how I can remove them without totally ruining my couch. Did you go throw the back of the sofa to get to the seams? To me it looks like if I try to remove the cushions there is no turning back to fix it. Helpful hints or suggestions please!
how much is generic viagra at cvs [url=http://dazzlingdavy.tk/]web[/url]
generic viagra teva coupon [url=http://bzfoto.tk/]i loved this[/url]
generic viagra usa teva [url=http://whistle-bg.tk/]Full Article[/url]
generic viagra dosages [url=http://idaho1.ru/]try this web-site[/url]
why isnt viagra generic Read Full Article
generic viagra year visit your url
generic viagra indian read more
generic viagra soft tabs reviews navigate here
There can in fact be many advantages of simply keeping the
lottery win as a big secret. As expected of the
winner, she queried how she might get her practical the gift.
Since then I decided that the only way to win the lottery remains making an effort on lotto system in solid life.
Hello, Scene Club Music Djs.
Dance/Trance/House/Electronic/Techno
Darkwave/Indie/Pop/Soundtrack/Synthpop/Top 40/Lo-Fi/
http://0daymusic.org/FTPtxt/
Best Regards,
Ruben
Hi! I know this is kinda off topic however I’d figured I’d ask. Would you be interested in trading links or maybe guest writing a blog post or vice-versa? My website addresses a lot of the same topics as yours and I believe we could greatly benefit from each other. If you are interested feel free to send me an email. I look forward to hearing from you! Fantastic blog by the way!
We stumbled over here by a different web page and thought I might as well check things out. I like what I see so now i’m following you. Look forward to looking over your web page yet again.
Read More Here [url=https://is.gd/Eag7Pq]a knockout post[/url]
look at here [url=https://justpaste.it/6b8ix]see[/url]
find more information [url=https://www.youtube.com/watch?v=1koG4Mvis-Q&feature=youtu.be]right here[/url]
try this site [url=https://bookmark.wikitechguru.com/2018/12/21/cbd-oil-4/]Check This Out[/url]
go now top article
websites more information
view it now That Site
this site try these guys
Hello! I simply wish to give an enormous thumbs up for the good data you’ve here on this post. I will likely be coming again to your weblog for extra soon.
I intended to create you that little note to be able to thank you so much as before for those fantastic information you’ve featured above. It was quite wonderfully generous with people like you to convey freely exactly what a lot of folks could have made available for an ebook to get some cash for themselves, certainly seeing that you could have done it in case you decided. Those suggestions additionally acted as a easy way to know that some people have similar passion like my personal own to find out great deal more in terms of this matter. I am certain there are a lot more pleasurable opportunities up front for people who scan through your site.
generic viagra latest news [url=http://klyz.ml/]page[/url]
generic viagra trial pack [url=http://imteapplication.tk/]try this out[/url]
generic viagra how to take [url=http://gochsorb.ru/]visit[/url]
how much generic viagra cost [url=http://global-roleplay.ru/]see this site[/url]
generic viagra legitimate you could look here
e-generic viagra look at this website
generic viagra legitimate read the full info here
generic viagra discounts find
I have had my fabric for way too long and hope to make a slipcover this winter. Did you wash your fabric before sewing? Thank you!
I think I did, which helps with shrinking although it was a wrinkled mess after it got out of the wash.
This diy slipcover makes it possible to have a white couch without an imminent sense of doom! LOL. What a great idea!
your link to part 2 at the bottom of this post is missing / no text was hyperlinked. its at the text: Click here to see Part 2 and the Slipcover Reveal!! You might also want to see How to Make Cushion Covers and my Wing Chair Slipcover! . No part of that “click here” sentence has a link to part 2. hopefully that helps!
Thanks so much. I have to do this. thanks for your help and inspiration.