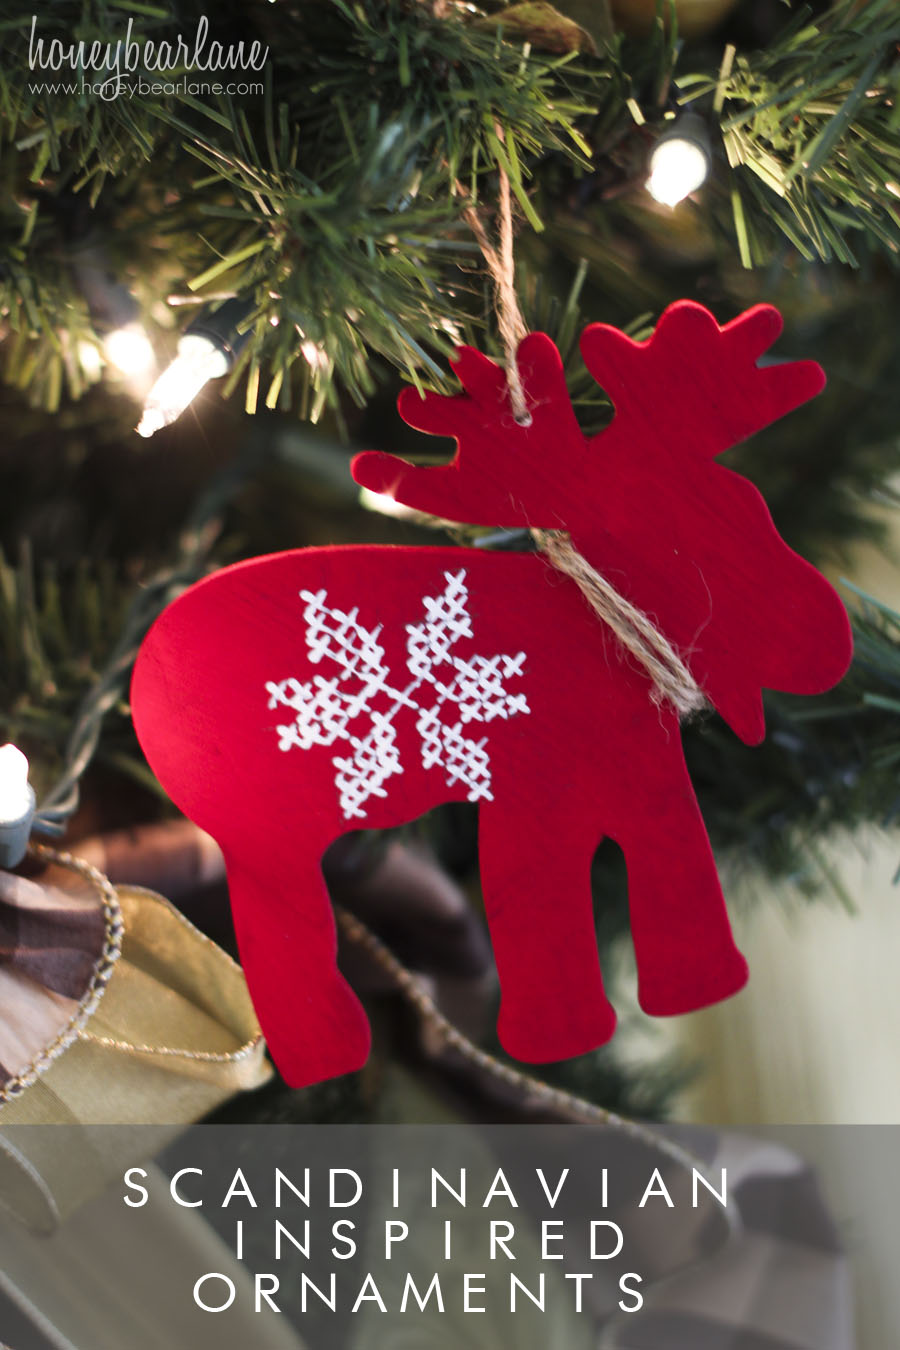
Scandinavian Inspired Ornaments
Hello friends! As part of the DecoArt Design Team, this month I was challenged to come up with a project with the theme of International Holidays. There are so many options here, but I was really drawn to the bold red and white of Scandinavia. I really love their style and art, so I decided to give my own a try. It ended up being pretty easy and anyone can do it! I mean seriously, my six year old helped me with this, so yes–anyone can do it.
Want to make your own Scandinavian inspired ornaments?
Supplies:
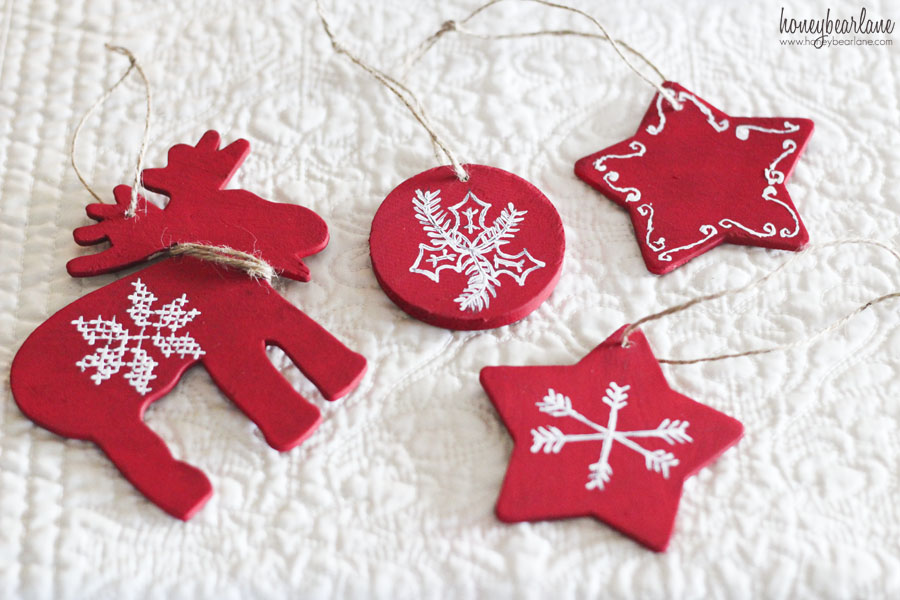
- Wooden shapes from craft store (heart, star, circle, moose)
- DecoArt Chalky Finish Paint in Romance and Everlasting (red and white)
- Toothpicks
- Paintbrush
- Drill
- Twine
First you give the wooden shapes a couple of coats of red paint. Or you could do some in white with a red design. Be sure to paint the back too. Let it dry thoroughly.

Next use a pencil to draw your design on. I freehanded most of these, but for the ‘cross stitch’ effect on the moose, I actually made a grid of 11 lines up and 10 lines across. Then I marked X’s in the grid in the design you see below.
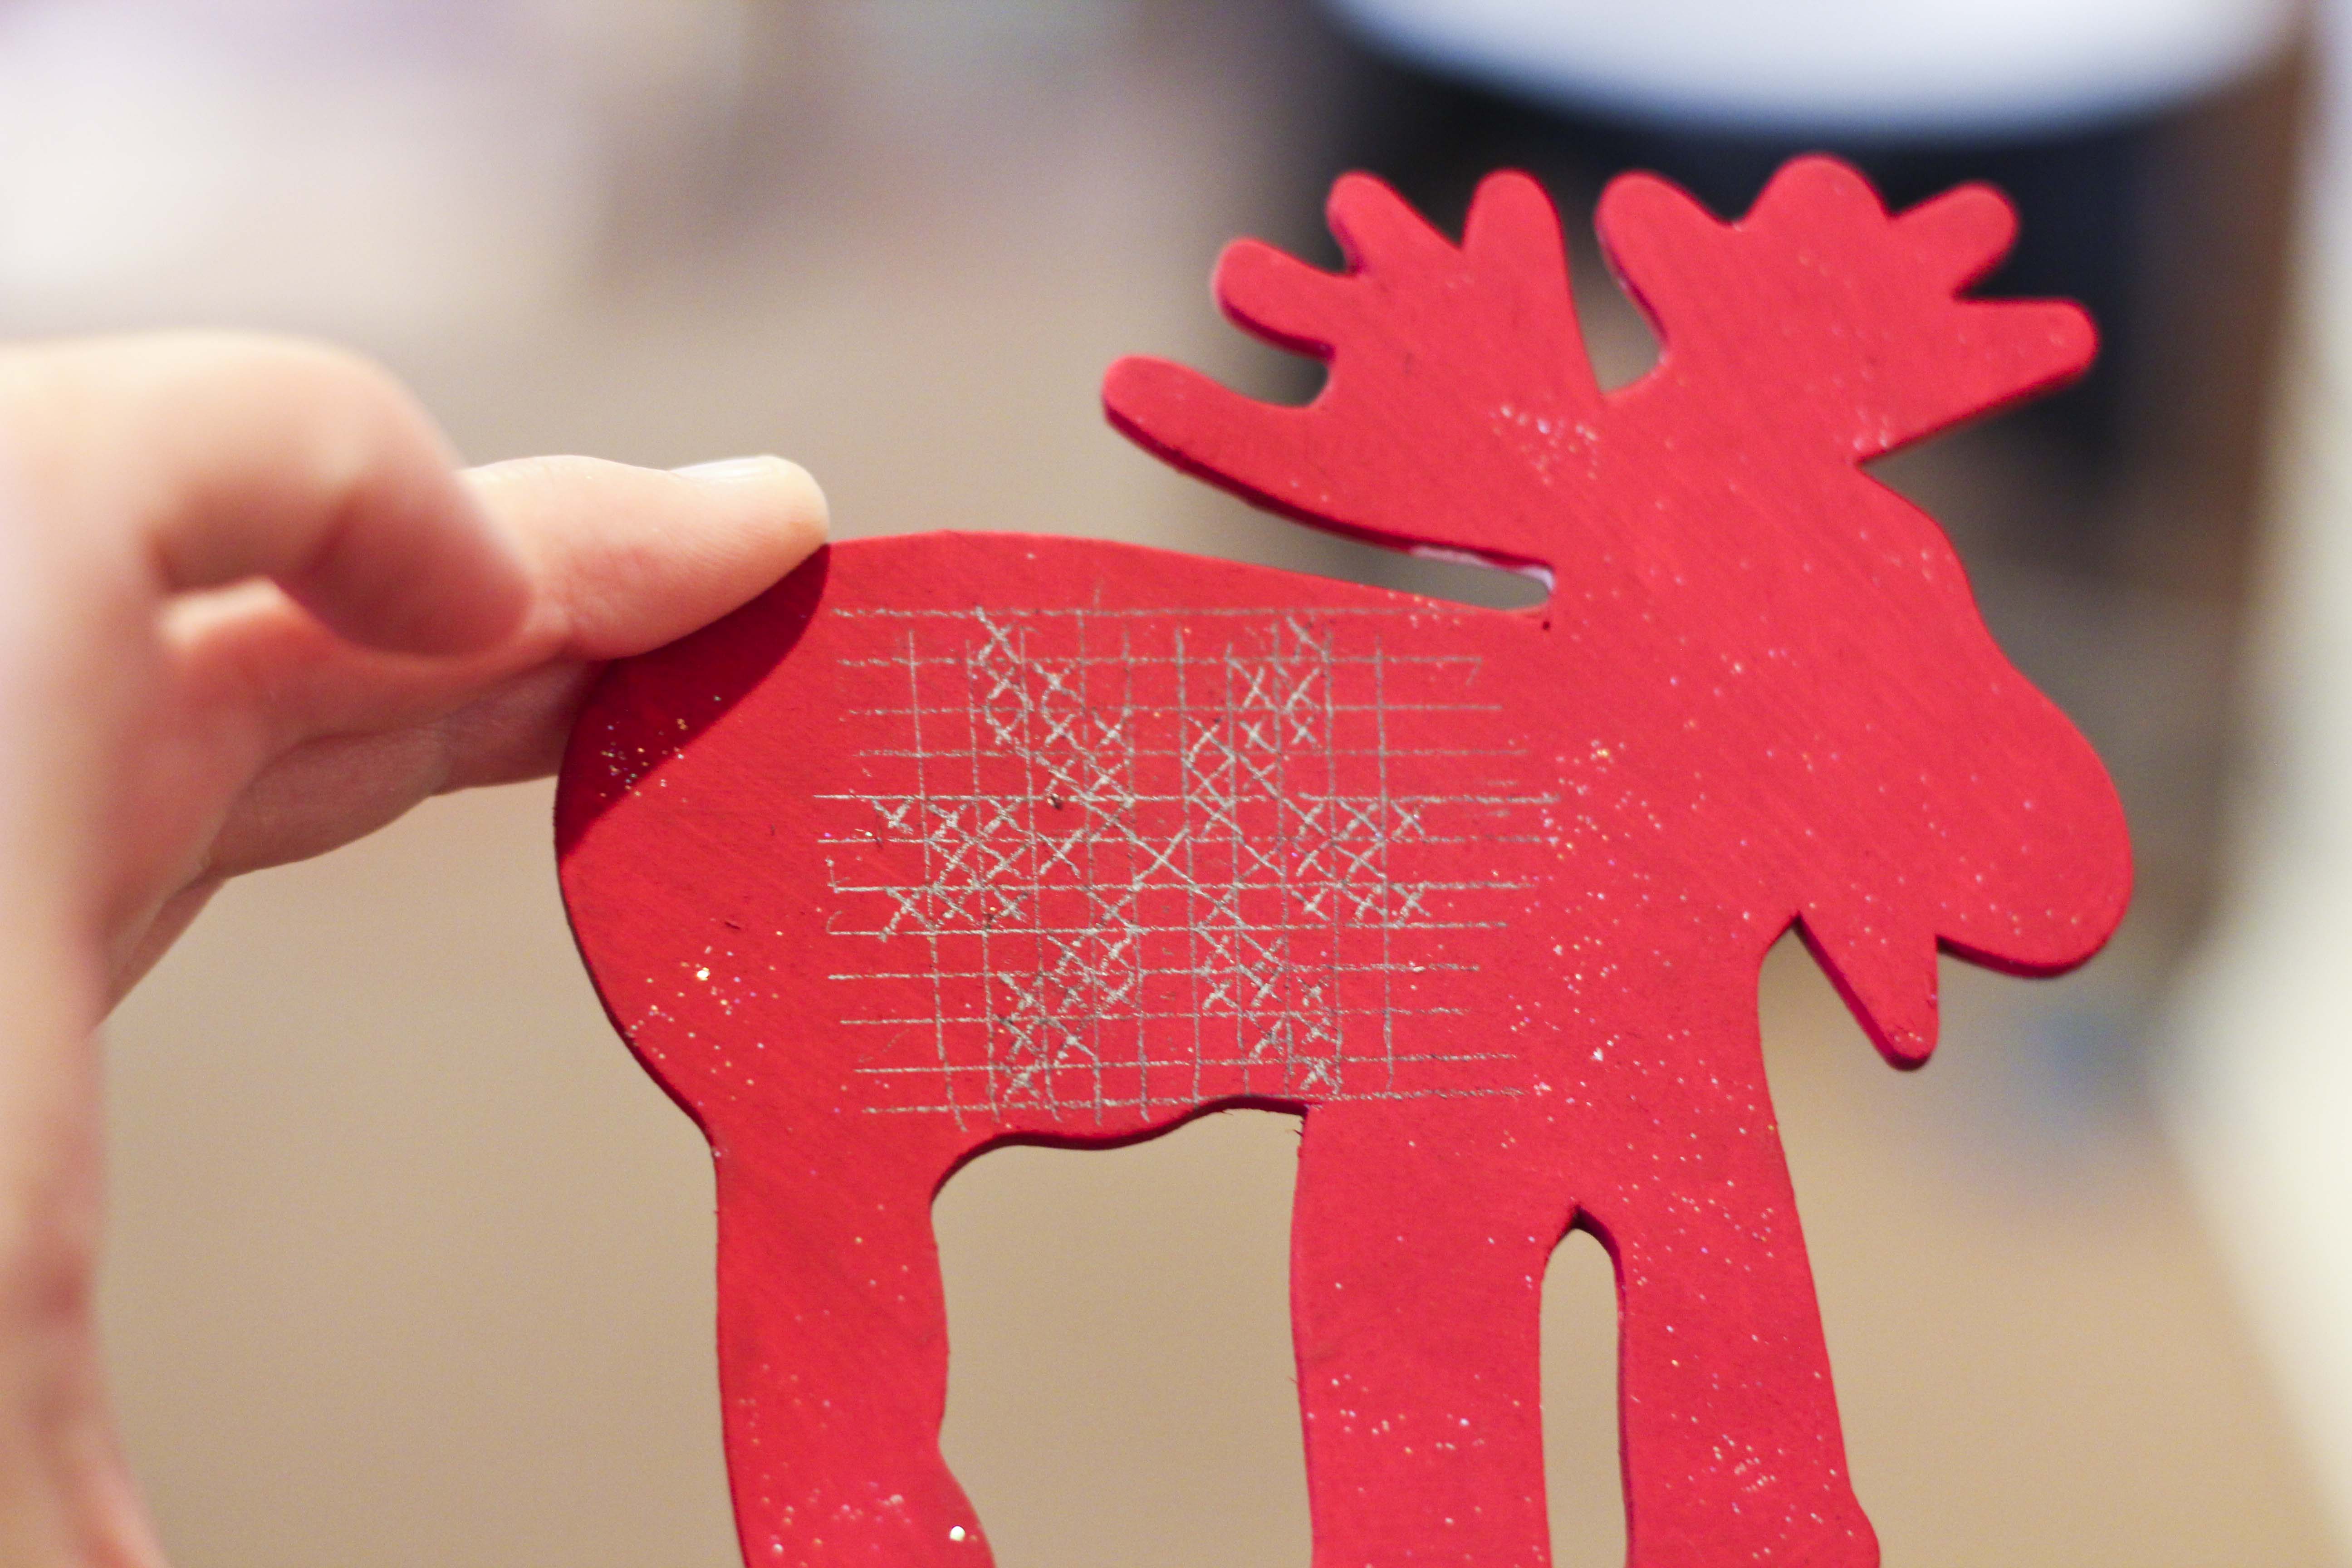
Now you use the toothpick to paint on the design. Dip the toothpick and carefully follow your penciled design. You will have to dip frequently. But my six-year-old did this part with me so you should be able to follow the lines. Let it dry and then gently erase any pencil marks left over (like the grid.)
Finally drill a small hole in the top and tie your twine through. Done!
I love these cute little ornaments on the tree, but you could also use them to decorate a gift (kinda doubling as two gifts eh?) Merry Christmas!

This post was sponsored by DecoArt, all opinions are my own.
4 Comments