Chic Boho Half Bathroom Renovation
I partnered with Love Vs Design for this post, all opinions are my own. Post contains affiliate links.
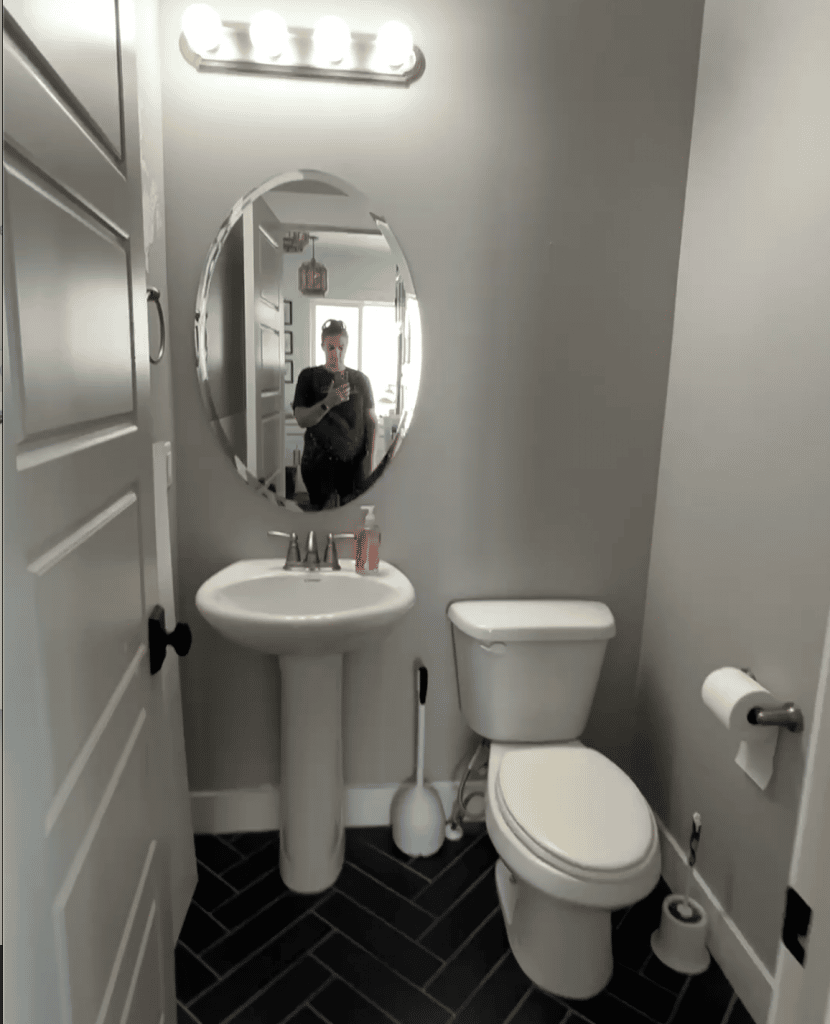
I’m so excited to share my boho Half Bathroom Makeover! This bathroom has been dying for a renovation since we moved in. It was seriously such a boring room. But since it’s tiny with no windows and I didn’t personally use it, it fell to the wayside for many years. When I was contacted by Love Vs Design Wallpaper, I knew it was time to pull the trigger!
I mean really…this bathroom is the worst. You can tell by my face how excited I am about this bathroom in its current state.
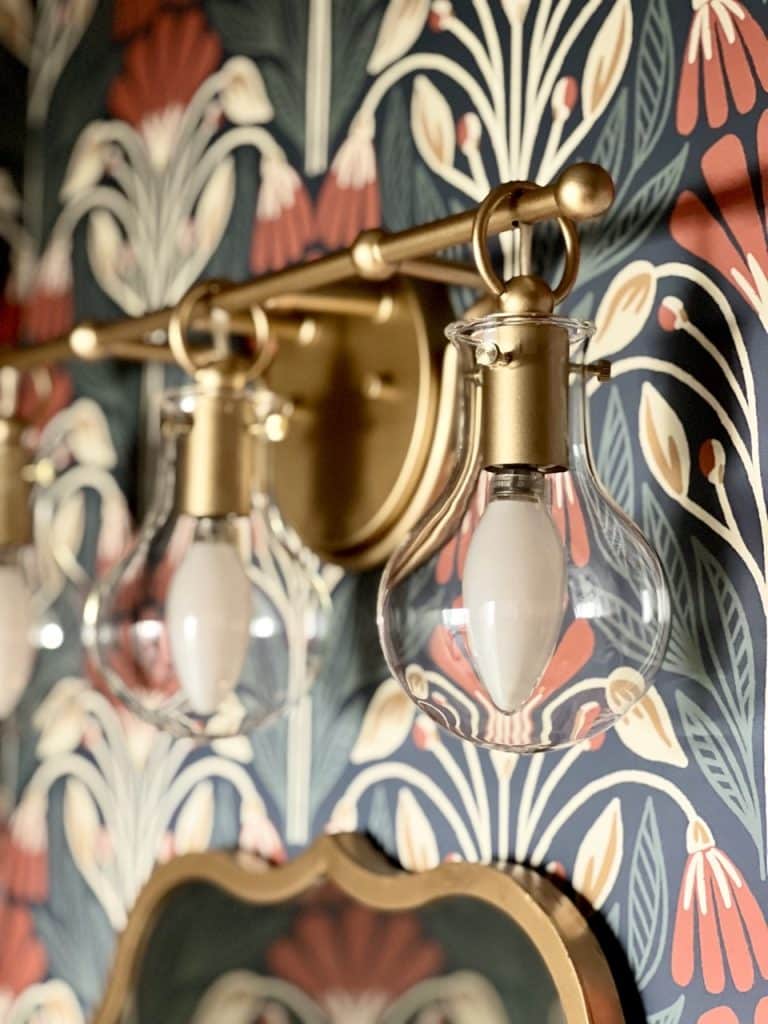
You might have seen my plans I shared here, and while I mostly stuck close to them, I did change a couple things. The main thing I changed was the wallpaper, since the wallpaper I originally planned to use was not available on the Love Vs Design website (all their designs are custom!) Since I was partnering with them on this project, I opted to change the plan for the wallpaper. The only other thing I changed was the light, since my budget was running low and I found one I liked for much cheaper. Oh and I opted for shiplap paneling instead of board and batten. So maybe I did change a lot of things, haha!

Installing the Wall Treatment
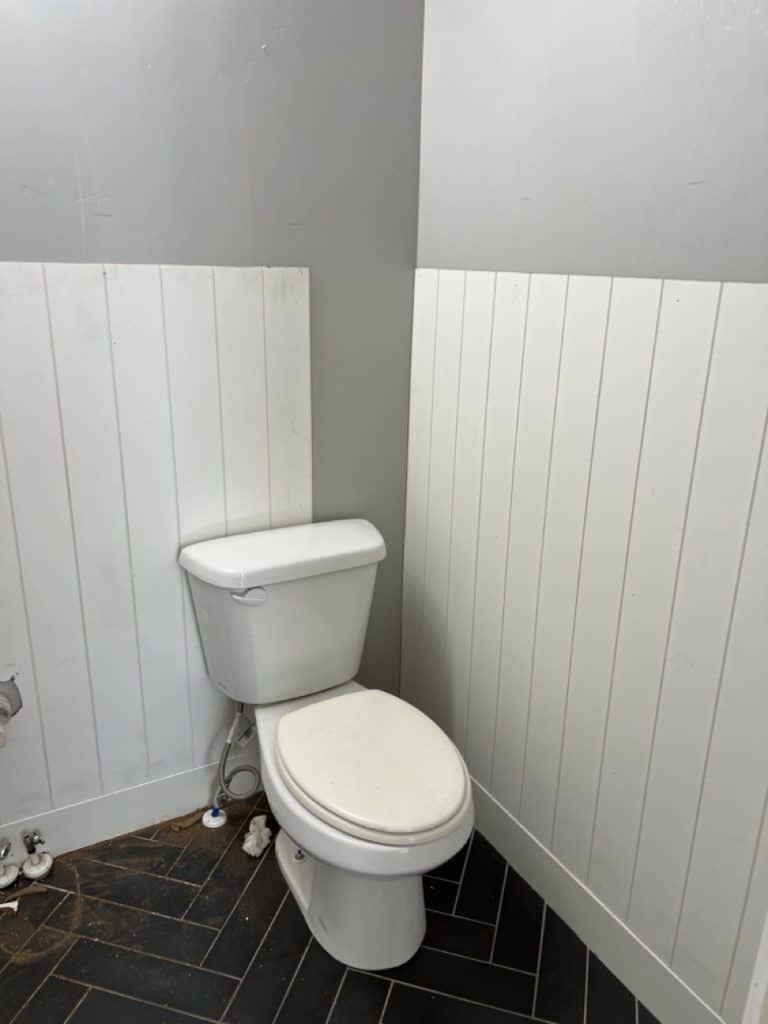
Since the prices of building materials has skyrocketed, I decided to use a shiplap paneling for a wall treatment rather than traditional shiplap. The other bonus to the paneling was that it’s only 1/4″ thick so I could place it right on top of the existing baseboard. Baseboards are not quite as thick as shiplap and so you have to deal with replacing or adjusting the baseboard. I bought four panels and had them cut them in half at Home Depot so it was easy to bring them home. After my husband disconnected the pedestal sink and hauled it out, I adhered the panels to the wall with caulk and finish nails, cutting out the spots for light switches, outlets, and the plumbing. I topped it off with another trim piece for a fairly easy wall treatment.
Painting
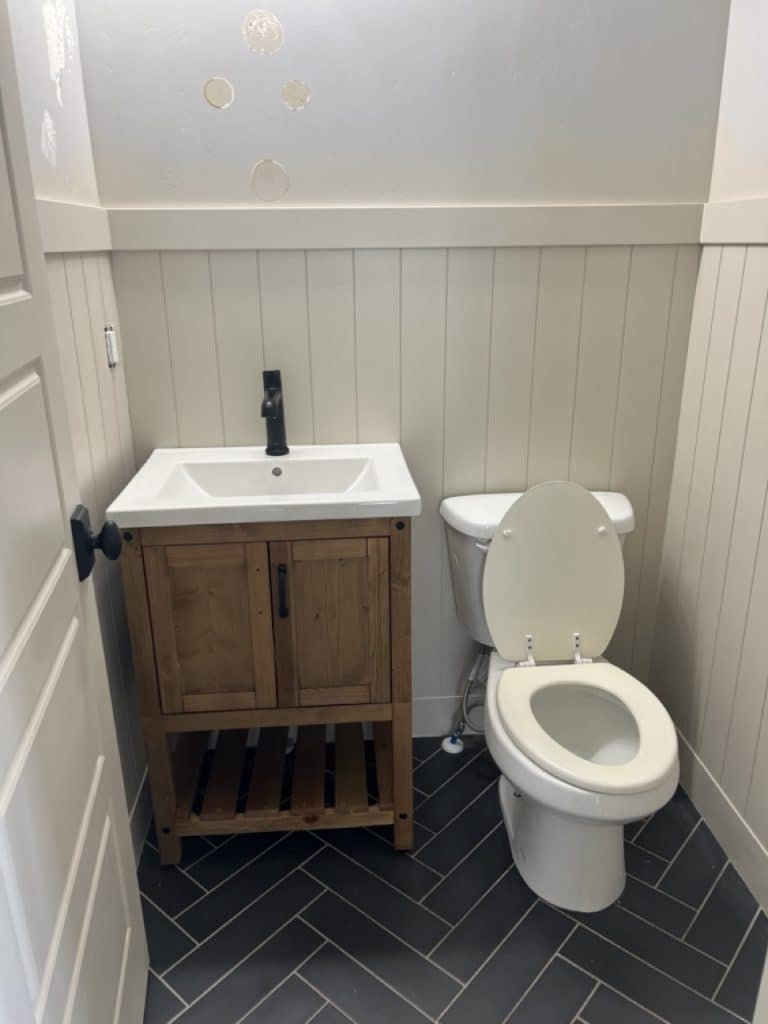
I planned to paint it with my Wagner sprayer, which is a smaller paint sprayer I use for smaller jobs since the Graco paint sprayer I use for large jobs is not worth the hassle for such a small space. It worked great and I didn’t have any weird spray pattern problems. I had to take some time to cover the floors and toilet with paper and plastic, but I sprayed all the panels and trim as well as the door. I chose the color Sherwin Williams Accessible Beige, which I used for my mudroom and is truly the BEST griege color!
After the paint dried, we were able to install a brand new sink vanity from Wayfair (which was less than $500) and a new touchless faucet we found at Home Depot. We had to make a couple of modifications to get the sink to fit, but I think that’s to be expected.
Choosing Wallpaper
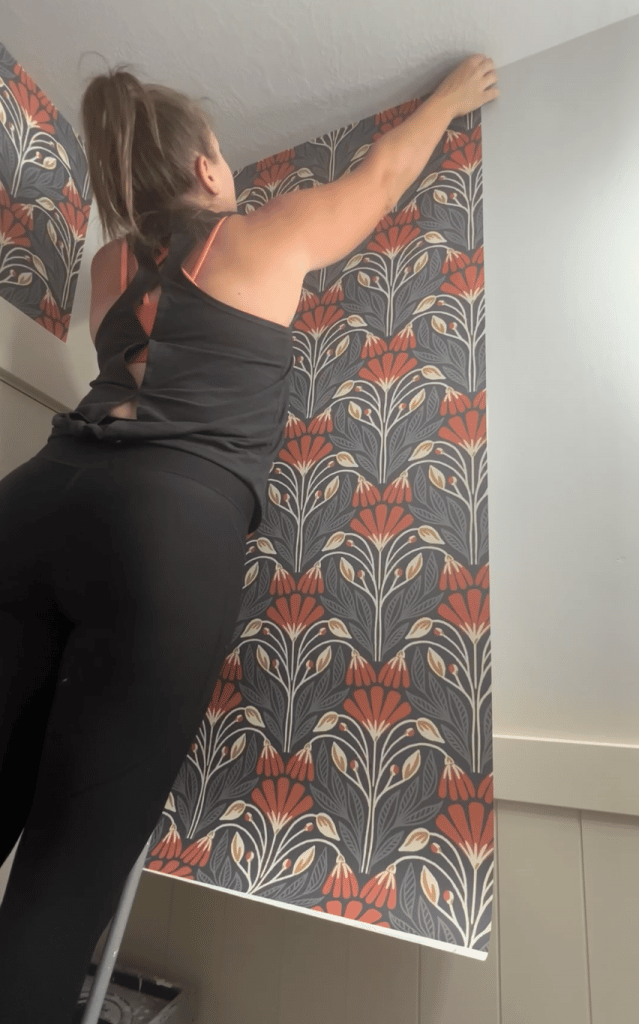
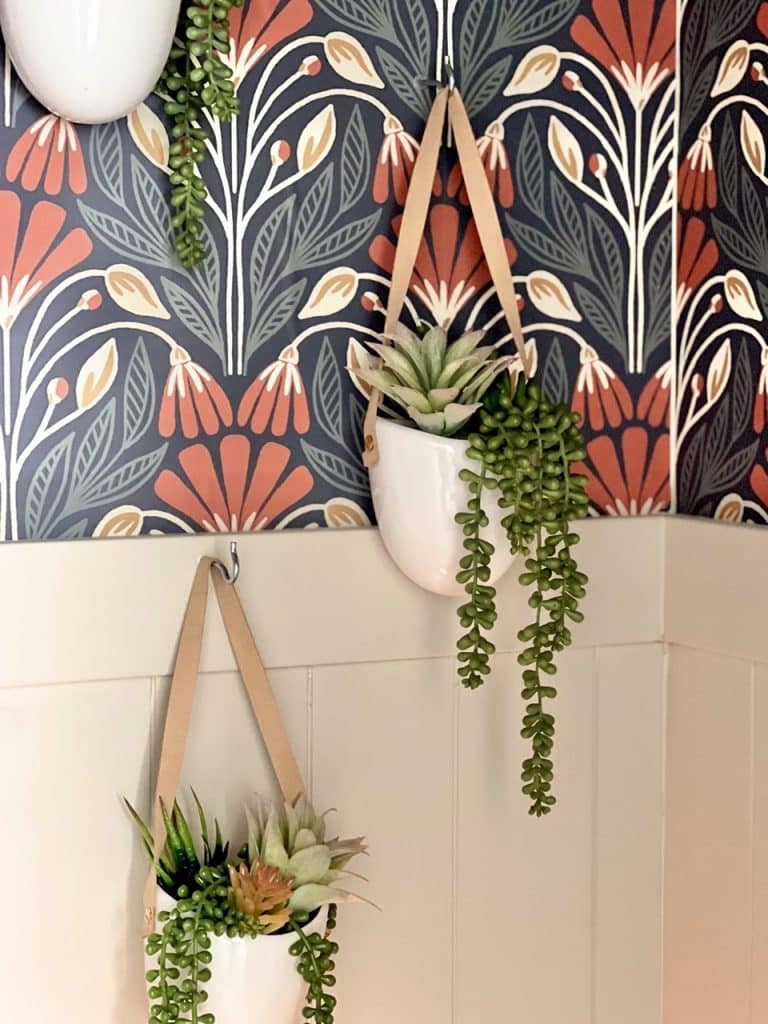
I had searched the Love Vs Design website for awhile, having fun changing the colors in various patterns to different color schemes. I ordered three samples and finally decided on Meadow Damask. I changed the colors to be a darker burnt orange flower, to go along with that color I have in other places in the house. Here’s a little video of me changing the colors and ordering a sample. It couldn’t be easier!
It was really high quality paper, especially since I ordered the woven finish. It was super easy to put up (as easy as putting up wallpaper can be because let’s face it, it’s always kind of obnoxious working with a massive piece of paper) but what I loved the most was how it lined it. I was able to line up every piece perfectly aligned with the ceiling/wall joint and only overlapped the wallpaper by about an inch or so. The key to DIY wallpapering is to not get hung up (pun!) on getting every single pattern matched up perfectly with the next piece. It’s basically impossible so you have you just accept a certain level of imperfection. And you really don’t notice it.
I like to use a large paint scraper to smooth out the wallpaper and get rid of any bubbles that might occur. Then I use the edge of the scraper to make a sharp edge right before I cut off the excess with a razor blade.
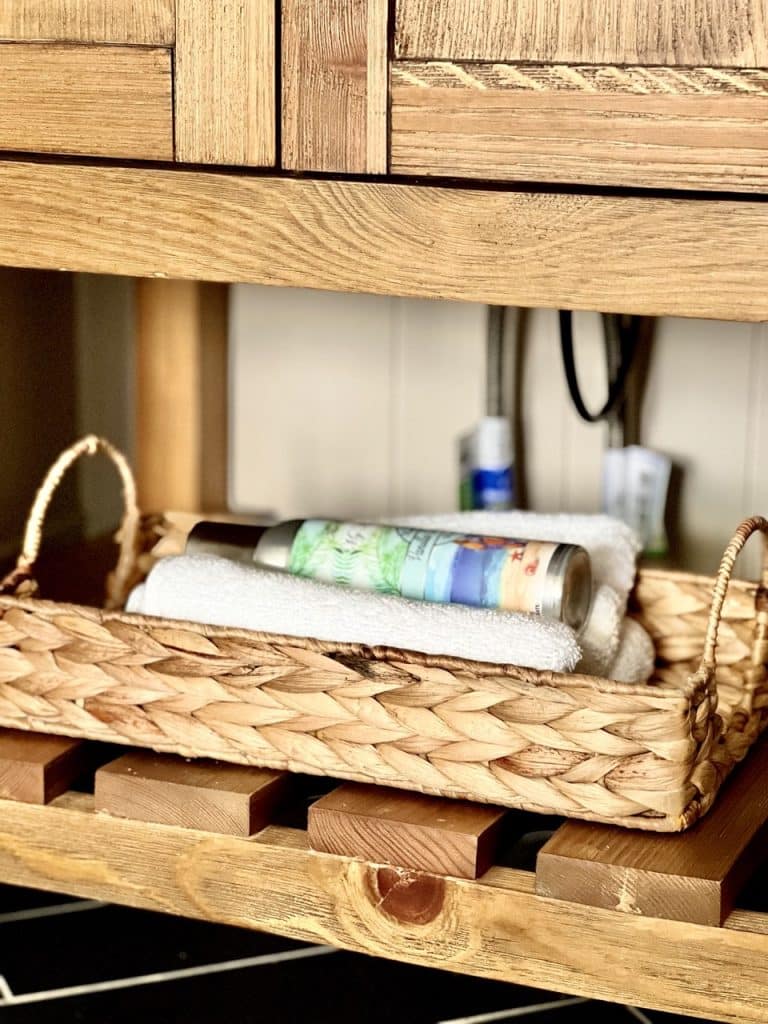
After the wallpaper was up, it was time for the finishing touches. I installed a new light I found on Overstock, hung up new hardware, put together some faux succulent planters, and hung some art. I also found a couple of nice little baskets to hold toilet paper and such. The bathroom is done! It’s amazing how different it is now…my son said it has a Latin vibe because of the wallpaper. What do you think?

I actually love it because I love anything with wallpaper. Wallpaper is hands down the fastest and easiest way to achieve the real “wow!” statement in a space. I had such an easy time working with Love Vs. Design I would totally recommend them, especially if you need wallpaper with custom coloring.

Room Sources:
Mirror: Hobby Lobby
Rug: Amazon
Toilet Paper Basket: Home Goods
Sink: Wayfair
Faucet: Home Depot
Hardware: Amazon
Wallpaper: Love Vs Design, “Meadow Damask” with custom colors
Wall art: Smith’s Marketplace
Light: Overstock
I really appreciate that you decor your restroom in a very good way you totally change the vibe of your restroom it’s look so neat and clean as well as beautiful.