DIY Window Seat with Bookcases Part 1
I’ve wanted to redo my daughter Ellie’s bedroom for over a year now and after playing with a few different designs, I ultimately decided to build a DIY window seat with bookcases and a desk to fit custom in her bedroom. She doesn’t have a huge bedroom, but this built-in window seat would include storage for her clothes and books along with providing a large workspace for her to do homework, makeup, nails, artwork, etc.
I drew up some basic plans on Sketchup in this post, and I was excited to get started, so I just drove off to Home Depot and bought a bunch of plywood, which I had them rip in half vertically so it would be easier to take home. However when I got home, I realized that the 24″ depth is going to create a really big window seat. Since I didn’t want to waste the plywood that was already cut, I just decided to live with it being huge.
The other problem was that this meant I really couldn’t use the IKEA cabinet that I had bought to use on the sides of the window seat because it was only 15″ deep. Oh well, I will live with my mistake and use the cabinets for something else.
I first ripped out the wall treatments that were on the south wall, and then I got painting. I went from white and navy blue to cream and beige. I’m planning to paint the window seat with bookcases a soft, light blue which will bring subtle color into the room.
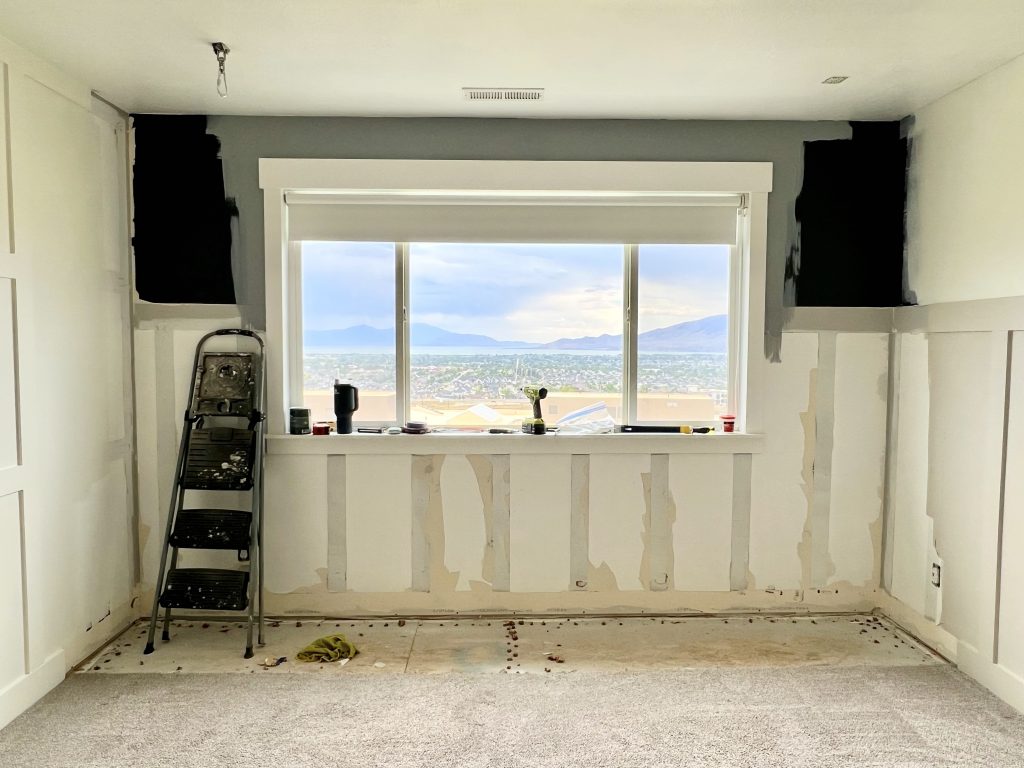
After I painted, I got to work on the window seat. I decided to rip out the carpet where the window seat will go, which meant I had to rip out the tack strip and then place a new one. This is far easier than it might sound. The only thing that I don’t love is that the carpet isn’t professionally stretched taught on the new strip, but I will eventually rip out all the carpet so it’s kind of a band aid solution.
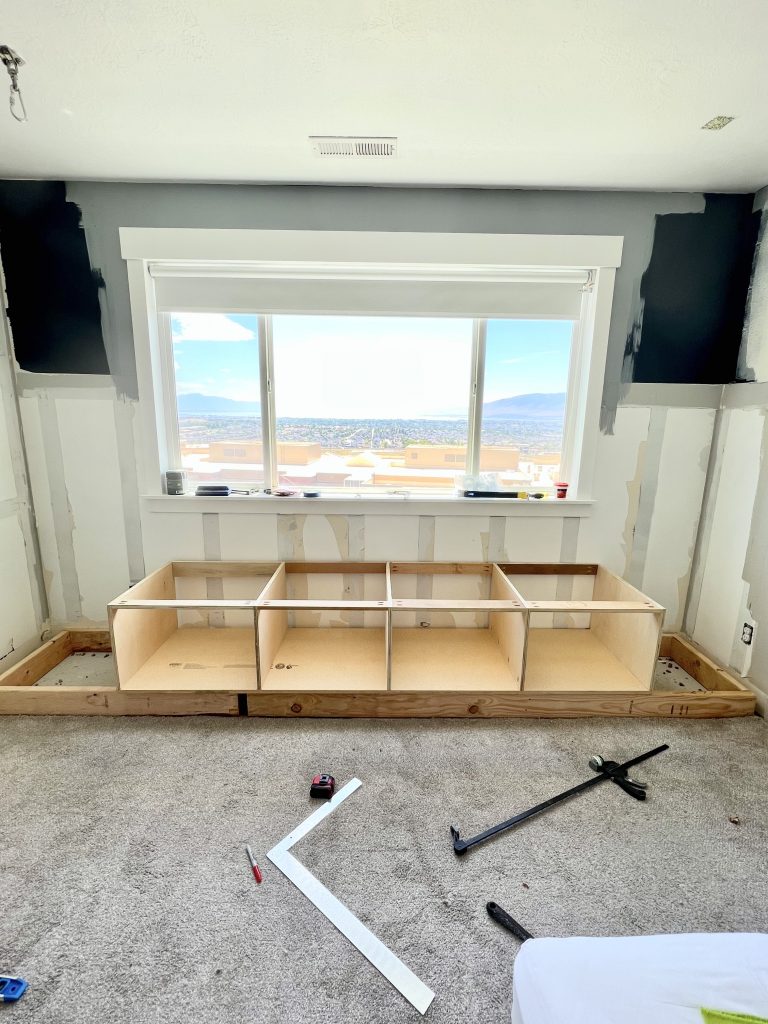
Foundation (Cabinet Base)
I have built builtin cabinets now several times and it always starts with a base foundation. Well, unless you’re using cabinets that have a built in foundation, like in a kitchen. The base foundation serves as a way to elevate the cabinets so they don’t just sit on the floor and also as an easy way to level them together. You build one foundation and make it level, everything else will already be level.
I usually build it out of 2x6s because my baseboards are 5″ high so this provides enough height to be covered by that height baseboard. I screw it into the studs into the back wall. Everything here will be completely covered so it can be as ugly as you want, just make sure it’s level.
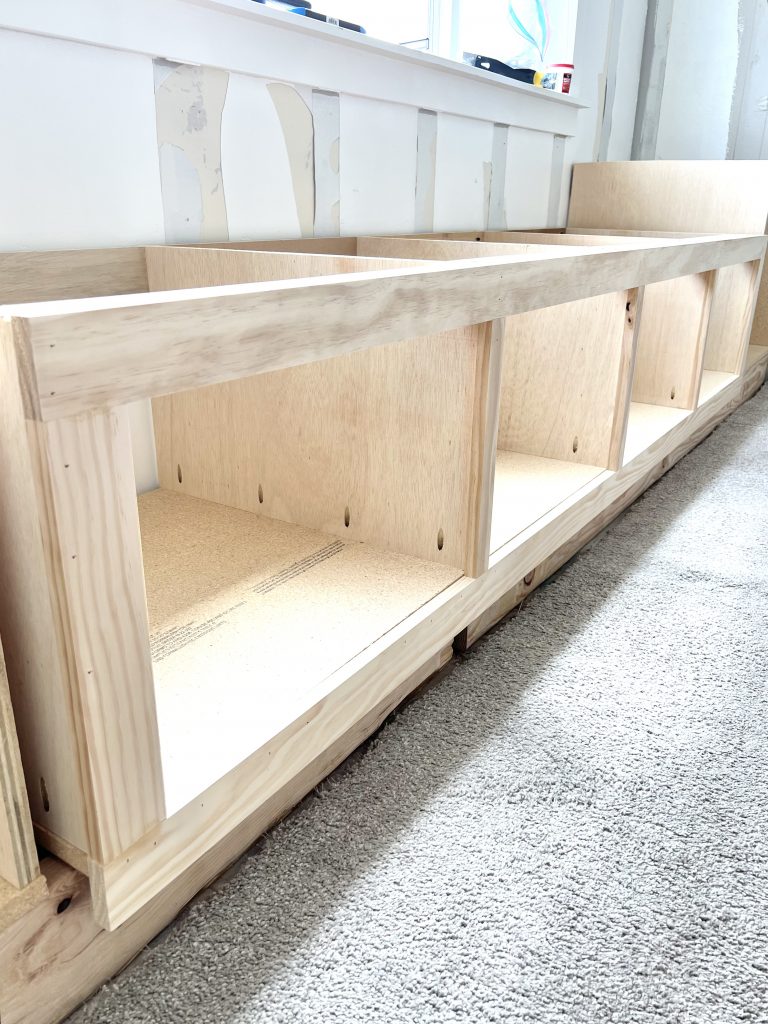
Window Seat
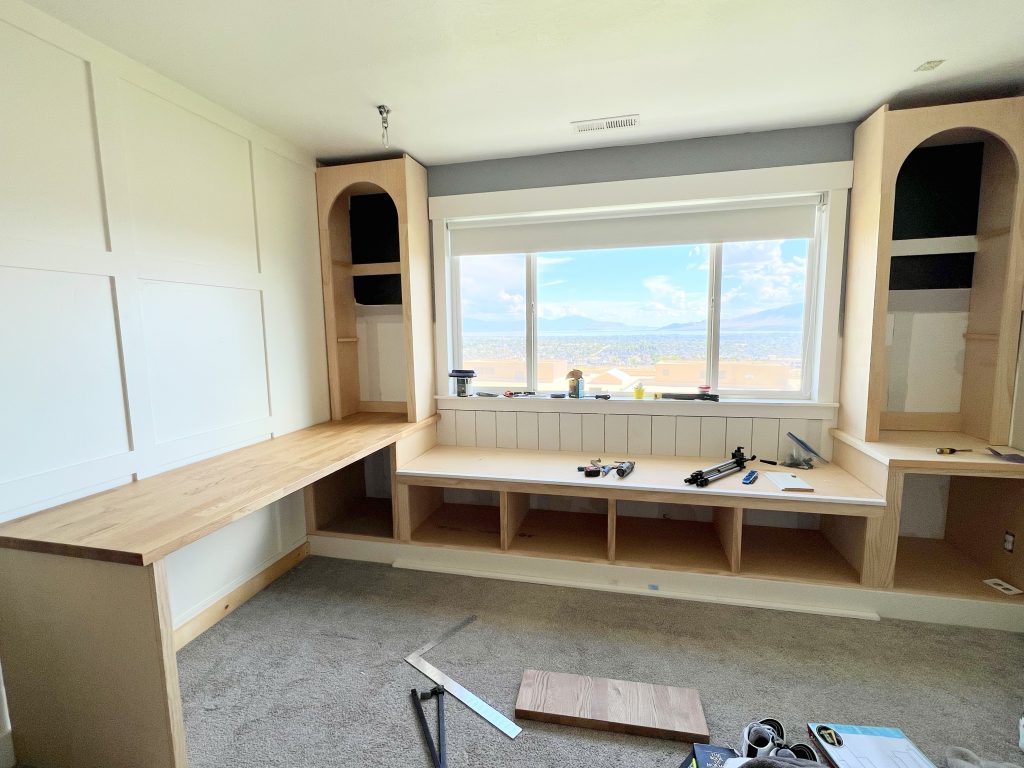
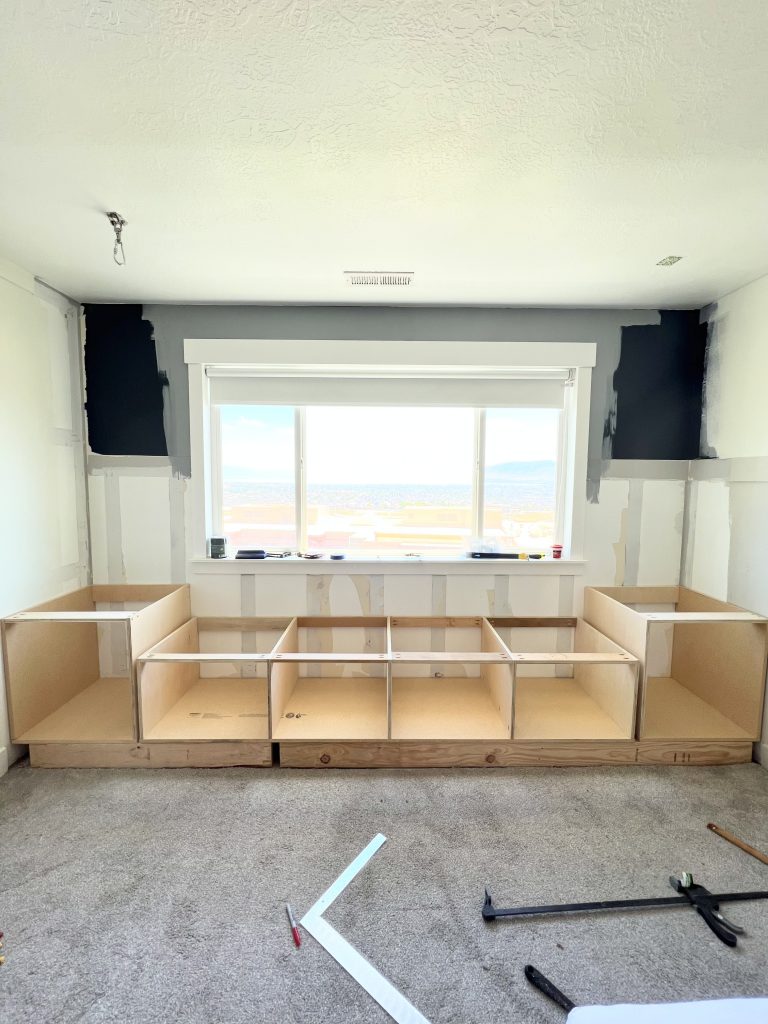
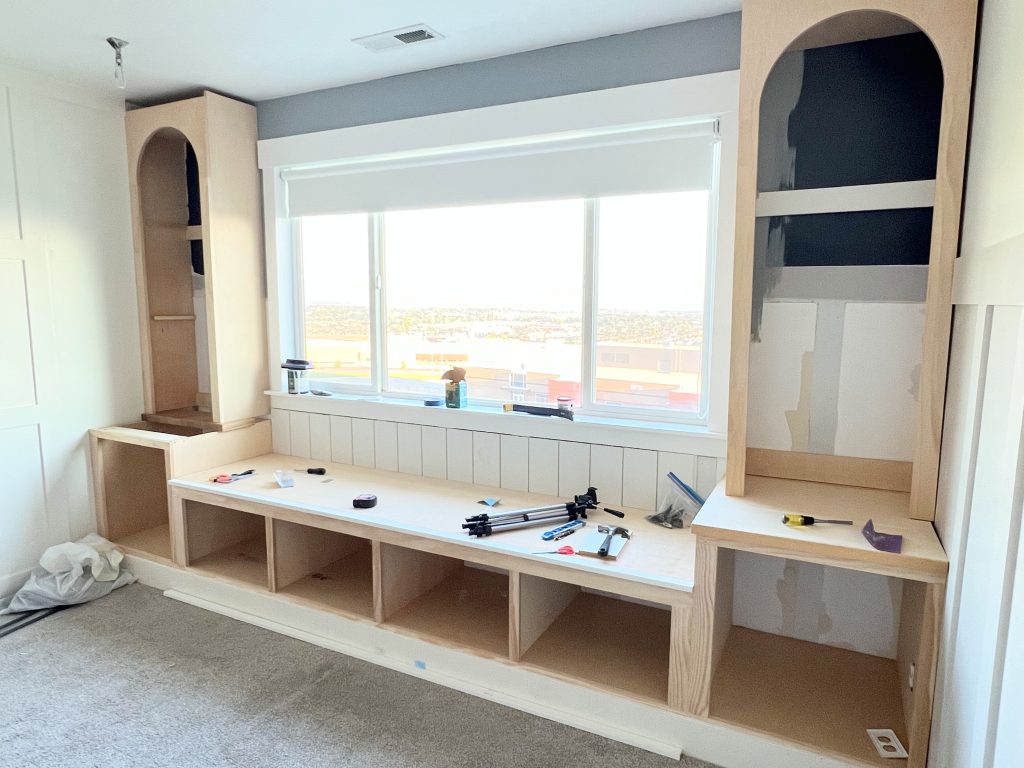
The next part is to build the window seat. If you’re reading this, chances are that you’ve probably read a few other window seat tutorials as well, and they are all pretty different. I’ve seen them where they are all completely framed by 2x4s but I prefer to build mine out of plywood, like standard cabinets. I’m going to put drawers in the spaces, so I feel most confident doing it this way. Pretty straightforward, just start with them bottom and add two sides and a couple dividers using pocket screws. Then I add in cleats at the back top and top front. This is the exact same way I built the bottom of my mudroom lockers. The top is just a piece of plywood placed on top, which I edged with a 1×2 piece of primed MDF. This will all be painted and topped with a nice cushion.
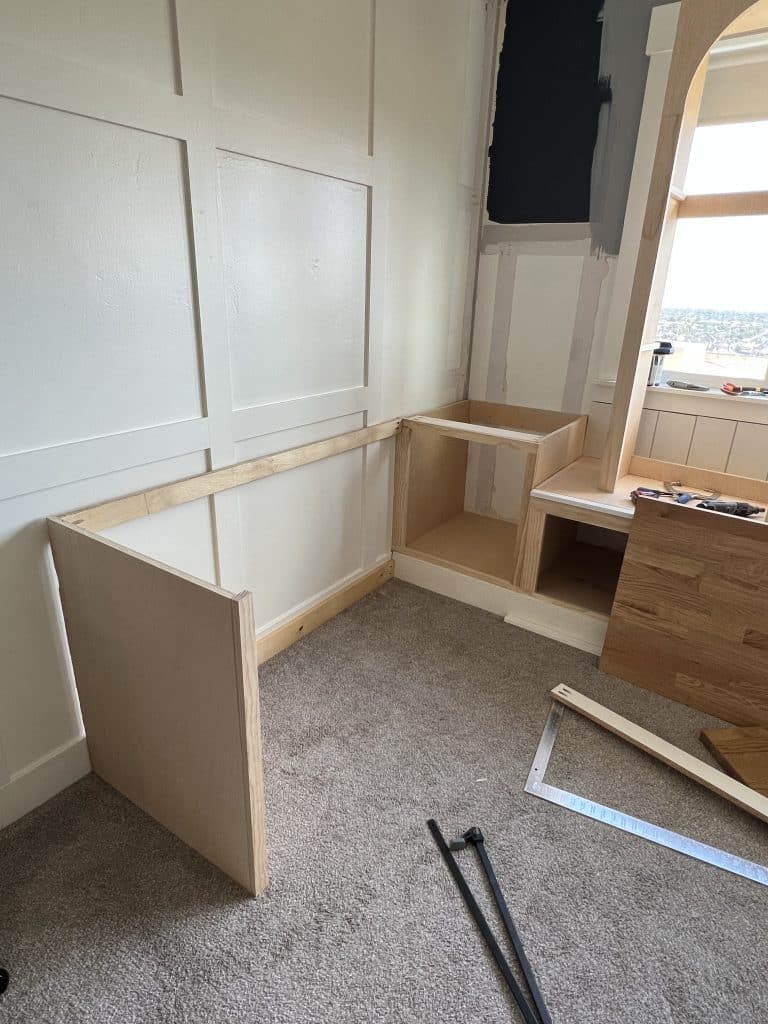
Side Cabinets
The side cabinets were constructed in the same exact way I made the window seat, just not with all the dividers. I made them 24″ high and 24″ wide so they are basically perfect cubes. I had to make them a little shorter because of the desk.
Face Frames
The next step was to frame out the entire unit. I like to build the face frame completely assembled in the garage and then nail it into place. I use pocket screws to build the face frames and this makes the joints strong and tight. I’ve built units in the past where I’ve just nailed the frames on piece by piece and it just doesn’t look as good. Additionally if you are intending to screw a hinge onto the frame, a few nails won’t be strong enough to prevent the door from eventually just coming off.
Bookcases
The next step was to build the bookcases. I used 12″ wide plywood pieces and secured them together with some cleats. I usually do it this way to save on lumber because I can just paint the wall. This time, however, I should have put backs on the bookcases because of the damage on the wall. I decided to put something else on the back, which you will see in the next post!
As for the shelves, I’m actually using some white oak I got from my friend’s leftover stash from her recent home build. It’s going to match the desk and look beautiful!
Desk
I bought a laminate butcher block countertop from IKEA for the desk. I got the 98″ length because I needed 15″ to complete my basement kitchen and I would use the rest for the desk. Otherwise I would have just used more plywood; however, I do I like the contrasting wood tone. I built an extending frame with a plywood leg for support. The countertop is thick enough that it doesn’t need a center support, but if I were to use anything else, I would need a center support.
As you can see I have arches on the bookcases but I am going to write a separate post for that, so stay tuned.
I’m super excited to see the finished result of this my DIY window seat and then to move onto all the fun stuff, like choosing the decor for the rest of her bedroom. I have some fun DIY projects planned!
If you like this post, check out these other ones!
DIY Mudroom Lockers with Doors
DIY Shiplap Builtin Media Unit
Wow, your dedication to creating the perfect space for Ellie is truly impressive! The DIY window seat with bookcases and desk sounds like an incredible project, and it’s amazing how you adapted when faced with challenges like the larger size and cabinet depth. Your attention to detail, from the foundation to the face frames and choice of materials, shows your commitment to quality. Ellie’s room is going to be a beautiful, functional, and personalized haven for her. Great job!
I’m so amazed by this! It’s exactly what I’m working to design for my living room for more storage! Anxiously searching for part 2!
Thank you so much! I will post this soon hopefully.