Built in Window Seat Plans with Bookshelves and Desk
I spent some time the other day putting together my built in window seat plans that include bookshelves and a desk for my daughter’s bedroom, using Sketchup. It’s a pretty tricky program to get the hang of and I’m still a beginner with it, but I made some basic plans to share with you all as I build this unit.
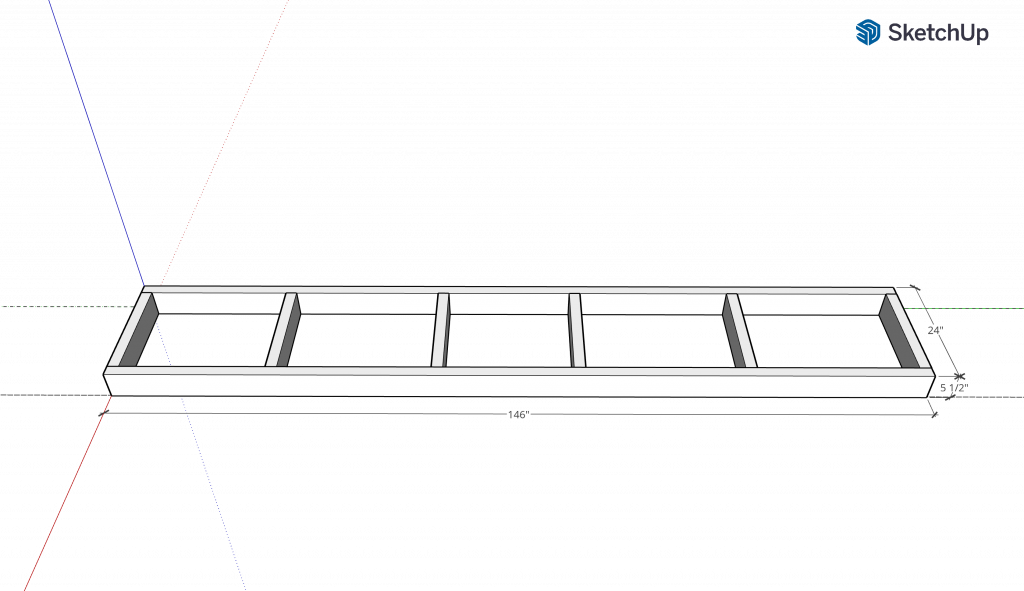
As always, you build a base frame out of 2x6s. The tricky thing here is often 2x6s are wonky and warped so try and get the best wood pieces you can. For Ellie’s room, I’m building it the width of the bedroom, which is about 12′ wide. This can be done with simple screws and butt joints.
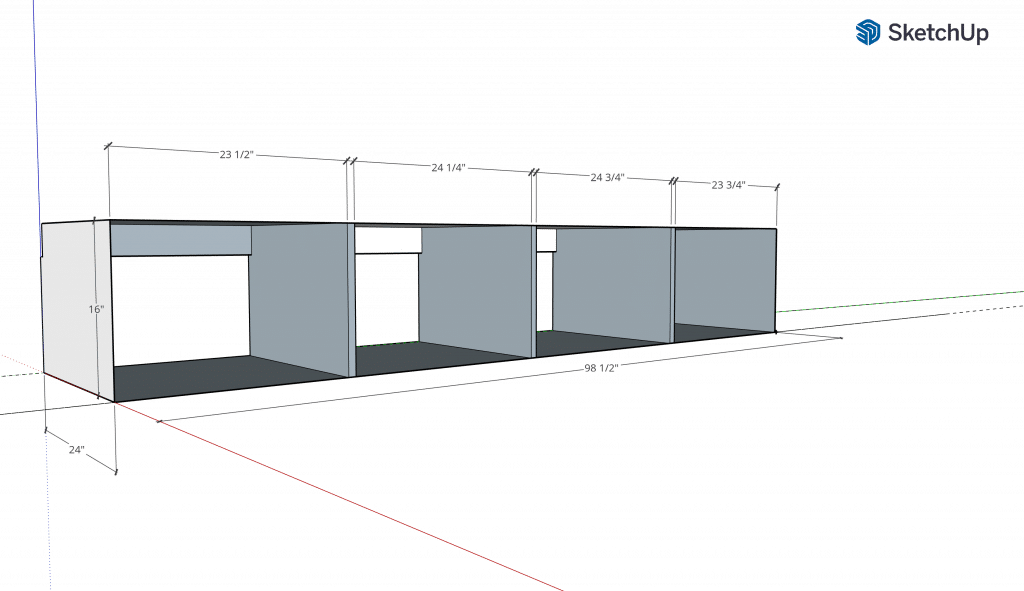
Next is to build the window seat unit, using plywood. As you might notice, each compartment is slightly different in width. This is simply a limiting factor from Sketchup because I don’t know how to build a typical 3/4″ wood on center within the program. So adjust the wood so the compartments are the same, if possible. It’s okay if they are not exactly the same, just be aware of that going into it. I build a basic carcass with only sides, top and bottom and then a wood piece going across the back to screw it into the wall (studs, always.)
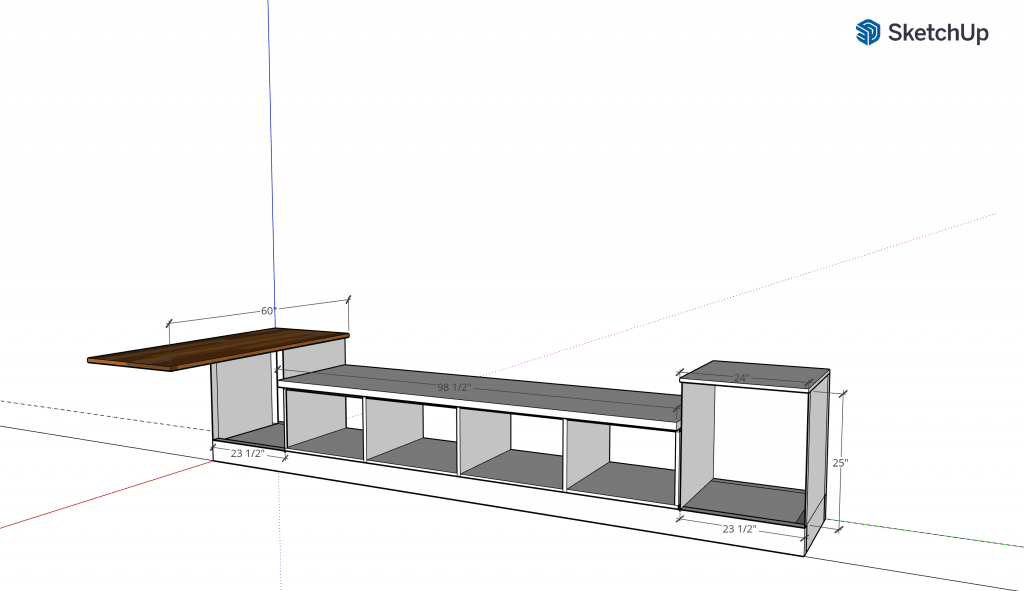
Next up are the side cabinets, which you would build out of plywood (for my project I am hacking an As-Is IKEA unit I bought and sawed in half. I like to find little ways to make things a little faster.) You add a topper piece to the window seat and one cabinet and then since I’m building a desk on the other end, I am using an IKEA KARLBY countertop piece I had leftover for the desk portion. If you want the window seat top to be a little thicker, you can double it up and iron on some edge banding to hide the seam.
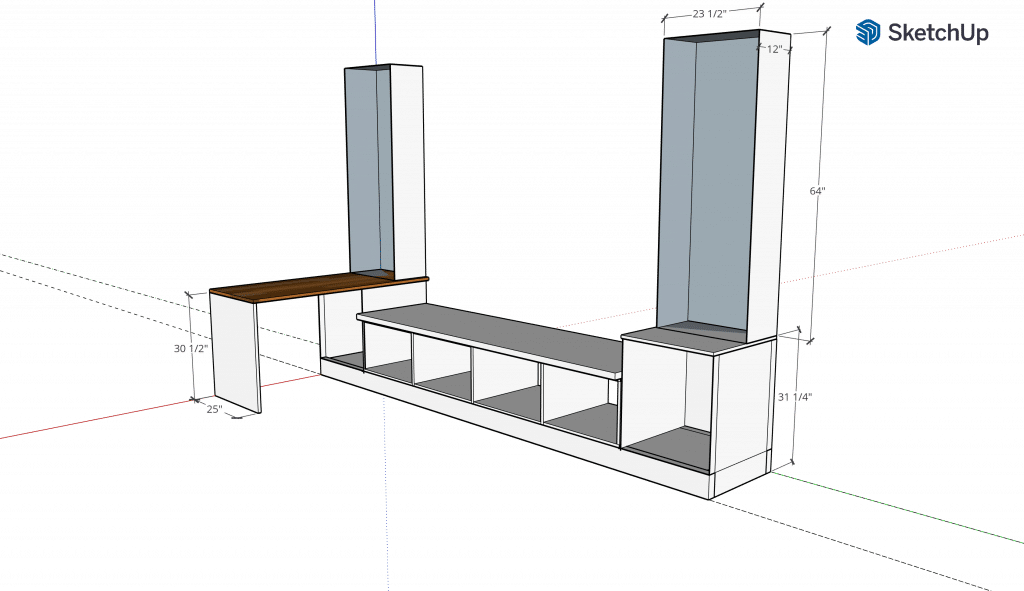
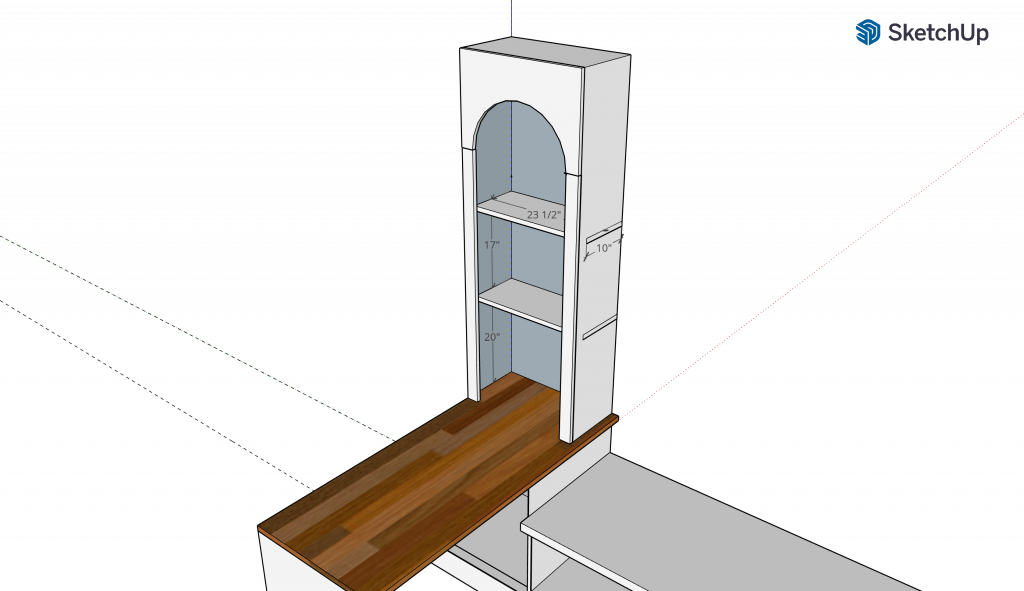
The last giant part are the bookcases. Build two more carcasses and you can put a 1/4″ piece of plywood or MDF on the back side. MDF is great for painting but it is also very heavy. Don’t have any portion on the bottom so it can just rest on top of the lower cabinet. I also add a cleat on the top across the back to screw into the studs in the wall. I also frequently use pocket holes to attach the sides at the bottom to the lower cabinet, then plug them up and paint. You’ll notice I also added a piece of wood at the end of the desk. This will need to be attached to a stretcher piece that will go against the wall.
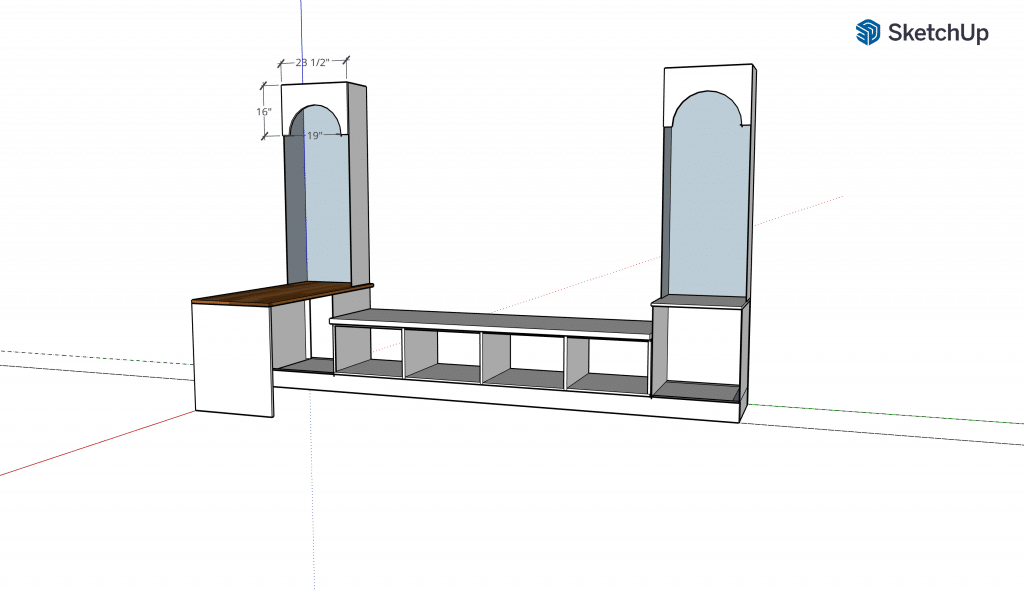
For this project, I want to add some arches to the bookshelves. You take a piece of rectangular plywood, find the center at the bottom, attach a string to a nail set at the center point and then draw a semi-circle using the string as an anchor point. Just do this once and then use the first piece as a pattern for the second one so they stay the same. Make sure the offset is the same width as the trim piece you use for the rest of the bookcase.
**Also you should probably put the shelves in the bookshelves before you do this, which is not shown here in my plans.

Add the rest of the frame. You’ll have to caulk and sand to make it appear as seamless as possible.
And here it shows adding in the shelves, which I recommend doing before all the framing. Sorry about that confusion!
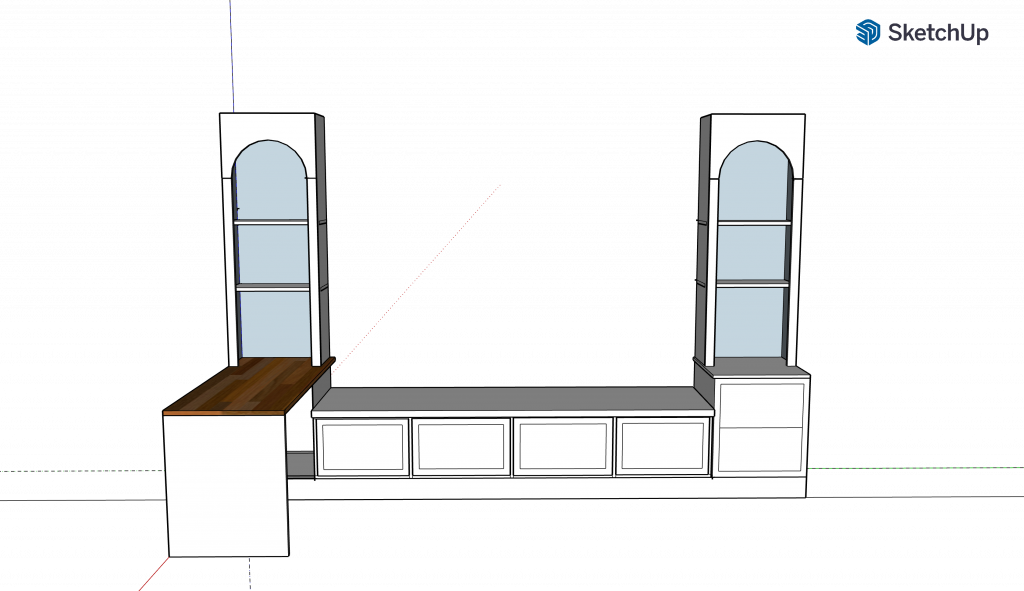
The last step is to build and install the drawers for each spot (four total.) Those plans aren’t included here.
Are you wondering why I didn’t do anything for that other open cabinet? I decided to leave it open since it’s in an awkward spot to access, being in the corner under the desk. It’s the perfect spot for a trash can or a basket of something. Plus that’s less I have to build!
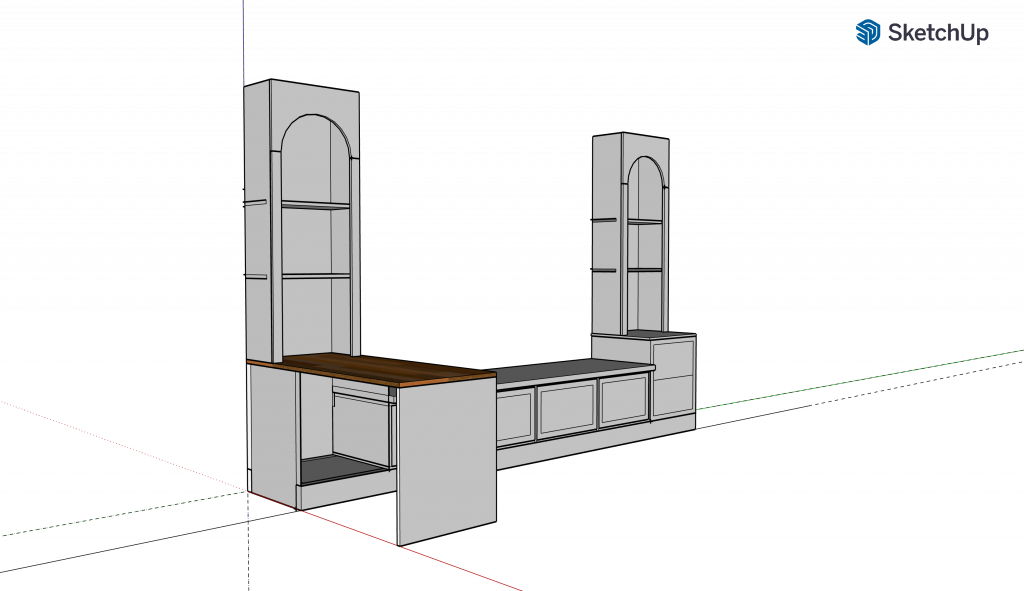
This here seems like it’s all done, but after this I would also add in crown moulding, which is a pain to add in Sketchup. I also skipped over the process of adding a face frame to the window seat and other cabinet. I plan on doing that but I wanted to play around with some other ideas I had. If you want to see more about how to build a face frame, see this post.
There’s your basic build in window seat plans with bookcases and a desk! You can easily opt out of the added accessories and tailor the plans to be exactly what you need for your space. I used to make plans without dimensions because it was all custom but so many people ask me for the dimensions anyway that I’m just doing it when I can!
More FREE plans:
West Elm Inspired Dining Table
This is such a cool idea and exactly what I’ve been looking to do! Would love to see the finished product and your process in real life!