Make a Faux Sheepskin Rug
Time for the next episode of Ellie’s Nursery! This faux sheepskin rug is SO easy to make yourself, no sewing required! The only thing you’ll need is the fabric and some good scissors.
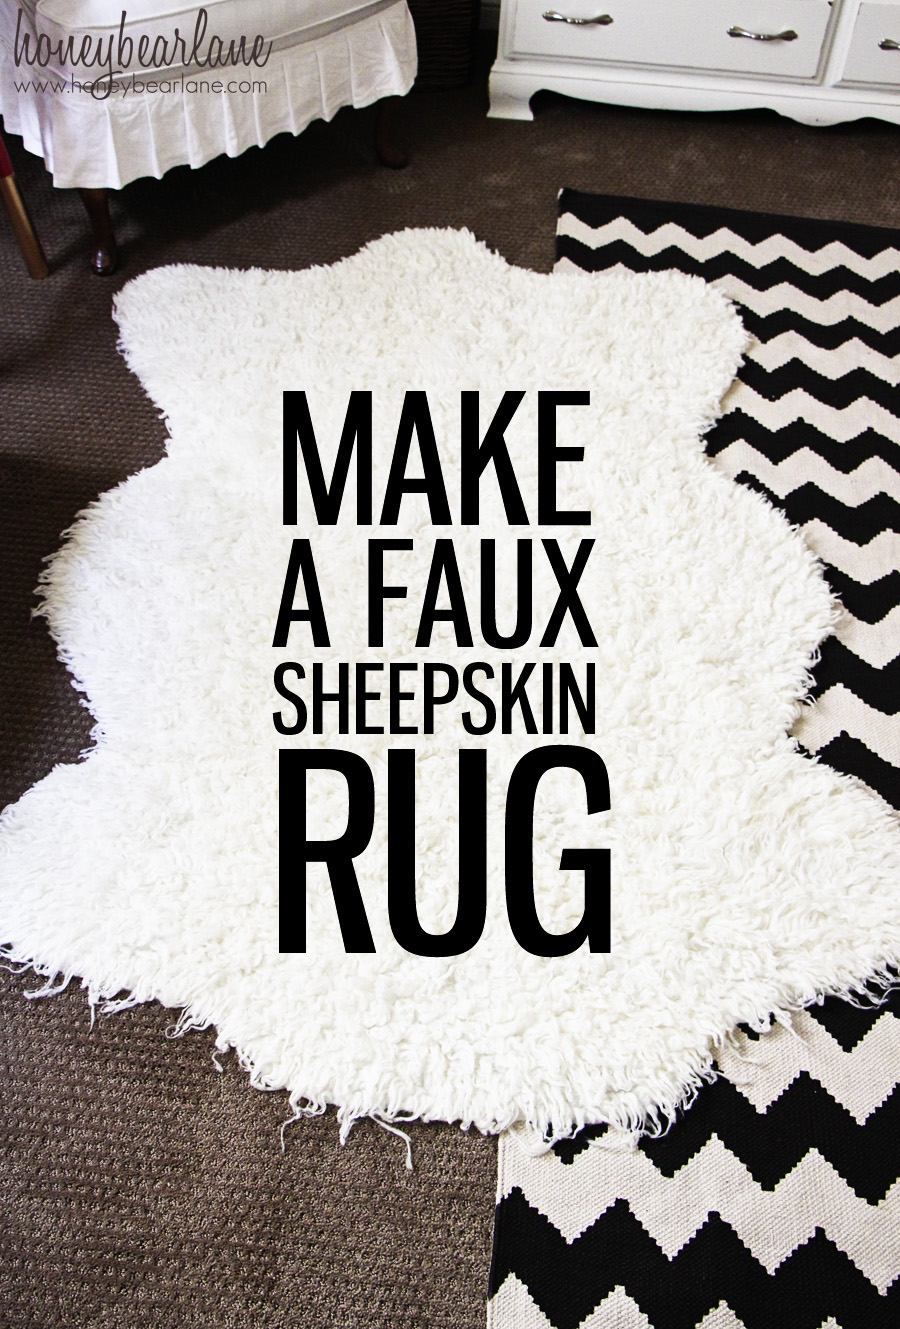
I really wanted to get a fluffy furry rug for Ellie’s room, but all of the good ones were $300+. Since I’m doing her room on the cheap, this was too much for one item. In fact, I think the most expensive thing in her room is her crib which was still pretty cheap. Nearly everything else was thrifted or given to me. Anyway, the carpet in her room was just this giant void which really needed an accent rug. So I got the chevron rug you see here at Urban Outfitters for $40. The problem is, it was not the right size for the room.
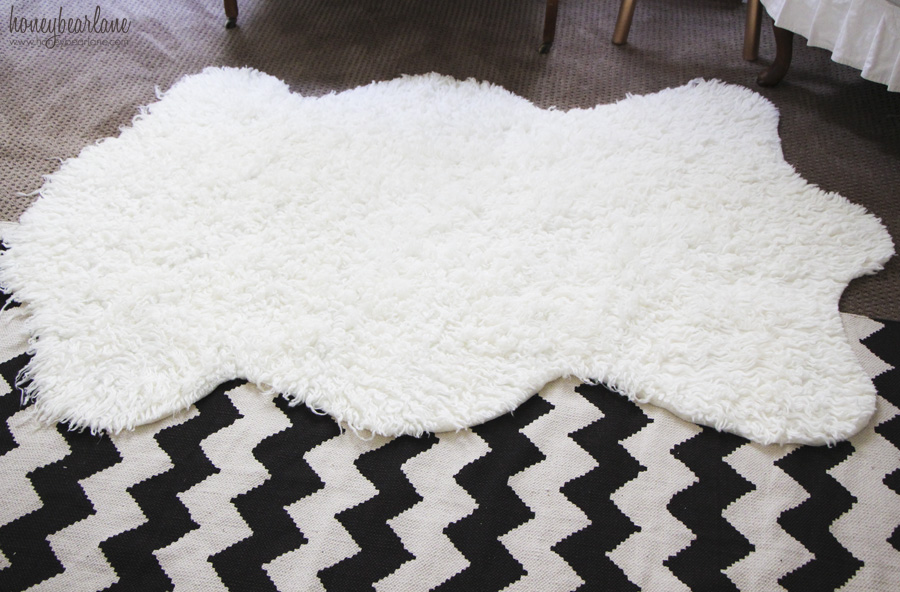
I had the idea of making my own Sheepskin rug with some faux fur fabric. And in my partnership with Shannon Fabrics, I discovered that they also sell lots of high quality faux fur! They happily sent me some of their sheepskin fur to try for this project. It is high quality faux fur and it has a thick base so it does lay securely in place when on carpet. And now I have a super awesome rug for super cheap when the real things cost hundreds! That’s my kind of rug.
Want to make your own sheepskin rug?
For this size, about 4×6, you will need 2 yards of 60″ wide faux fur.
Sewing scissors
Marking pen or pencil
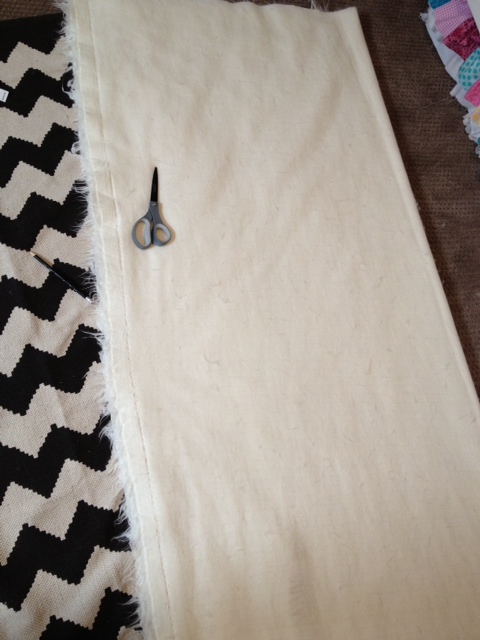
First, you get an inspiration picture to copy. There are different shapes of these types of rugs so go find a picture on the internet of a shape you like. Then fold your fabric in half, lengthwise, with the fur inside (right sides together.)
Channel your inner kindergartener making heart valentines. Remember how you would fold the paper in half and then draw a fishhook shape? Then you cut it out, unfold it, and have a lovely heart. Same idea here. If you need to practice, try it out on a paper first. Trace half of the shape you want on the paper and cut it. Make adjustments accordingly. I felt pretty confident about cutting the right shape so I just went ahead and drew a line on the fabric.
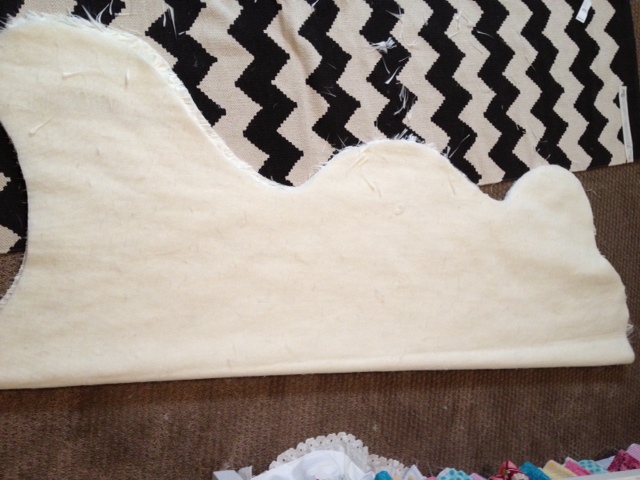
Then cut! It will probably shed like crazy as you cut it, so cut it on an area that will be able to be easily cleaned up. I cut it out and then decided I didn’t like the long ‘legs’ so I trimmed them. Once you’ve cut it to the way you like it, just throw it in the dryer for about 10 minutes with a dryer sheet. It will not shed after the dryer.
And that’s it! One caveat: If you want to put your rug on a wood or other slippery surface, attach a rug pad to the fabric underside before you cut it out.
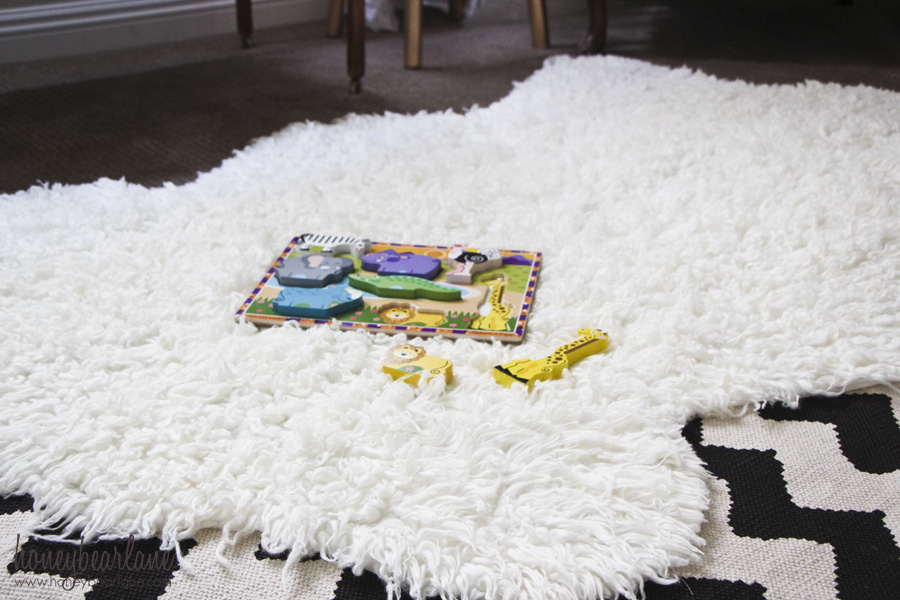
I love this rug and it is one of the easiest project I’ve ever done. Try it!!
Check out the other Nursery Projects for her room…
- Gold Dipped Bar Stools
- DIY Ruffled Curtains
- Pinwheel Quilt
- Framed Burlap Monogram
- Ribbon Woven Bow Holder
- Alphabet Art
- Paintchip Chandelier
- Painted Vases
Linked up to TT&J Weekend Wrapup
Did you bind the edging you cut? Is it shedding a lot at the cut area? I like the way you think!
Nope! Just throw it in the dryer so it doesn’t shed anymore and you’re good to go!
What a fun idea!! I love how that turned out!
I can’t take credit for this idea, since it’s on Home Depot’s Garden Club site, but it is a new favorite for sure!
Great idea and you did such a wonderful job on it! I really like the way it looks.
Thank you! This project is SUPER easy and anyone can do it!
Wow! So easy and soooooo cute!
I don’t see any “sheepskin fur” listed on Shannon fabrics website. Can you be more specific as to what you ordered?? Thank you!!
Shannon Fabrics doesn’t sell directly online but rather distributes their fabrics through retailers like local quilt shops. They will have a store finder widget on their site soon!
Did you use the white mongolian fur? It has a different consistency (in your photos) than any mongolian fur I’ve seen. Did that happen after you threw it in the drier?
Yes, it got more curly and looked more like real fur after I threw it in the dryer. I really love how it came out and it was one of the easiest projects Ive ever done.
They do list the fabrics they distribute though, and the only one I see listed is white mongolian fur. Is that what you used?
Yes–although mine was off-white.
I suggest NEVER putting any faux fur in heat. It will melt and matt. If you put it in the dryer, set it so it doesn’t come in contact with heat.
Yes, no direct heat. But it was fine in my dryer!
I am putting the fur rug I plan to make in front of our motorhome fireplace on a tile floor. I’ll need to put a pad on it before cutting (as your instruction says). How do I attach it?
I don’t think you have to attach it since it’s kind of sticky but you could hand sew tacks in if you’d like.
Thanks do sharing! If I want to make a large rug.. How can I attach
The pieces together? Can a sticky glue it, hot glue it, or
Sew it.
I would probably tape it together on the back with carpet tape–I think you can buy that stuff at carpet stores. Or Duck tape might work nicely. that way you won’t have any bump in the rug.
Thanks for sharing*
Hi! I actually bought a faux sheepskin rug. Unfortunately, my dogs have laid on it and it needs a cleaning. Any idea how to do that and what to use to clean it?
Thanks!
I can’t really give you recommendations for a faux sheepskin rug, since the one I made was from faux fur fabric. I washed a sheepskin rug once and that was a terrible idea! But the faux fur fabric rugs wash great.
Now Ikea is in trouble… 🙂 indeed. Great work and creative!
Thank you!